Blog
DIY Knitted Fingerless Gloves: A Step-by-Step Guide to Handmade Warmth
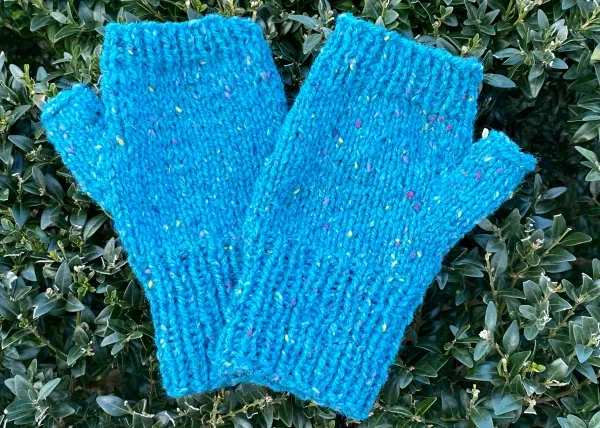
As the air turns crisp and the leaves begin to turn, there’s nothing quite like the cozy feeling of slipping on a pair of handmade fingerless gloves. Imagine yourself, a warm drink in hand, fingers free to type, craft, or simply enjoy the warmth while the world rushes by. That’s the beauty of fingerless gloves – they offer the perfect blend of practicality and warmth.
At Robert Kline Art, we believe in the power of handcrafted creations. That’s why we’re excited to share this detailed guide on knitting your own fingerless gloves. This project is perfect for knitters of all levels, from enthusiastic beginners to seasoned pros. So, gather your supplies, and let’s create something special together.
Gathering Your Knitting Supplies
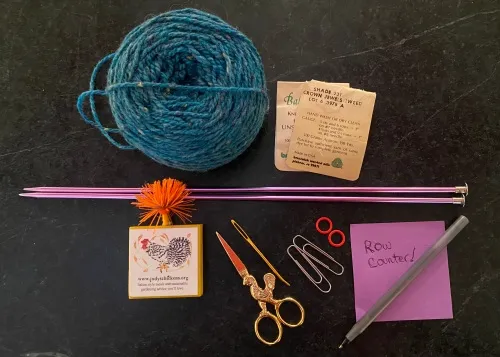
Before we dive into the stitches, let’s gather our tools. Here’s what you’ll need:
- One pair of size 7 straight knitting needles: These are a versatile size for this project.
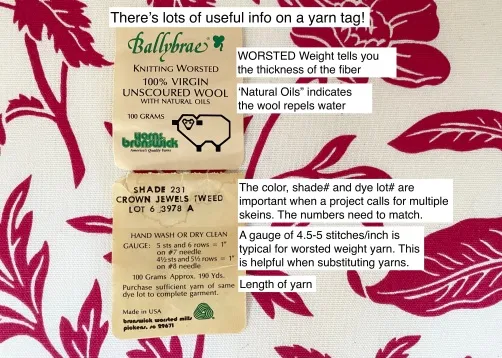
- One skein (approximately 110 yards) of worsted weight yarn: Choose a color and fiber that speaks to you. Remember, “worsted” refers to the thickness of the yarn, not its weight.
- Two stitch markers (paperclips work well too): These handy tools help mark specific points in your knitting.
- One large-eyed sewing needle: Perfect for weaving in those loose ends.
- Measuring tape: For ensuring the perfect fit.
- Scissors: Essential for snipping yarn.
- Paper and pen (optional): Useful for keeping track of rows.
Understanding Knitting Terms and Techniques
To make our knitting journey smoother, let’s familiarize ourselves with some key terms:
- Cast-on: This is how you create the first row of loops on your needle.
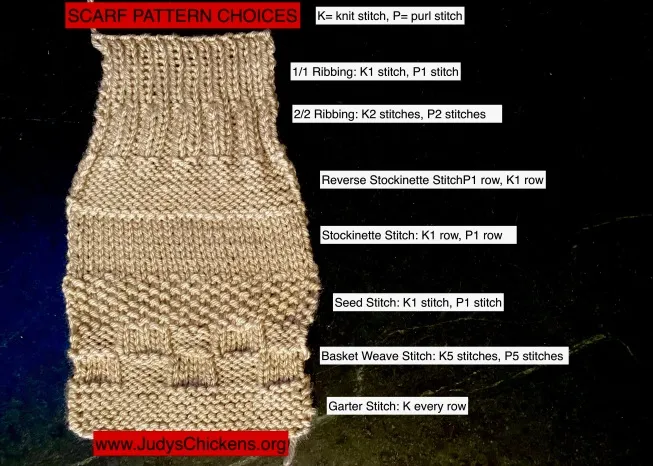
- 1×1 Rib: A classic knitting pattern where you alternate one knit stitch with one purl stitch.
- Stockinette Stitch: Creates a smooth, fabric-like surface – knit on the right side, purl on the wrong side.
- Increase a Stitch: A technique that turns one stitch into two, adding width to your knitting.
- Bind-off: The process of securing the last row of stitches, preventing unraveling.
- RS: Refers to the “right side” or the front of your glove.
- WS: Indicates the “wrong side” or the inside of your glove.
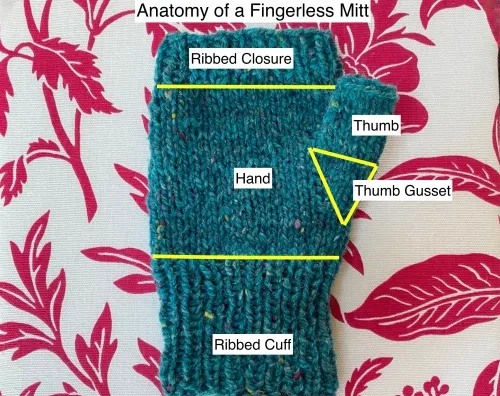
- Gusset: A triangular section of fabric added to a garment, like our gloves, to provide extra room and flexibility – in this case, for your thumb.
A Visual Guide: Anatomy of a Fingerless Mitten
Before we begin, let’s visualize the finished product. Our fingerless gloves will be approximately 7 inches long and 8 inches around the palm. The thumb, strategically placed for comfort, will fit either hand.
 Knitted fingerless gloves in progress
Step-by-Step Knitting Instructions
Ready to bring your fingerless gloves to life? Let’s begin:
Part 1: Knitting the Cuff
- Cast on 36 stitches.
- Work in a k1, p1 rib stitch for 2 ¾ inches. Make sure your last row ends on the WS (wrong side). Remember, the tail of your cast-on will be on the right side.
 Finished cuff of the knitted fingerless gloves
Part 2: Knitting the Hand
- With the RS (right side) facing you, knit 6 rows of stockinette stitch. Using tally marks or a notepad can help you keep track of your rows.
 Knitting the hand section of the fingerless gloves
Part 3: Setting Up the Thumb Gusset Increases
- Row 1: Knit 16 stitches, place a marker, increase 1 stitch, knit 1, increase 1, place a marker, knit the remaining 17 stitches. You should now have a total of 38 stitches.
- Rows 2, 4, 6, 8, and 10: Purl across the row.
- Row 3: Knit 16 stitches, increase 1, knit 3, increase 1, knit the remaining 17 stitches (40 stitches total).
- Row 5: Knit 16, increase 1, knit 5, increase 1, knit 17 (42 stitches total).
- Row 7: Knit 16, increase 1, knit 7, increase 1, knit 17 (44 stitches total).
- Row 9: Knit 16, increase 1, knit 9, increase 1, knit 17 (46 stitches total).
 Knitted fingerless gloves with thumb gusset
- Purl the 10th row and remove your stitch markers. Turn your work over to the RS.
Part 4: Shaping the Thumb
- With RS facing, knit 27 stitches. Increase one stitch on the 28th stitch.
- Turn your work. With WS facing, purl 11 stitches, then increase one stitch on the 12th stitch for a total of 13 stitches.
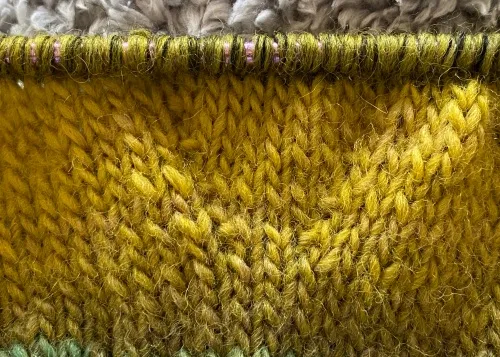
- Turn your work again. Work back and forth in stockinette stitch on these 13 stitches for a total of 4 rows. Don’t worry if it looks a bit unusual at this stage – it’s all part of the process!
- Loosely bind off the 13 thumb stitches, leaving a tail of about 10 inches.
 Knitted thumb gusset for fingerless gloves
Part 5: Knitting the Rest of the Hand
- Row 1: With RS facing, join your yarn from the ball and increase one stitch on the first stitch to the left of the thumb gusset. Knit to the end of the row. You should now have 36 stitches on your needle with a gap where the thumb will be.
- Row 2: Turn your work and purl across the row, connecting the two sides of your knitting.
- Next 6 rows: Continue working in stockinette stitch. If you prefer longer gloves, add an extra 4-6 rows here.
 Knitting the hand section of the fingerless gloves
Part 6: Creating the Ribbed Closure
- Next 6 rows: Work in a k1, p1 rib stitch.
- 7th row: Bind off your stitches in the rib pattern, leaving a tail of about 15 inches.
Part 7: Finishing Touches
- Thumb: Turn your work to the RS. Starting at the top of the thumb, use the mattress stitch to sew the seam. Turn the fabric to the WS, pull the tail through, and weave in the end to secure it.
- Sides: With the RS facing you, use the mattress stitch to sew the sides of the mitten together. Turn the mitten inside out (WS facing), pull the tail through, and weave in the ends.
 Finished knitted fingerless gloves
Resources for Knitters: Learning and Perfecting Your Craft
- For Visual Learners: A picture is worth a thousand words! Websites and apps like the Skill Set app from Modern Daily Knitting provide excellent visual instructions for various knitting techniques, including the mattress stitch.
- Local Yarn Stores: These treasure troves are staffed with knowledgeable knitters who are always happy to answer questions, offer advice, and help you troubleshoot any challenges.
Conclusion: The Joy of Handmade Warmth
Congratulations on completing your very own pair of fingerless gloves! Not only have you created a cozy and stylish accessory, but you’ve also experienced the joy and satisfaction of crafting something with your own two hands.
Here at Robert Kline Art, we believe that handmade gifts are infused with love and care. Why not spread the warmth by knitting a pair of these gloves for someone special?
We’d love to see your creations! Share photos of your finished gloves in the comments below. And be sure to explore the Robert Kline Art website for more inspiring DIY projects and unique handmade gifts. Happy knitting!
