Blog
How to Keep Your Coffee Piping Hot with a DIY French Press Cozy

Nothing beats the aroma and taste of freshly brewed coffee from a French press. But that second cup? It can get cold quickly! That’s where a cozy comes in – a simple, handmade hug to keep your coffee warm and your mornings delightful. Inspired by my daughter’s thoughtful gift of Starbucks coffee beans, I created this easy-to-follow guide to craft your own French press cozy. Let’s get stitching!
Why You Need a French Press Cozy
Remember the saying, “Necessity is the mother of invention”? Well, after my daughter gifted me delicious Starbucks coffee beans, I realized my second cup was always getting cold. That’s when the idea for a French press cozy was born! Just like my cozy designs for bowls and plates, this one ensures every sip is as warm and comforting as the first.
Gathering Your Supplies
Before we begin, let’s gather our crafting tools. You’ll need:
For the Cozy:
- Outer fabric (non-directional print recommended): 13 3/4″ x 7 1/2″
- Insulbrite: 13 3/4″ x 7 1/2″
- Lining fabric (can match the outer fabric): 13 3/4″ x 7 1/2″
For the Tab:
- Outer fabric: 4 1/2″ x 7 1/2″
- Insulbrite: 4 1/2″ x 3 3/4″
- Sew-on Velcro (1-inch wide): 3 3/4″ long
General Sewing Supplies:
- Sewing machine
- Fabric scissors
- Thread
- Pins
- Iron and ironing board
- Measuring tape
Sewing Your French Press Cozy
Ready to create your cozy? Let’s break down the process into manageable steps:
Creating the Tab
- Fold and Layer: Fold the tab fabric in half, right sides facing, with the 4 1/2″ edges aligned. Place the Insulbrite underneath, shiny side up.
- Sew the Sides: Sew along both 3 3/4″ edges using a 1/4″ seam allowance, leaving the side opposite the fold open.
- Turn and Press: Clip the corners near the fold, turn the tab right side out, and press it flat.
- Attach Velcro: Position the soft side of the Velcro on the side of the tab facing the shiny Insulbrite. The long side of the Velcro should be a scant 1/4″ away from the fold, with an even amount of fabric showing at each end. Secure the Velcro with pins or tape.
- Topstitch: Topstitch around all edges of the tab, about 1/4″ from the edge. Ensure your stitching catches all three sides of the Velcro. Sew along the open side to close it, then sew along the final edge of the Velcro. Set the tab aside.
Sewing the Cozy Body
- Mark and Cut the Lining: Fold the lining fabric in half. Measure 1 inch in from the fold and 1 inch down from the fold, marking both points. Cut off the folded triangle.
- Layer the Fabrics: Unfold the lining fabric. Layer the fabrics as follows: Insulbrite shiny side down, outer fabric right side up, and lining wrong side up.
- Mark the Outer Fabric: On the outer fabric’s right-hand end, mark 2″ up from the bottom and 1 1/2″ in from the top edge.
- Sew the Side Seam: Using a 1/4″ seam allowance, sew from the bottom mark to the top mark, reinforcing the stitching at both ends. Follow the curved outline created by the cut-out triangle on the lining fabric.
- Trim and Clip: Carefully cut out the triangle from the outer fabric and Insulbrite, ensuring you don’t cut the seam. Clip the seam allowance at the point of the “V,” again avoiding the stitching.
- Turn and Press: Turn the cozy right side out through the open end. Press it flat, tucking in the seam allowances at the opening.
Final Assembly
- Mark the Tab: On the tab, draw a line 1/2″ in from the edge that was left open.
- Insert the Tab: With the outer fabric side up, insert the tab into the cozy’s open end, Velcro side down. Align the marked line on the tab with the raw edge of the cozy opening.
- Topstitch and Secure: Pin the tab in place and topstitch around the entire opening, securing the tab and closing the opening.
- Attach the Remaining Velcro: Sew the remaining piece of Velcro to the outside of the cozy, opposite the tab. The top edge of the Velcro should be 1 1/4″ from the top edge of the cozy, with the outer edge 1 3/4″ in from the side edge and the bottom edge 1 3/4″ from the bottom edge. Sew around the outer edges of the Velcro to secure it.
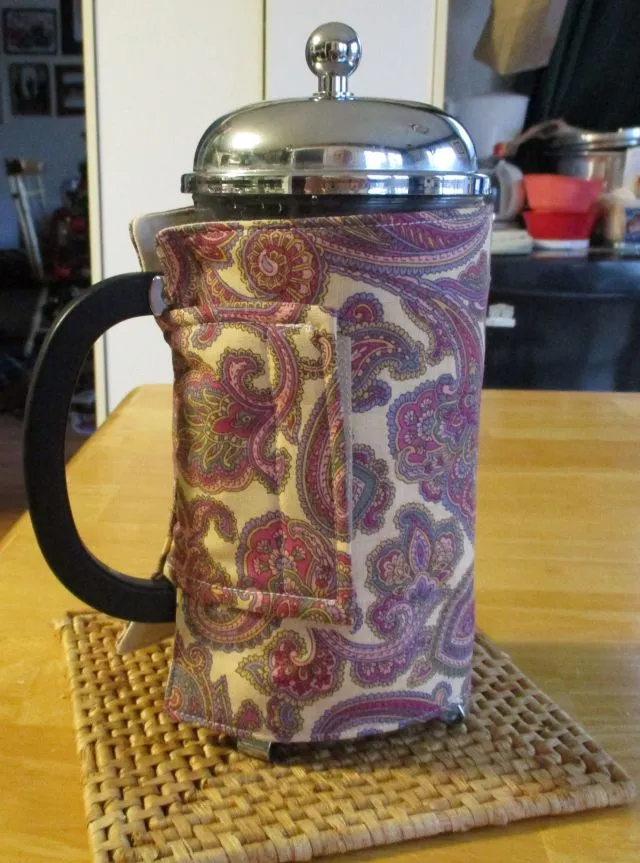
 French press cozy side view
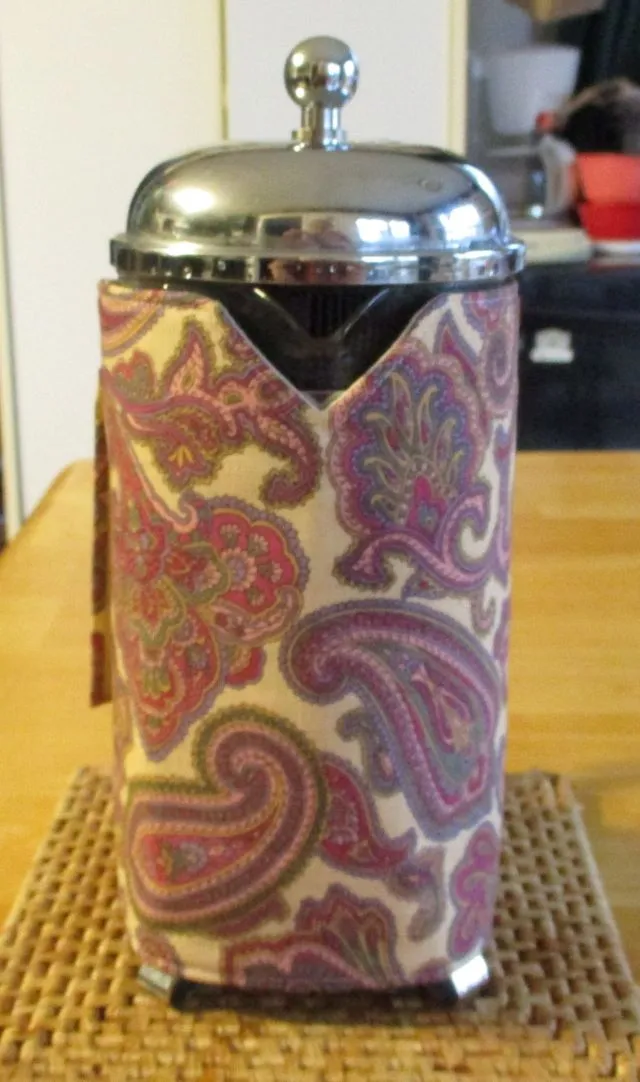
 Front view of the French Press cozy
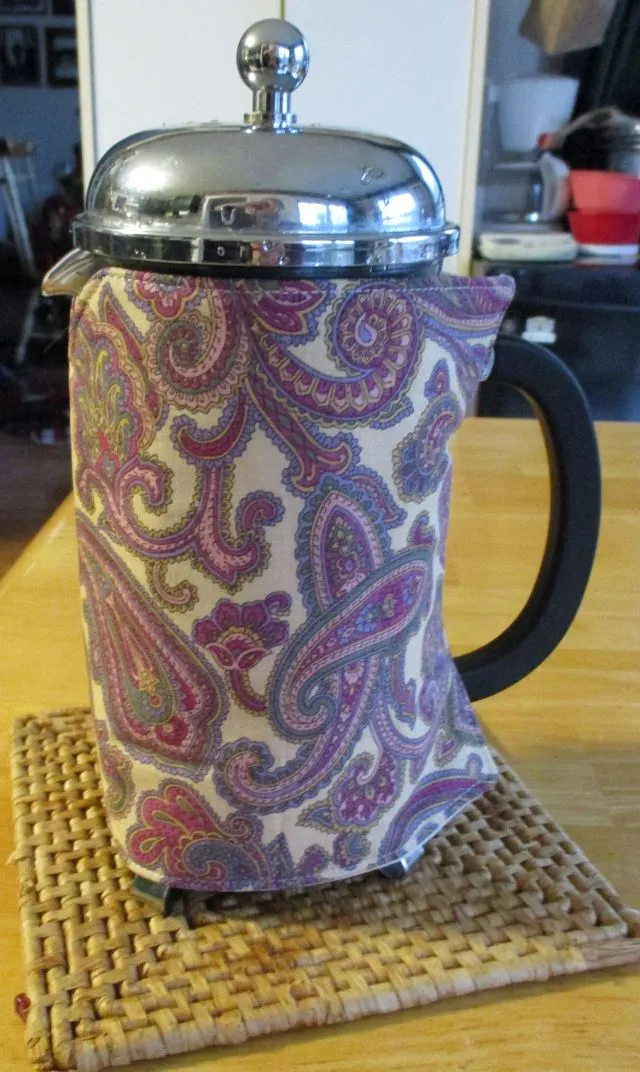
 other side view of French Press cozy
 attaching the velcro to the tab of the French Press Cozy
 mark and cut the triangle for the spout
 Constructing the main part of the French Press cozy
Congratulations!
You’ve successfully sewn your very own French press cozy! This cozy not only keeps your coffee hot but also adds a personal touch to your morning routine.
Feeling crafty? Explore Robert Kline Art for more inspiring DIY projects and unique handmade gift ideas. Share your creations and connect with fellow craft enthusiasts in the comments below!
