Blog
How to Create a Unique Washi Tape Picture Frame: A Fun DIY Project

Do you love the vibrant patterns and endless possibilities of washi tape? Are you looking for a creative way to display your treasured photos? Look no further! In this step-by-step guide, we’ll explore how to make a one-of-a-kind washi tape picture frame that adds a pop of personality to any space. This easy DIY project is perfect for gift-giving or adding a personalized touch to your home decor.
Gathering Your Supplies
Before we dive into the crafting process, let’s gather everything you’ll need. Don’t worry, the beauty of this project lies in its simplicity and affordability:
- An Unfinished Wooden Frame: These are readily available at craft stores or even in the craft aisle of your local superstore.
- White Paint: White paint provides a crisp background, allowing the washi tape patterns to truly shine. Any white paint will do, but spray paint offers a quick and even finish.
- Washi Tape: This is where the fun begins! Choose a variety of colors and patterns that complement your photo and personal style. Don’t be afraid to mix and match!
- Mod Podge: This versatile crafting essential will act as a sealant, protecting your washi tape design and ensuring its longevity.
- Scissors
- Paintbrush (if not using spray paint)
Creating Your Washi Tape Masterpiece
Now that you’ve assembled your crafting arsenal, let’s transform that plain frame into a work of art!
Step 1: Prepping Your Canvas
Begin by painting your wooden frame white. If you’re using spray paint, find a well-ventilated area and apply thin, even coats. If you opt for traditional paint and a brush, apply two coats, allowing ample drying time between each.
Step 2: Unleash Your Inner Artist!
With a clean and dry white frame as your canvas, it’s time to unleash your creativity with washi tape! There are no hard and fast rules here – let your imagination run wild!
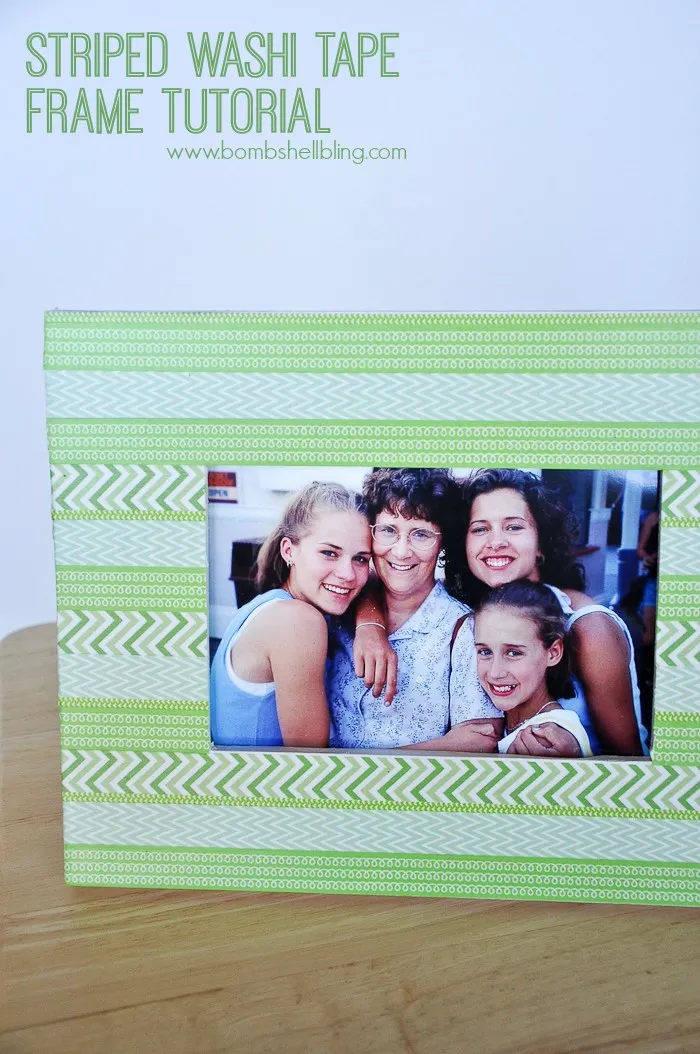
- Stripes: Classic and chic, stripes never go out of style. Use different widths and colors of washi tape to create a bold or subtle striped pattern.
- Geometric Designs: Embrace your inner geometrician by crafting triangles, squares, or any other shapes that catch your eye. Overlapping different patterns can create a visually stunning effect.
- Personalized Touches: Incorporate elements that reflect the recipient’s personality or the theme of the photo. For a birthday gift, consider adding washi tape with confetti patterns.
Remember, washi tape is forgiving! You can easily reposition it if you change your mind.
 Washi tape frame with photo
A completed washi tape picture frame showcasing the finished project
Step 3: Securing Your Creation
Once you’re satisfied with your washi tape design, it’s time to seal the deal! Use scissors to carefully trim any excess tape around the edges of the frame for a polished look.
Apply a thin, even layer of Mod Podge over the entire washi tape design, ensuring all edges are sealed. This will protect your creation from dust, moisture, and fading, allowing its beauty to endure.
Allow the Mod Podge to dry completely before inserting your photograph.
Showcasing Your Washi Tape Frame
Congratulations, you’ve created a unique and personalized picture frame that is sure to be cherished! Place your favorite photo inside and find the perfect spot to display your handiwork. Your washi tape frame will add a pop of color and a touch of handmade charm to any room.
Exploring the World of Washi Tape Crafts
This picture frame is just the tip of the washi tape iceberg! From embellishing notebooks and phone cases to creating wall art and gift tags, the possibilities are endless. Explore different patterns, colors, and textures to discover your own unique crafting style.
Don’t hesitate to share your washi tape creations and inspire others! Leave a comment below with your favorite washi tape projects or any questions you might have.
Happy crafting!
