Blog
Elevate Your Workspace: A Guide to Crafting Custom Wooden Laptop Stands

In the digital age, laptops have become indispensable, blurring the lines between work and leisure. As someone who spends countless hours in front of a screen, you understand the importance of a comfortable and ergonomic workspace. While a regular desk setup might suffice, a custom wooden laptop stand can significantly elevate your work experience, both literally and metaphorically.
At Robert Kline Art, we believe in the power of handmade craftsmanship. That’s why we’ve curated this comprehensive guide to inspire you to create your own custom wooden laptop stand. Not only will this add a touch of personalized style to your workspace, but it will also improve your posture, reduce neck strain, and enhance your overall productivity.
Why You Should Consider a Custom Wooden Laptop Stand
Before we delve into the crafting process, let’s explore the compelling reasons why a custom wooden laptop stand is a worthwhile investment for any laptop user:
-
Enhanced Ergonomics: Raising your laptop to eye level promotes better posture, reducing strain on your neck, shoulders, and back. This is particularly crucial for those who spend prolonged periods working on their laptops.
-
Improved Cooling: Most laptops generate a fair amount of heat, especially during demanding tasks. A well-designed stand elevates your device, allowing for better airflow and preventing overheating.
-
Space Optimization: Reclaim valuable desk space by elevating your laptop. This creates a clutter-free environment and frees up space for other essentials like notebooks, pens, or even a decorative plant.
-
Personalized Aesthetics: Unlike generic plastic stands, a custom wooden stand allows you to unleash your creativity. Choose from a variety of wood types, finishes, and designs to perfectly match your style and workspace.
-
Sustainable Choice: Opting for a handmade wooden stand is an environmentally conscious choice. Wood is a renewable resource, and by creating your own stand, you’re contributing to a more sustainable lifestyle.
Crafting Your Custom Wooden Laptop Stand: A Step-by-Step Guide
Now, let’s roll up our sleeves and get down to the art of crafting your own custom wooden laptop stand. This project is perfect for both beginners and seasoned DIY enthusiasts alike. Remember, the beauty of crafting lies in personalization, so feel free to adapt these steps to match your unique vision.
Materials You’ll Need:
- A piece of hardwood (such as oak, maple, or cherry) approximately 18 inches long, 10 inches wide, and 1 inch thick
- Wood glue
- Wood screws
- Sandpaper (various grits)
- Wood stain or paint (optional)
- Polyurethane or other protective finish
- Measuring tape
- Pencil
- Saw (hand saw or circular saw)
- Drill
- Screwdriver
- Clamps
Step 1: Design and Planning
Before you start cutting, take some time to plan your design. Consider the size of your laptop, the desired height and angle of the stand, and any additional features you’d like to incorporate. You can find inspiration online or sketch out your own ideas.
Step 2: Cutting the Wood
Once you have a plan, measure and mark the wood according to your design. Use a saw to carefully cut the wood into the required pieces. If you’re not comfortable using power tools, you can have the wood cut to size at your local hardware store.
Step 3: Assembling the Stand
Assemble the cut pieces of wood to form the basic structure of your stand. Use wood glue and screws to securely attach the pieces together. Make sure to use clamps to hold the pieces in place while the glue dries.
Step 4: Sanding and Finishing
Once the glue has dried, sand all the surfaces of the stand smooth. Start with a coarser grit sandpaper and gradually move to finer grits for a polished finish. If desired, you can stain or paint the stand at this stage.
Step 5: Applying a Protective Finish
Apply a protective finish, such as polyurethane, to seal and protect the wood. Follow the manufacturer’s instructions carefully and allow the finish to dry completely before using your new laptop stand.
Exploring Creative Variations
The beauty of a custom wooden laptop stand lies in its versatility. Here are a few creative variations to spark your imagination:
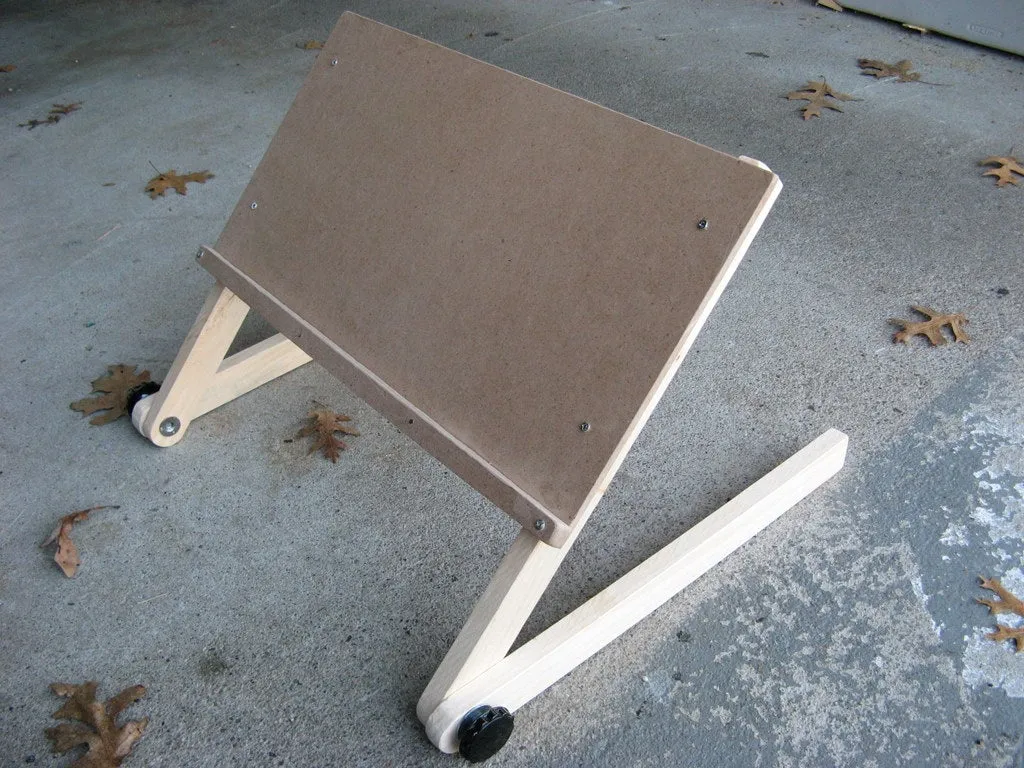
- Laptop Tripod: For a minimalist and portable option, consider crafting a simple yet elegant laptop tripod. This design is perfect for those who frequently move their workstations.
 Laptop Tripod
- Laptop Stand From Hanger: Repurpose an old wooden coat hanger to create a unique and stylish laptop stand. This eco-friendly option adds a touch of vintage charm to your workspace.
 Laptop Stand From Hanger
- Laptop Stand with Hidden Organizer: Maximize functionality by incorporating a hidden storage compartment within your stand. This clever addition helps keep your workspace organized and clutter-free.
 Work/Play Laptop Stand
- Laptop Bubble Stand: For a playful and modern touch, create a stand with a unique bubble-like design. This eye-catching piece is sure to add a touch of whimsy to your workspace.
 Laptop Bubble Stand
- Ergonomic Laptop Stand Made from a Coat Hanger: Give new life to a forgotten coat hanger by transforming it into an ergonomic laptop stand. This budget-friendly option is both practical and stylish.
 Ergonomic Laptop Stand Made From a Coat Hanger
Tips and Tricks for Crafting Success
-
Choose the Right Wood: Opt for hardwoods like oak, maple, or cherry, known for their durability and attractive grain patterns. Consider the weight of your laptop when selecting the wood thickness.
-
Measure Twice, Cut Once: Accurate measurements are crucial for a well-fitting and functional stand. Double-check your measurements before making any cuts to avoid costly mistakes.
-
Sanding is Key: Take your time with sanding. A smooth finish not only enhances the aesthetics but also prevents scratches on your laptop.
-
Consider Your Workspace: Design your stand to complement your existing workspace. Choose a style and finish that harmonize with your desk, chair, and other accessories.
-
Personalize It: Don’t be afraid to add your own personal touch. Experiment with different wood stains, paint colors, or even decorative carvings to create a truly unique piece.
Conclusion: Elevate Your Workspace and Unleash Your Creativity
Crafting a custom wooden laptop stand is a rewarding project that combines functionality, sustainability, and personalized style. It’s an opportunity to enhance your workspace, improve your posture, and unleash your creativity.
We encourage you to embrace the art of handmade craftsmanship and create a laptop stand that reflects your unique style. Share your creations and inspire others to elevate their workspaces with Robert Kline Art. Let us know in the comments below if you decide to embark on this crafting journey. We’d love to hear your thoughts and see your creations!
And if you’re looking for more unique and handcrafted gifts, be sure to explore the exquisite collection on the Robert Kline Art website. From beautiful wooden home décor to one-of-a-kind jewelry pieces, you’re sure to find something special for everyone on your list.
