Blog
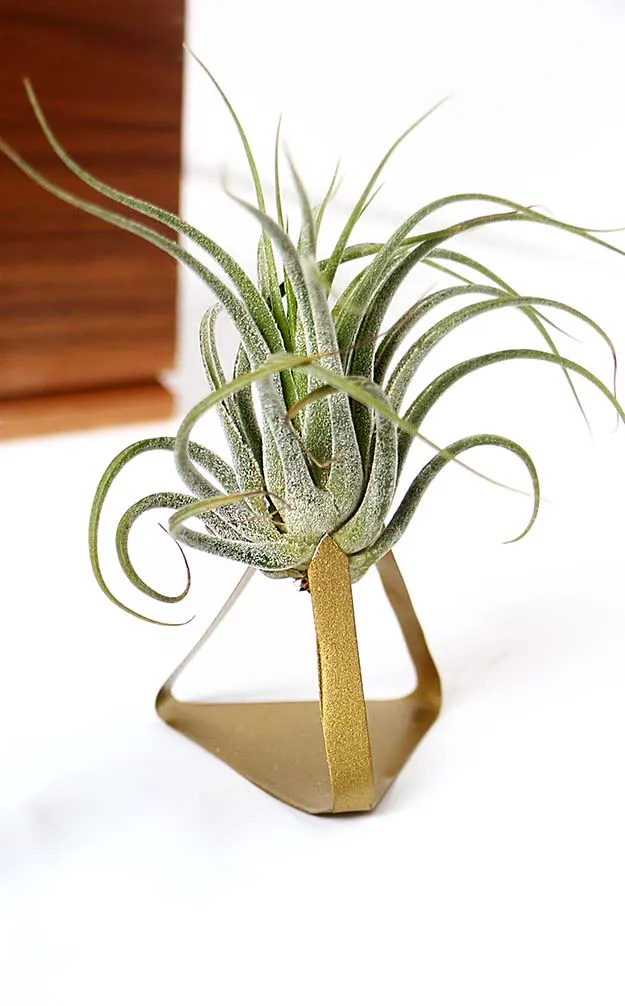
DIY Metal Air Plant Stand: A Simple & Chic Project

Hey there, fellow art enthusiasts! Robert Kline here, and let me tell you, I was just as skeptical as you might be about air plants. Plants that thrive on air alone? Sounded too good to be true! Turns out, they do need a little more TLC than just air, but they’re still incredibly low-maintenance and oh-so-stylish.
One of the things I love most about air plants is their versatility. You’re not limited by pots and soil! You can get super creative with how you display these little wonders. I’ve seen them nestled in terrariums, mounted on walls in stunning sculptures, and even gracing bookshelves in quirky holders. The possibilities are endless!
Inspired by a chic (and pricey!) air plant stand I spotted at a high-end store, I decided to embark on a mission to create my own “look for less.” Armed with a dollar store metal pan and a burst of creativity, I ended up with a DIY project that’s as affordable as it is stylish.
Let’s dive into this simple and chic DIY metal air plant stand project, shall we?
Gathering Your Supplies
Before we get our hands crafty, let’s gather our materials. Here’s what you’ll need:
- Metal Baking Dish: The dollar store is your best friend for this! Look for a sturdy yet pliable metal pan.
- Gold Metallic Spray Paint: Because everything looks a touch more elegant with a hint of gold, don’t you think?
- Scissors: For precision cutting.
- Air Plant Template: You can easily find printable templates online, or if you’re feeling adventurous, freehand your own design!
- Air Plant: Of course, you’ll need the star of the show!
Crafting Your DIY Metal Air Plant Stand
Ready to bring your air plant vision to life? Here’s a step-by-step guide:
- Cut it Out: Start by carefully cutting out the center of the metal tray. Next, trace your air plant templates onto the tray and cut those out as well.
- Create the Prongs: Cut out small points on all three ends of your stand. These will act as supports to hold your air plant securely.
- Add a Touch of Gold: Apply two even coats of gold spray paint to both sides of the metal stand, allowing the paint to dry completely between each coat.
- Shape the Supports: Once the paint is dry, gently fold the prongs upwards. You can adjust the angle and position to perfectly cradle your air plant.
- Welcome Your Air Plant Home: Place your air plant in its new, stylish abode!
Tips and Tricks for a Standout Stand
- Sturdiness is Key: If you’re working with a heavier air plant, consider reinforcing the metal by gluing two template pieces together with strong adhesive like E6000.
- Size Matters: Adjust the size of your template to accommodate the size of your air plant.
- Get Creative with Design: Don’t be afraid to experiment with different shapes and designs for your stand. Let your creativity soar!
This DIY project is incredibly budget-friendly, and the end result is a piece of decor that looks like it came straight out of a trendy home goods store. It’s amazing how a simple dollar store find can be transformed into something so chic and modern.
So, there you have it! Now you can join the ranks of us cool kids with your very own air plant and a stylish, handcrafted stand to show it off.
What are your favorite ways to display air plants? Share your ideas and creations in the comments below! I always love hearing from fellow craft enthusiasts.
And don’t forget to explore the rest of Robert Kline Art for more inspiring DIY projects and unique handcrafted gifts. Happy crafting!
 DIY Metal Air Plant Stand
A simple metal baking dish transformed into a chic air plant stand
 DIY Metal Air Plant Stand
Adding a touch of gold elevates the look of the stand
 DIY Metal Air Plant Stand
The finished product: A stylish and modern air plant stand
 DIY Metal Air Plant Stand
Display your handcrafted air plant stand with pride
