Blog
DIY Custom Leather Luggage Tags: Travel in Style

As an artist who thrives on creativity and craftsmanship, I’m always drawn to projects that add a personal touch to everyday items. Lately, I’ve been bitten by the travel bug, and what better way to set my luggage apart than with unique, handcrafted leather luggage tags?
These aren’t your average tags. We’re talking about stylish statements that reflect your personality and make a statement on the baggage carousel. I’m excited to share this step-by-step guide to crafting your own custom leather luggage tags. Let’s transform those travel essentials into miniature works of art!
Gathering Your Supplies:
Every masterpiece begins with the right tools. For this project, you’ll need:
- Leather: Choose a leather type and color that speaks to you. Vegetable-tanned leather is a great option as it ages beautifully.
- Letter Stamp Set: These will be your tools for personalization. Select a font size that fits your tag dimensions.
- Braided Elastic: Opt for a durable elastic in a complementary color for a touch of contrast.
- Rotary Cutter: Ensures clean, precise cuts for your leather.
- Leather Punch: Creates the perfect hole for attaching the elastic.
- Hammer: Your trusty sidekick for making those letter impressions.
- Water: For dampening the leather.
- Tape: To guide your lettering.
- Scrap Wood: Protects your work surface during hammering.
- Pencil: For marking your leather.
- Ruler: For measuring your desired tag size.
Crafting Your Custom Luggage Tags:
Now that you’re prepped with your supplies, let’s dive into the creative process.
Step 1: Measure and Cut Your Leather
Using your ruler and pencil, mark out your desired tag size on the leather. A rectangular shape is classic, but feel free to get creative. Once you’re happy with the shape and size, carefully cut it out using your rotary cutter.
Step 2: Prep Your Leather for Stamping
Lightly dampen your leather with a damp paper towel. This crucial step allows the leather to take the impressions from the stamps more effectively.
Step 3: Plan Your Design
Before you begin stamping, lay out your letters on the leather to ensure proper spacing and alignment. Use a ruler and pencil to lightly mark guidelines if needed. Trust me, a little planning goes a long way in achieving a polished look.
Step 4: Test Your Stamps
I always recommend doing a test run on a scrap piece of leather. This helps you get a feel for the pressure needed and ensures your letter alignment is spot-on.
Step 5: Stamp Your Design
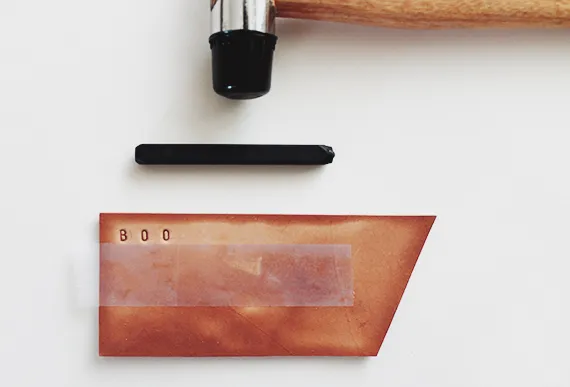
Secure your leather to your work surface using tape. Place the stamp on the leather, ensuring it’s straight and centered. Give it two firm, even taps with the hammer. Repeat for each letter, working row by row.
Pro Tip: “For a deeper, more defined impression, apply a leather stamping sealant after the impressions have dried,” suggests experienced leatherworker, Sarah Jones.
Step 6: Attach the Elastic
Using your leather punch or an awl, carefully create a hole at the top of your tag for the elastic. Thread a double piece of braided elastic through the hole and secure it with a double knot.
Time to Travel in Style!
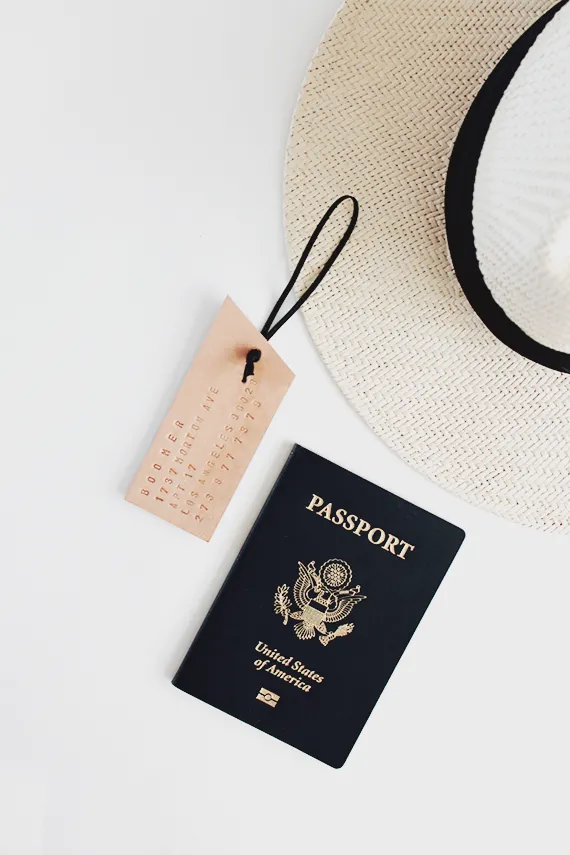
Congratulations! You’ve just crafted your own custom leather luggage tags. These personalized pieces add a touch of character to your travels and make identifying your belongings a breeze. Experiment with different leather colors, stamp sizes, and even add decorative elements for a truly unique look.
Don’t forget to share your creations with me! I’m always excited to see the unique pieces you craft. And for more handmade gift ideas and inspiration, be sure to explore the rest of the Robert Kline Art website. Happy crafting!
 diy leather luggage tag
Personalized leather luggage tag with a name stamped on it
 diy leather luggage tag
Close up of the stamped letters on the leather luggage tag
 diy leather luggage tags
Multiple finished leather luggage tags with different names
 diy leather luggage tags
Flat lay of leather luggage tags with tools used to make them
 diy leather luggage tags
Leather luggage tags hanging from a suitcase handle
 diy leather luggage tag
Close up of leather luggage tag showing the elastic loop
 diy leather luggage tag
Leather luggage tags attached to different colored suitcases
