Blog
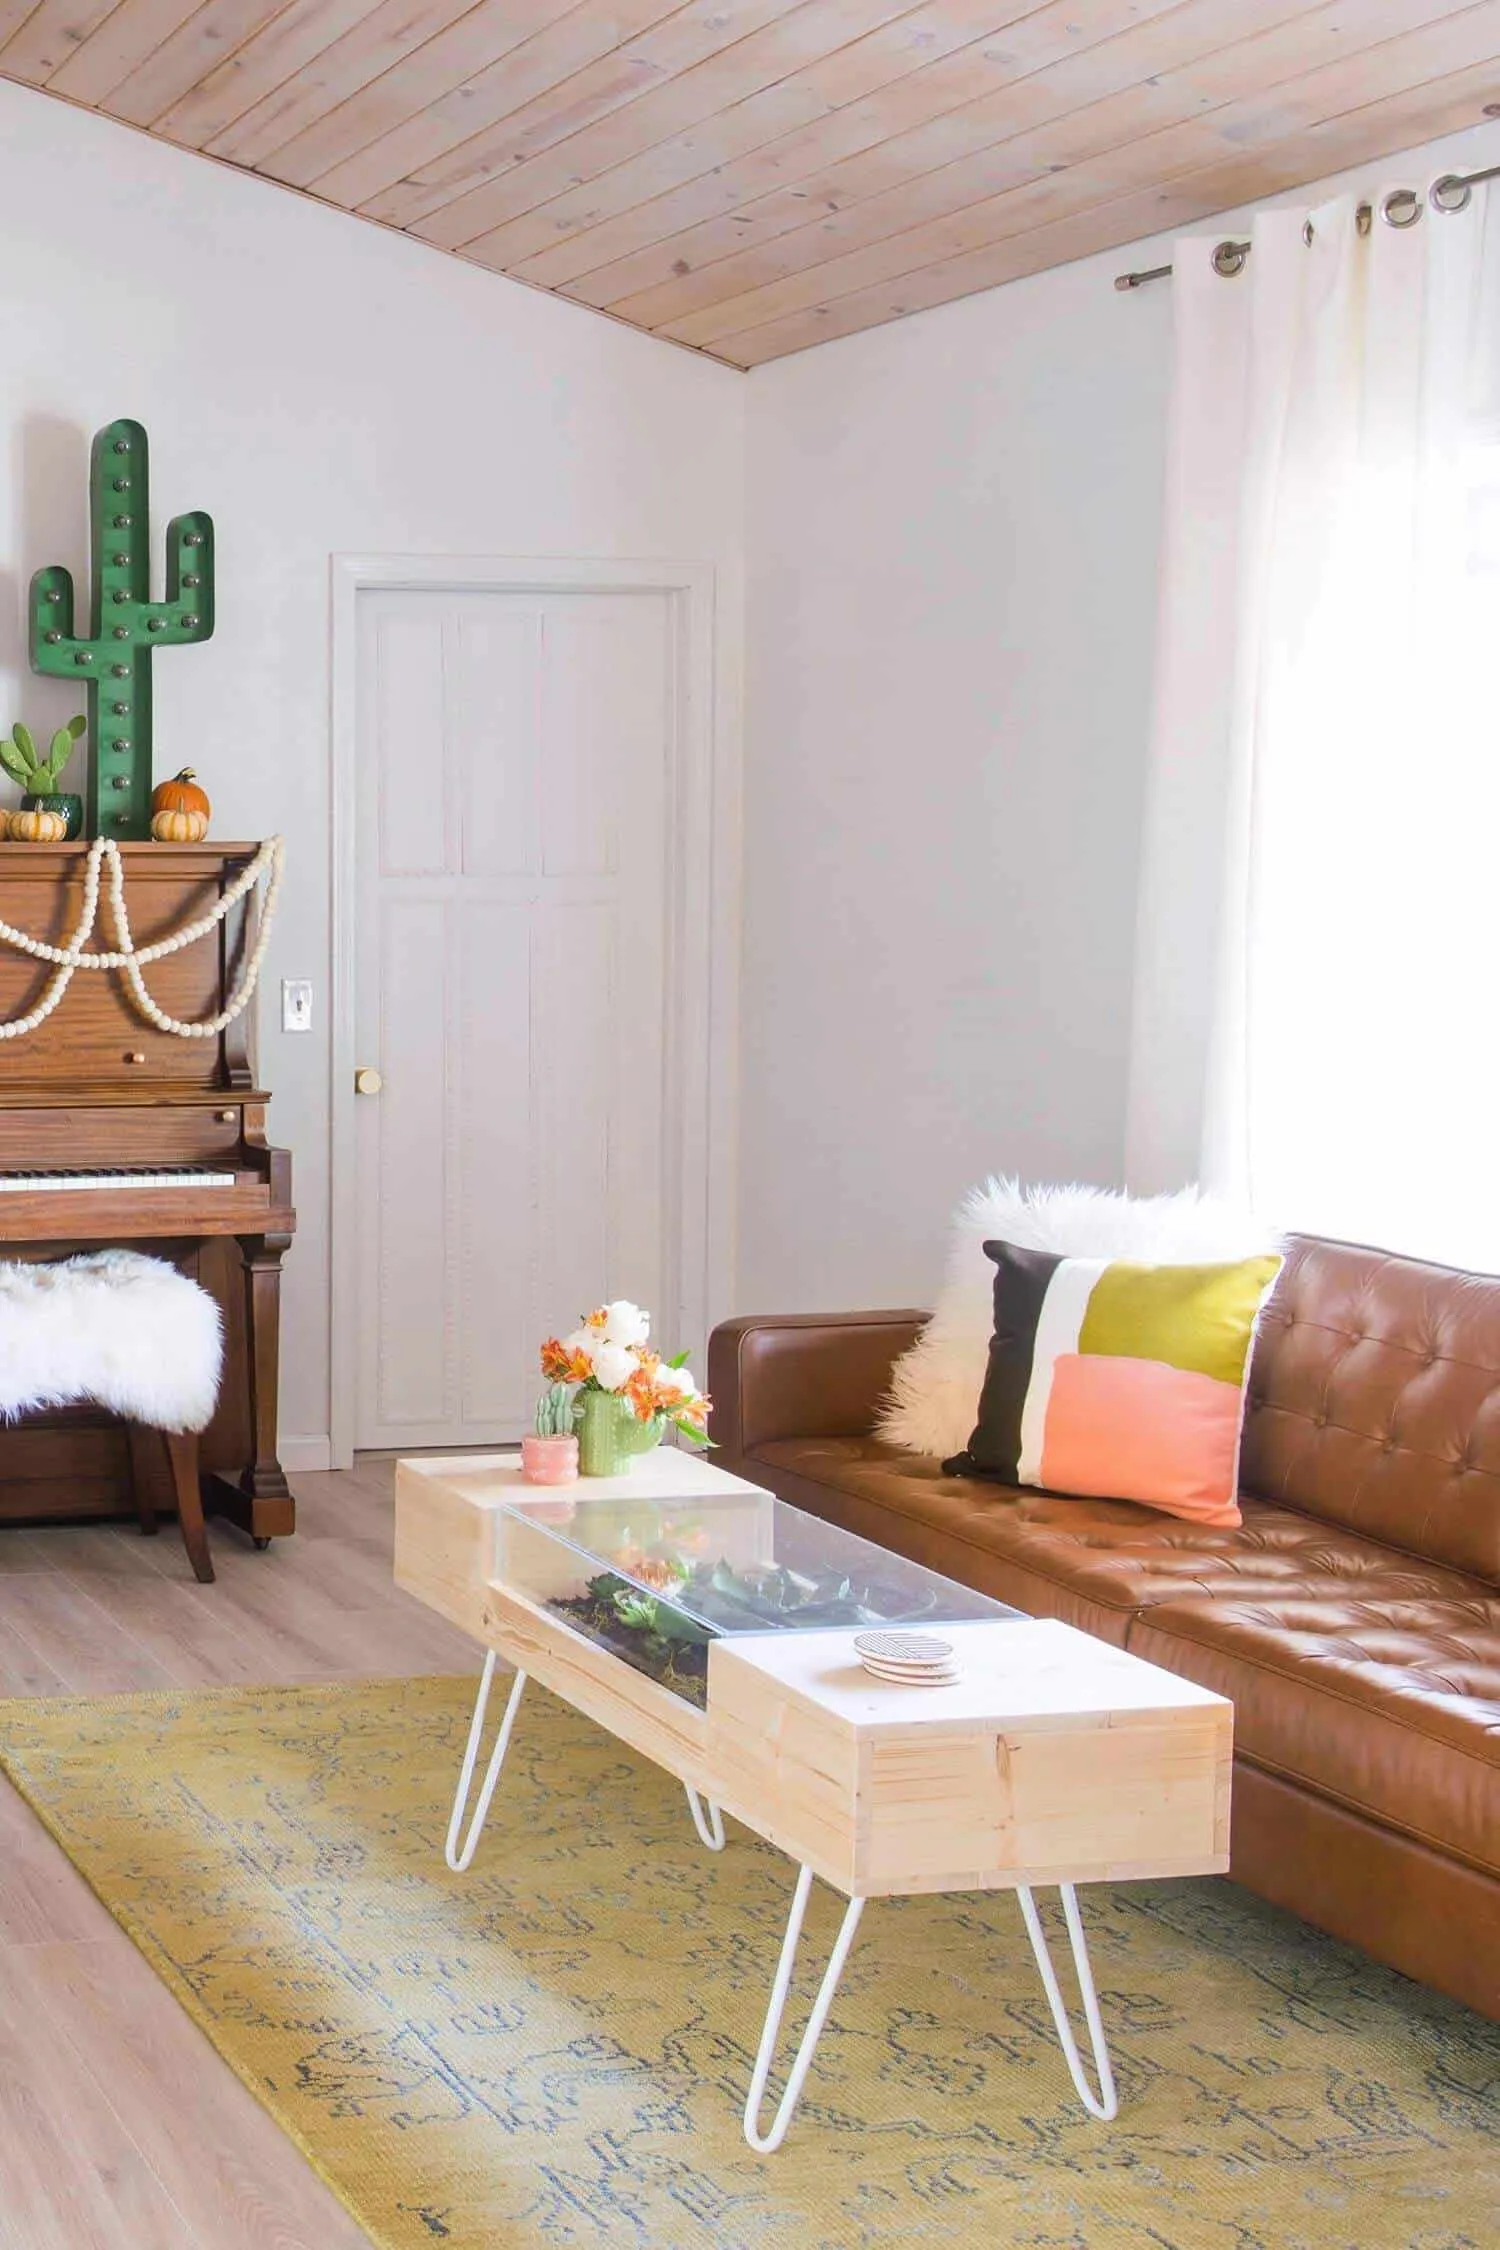
DIY Terrarium Coffee Table: A Unique Centerpiece For Your Living Room

Hey there, fellow craft enthusiasts! Robert Kline here, and today we’re diving into a project that’s close to my heart – building a stunning terrarium coffee table. This isn’t just any ordinary piece of furniture; it’s a conversation starter, a vibrant touch of nature for your living room, and a testament to your DIY skills.
Inspiration Behind The Design
As an artist who loves incorporating natural elements into my work, I’ve always been drawn to terrariums. The idea of creating a mini ecosystem within a beautiful glass enclosure fascinates me. So, when I decided to revamp my living room, I knew a terrarium had to be a part of it.
Instead of a traditional side table, I envisioned a coffee table – a centerpiece that would draw the eye and spark conversations. The challenge? Finding the perfect design that balanced functionality with visual appeal.
Gathering Your Tools and Materials
Before we embark on this exciting journey, let’s ensure we have everything we need:
Materials:
- 6 pieces of 10-inch x 8-foot pine boards
- 1 piece of 3-inch x 5-foot pine board
- 1 sheet of 14.5-inch x 2-foot acrylic
- 2 sheets of 7.5-inch x 2-foot acrylic
- 1 box of 1 3/4-inch wood screws
- 1 box of 1-inch screws
- 4 white hairpin legs
- Wood glue
- Acrylic glue
Tools:
- Circular saw
- Clamps
- Medium and fine grit sandpaper
- Measuring tape
- Pencil
Crafting Your Terrarium Coffee Table: A Step-by-Step Guide
Step 1: Building the Tabletop Frame
We’ll begin by creating the foundation of our coffee table. Cut three of the 10-inch x 8-foot pine boards in half using a circular saw, resulting in six 4-foot boards. These boards will form the core structure of our tabletop.
Smooth out the cut ends with medium grit sandpaper, ensuring a clean and even surface for the glue to adhere to. Apply wood glue to the long sides of the boards and use clamps to hold them firmly together. Ensure the ends are aligned and the boards lie flat. Allow the glue to dry overnight.
 Building the tabletop frame
Expert Tip: To avoid clamp marks on the wood, place scrap cardboard or wood between the clamps and the tabletop.
Step 2: Creating the End Boxes and Terrarium Lip
Next, we’ll construct the end boxes that will flank the terrarium. These boxes will add visual interest and provide a sense of enclosure to the overall design.
Cut four 1-foot boards and four 28-inch boards from the remaining pine boards. These will form the sides and top of the boxes. Attach the 1-foot boards to the underside of the tabletop using wood glue and 1-inch screws. Repeat the process for the 28-inch boards, forming the sides of the boxes.
For added stability, consider adding a cross brace inside each box. Cut scrap wood to size and create a half-lap joint for a secure connection.
Once the boxes are complete, cover their tops with six 1-foot pine boards, gluing and clamping them in place. Allow ample drying time.
To create the lip that will hold the acrylic terrarium, cut the 3-inch pine board to fit snugly between the two end boxes. Secure it in place using glue and screws.
Step 3: Building the Acrylic Terrarium
Now for the heart of our project – the acrylic terrarium. Measure the inner dimensions of the tabletop space where the terrarium will be housed. Using a circular saw, carefully cut the acrylic sheets to match these dimensions.
Expert Tip: Acrylic can be tricky to cut. For smoother edges, use a specialized acrylic cutting blade or score the acrylic along the cut line multiple times before snapping it.
Apply acrylic glue to the edges of the cut acrylic sheets and clamp them together to form the terrarium box. Avoid over-tightening the clamps, as this could crack the acrylic. Once the glue is dry, carefully insert the terrarium box into the tabletop frame.
Step 4: Adding the Finishing Touches
With the structure complete, it’s time to add the finishing touches. Attach the hairpin legs to the underside of the tabletop using screws, ensuring they are evenly spaced and provide stability.
Sand down any rough edges or imperfections on the table’s surface. You can choose to stain or paint the wood to your liking or leave it natural for a more rustic appeal.
 Building the tabletop frame
Bringing Your Terrarium to Life
Now comes the fun part – filling your terrarium! Select an assortment of low-maintenance plants that thrive in a humid environment, such as succulents, air plants, or ferns.
Add layers of pebbles, activated charcoal, and potting mix to create a healthy growing medium for your plants. Get creative with decorative elements like moss, stones, or miniature figurines to personalize your terrarium.
Conclusion: A Coffee Table that Sparks Joy
Congratulations on creating a unique and beautiful terrarium coffee table! This stunning centerpiece will not only enhance the aesthetic of your living room but also bring the tranquility of nature indoors.
Remember, the beauty of DIY projects lies in putting your personal touch on them. Feel free to experiment with different wood finishes, terrarium arrangements, and decorative elements to create a piece that reflects your individual style.
I’d love to see your creations! Share pictures of your finished terrarium coffee tables with me on the Robert Kline Art social media pages. Happy crafting!
