Blog
Creating a Memory Quilt: A Step-by-Step Guide to Sewing with Love

Memory quilts are more than just blankets; they’re woven hugs, tangible reminders of cherished times, and heartfelt tributes to loved ones. Imagine snuggling under a quilt pieced together with your grandfather’s favorite shirts, each square whispering stories of his life. That’s the magic we’re diving into today. As a seasoned quilter, I’ve had the privilege of crafting numerous memory quilts, and today, I’m thrilled to guide you through the process, sharing my tried-and-true techniques and heartfelt tips.
Inspiration for Your Memory Quilt Journey
Before we jump into the how-to, let’s bask in the beauty of some inspiring memory quilts.
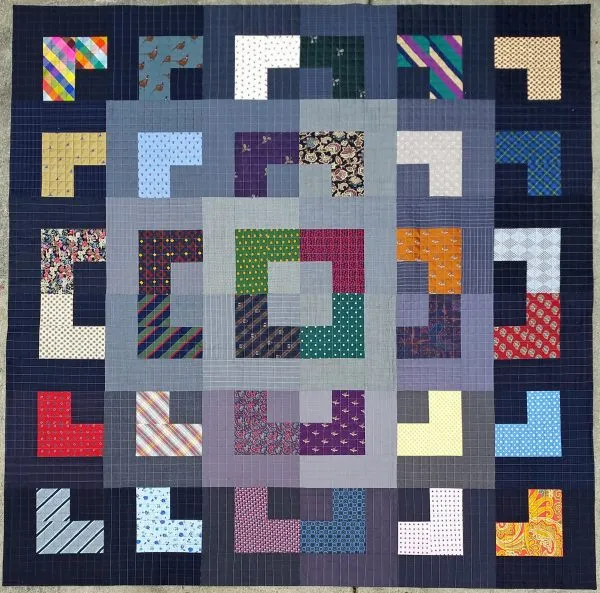
 Tie Quilt
A Quilt of Ties: I crafted this memory quilt from my stepfather’s ties, celebrating his retirement. Imagine his joy, wrapped in this warm reminder every time he relaxed with a book!
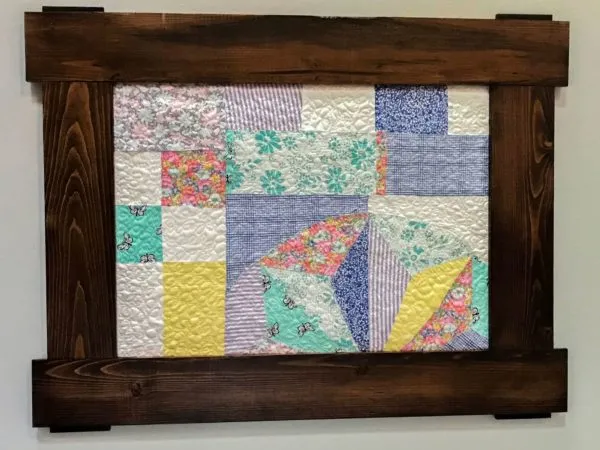
 Jenny Mom's Block
Framed Memories: Shari Butler’s exquisite framed quilt blocks are a testament to the power of memory quilts in preserving the essence of loved ones.
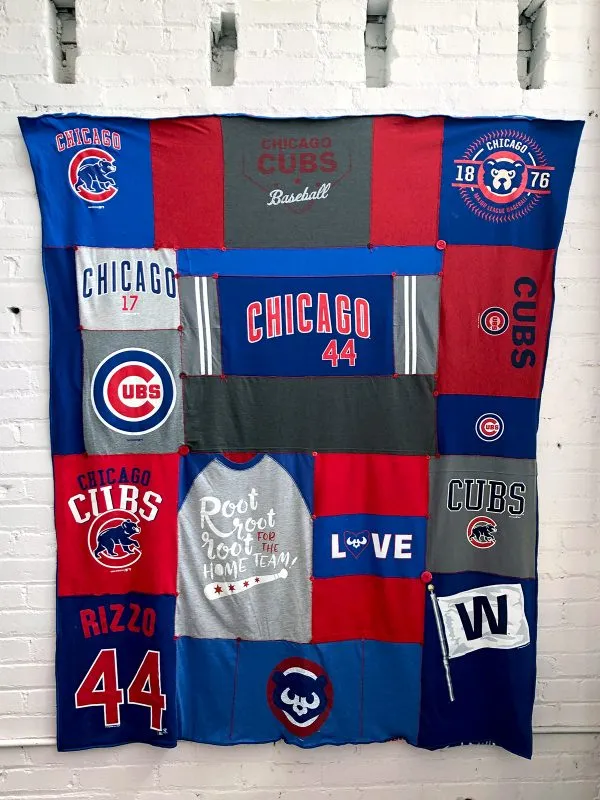
 T-shirt tutorial
A Team Spirit Quilt: Jaime David’s vibrant t-shirt quilt captures the energy and camaraderie of a beloved sports team.
Gathering and Preparing Your Fabrics: A Journey Down Memory Lane
The beauty of memory quilts lies in their ability to incorporate diverse fabrics, each piece echoing a story. T-shirts, dresses, jeans, even pillowcases – if it holds sentimental value and is washable, it has a place in your quilt!
Navigating the Fabric Rainbow: Don’t fret about mismatched colors or patterns; embrace the individuality! If you feel the need for a cohesive touch, a trip to a thrift store or your local quilt shop can fill in any gaps with solid colors or complementary prints.
Expert Tip: “When choosing fabrics for a memory quilt, I always advise my clients to focus on the story they want to tell,” shares renowned quilting expert, Sarah Jenkins. “Don’t be afraid to mix and match textures and prints – it adds depth and character to the final piece.”
Prepping Your Fabrics:
- Check Care Instructions: Ensure all items are washable, avoiding delicate fabrics like silk or lace.
- Pre-wash Everything: This prevents shrinking and color bleeding later. Remember to adjust your iron settings for different fabrics to avoid mishaps!
Essential Tools for Deconstructing Garments
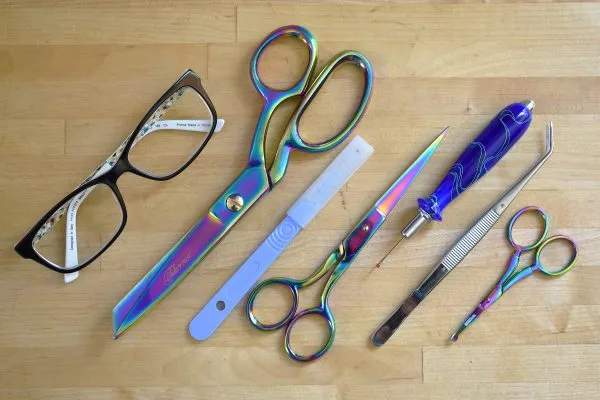
It’s time to give those cherished garments a new life! Here’s my arsenal of trusty tools:
- Eyeglasses (for those tiny stitches!)
- 8″ Seamstress Shears
- 6″ Scissors
- Small Thread Snips
- Forked Seam Ripper
- Curved Blade Seam Ripper
- Tweezers
- Lint Roller
- Iron and Pressing Surface
Deconstructing with Care: Two Techniques
Let’s explore two methods to carefully take apart your garments, ensuring every precious scrap finds its place in your memory quilt.
1. Taking Apart the Seams: A Delicate Touch
 How to make a memory quilt: preparing the materials
This method, ideal for maximizing fabric from areas like cuffs or seams, involves carefully removing stitching to salvage larger pieces.
- Open Cuffs and Hems: Use the forked seam ripper to gently open up hems and cuffs.
- Release Side Seams: Employ the curved blade seam ripper to carefully remove overlock stitches along side seams. Remember to work with the blade pointing away from you!
- Remove Seam Stitching: Use the forked seam ripper again to remove a few inches of stitching at the bottom of the pant leg, gently pulling the seam apart to release the threads.
- Cut Away Excess: For areas like waistbands or zipper flies, use sharp dressmaking shears to cut close to the seams, as seam ripping won’t yield usable fabric.
- Press and Clean: Thoroughly press each salvaged piece, using tweezers and a lint roller to remove stray threads.
2. Cutting Apart the Seams: A Time-Saving Approach
 How to make a memory quilt: preparing the materials
This method is perfect for quickly deconstructing multiple garments like shirts.
- Start with Button Plackets: Using sharp dressmaking shears, cut along the button plackets, up to the collar.
- Remove Collar and Side Seams: Cut off the collar, then proceed to cut along the side seams and around each armhole.
- Separate Shoulders and Sleeves: Cut across the shoulder seams, back yoke (if present), and open up the sleeves by cutting along their seams. Remove cuffs and plackets.
- Final Touches: Remove buttons, pockets (either carefully seam rip or cut around them), and give each piece a final pressing.
Ready to Sew Your Memory Quilt?
Now that you’ve prepped your fabrics, join me next week for Part 2 of our Memory Quilt journey! We’ll delve into creating simple yet stunning 12″ quilt blocks using a quarter square ruler, perfect for a range of quilt sizes. From baby quilts to snuggle-worthy throws, the possibilities are endless!
Don’t forget to subscribe to Robert Kline Art for more inspiring crafting guides and explore our collection of unique handmade gifts, perfect for preserving memories and spreading joy!
