Blog
**DIY Air Plant Wall Display: Bringing Nature Home**

As an artist and plant enthusiast, I’m constantly inspired by the beauty of the natural world. At Robert Kline Art, we believe in bringing a touch of the outdoors into your living spaces, and one of my favorite ways to do this is with a stunning air plant wall display. Air plants, or Tillandsia, are incredibly versatile and low-maintenance, making them the perfect addition to any modern home.
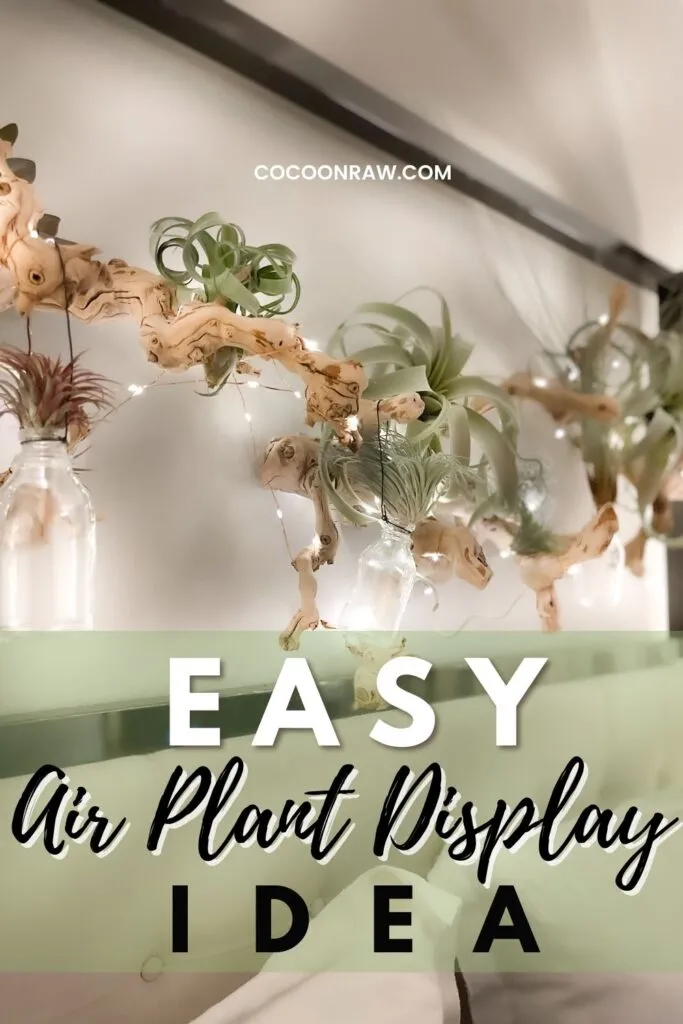
Today, I’m excited to guide you through the simple steps of creating your own eye-catching air plant wall display using driftwood – a project that effortlessly blends rustic charm with modern design.
Why Air Plants? Unveiling the Allure
What fascinates me most about air plants is their unique ability to thrive without soil. They draw in moisture and nutrients through their leaves, making them incredibly adaptable and perfect for creative displays.
This characteristic opens up a world of possibilities, allowing you to showcase them in ways you never thought possible with traditional plants!
Gathering Your Supplies: A Symphony of Natural Elements
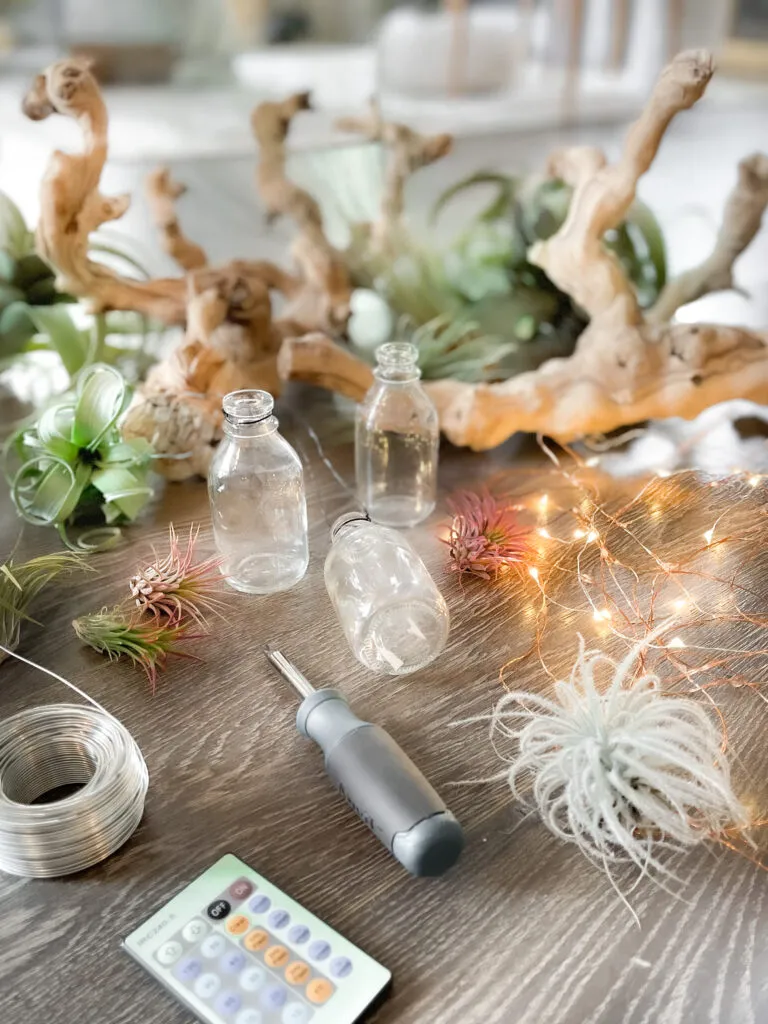
Before we embark on our creative journey, let’s gather the essential materials:
- Driftwood: The star of our show! Choose pieces with interesting shapes and sizes.
- Picture Hanger Wire
- Picture Hooks
- Drill
- D-Ring Hangers with screws
- Plug-in Mini Lights with Remote (optional, for a magical touch!)
- Small Glass Bottles
- Black Craft Wire
- Screwdriver
- Air Plants in various sizes and shapes to add visual interest
Pro Tip: Sourcing your air plants from reputable sellers on Etsy ensures you’re getting healthy and ethically sourced plants.
Creating Your Masterpiece: A Step-by-Step Guide
1. Planning Your Composition:
- Before diving in, lay out your driftwood pieces on the floor. Experiment with different arrangements until you find a visually pleasing composition.
- Mark the desired positions of your D-ring hangers on each piece of driftwood.
2. Prepping the Driftwood:
- Drill small holes at your marked locations to prepare for the D-ring hangers.
- Securely attach the D-ring hangers to each piece of driftwood.
- Thread the picture wire through the D-rings, creating a loop for hanging.
3. Mounting the Driftwood:
- Measure and mark the desired placement of your picture hooks on the wall.
- Install the picture hooks, ensuring they are securely fastened.
- Hang your driftwood pieces, adjusting their heights to achieve a dynamic composition.
4. Adding a Touch of Magic (Optional):
- If you’re opting for the enchanting glow of fairy lights, now’s the time to weave them around your driftwood pieces.
- Start at the end where you plan to plug them in, ensuring you have enough length to reach the outlet.
5. Crafting the Air Plant Holders:
- Wrap black craft wire around the neck of each glass bottle, creating a secure loop for hanging.
6. Hanging the Bottles:
- Suspend your charming glass bottles from the driftwood, distributing them evenly throughout the display.
7. The Grand Finale: Placing Your Air Plants:
- Now comes the most exciting part! Begin arranging your air plants on the bottles and throughout the driftwood, using their natural shapes to complement the overall design.
- Larger air plants can be strategically placed to conceal any visible wires or hooks.
 air plant wall display
Caring for Your Air Plant Masterpiece: A Symphony of Light and Water
Just like any living art piece, your air plant wall display will thrive with a little TLC:
- Light: Air plants adore bright, indirect light. Choose a location near a window, but avoid harsh, direct sunlight.
- Water: Every 1-2 weeks, treat your air plants to a refreshing soak. Submerge them in a bowl of water for 20-30 minutes. After soaking, gently shake off excess water and place them upside down on a towel to dry completely before returning them to the display.
Remember: Never use soil with your air plants!
 AirPlant Wall
Air Plant Wall Display Tips: Wisdom from an Artist’s Perspective
Over the years, I’ve picked up a few valuable tips for creating stunning air plant displays:
- Embrace Variety: Just like a painter uses different brushstrokes, experiment with air plants of varying sizes, textures, and even colors to add visual intrigue.
- Less is More: Avoid overcrowding your display. Allow each air plant to breathe and shine.
- Consider the Setting: The overall style of your room should harmonize with your air plant display. For a minimalist look, opt for sleek containers. For a bohemian vibe, embrace natural elements like driftwood and macrame.
- Don’t Be Afraid to Experiment: Have fun and let your creativity guide you! There’s no right or wrong way to create an air plant wall display.
Beyond the Display: Exploring the World of Air Plants
The beauty of air plants extends beyond wall displays. These versatile wonders can be incorporated into a myriad of creative projects.
- Terrariums: Create miniature ecosystems by pairing air plants with other low-maintenance companions like succulents and moss.
- Hanging Mobiles: For a touch of whimsy, suspend air plants from decorative hoops or branches using fishing line.
- Tabletop Displays: Arrange air plants in decorative bowls, vintage teacups, or even on a simple bed of pebbles.
The possibilities are endless!
Final Thoughts: Embracing Nature’s Artistry
Creating an air plant wall display is a journey of artistic expression and a celebration of nature’s simple elegance. At Robert Kline Art, we believe that surrounding yourself with natural elements like air plants brings a sense of tranquility and beauty to your home.
So, why not embark on this creative adventure and craft your own living masterpiece? Share your creations with us – we’d love to see your unique take on air plant displays!
For more inspiring ideas and DIY projects, explore the world of Robert Kline Art!
