Blog
Craft the Perfect Dreamcatcher: A Step-by-Step Guide

Have you ever gazed upon a dreamcatcher, its intricate web shimmering with beads and feathers, and felt a sense of wonder? Dreamcatchers hold a special magic, whispering tales of ancient cultures and promising peaceful sleep. Today, we’ll embark on a creative journey together and learn how to craft our own dreamcatchers, infusing them with our personal touch.
This isn’t just a craft project; it’s an opportunity to connect with a rich history and awaken your inner artist. So, gather your supplies, and let’s weave some magic!
Understanding the Legend of the Dreamcatcher
Before we dive into our crafting adventure, let’s take a moment to appreciate the rich history behind these enchanting creations. Dreamcatchers originate from Native American culture, specifically the Ojibwe people.
According to Ojibwe legend, the night air is teeming with both good and bad dreams. Dreamcatchers, traditionally hung above beds, act as filters for these dreams. Good dreams, knowing the way, easily navigate through the web’s center and gently slide down the feathers, delivering peaceful slumber. Bad dreams, however, become ensnared in the web’s intricate pattern, vanishing with the first light of dawn.
This beautiful legend reminds us of the power of hope and the importance of holding onto good dreams. Now, let’s create our own dreamcatchers and invite a little magic into our lives.
Gathering Your Dreamcatcher Supplies
Every crafting journey begins with gathering the right tools and materials. Here’s what you’ll need to create your own dreamcatcher:
- A Wooden Embroidery Hoop: This forms the base of your dreamcatcher. Choose a size that suits your preference.
- Washi Tape: Add a pop of color and personality by decorating your hoop with washi tape.
- Yarn: Select two or more colors of yarn that speak to you. You’ll use this to create the dreamcatcher’s web.
- Felt: Choose two colors of felt to craft a small heart for your dreamcatcher, representing love and good dreams.
- Polyester Batting: A small amount of batting will give your felt heart a soft and plush feel.
- Needle and Thread: You’ll need these for stitching the felt heart together.
- Beads: Pony beads, wooden beads, or any beads that catch your eye will add a touch of sparkle and personality.
- Pom-Pom Maker (Optional): Add playful pom-poms to your dreamcatcher for extra texture and whimsy.
- Paper Pinwheels: These add a unique and colorful dimension to your dreamcatcher. (We’ll provide a link to easy instructions for making these!)
- Watercolors: Bring your paper pinwheels to life with vibrant watercolor paints.
- Wire (Silver or Colored): You’ll use wire to create a loop for hanging your finished dreamcatcher.
- Hot Glue Gun (Optional): A hot glue gun can be helpful for securing knots and adding embellishments.
Now that we have our supplies ready, let’s move on to the step-by-step process of bringing your dreamcatcher to life.
Crafting Your Dreamcatcher: Step-by-Step
Get ready to unleash your creativity! This step-by-step guide will walk you through the entire process of creating your dreamcatcher.
Step 1: Decorating the Hoop
Start by personalizing your embroidery hoop. Tear or cut small pieces of colorful washi tape and apply them around the hoop, creating a vibrant and unique design. Don’t be afraid to get creative and experiment with different patterns.
Step 2: Weaving the Web
Now, let’s create the dreamcatcher’s web using your chosen yarn colors. Here’s how:
- Tie one end of your yarn securely to the hoop.
- Begin wrapping the yarn around the hoop, creating evenly spaced loops. Ensure the yarn is wrapped tightly to prevent slipping.
- Continue wrapping until you’ve gone all the way around the hoop.
Step 3: Crafting the Felt Heart
The felt heart symbolizes love and good dreams. Here’s how to create it:
- Draw a heart shape on a piece of paper (about 3.5 inches wide).
- Cut out the paper heart and use it as a template to trace two identical hearts onto your felt.
- Thread your needle with a double strand of thread and tie a knot at the end.
- Use a whip stitch to sew the two felt hearts together, leaving a small opening for stuffing.
- Lightly stuff the heart with polyester batting, giving it a soft and plush feel.
- Stitch the opening closed.
Step 4: Painting the Pinwheels
Add a touch of whimsy with colorful paper pinwheels:
- Follow the instructions in the provided link to create your paper pinwheels (we recommend a 4-inch diameter).
- Once assembled, let your creativity flow by painting the pinwheels with watercolors.
- Allow the paint to dry completely, then carefully punch a small hole at the top of each pinwheel.
Step 5: Making Pom-Poms (Optional)
Pom-poms add texture and a playful touch:
- If using a pom-pom maker, follow the manufacturer’s instructions.
- Alternatively, use the traditional cardboard circle method (a tutorial is linked in the supplies section).
Step 6: Assembling Your Dreamcatcher
Now, it’s time to bring all the elements together:
- Cut four pieces of string or yarn.
- Thread one string through the top of the felt heart, one through the hole in the pinwheel, and attach the remaining two to your pom-poms.
- String beads onto the strings as desired, adding a touch of sparkle and personality.
- Tie the strings onto the hoop at varying lengths, creating a visually appealing cascade.
Step 7: Creating the Hanging Loop
Finally, create a secure loop for hanging:
- Cut a piece of wire and bend it into a loop shape.
- Securely attach the loop to the top of the hoop using hot glue or by tightly wrapping it with yarn.
Congratulations, your dreamcatcher is complete!
Showcasing Your Creation
You’ve poured your heart and creativity into crafting this beautiful dreamcatcher, so find the perfect spot to hang it. Traditionally, dreamcatchers are hung above beds to filter out bad dreams, but you can place yours wherever it brings you joy and peace.
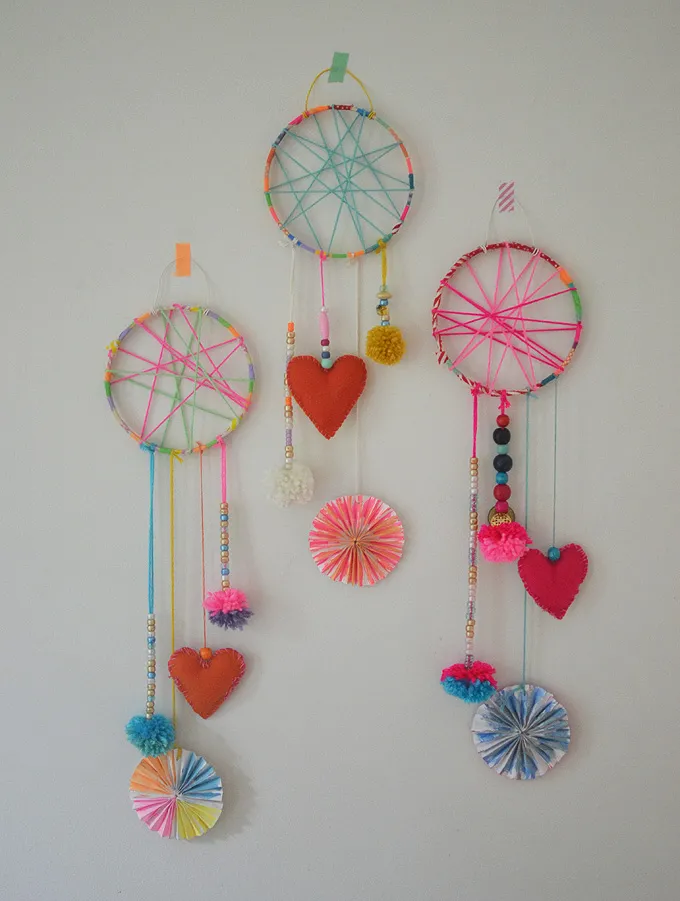
 Dreamcatchers made by 5-7yr olds in art camp.
A collection of vibrant dreamcatchers, each one unique and bursting with color.
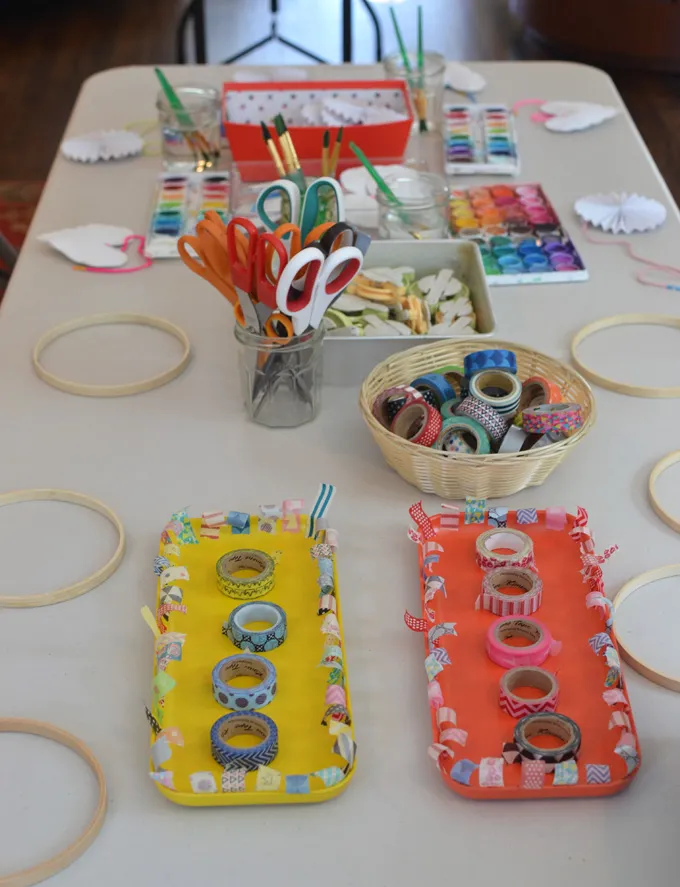
 Kids make dreamcatchers at a birthday party.
Crafting dreamcatchers is a fun and engaging activity for all ages, perfect for birthday parties and gatherings.
Exploring Variations and Personal Touches
The beauty of crafting dreamcatchers lies in the endless possibilities for customization. Don’t be afraid to experiment with:
- Different Bead Combinations: Explore various colors, shapes, and sizes of beads to create unique patterns and textures.
- Feathers and Other Natural Elements: Add feathers, dried flowers, or crystals to your dreamcatcher for a touch of nature and whimsy.
- Embroidered Details: Embroider meaningful words, symbols, or patterns onto your felt heart or directly onto the dreamcatcher’s web.
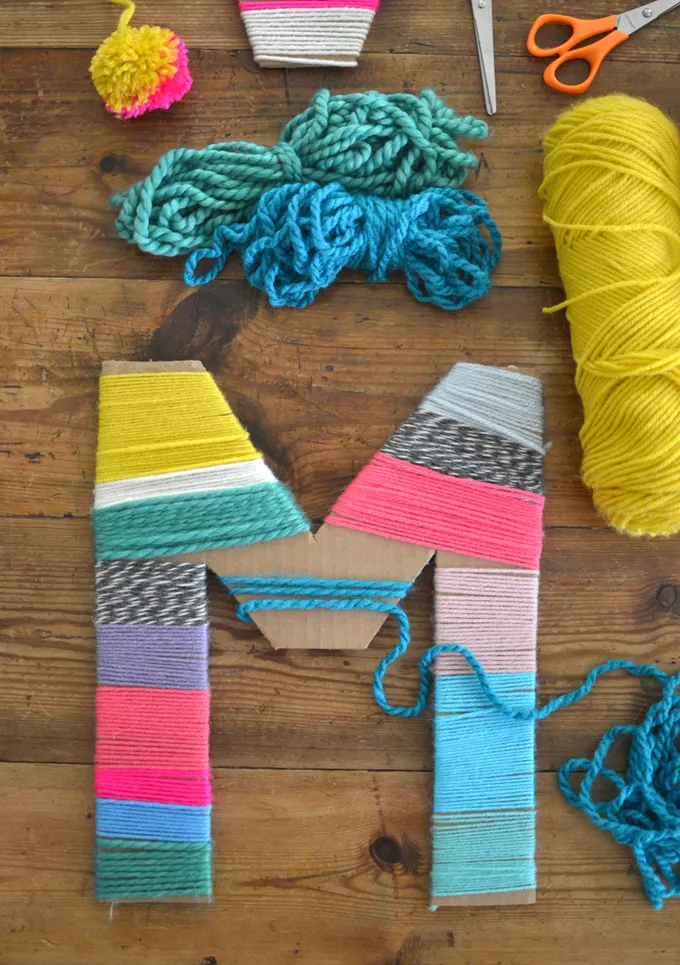
 Use yarn to wrap cardboard letters and create a beautiful work of art. Great for children to adults.
Yarn wrapped letters make a beautiful addition to your dreamcatcher, adding a personalized touch.
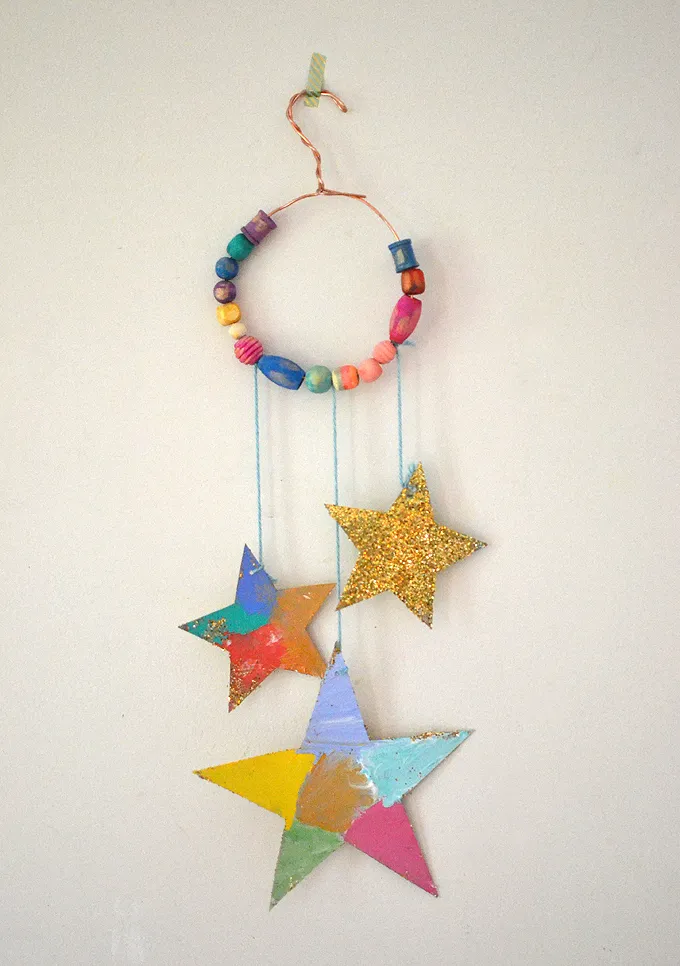
 Cardboard stars and painted and glittered in the beaded wire garland.
Sparkling stars add a touch of magic and whimsy, enhancing the dreamlike quality of your creation.
Conclusion
Creating a dreamcatcher is more than just assembling materials; it’s about tapping into your creativity, connecting with a rich cultural tradition, and crafting a tangible symbol of hope and peaceful dreams.
So, gather your supplies, unleash your inner artist, and let the magic of dreamcatchers fill your life. Don’t forget to share your creations with us! We’d love to see your unique interpretations of this timeless craft.
And remember, here at Robert Kline Art, we’re passionate about inspiring creativity and helping you discover the joy of handmade artistry. Be sure to explore our website for more unique craft ideas, DIY projects, and one-of-a-kind gifts. Happy crafting!
