Blog
DIY Wall-Mounted Umbrella Holder: A Simple Guide

As a craft enthusiast, I’m always seeking creative ways to use leftover materials. Recently, my mom needed a practical solution for her umbrella clutter, so I decided to craft her a DIY wall-mounted umbrella holder using scrap wood. It turned out to be a simple and rewarding project, and today, I’ll guide you through the process, so you can create your own!
Gathering Your Materials
Before diving in, let’s gather the necessary materials. Fortunately, this project requires minimal supplies, most of which you may already have on hand:
- Scrap wood (1x2s and 1x6s)
- Plywood
- Wood glue
- Brad nails
- Wood filler
- Sandpaper
- Primer
- Paint
- Drill
- Screws
- Hooks (optional)
Building the Umbrella Holder
Step 1: Creating the Frame
To prevent the umbrellas from falling out, we’ll start by crafting the holder’s frame. For a polished look, I used 45-degree miter cuts for the 1x2s and 1x6s. Cut a longer piece of each, followed by shorter pieces of equal length. Arrange them to ensure a perfect fit, then secure them together using wood glue and brad nails. Clamping the pieces at a 90-degree angle while nailing ensures a sturdy frame.
 " data-load=
Step 2: Adding the Base
Next, cut two plywood pieces: one for the back and one for the bottom of the holder, matching the dimensions of the frame. Drill drainage holes in the bottom piece to prevent water accumulation and potential mold growth. Attach both plywood pieces to the frame using brad nails and clamps.
 " data-load=
Step 3: Ensuring Stability
Before moving on to the finishing touches, double-check all measurements and ensure the holder is level. Consider the size of your umbrellas, especially the taller ones, to determine the optimal placement of the frame’s top section. This step is crucial for a functional and aesthetically pleasing final product.
 " data-load=
Finishing Touches and Installation
Step 1: Prepping the Surface
With the structure complete, it’s time to create a smooth and polished finish. Apply wood filler to any gaps or nail holes, and once dry, sand the entire surface for a seamless look. Apply a coat of primer, followed by two coats of your chosen paint color. Matching the paint to your wall color allows for a cohesive and integrated appearance.
 " data-load=
Step 2: Mounting the Holder
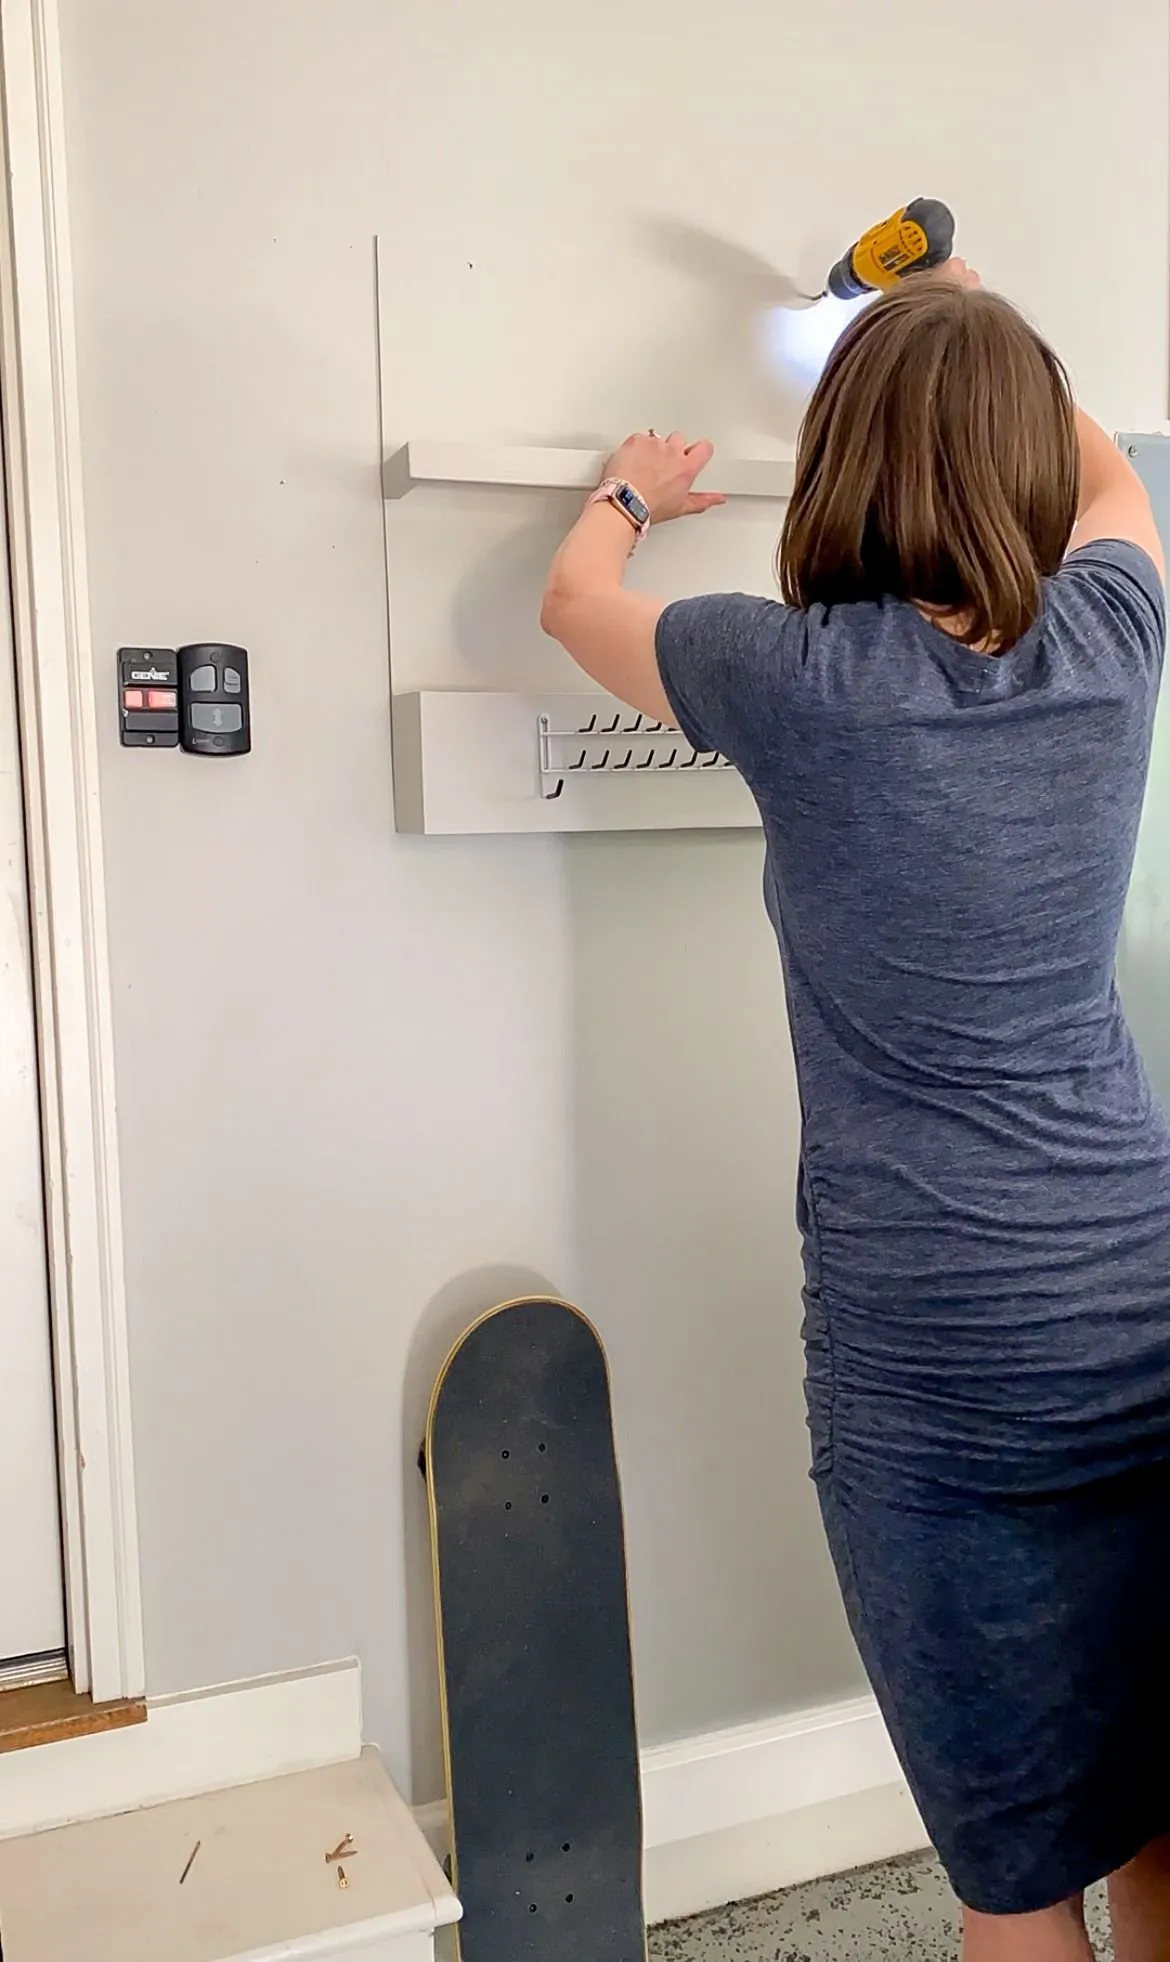
Locate the wall studs for maximum support and mark their positions. Pre-drill holes at these marked points, then securely mount the umbrella holder to the wall using wood screws. Using multiple screws ensures a robust and long-lasting installation.
 " data-load=
Step 3: Optional Hook Installation
For added functionality, consider installing a set of hooks to the front of the holder. This simple addition provides a designated spot for smaller umbrellas, maximizing storage space and keeping all your rain gear organized.
 " data-load=
Conclusion
Creating this DIY wall-mounted umbrella holder was a rewarding experience, allowing me to repurpose scrap wood and provide my mom with a practical solution for her umbrella storage needs. It’s a testament to the fact that even with limited resources, one can craft functional and aesthetically pleasing pieces for their homes.
Remember, crafting is a journey of experimentation and personalization. Feel free to modify the design, dimensions, or finishing touches to match your style and storage requirements.
I encourage you to give this project a try and share your creations with the Robert Kline Art community in the comments below. Who knows, your project might inspire fellow craft enthusiasts to embark on their own DIY adventures! For more unique and personalized gift ideas, be sure to explore the handcrafted treasures available on the Robert Kline Art website.
 " data-load=
