Blog
DIY Wall-Mounted Scarf Organizer: An Easy and Elegant Solution

As an artist, I find beauty and inspiration in the everyday, even in the organization of my craft supplies and wardrobe. Over the years, my scarf collection has grown, leading me on a quest for the perfect storage solution. Today, I’m excited to share a simple DIY project: a wall-mounted scarf organizer using readily available materials. This project is not only practical but also adds a touch of rustic charm to your space.
Gathering Your Supplies
Before we embark on this creative journey, let’s gather our tools and materials. Here’s what you’ll need:
- Wooden towel bars: Choose a size that complements your space and scarf collection.
- White spray paint (optional): I opted for a clean, white finish, but feel free to experiment with colors that suit your style.
- Level: Precision is key to ensuring your organizer hangs straight.
- Pencil: For marking those crucial drill points.
- Electric drill/screwdriver: Your trusty sidekick for this project.
- Wall anchors (if necessary): These provide extra support, especially if your towel bars don’t come with them.
Creating Your Masterpiece
Now, let’s dive into the heart of our DIY project. Don’t worry; I’ll guide you through each step.
Step 1: Preparation is Key
If you choose to paint your towel bars, begin by applying two to three light coats of spray paint. Allow ample drying time between each coat.
Step 2: Measure Twice, Drill Once
Remember the age-old adage: “Measure twice, cut once”? The same principle applies here. Using a level and pencil, carefully mark the desired position of your towel bars on the wall. If using wall anchors, drill pilot holes at the marked locations.
Step 3: Secure the Foundation
Install the wall anchors (if needed) according to the manufacturer’s instructions. Then, firmly secure the towel bars to the wall using your electric drill/screwdriver.
Step 4: Organize and Admire
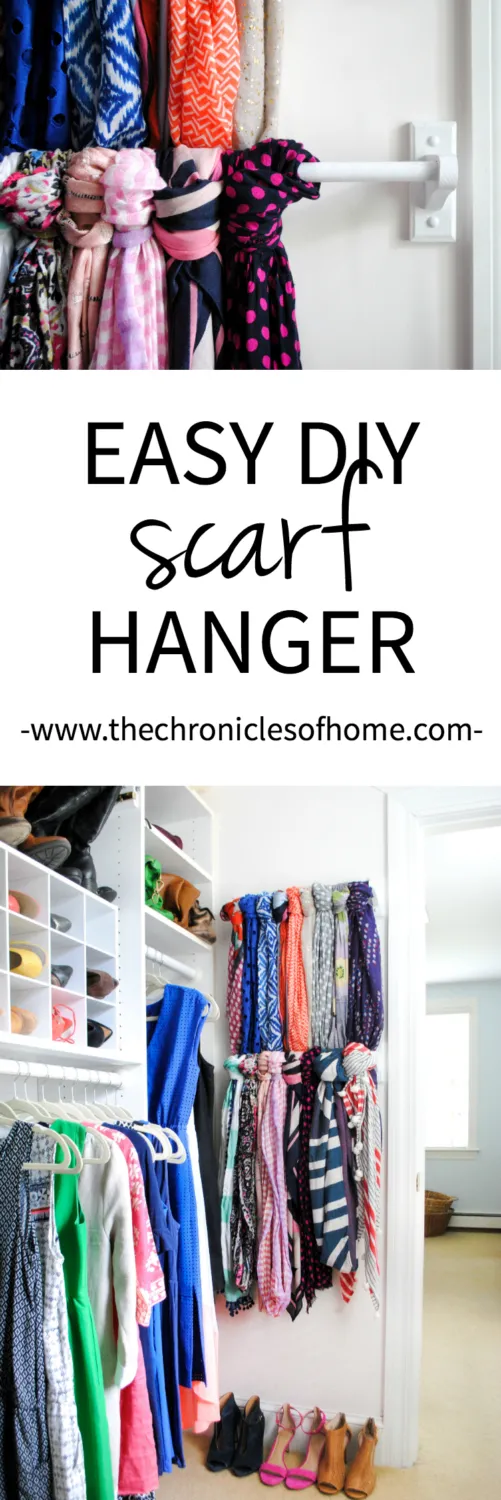
With your scarf organizer in place, it’s time to unveil your collection. Fold each scarf in half, loop the loose ends through the back of the towel bar, and pull them through the loop. And there you have it – a beautifully organized display of your favorite scarves.
 An easy and inexpensive scarf hanger using wooden towel bars
 An easy and inexpensive scarf hanger using wooden towel bars
 An easy and inexpensive scarf hanger using wooden towel bars
 An easy and inexpensive scarf hanger using wooden towel bars
Conclusion: Embrace the Beauty of Organization
This simple DIY project transformed my closet, making my mornings a little brighter. I encourage you to try it out and experience the joy of a well-organized space. Remember, creativity knows no bounds, and even the most practical items can be infused with a touch of artistry.
Have you tackled any DIY organization projects lately? Share your experiences and tips in the comments below! And don’t forget to explore the unique handmade treasures available on Robert Kline Art for personalized gifts that inspire and delight.
