Blog
DIY Wall-Mounted Folding Desk: The Ultimate Space-Saving Solution
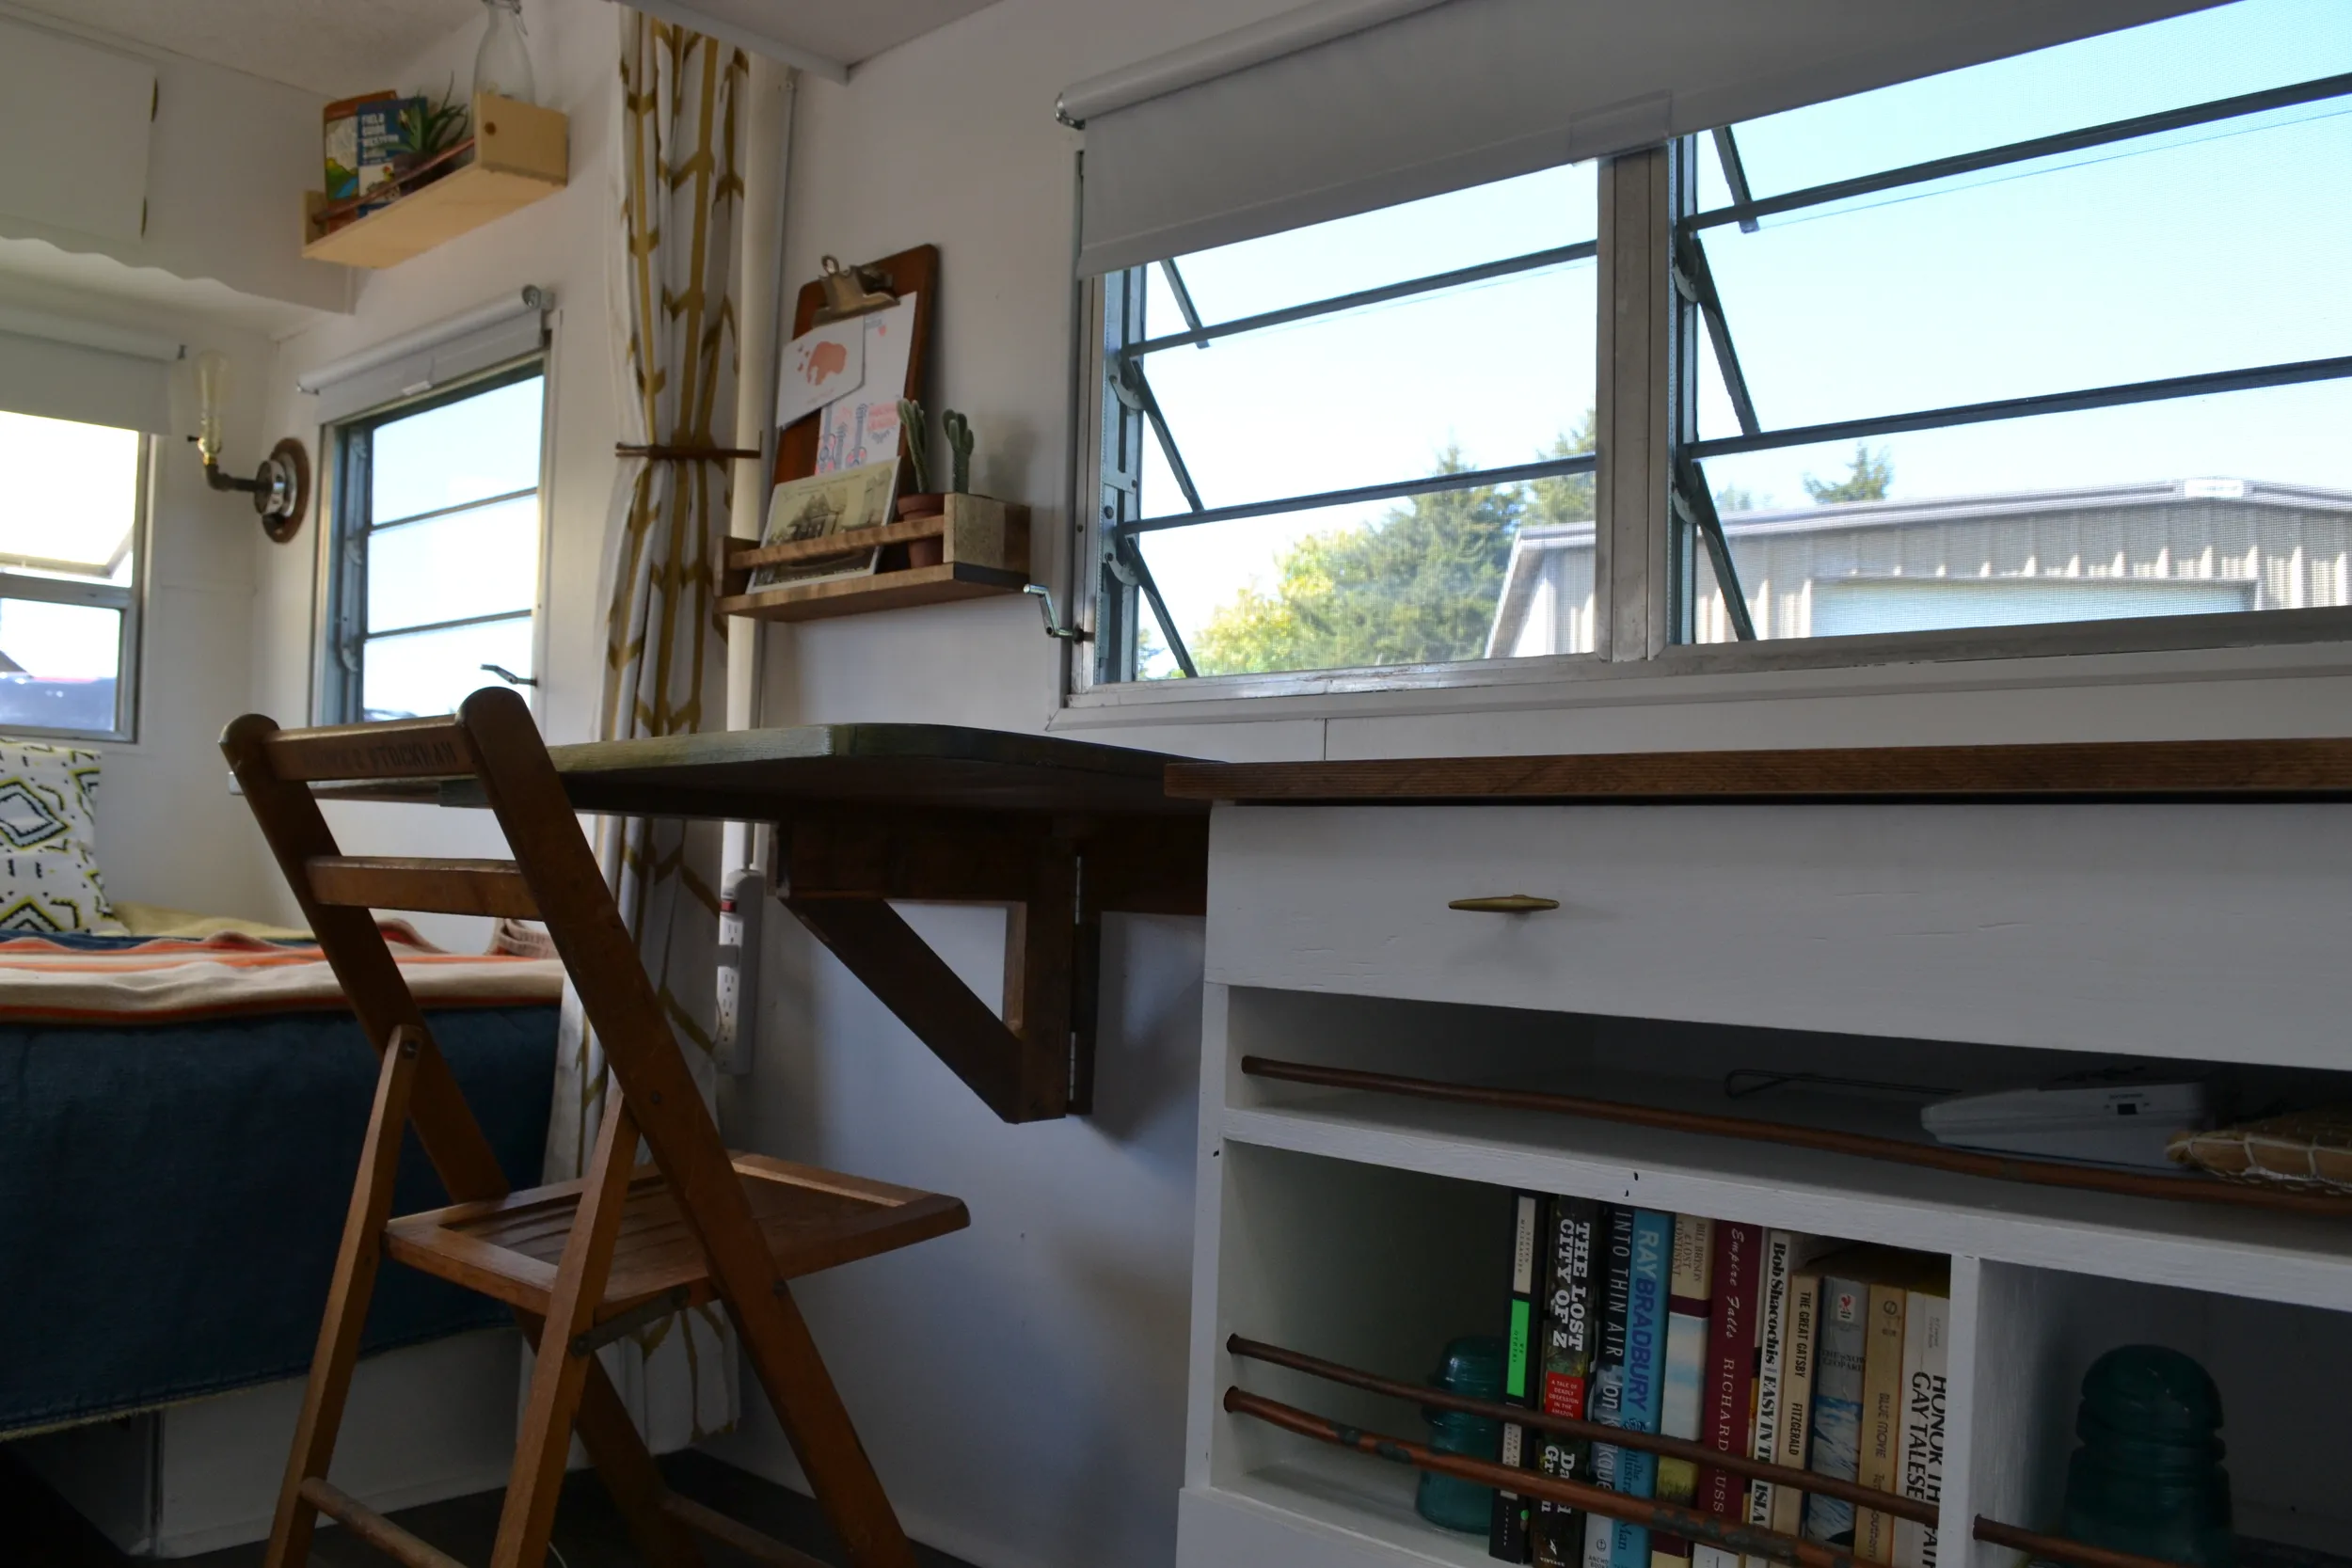
Hey there, fellow craft enthusiasts! Robert Kline here, and today, we’re diving headfirst into a project that’s near and dear to my heart: building a DIY wall-mounted folding desk. As someone who’s always looking to maximize space without compromising style, this project was a no-brainer. Sure, you can find pre-made options, but where’s the fun in that? Let’s unleash our inner artisans and create a piece that’s uniquely ours.
Why DIY?
While pre-made furniture has its place, there’s something deeply satisfying about crafting something with your own two hands. A DIY approach allows you to customize every detail to your liking – from the dimensions to the finish. Plus, the sense of accomplishment you’ll feel after completing this project? Priceless.
Gathering Your Supplies
Before we jump in, let’s gather our weapons of choice:
- Wood: You’ll need a large piece for the desktop, a smaller piece for the lip, and scrap wood for the braces.
- Hinges: Two types are needed: up/down and left/right.
- Screws: Various sizes for assembly.
- Wood Glue: For added strength and stability.
- Sandpaper: To smooth out those rough edges.
- Stain or Paint: Let your personality shine through!
- Polyurethane: For a durable and protective finish.
- Wood Peg: To secure the brace.
- Tools: Drill, jigsaw, measuring tape, pencil, level.
Building Your Masterpiece
Step 1: Inspiration and Planning
Every masterpiece starts with an idea. Take inspiration from existing designs, sketch out your vision, and finalize the dimensions based on your space and needs.
Step 2: Locating the Stud
Finding a stud in your wall is crucial for providing adequate support. Use a stud finder or the good old-fashioned “knock test” to locate it. Mark its position with a pencil.
 The folding desk is a huge space saver in the camper. Sure, we could have bought one at IKEA. But then it wouldn't really be ours.
Step 3: Installing the Horizontal Brace
This bad boy is the backbone of your desk, so ensure it’s securely attached to the stud you marked earlier.
Step 4: Attaching the Lip
The lip serves two purposes: it provides a finished look and prevents the brace from protruding when folded. Secure it on top of the horizontal brace.
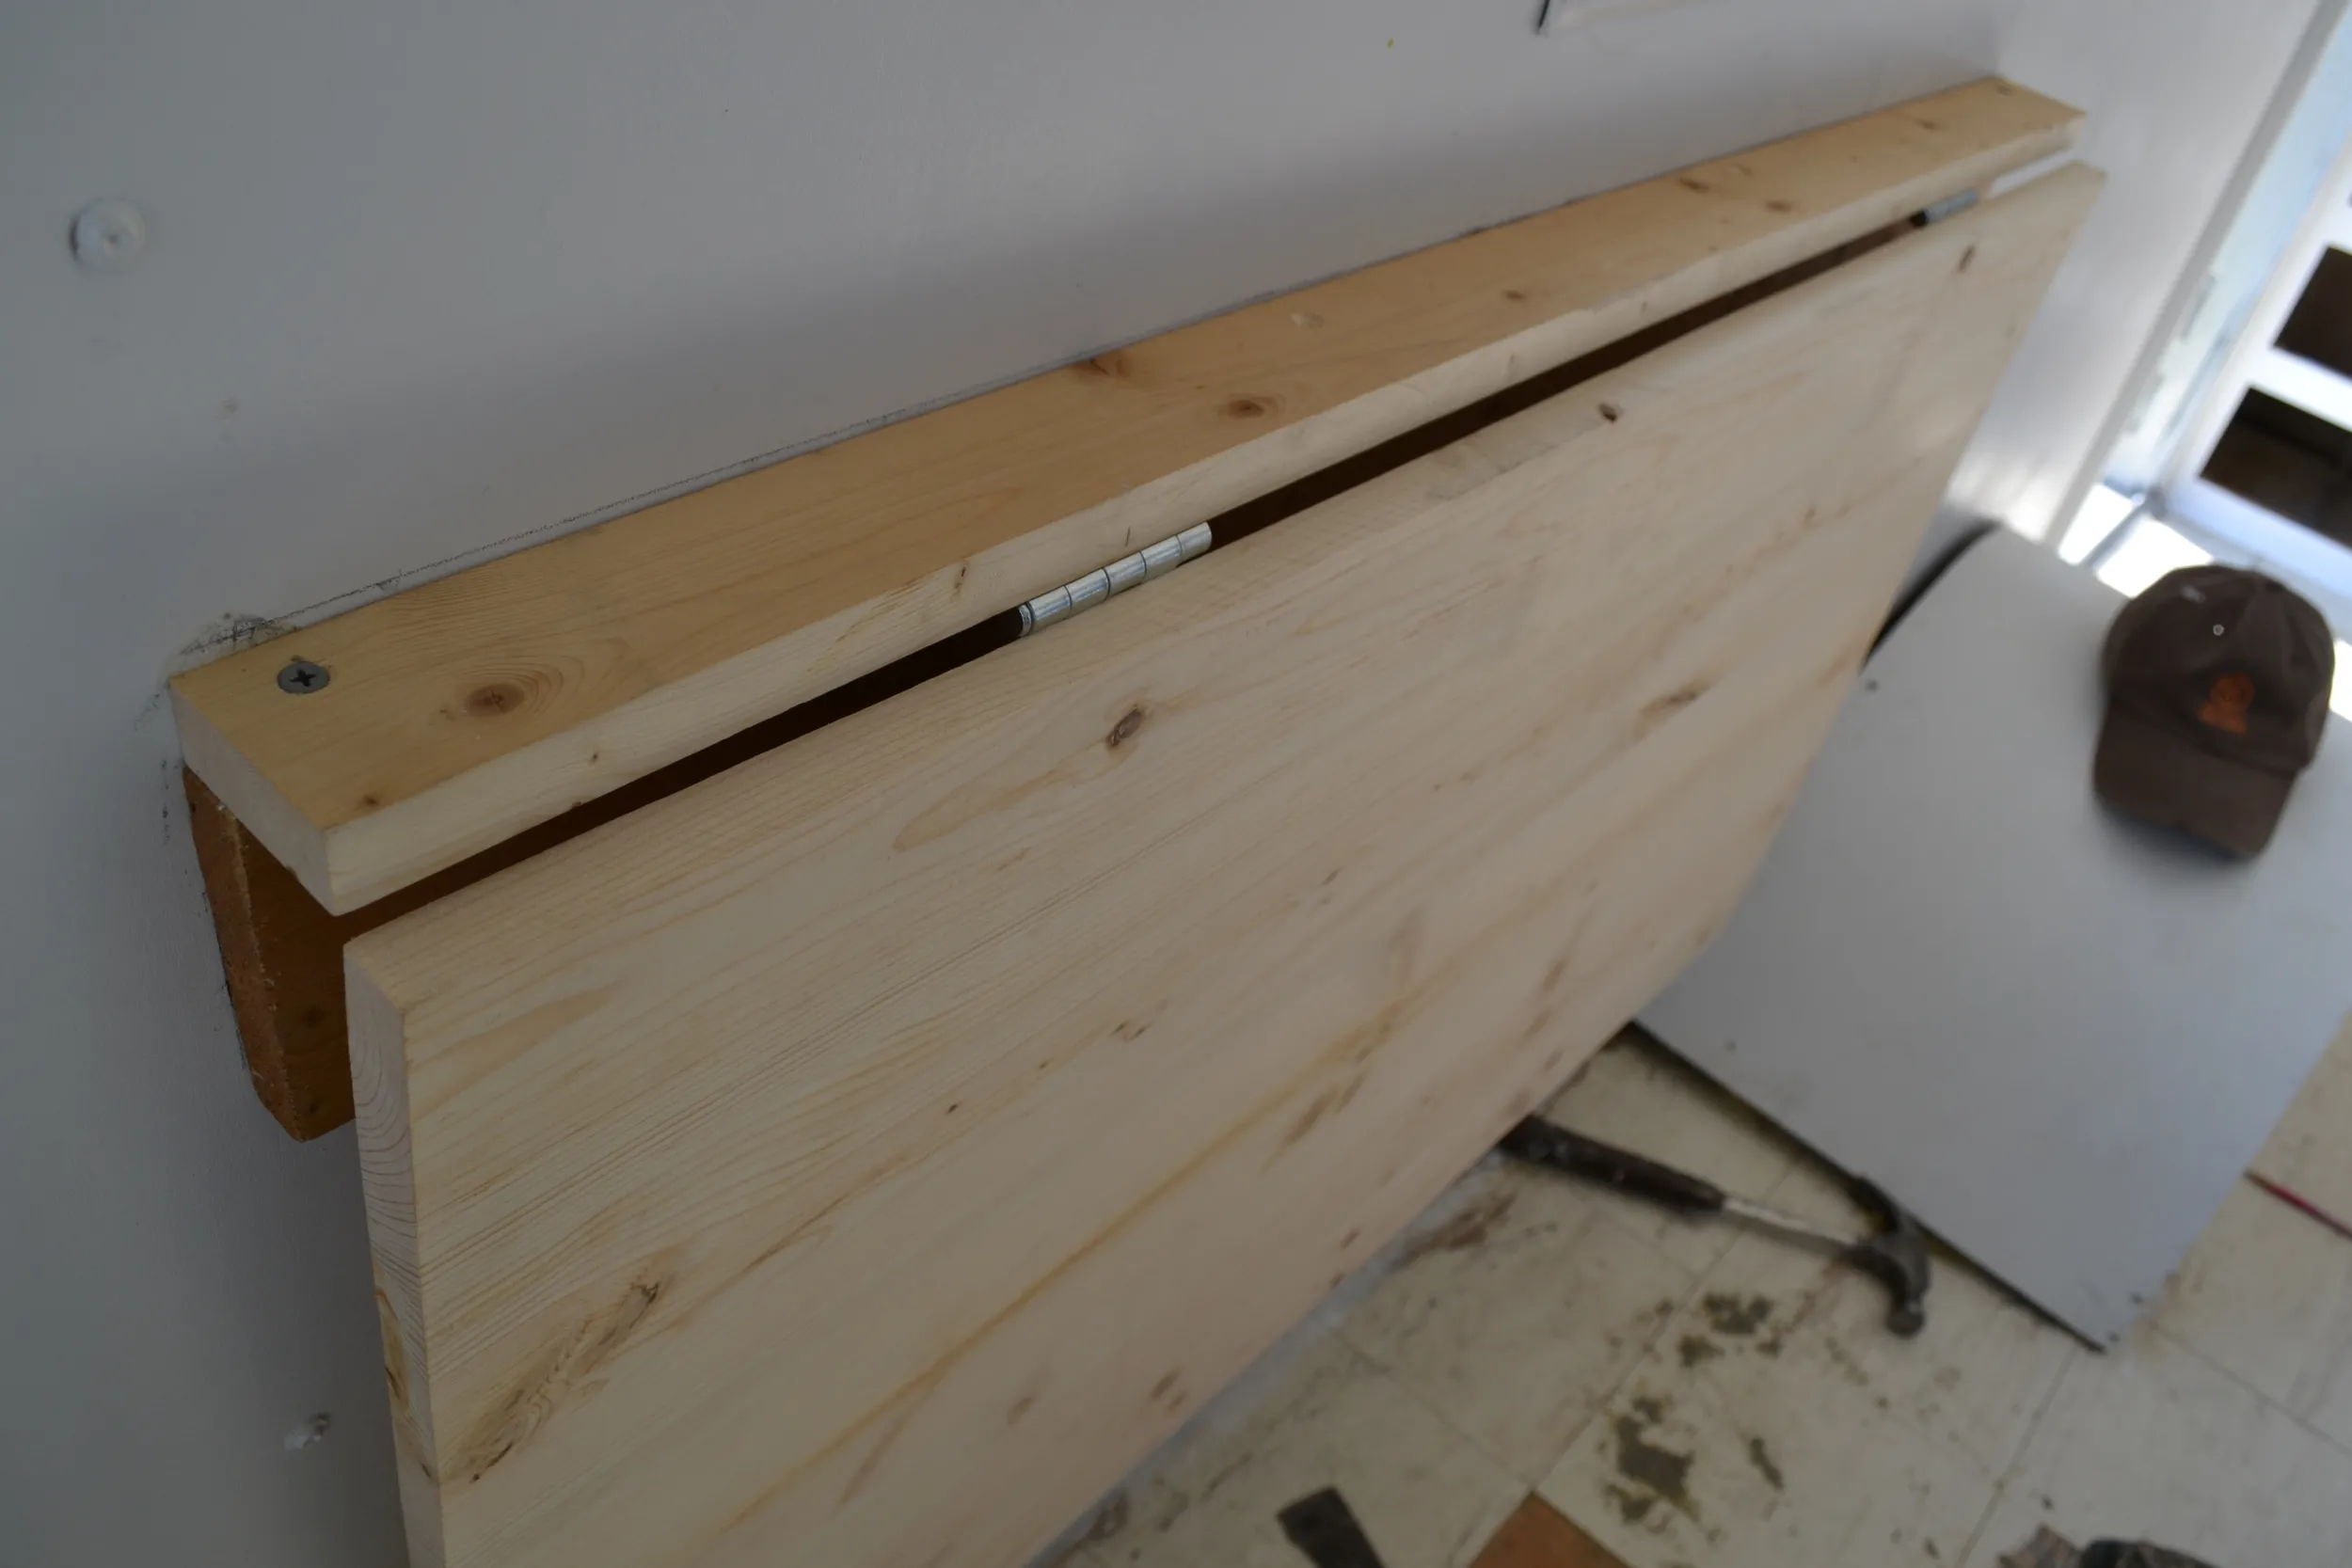 Here's what you're working toward. It looks a lot like the IKEA version, if you ask us. Take note: see that pencil line? We drew that once we found the stud in the wall and it was our measure of how high we wanted the desk to be. Just read below, it…
Step 5: Adding the Desktop
Hinge the desktop to the lip, ensuring smooth movement. Remember those up/down hinges? They come into play here.
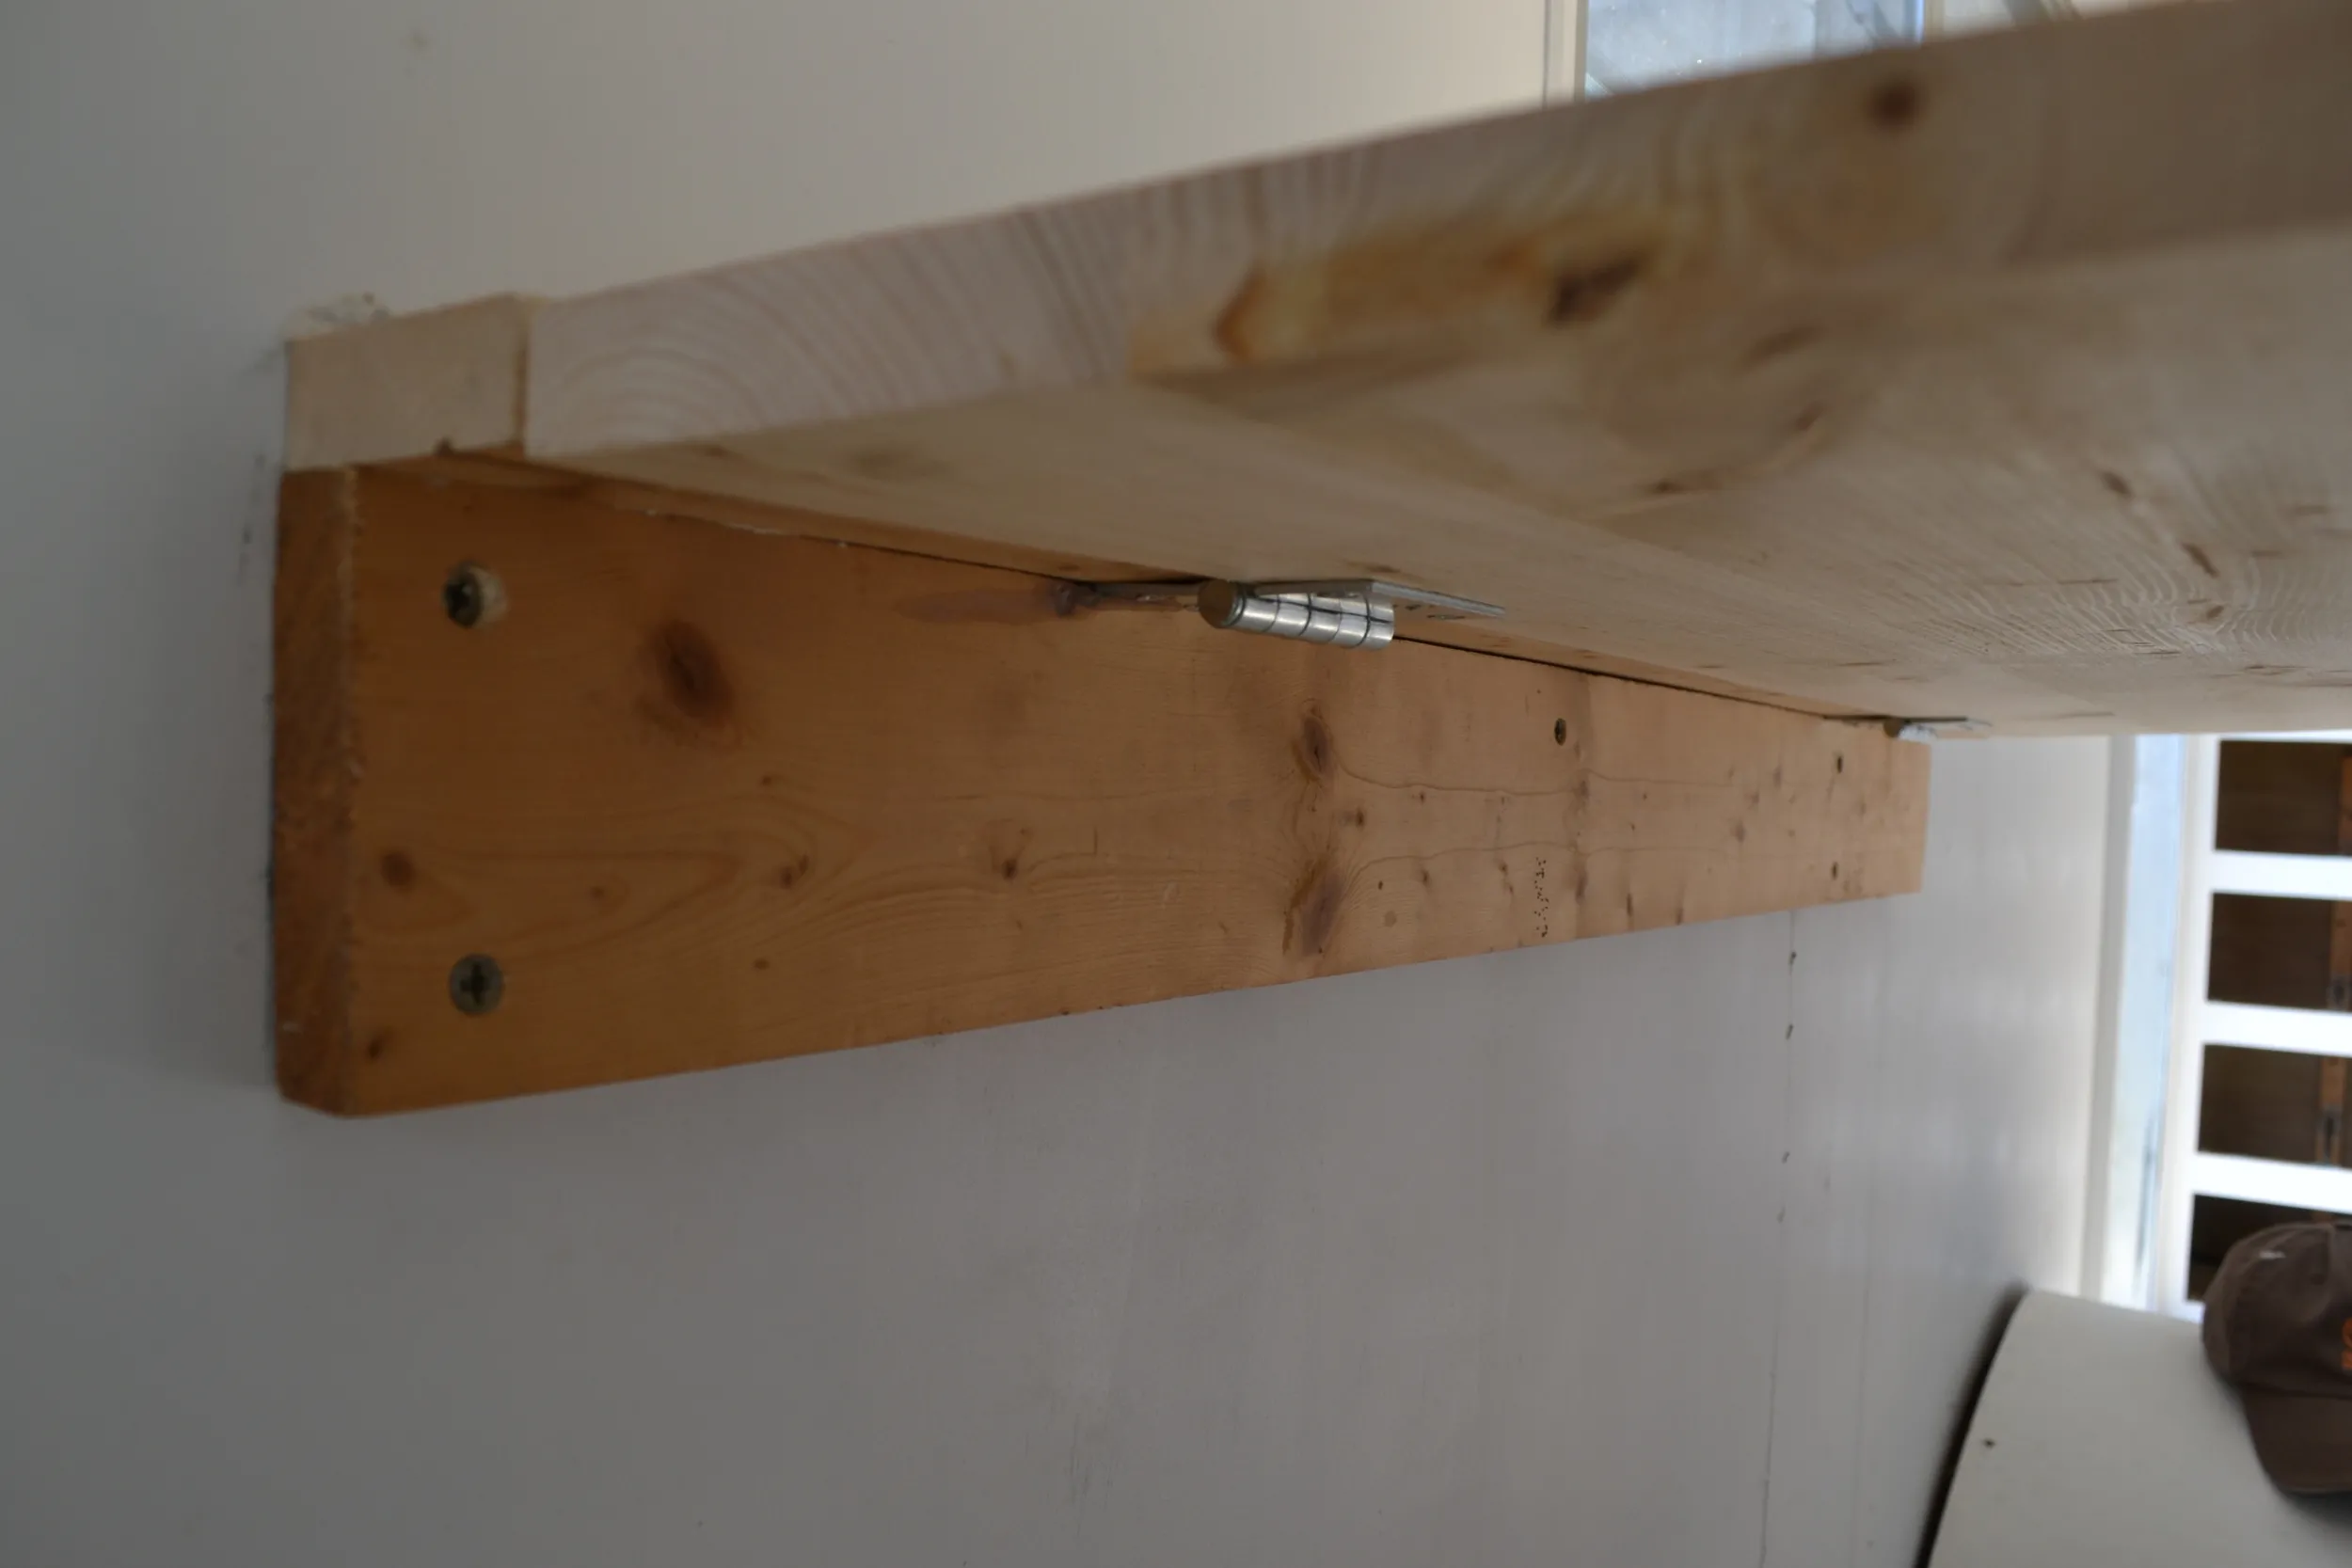 Here's the important stuff: a) the horizontal brace is the one drilled into the wall. The lip is the board sitting on top of it. The top is the big piece hinged to the lip. Got it?
Step 6: Creating the Vertical Support and Brace
Construct a “T” shape with your scrap wood, attaching the vertical piece to the wall and the horizontal piece to the underside of the desktop. This provides additional support for the folded desk.
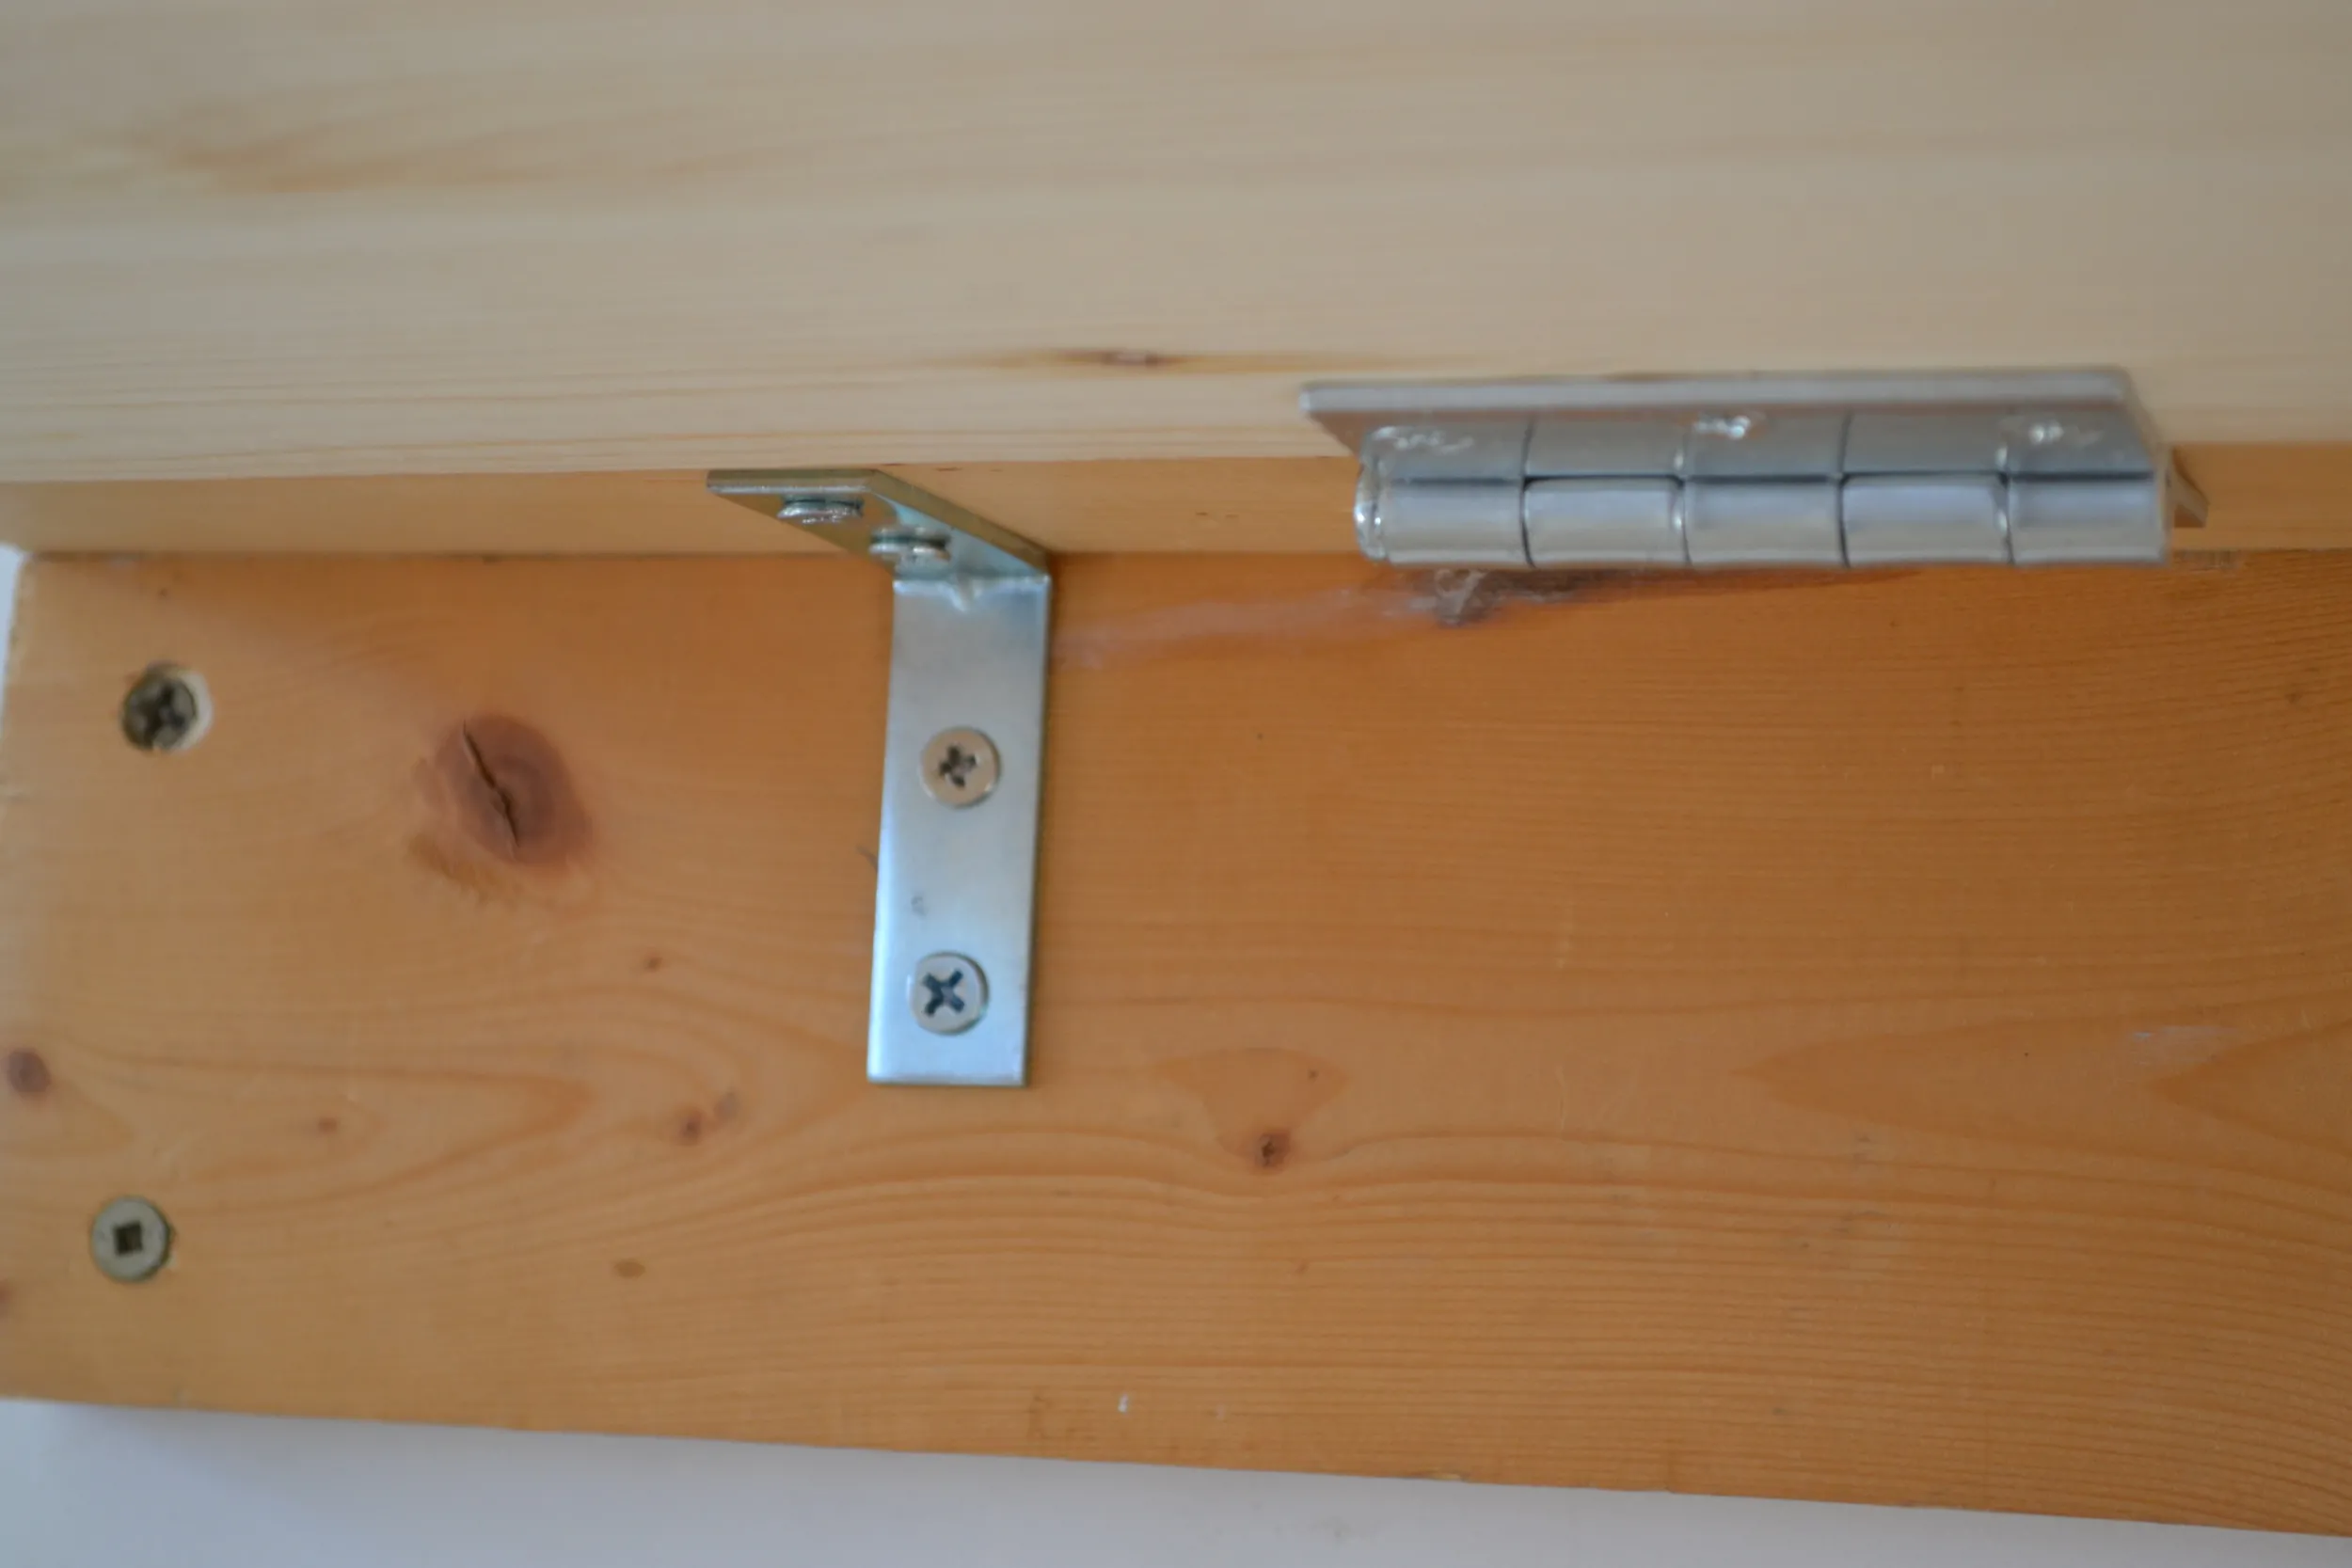 Here you can clearly see the horizontal brace, the lip, the L bracket, and the up/down hinge.
Step 7: Crafting the Triangle Brace
This ingenious piece locks your desk into place when unfolded. Use scrap wood to create a triangle with a right angle. Hinge one side to the vertical support and the other to the underside of the desktop (left/right hinges for this one!).
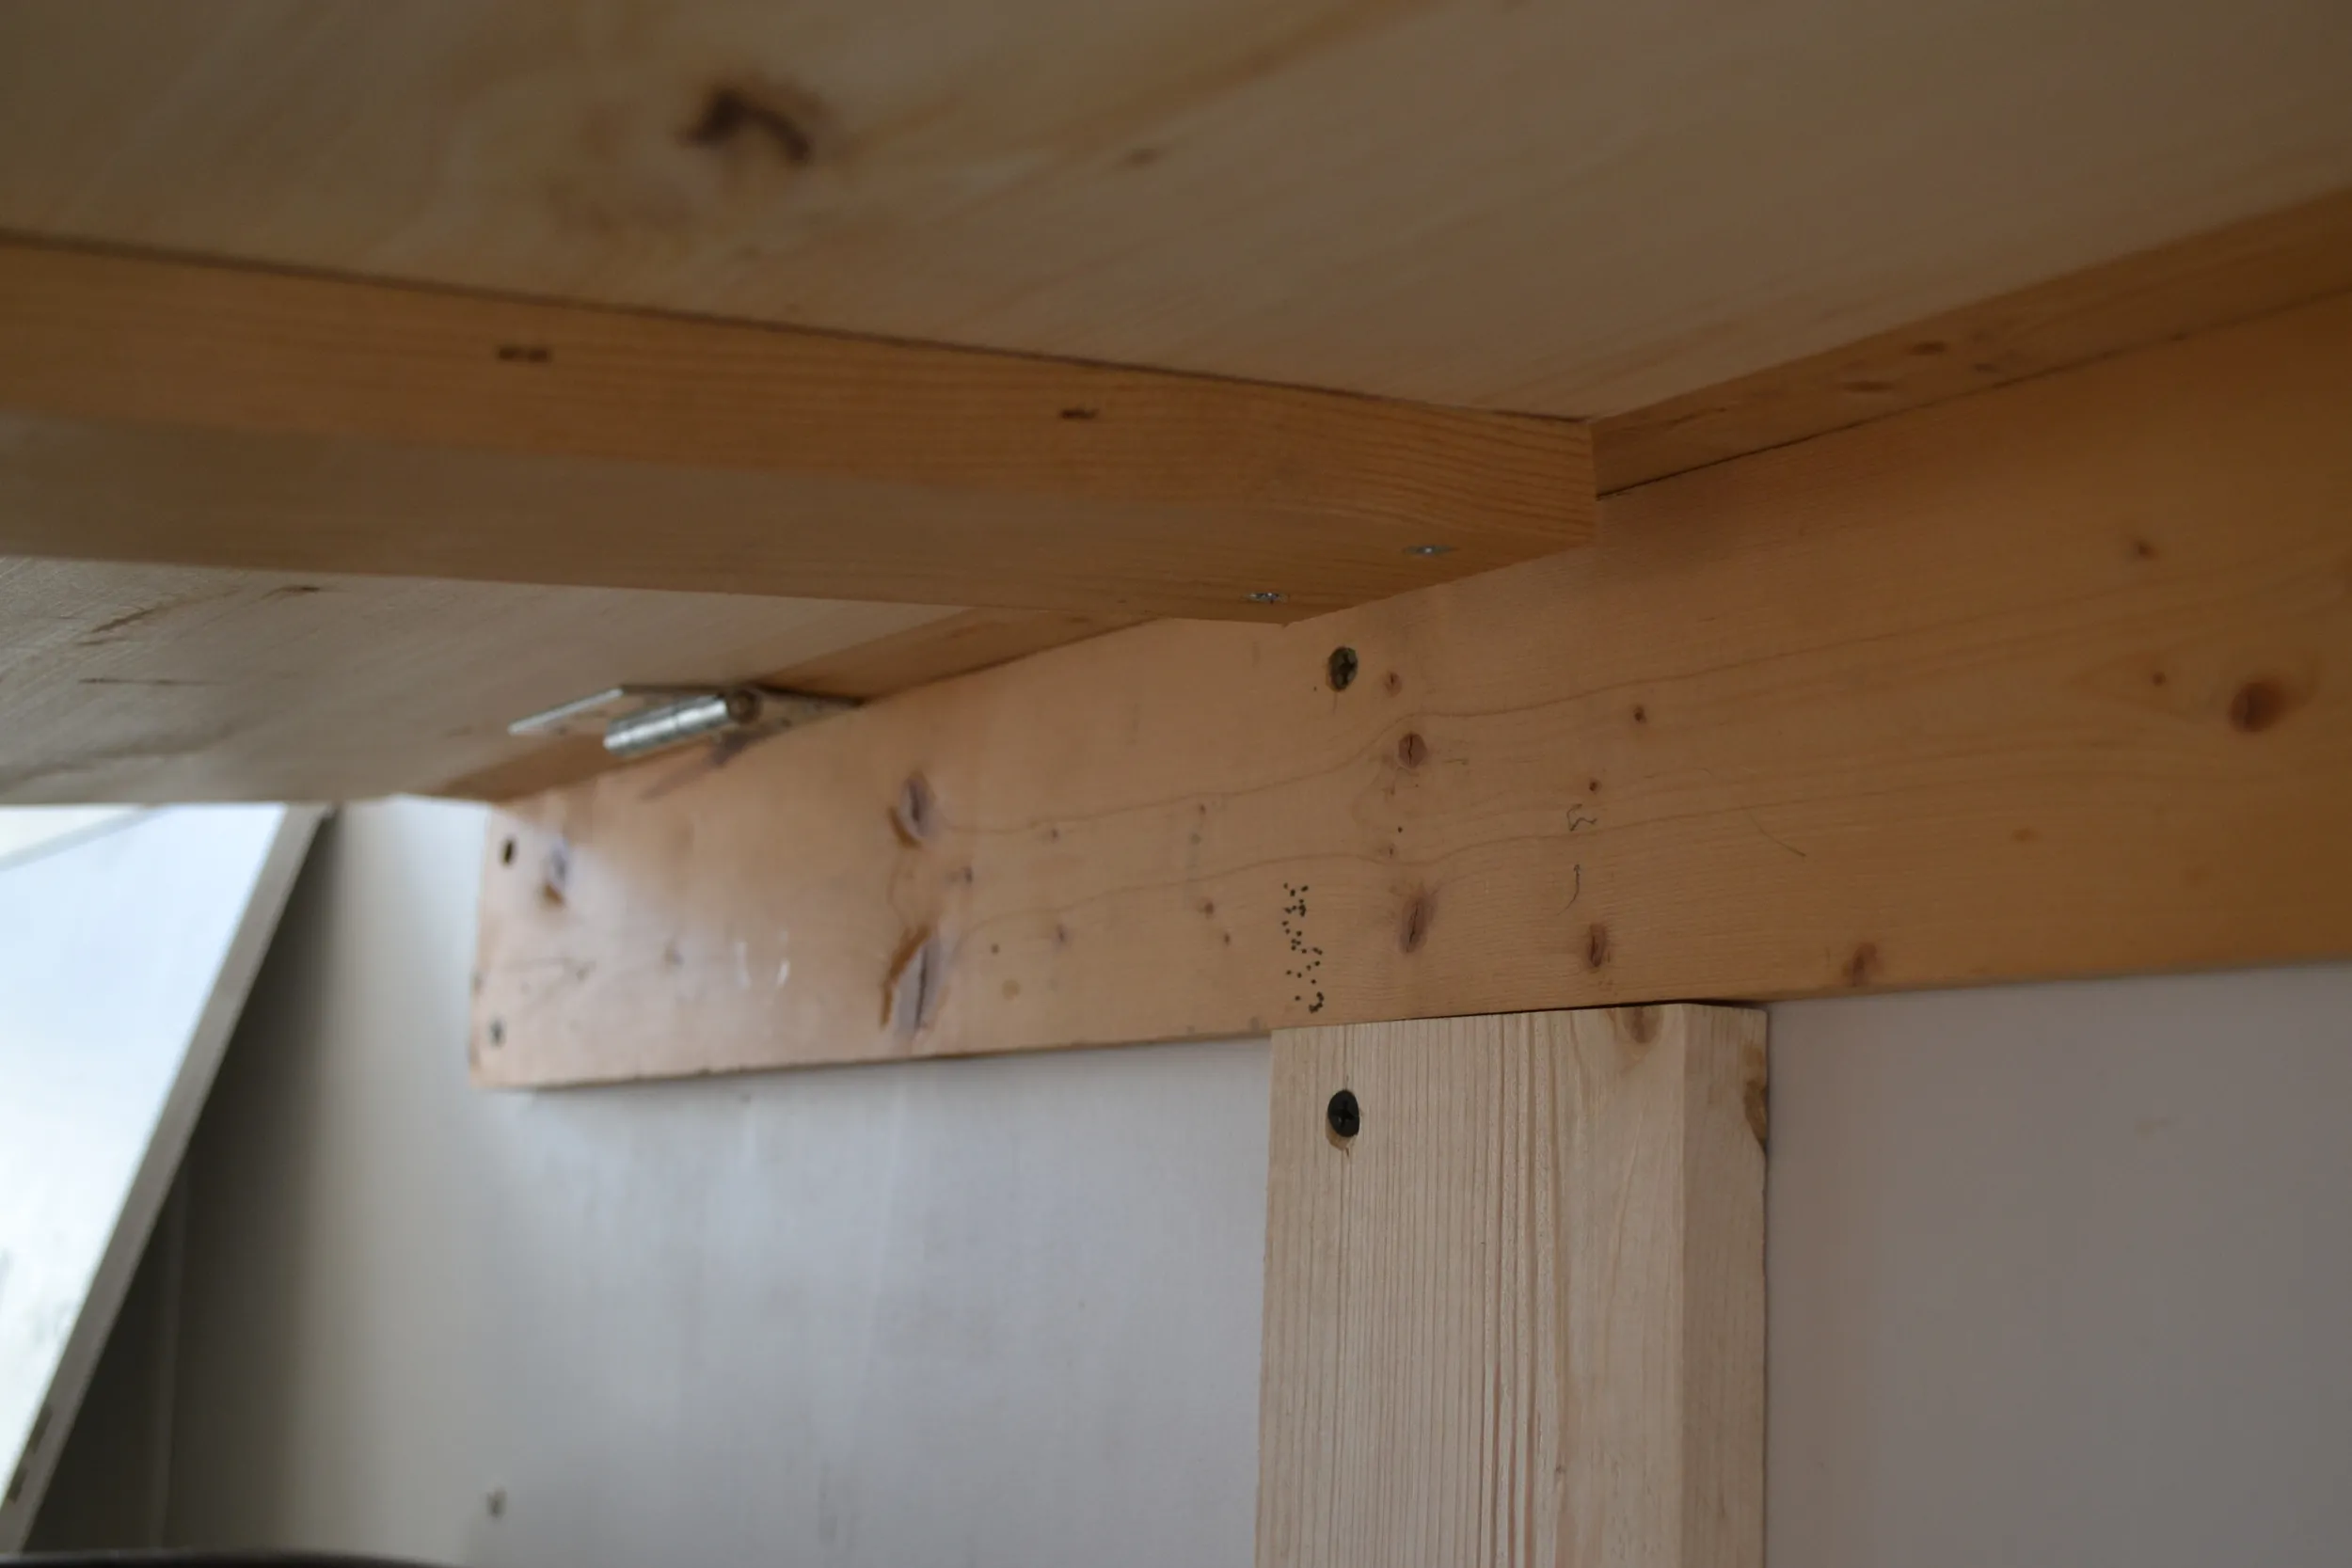 Here's your T. Also: see the brace board we applied the the underside of the top board.
Step 8: The Magic of the Wood Peg
Drill a hole in the triangle brace and the supporting “T” structure. Insert the wood peg, securing the brace when the desk is unfolded. This simple mechanism adds stability and peace of mind.
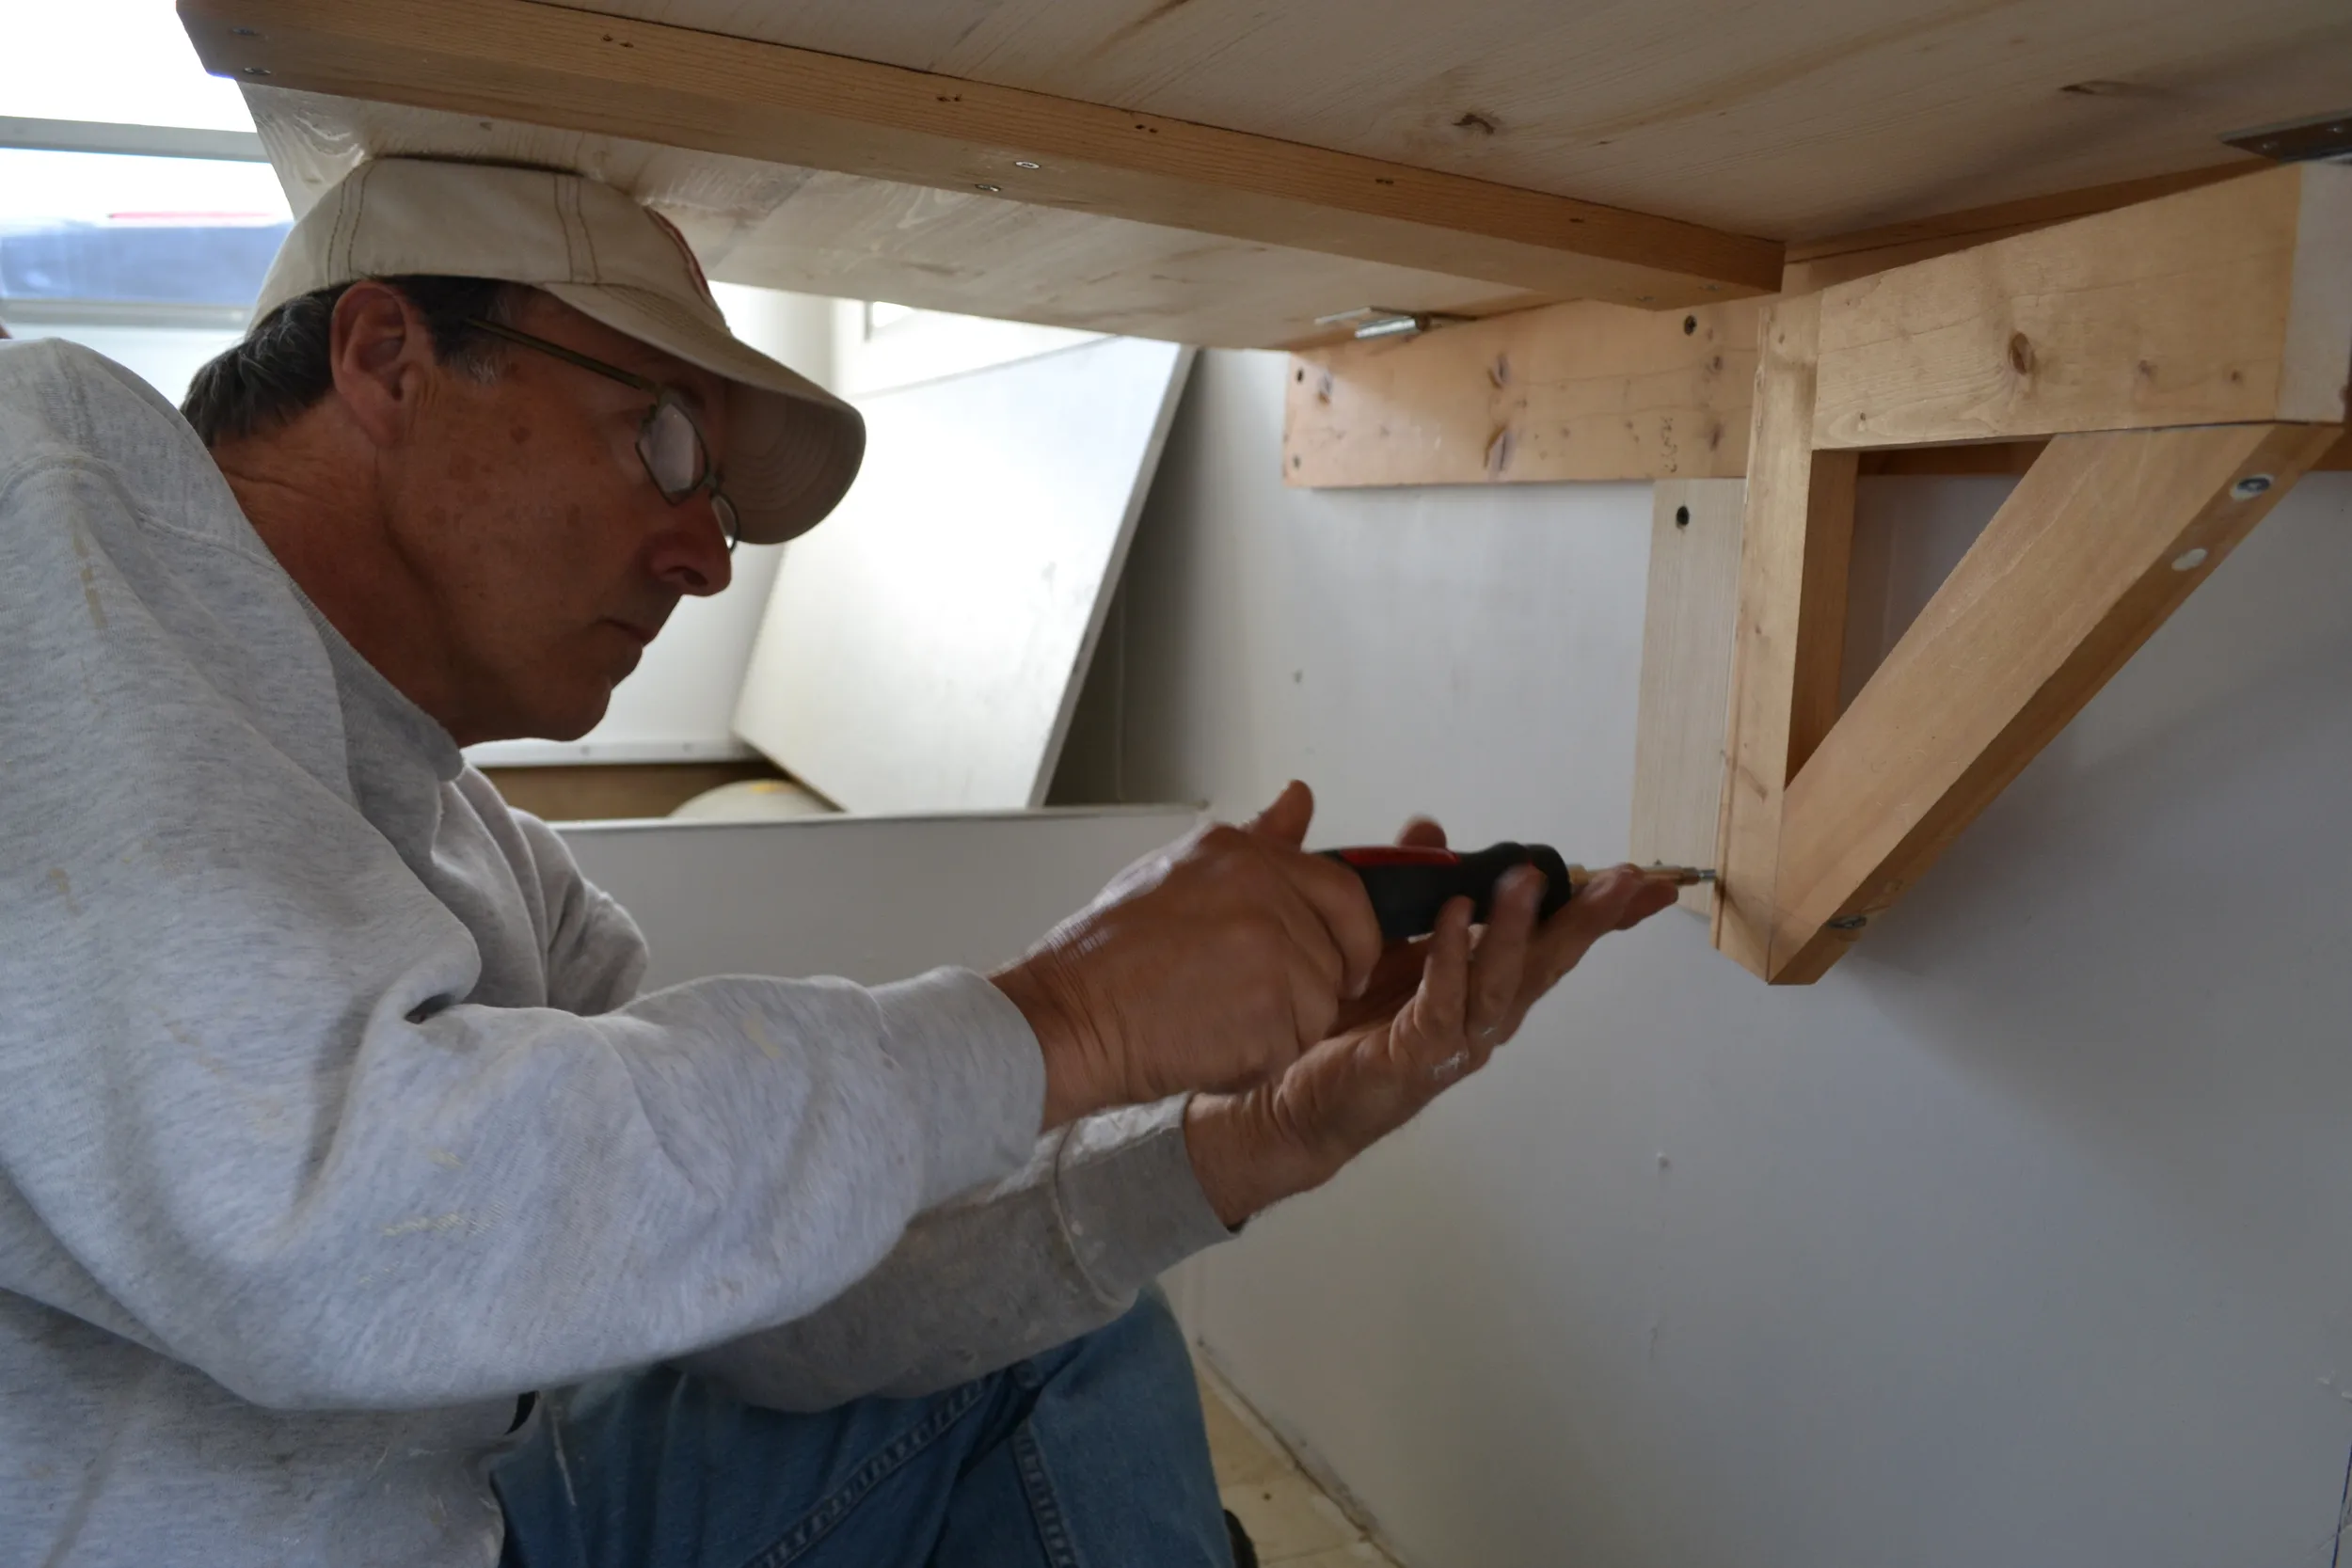 Jerry screws the triangle brace into the T.
Step 9: Finishing Touches
Sand down any rough edges and apply your chosen stain or paint. Protect your hard work with a coat or two of polyurethane.
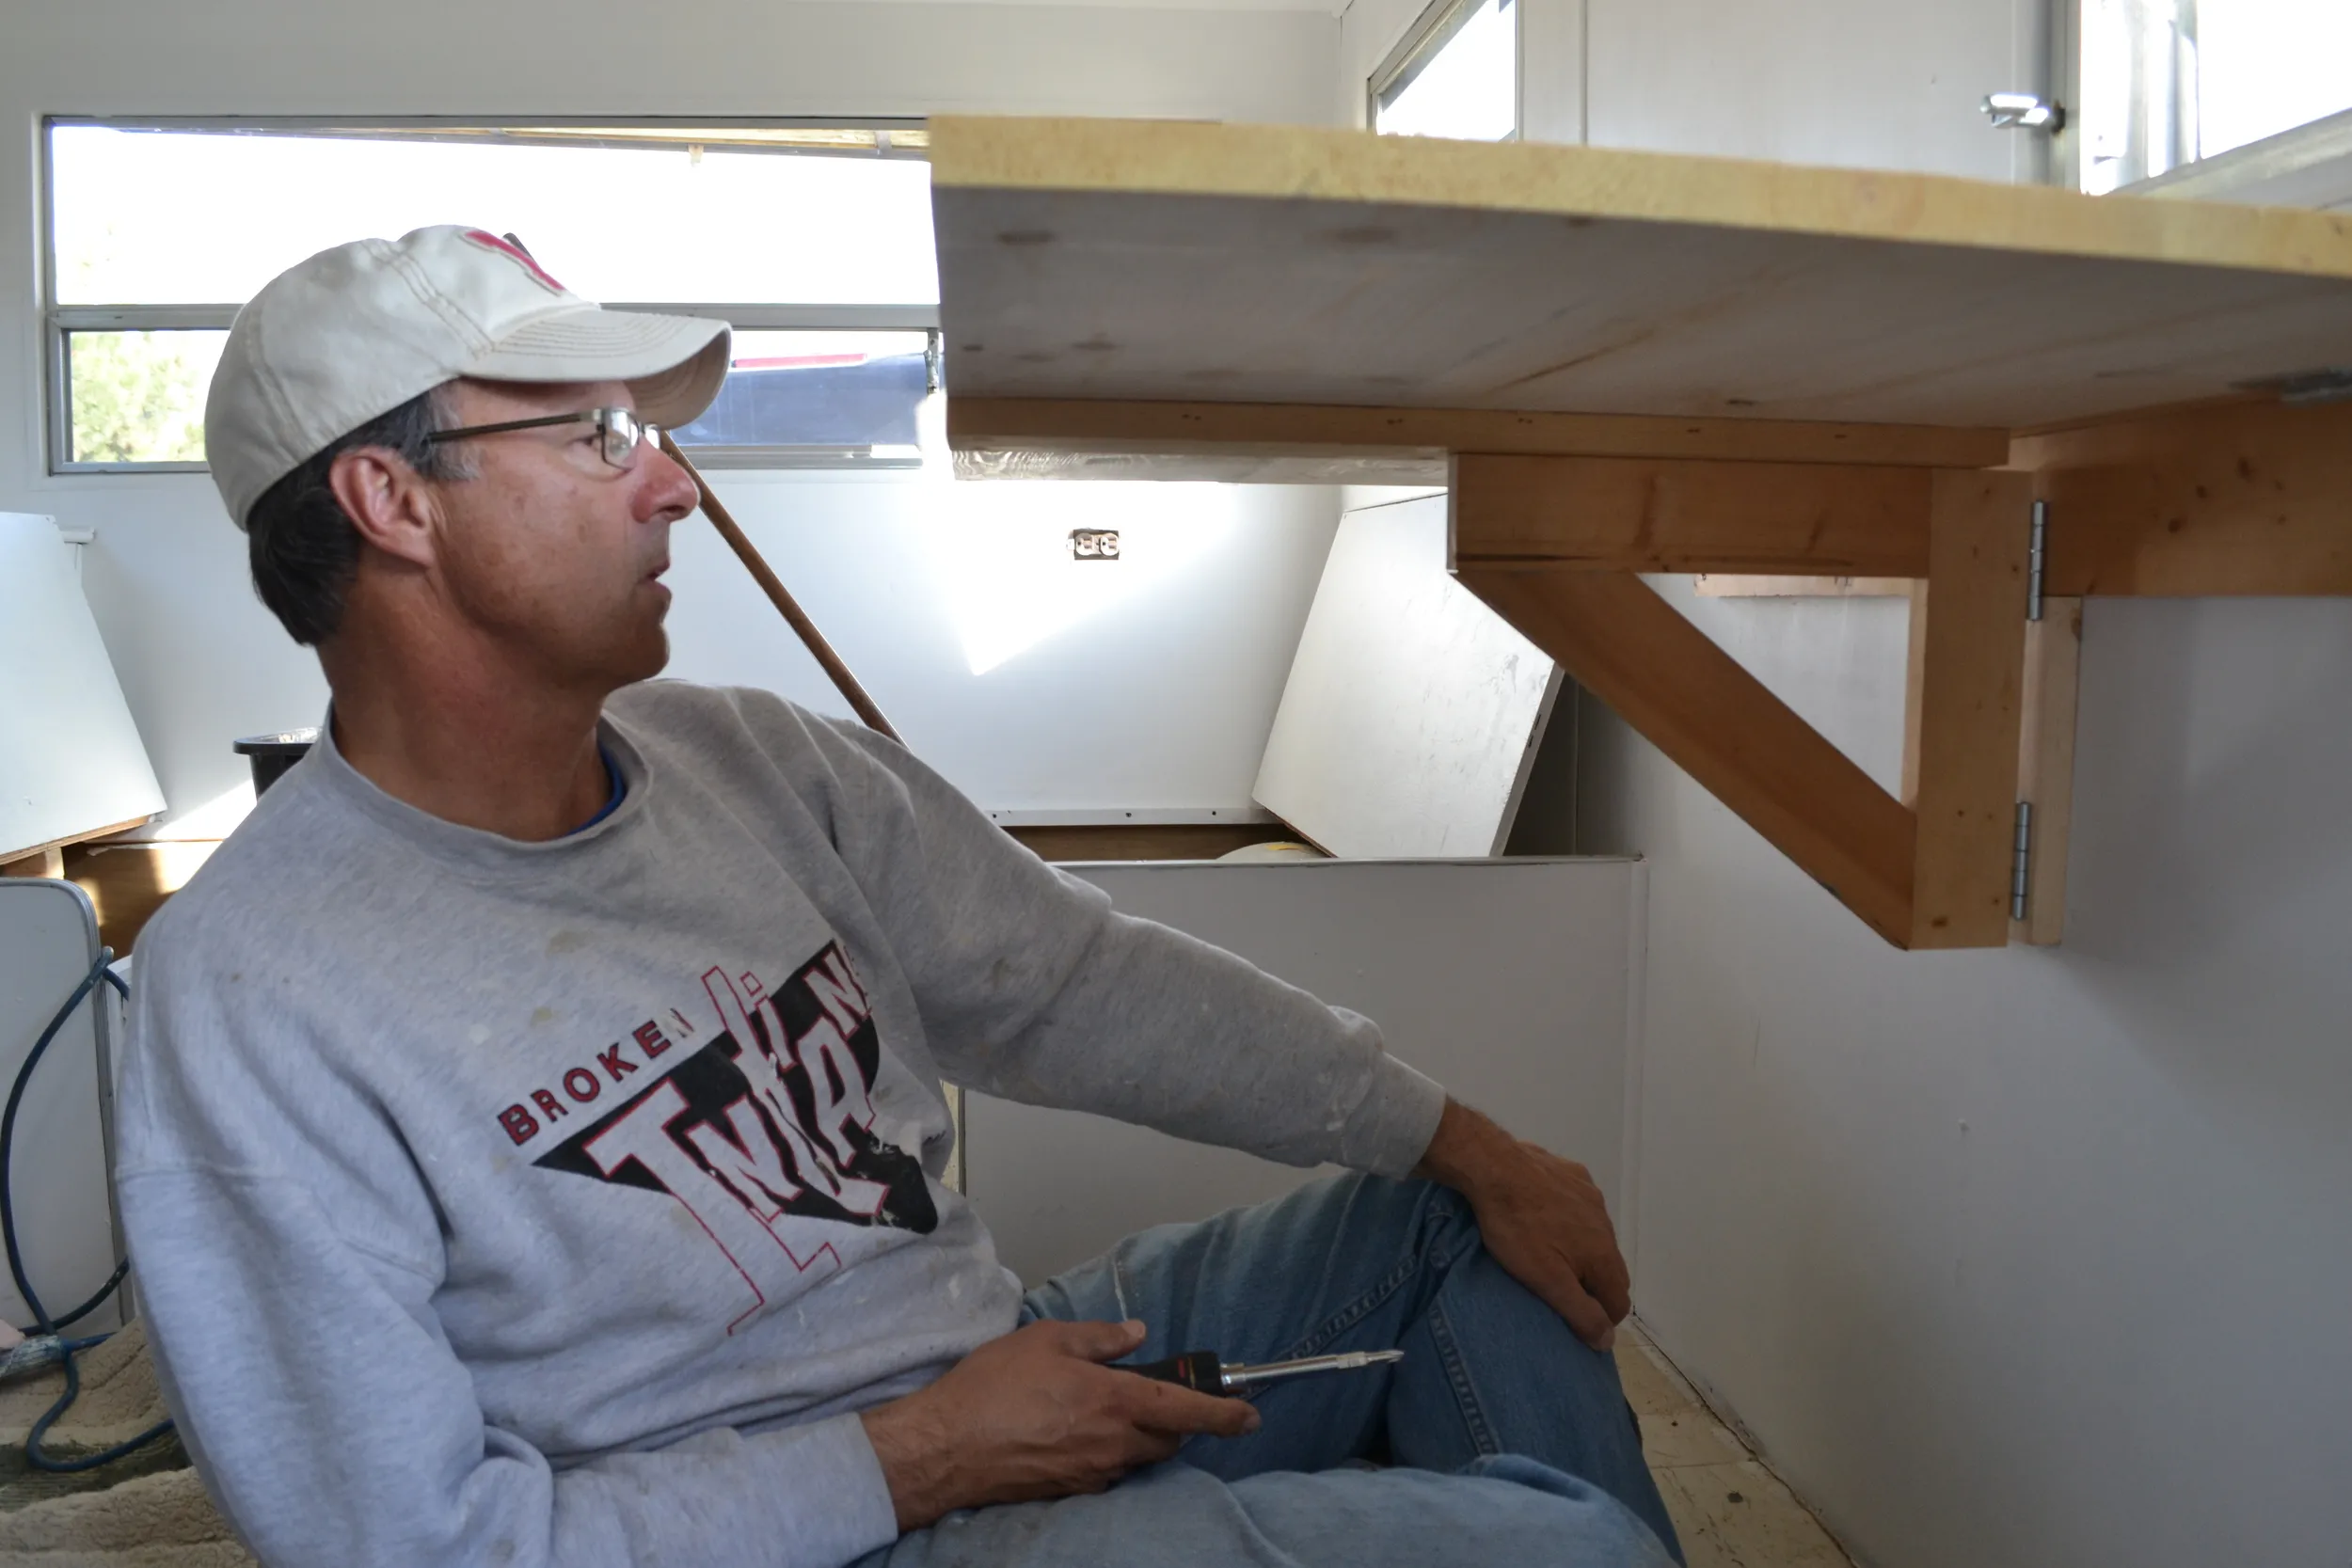 Triangle brace is in. Everything's sitting pretty — now we just have to secure it with the wood peg.
Conclusion
Congratulations, you’ve just created a functional work of art! This DIY wall-mounted folding desk is a testament to your creativity and craftsmanship. Now, step back and admire your handiwork. Feeling inspired? Share your creations with the Robert Kline Art community!
