Blog
Building a Stunning DIY Wall-Mounted Floating TV Stand with LED Lights

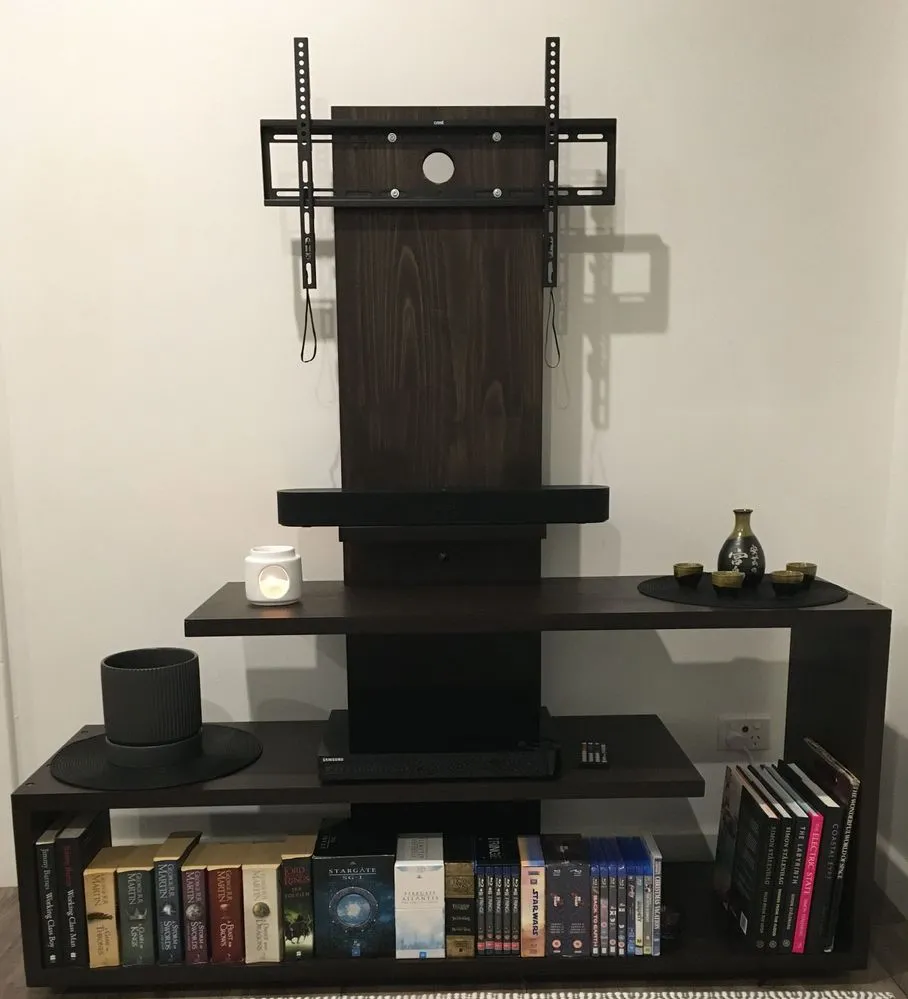
Hey everyone, Robert Kline here! As a passionate craftsman, I love sharing my DIY adventures with you. Today, I’m excited to walk you through the process of building a stylish and functional wall-mounted floating TV stand with integrated LED lights. This project is perfect for adding a modern touch to your living space while maximizing storage and showcasing your handiwork.
The Inspiration
Like many of you, I was searching for the perfect TV stand to complement my home décor. I dreamt of a floating design with ample storage space and a touch of modern flair. Unfortunately, finding a pre-made unit that ticked all the boxes seemed impossible. So, I decided to embrace the challenge and build my own!
Planning and Design
Using my trusty sketchbook, I began sketching ideas for a free-standing TV cabinet that could be “wall-mounted” and incorporate floating shelves. My goal was to achieve a sleek and contemporary look without sacrificing functionality.
 IMG_0327.JPG
Gathering the Materials
With a clear vision in mind, I headed to my local lumber yard. After exploring various options, I settled on two sturdy pine FJ laminated panels measuring 2100mm x 900mm x 30mm.
Here’s a complete list of materials I used:
- Two 2100mm x 900mm x 30mm pine FJ laminated panels
- Black stain and varnish (2-in-1)
- M6 65mm coach screws
- 70mm x 45mm pine struts
- LED light strips
- TV wall mount bracket
Pro Tip: Consider using a pre-made cutting list like the one I created to make the cutting process a breeze:
 IMG_0320.JPG
Building the TV Stand
The lumber yard staff was incredibly helpful and cut the panels according to my specifications. This made the assembly process a lot smoother.
Here’s a breakdown of the construction process:
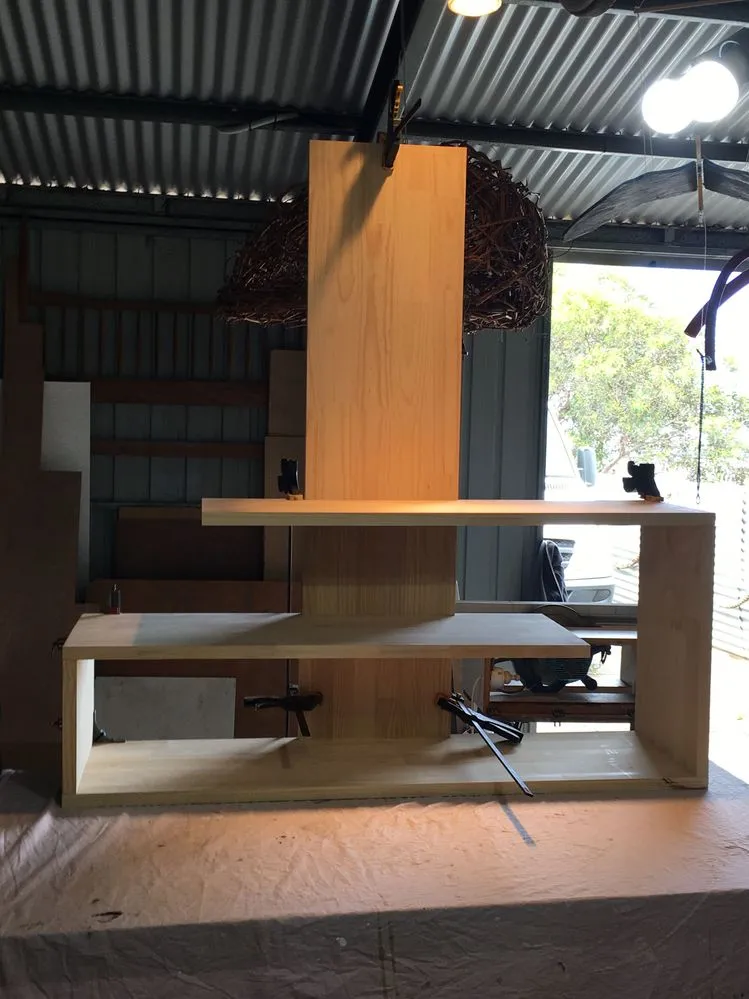
- Creating the Framework: I began by constructing the main frame of the TV stand using the cut panels. I opted for a depth of 400mm to suit my space, but you can adjust this based on your preferences.
- Incorporating Floating Shelves: To achieve the floating shelf effect, I cut the rear panel into three fitted pieces that sit “inside” the shelves. This provides support while maintaining a seamless, continuous look.
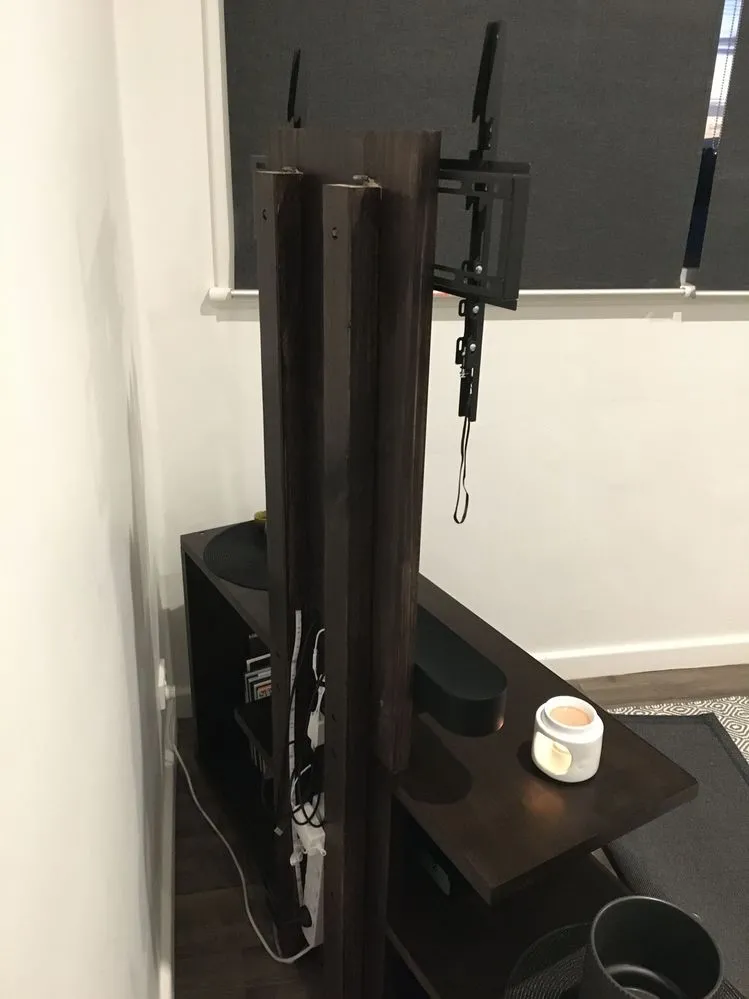
- Adding Support and Structure: To ensure stability, I attached two 70mm x 45mm pine struts along the back. These struts serve as mounting points for the rear panel, TV bracket, and soundbar shelf.
 IMG_0325.JPG
Finishing Touches
With the structure complete, it was time to add some finishing touches.
- Staining and Varnishing: I applied a sleek black stain and varnish to all the panels. To my surprise, I didn’t even need to sand beforehand! A quick hand-sanding between coats with 240-grit sandpaper did the trick.
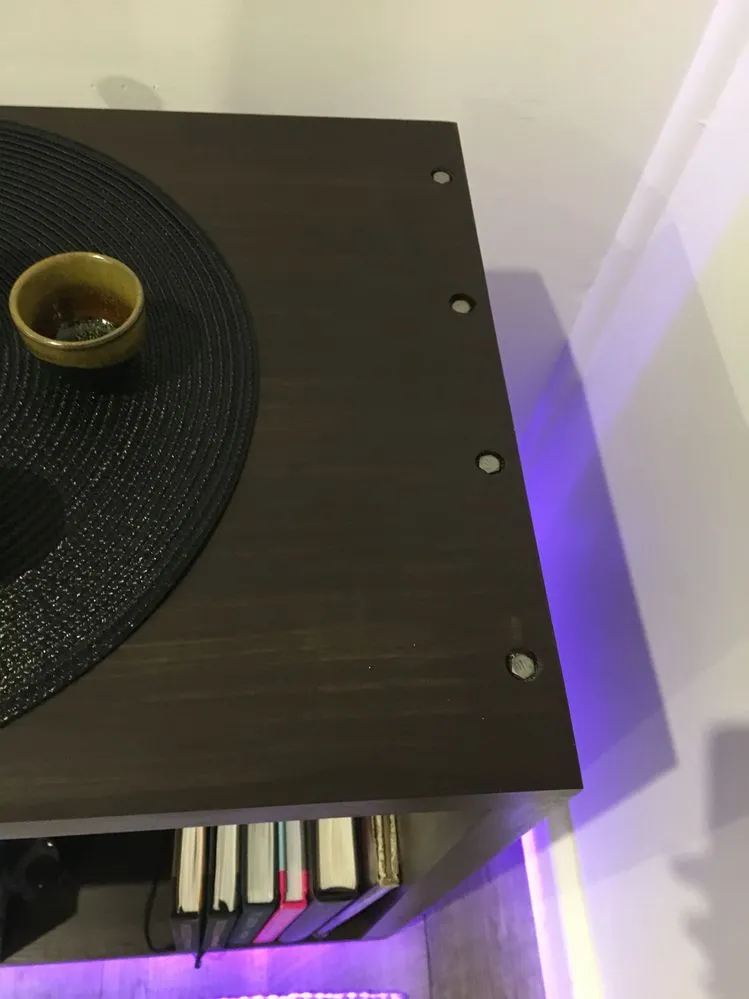
- Installing the LED Lights: To enhance the modern aesthetic, I strategically placed LED light strips along the back of the shelves. This creates a warm and inviting ambiance in the evenings.
Conclusion
Stepping back to admire my creation, I was filled with a sense of accomplishment. This DIY wall-mounted floating TV stand with LED lights is not only functional but also a unique piece of furniture.
 IMG_0326.JPG
I encourage you to embark on this rewarding project. Remember, crafting is about experimentation and pushing your creative boundaries. If you’re looking for more inspiring handmade gifts and DIY projects, explore the Robert Kline Art website. We offer a curated collection of unique and personalized treasures for every occasion.
