Blog
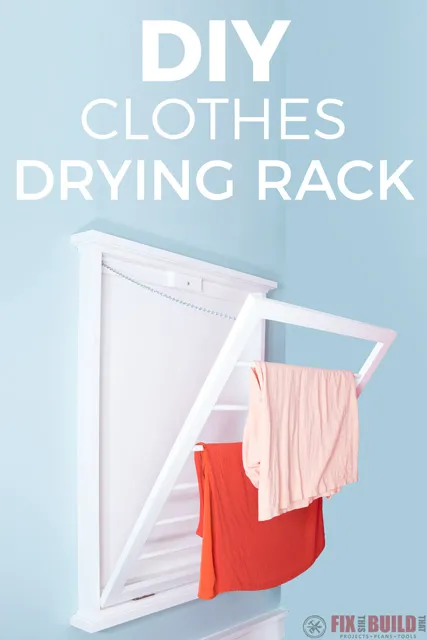
Craft the Perfect DIY Wall-Mounted Drying Rack

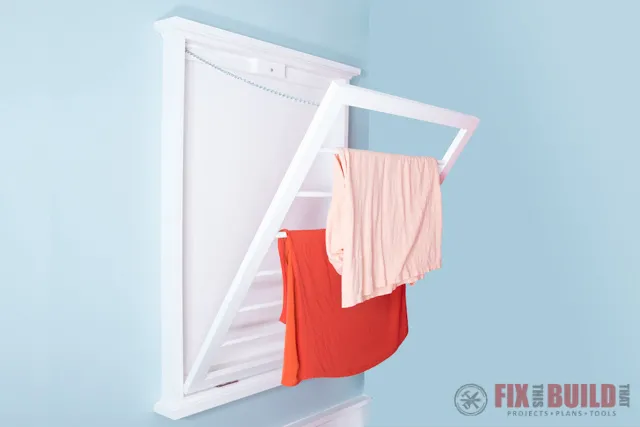
Hey there, fellow craft enthusiasts! Tired of bulky drying racks cluttering your laundry room? Let me introduce you to a game-changer: the DIY wall-mounted drying rack. This space-saving wonder is easier to create than you might think, and it’s a project that brings immense satisfaction. I’m excited to guide you through the process, step-by-step, so you can say goodbye to drying rack woes and hello to a more organized and efficient laundry routine.
Why You’ll Love This Project
Remember that old, wobbly drying rack that took up half your laundry room? This DIY wall-mounted version eliminates that headache. It’s a fantastic way to:
- Save Space: Free up precious floor space in your laundry room.
- Add a Personal Touch: Create a custom drying rack that perfectly matches your style and needs.
- Boost Functionality: Enjoy a dedicated and efficient drying solution.
Let’s roll up our sleeves and transform your laundry room with this simple yet impactful project!
What You’ll Need
Before we dive in, let’s gather our crafting arsenal. Here’s what you’ll need:
Tools
- Miter Saw
- Mobile Miter Saw Stand
- Pocket Hole Jig
- Kreg Face Clamp
- Cordless Drill
- Brad Nailer
Materials
- (1) 6′ 1×4 Select Pine Board
- (2) 6′ 1×3 Select Pine Boards
- (2) 8′ 1×2 Select Pine Boards
- (1) 4′ x 2′ 1/4″ Plywood
- 1-1/4″ Pocket Hole Screws
- Rare Earth Magnet
- Door Catch (for plate)
- 4′ #16 Jack Chain
- (4) #210 Screw Eyes
- 2-1/2″ Hinges
Expert Tip: “Always opt for high-quality wood and hardware. It might cost a bit more upfront, but it ensures your drying rack is sturdy and lasts for years.” – Sarah M., Master Woodworker
Let’s Get Building!
Step 1: Crafting the Drying Rack Ladder
- Cut the Components: Begin by cutting the top, bottom, and sides of your drying rack’s folding section from the 1×2 pine boards.
- Drill the Dowel Holes: Clamp the side pieces together and mark the positions for the dowel holes, ensuring they’re perfectly aligned. Use a drill press or a hand drill with a guide block to create the holes halfway through the sides.
- Prepare for Assembly: Drill pocket holes in the top and bottom pieces to connect them to the sides. Cut six dowels to fit into the holes you drilled earlier.
- Assemble the Rack: Apply wood glue to the dowel holes on one side, insert the dowels, and then attach the other side piece, securing it with pocket screws.
- Plug the Pocket Holes: For a polished look, plug the pocket holes using dowel plugs, wood filler, or your preferred method.
 DIY Drying Rack for Clothes Wall Mounted
Step 2: Building the Wall Mount Frame
- Cut the Frame Pieces: Cut the 1×3 pine boards to size for the frame’s top, bottom, and sides.
- Create the Rabbet Cuts: Cut rabbets on the inside edges of the frame pieces to accommodate the plywood back. Use a table saw or a router for this step.
- Assemble the Frame: Drill pocket holes in the frame pieces and assemble them using pocket screws, attaching the top and bottom pieces to the sides.
- Attach the Mounting Cleats: Secure the 1×2 mounting cleats to the top and bottom of the frame using glue and screws, ensuring they’re flush with the rabbets.
- Add the Magnet Spacer: Cut a small block of wood and attach it to the top mounting cleat. This will act as a spacer for the magnet later.
 DIY Clothes Drying Rack Plans
Step 3: Adding Trim and Finishing Touches
- Attach the Trim: Cut 1×4 pine boards to size and attach them to the top and bottom of the frame using countersunk screws for a decorative trim.
- Install Cove Molding: Apply cove molding around the top and bottom trim pieces using a pin nailer, mitering the corners for a seamless look.
- Fill and Sand: Fill any nail holes or gaps with wood putty and sand all surfaces smooth for a professional finish.
- Prepare for Paint: Cut and sand the dowels for the drying rack, filling any gaps with wood putty.
- Create the Magnet Recess: Cut a recess into the top of the drying rack to accommodate the metal plate from the door catch, using a Forstner bit and a chisel.
- Paint the Components: Apply two coats of your chosen paint color to the frame and drying rack, allowing ample drying time between coats.
- Install the Magnet and Back: Attach the metal magnet catch and the magnet to their designated positions on the frame and drying rack. Secure the plywood back to the frame using brad nails.
Step 4: Installing the Hardware
- Attach Screw Eyes: Drill pilot holes and install screw eyes on the frame and drying rack to hold the chain.
- Mount the Hinges: Attach the hinges to the drying rack first, and then to the frame, ensuring they’re properly aligned.
- Prepare the Chain: Cut the jack chain to create two equal lengths, doubling it over and bending open the middle link.
Step 5: Wall Mounting and Final Touches
- Mount the Frame: Use screws to securely mount the frame to the wall studs, ensuring it’s level and sturdy.
- Attach the Drying Rack: Reattach the drying rack to the frame using the hinges.
- Size and Install the Chains: Determine the desired length and angle for the chains to support the drying rack when extended. Cut the chains to size and attach them to the screw eyes on the frame and drying rack.
 DIY Clothes Drying Rack How to Make
Congratulations!
You’ve officially crafted a fantastic DIY wall-mounted drying rack! It’s time to say goodbye to clutter and hello to a more organized and functional laundry space.
Robert Kline Art believes that everyone can tap into their creative potential. We’re passionate about providing inspiration and guidance to help you bring your crafting visions to life.
Ready to explore more exciting DIY projects? Browse our website for a treasure trove of crafting inspiration and unique, handmade gifts for every occasion. Let’s create something beautiful together!
