Blog
Conquer Your Clutter: Build a DIY Wall-Mounted Bike Storage Rack

Fellow craft enthusiasts, are you tired of navigating a chaotic jungle of bikes in your garage? Do you long for an organized and accessible solution that won’t break the bank? Look no further! In this article, we’ll embark on a rewarding journey to transform your cluttered bike zone into a haven of order with an easy-to-build, budget-friendly DIY wall-mounted bike rack.
Gather Your Tools and Materials: A Symphony of Simplicity
Before we dive into the heart of our crafting adventure, let’s gather our trusty tools and materials:
- 2×4 lumber: The backbone of our sturdy bike rack, providing reliable support for your beloved two-wheeled companions. You’ll need two pieces, approximately 8 feet long each, which we’ll trim to size later.
- Bike hooks: The trusty guardians of your bikes, ensuring they hang securely and gracefully on the rack. Choose sturdy hooks that can handle the weight and size of your bikes.
- Screws: The unsung heroes that hold everything together. Opt for 3 ½” screws to ensure a secure and lasting bond between the 2x4s and your wall studs.
- Drill: Your trusty sidekick for creating pilot holes and driving screws with precision.
- Tape measure: The meticulous planner, ensuring accurate measurements for a flawless outcome.
- Pencil: The faithful scribe, marking cutting lines and screw positions with clarity.
- Level: The guardian of straight lines, guaranteeing a visually appealing and structurally sound bike rack.
- Saw: A tool for decisive cuts, transforming our 2x4s into the perfect size for our project.
Craft Your Masterpiece: Step-by-Step Guide
With our tools and materials assembled like a well-rehearsed orchestra, let’s begin crafting our DIY wall-mounted bike storage rack:
Step 1: Embrace the Art of Space Planning and Measurement
Before we make the first cut, let’s assess our workspace and measure our wall with the precision of a seasoned architect. Aim for roughly 12 inches of space per bike, plus 12 inches on either side of the bikes at the ends. This spacing will ensure ample room to maneuver bikes without collisions.
For instance, if you have five bikes, you’ll need approximately 7 feet of wall space. Remember, measuring twice and cutting once is a mantra for crafting success.
Step 2: Mount the 2x4s: The Foundation of Our Creation
With measurements in hand, it’s time to mount the 2x4s on your wall – the sturdy foundation of our bike storage haven.
- Lower 2×4 Placement: Mount the lower 2×4 roughly 65 inches from the ground. This height allows most bikes to hang freely without touching the floor. However, it’s wise to measure the length of your bikes to ensure compatibility.
- Upper 2×4 Placement: Mount the upper 2×4 approximately 14 inches above the lower 2×4. This staggered arrangement prevents handlebar clashes and maximizes storage efficiency.
Pro Tip: Always ensure you’re screwing into wall studs for maximum support and stability. Use two screws per stud for added peace of mind.
Step 3: Install Bike Hooks: The Guardians of Your Bikes
Now, let’s install the bike hooks on our 2x4s – the trusty guardians that will keep your bikes securely in place.
- Spacing is Key: Mount the hooks 24 to 26 inches apart on the same row. This spacing provides ample room to remove bikes on the opposite row without disturbing their neighbors.
- Center the Upper Hooks: After mounting the hooks on the lower 2×4, center the hooks on the upper 2×4 between the hooks on the lower 2×4. This arrangement ensures optimal bike spacing and prevents overcrowding.
Pro Tip: Pre-drilling holes with a ⅜” drill bit before installing the hooks will make the process smoother and prevent wood splitting.
Step 4: Optional Enhancement: A Cabinet for Accessories
For the ambitious DIY enthusiast, consider building a cabinet to store your bike accessories, such as helmets, gloves, and pumps. This optional addition elevates your bike storage solution to new heights of organization and convenience.
Step 5: Mount Your Bikes and Revel in the Joy of Organization
Congratulations, my fellow craft enthusiast! You’ve successfully transformed your cluttered bike area into a haven of order with your very own DIY wall-mounted bike rack. Now, mount your bikes, step back, and bask in the glory of your handiwork.
Conclusion: Unleash Your Inner Craft Enthusiast
As an ardent advocate for the transformative power of DIY, I encourage you to embrace this project with open arms and a creative spirit. This simple yet effective DIY bike rack not only solves your storage woes but also instills a sense of accomplishment that comes from creating something with your own two hands.
Remember, the beauty of DIY lies in its adaptability. Feel free to modify the design, add personal touches, or experiment with different materials to make it truly your own.
Now, go forth and conquer your clutter, armed with the knowledge and inspiration to craft your own DIY wall-mounted bike rack. And as always, happy crafting!
Robert Kline Art: Your Destination for Unique Handmade Gifts
Looking for the perfect gift for the art enthusiast in your life? Explore our exquisite collection of handcrafted treasures at Robert Kline Art. From stunning ceramics to intricate woodcarvings, we offer a curated selection of unique and meaningful gifts for every occasion.
 craftedworkshop
 How to Build a DIY Flip Top Tool Stand Workstation // Woodworking Shop Project
 DIY Bathroom Remodel // How to Install a Toilet & Vanity, Build a Mirror Frame
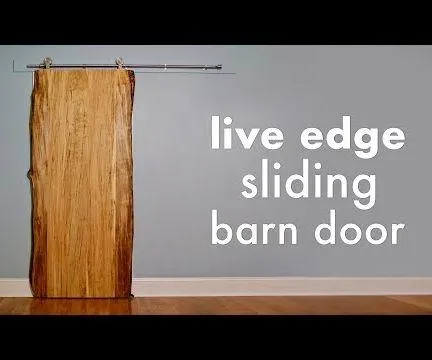
 DIY Live Edge Sliding Barn Door // How to Build – Woodworking
