Blog
DIY Plant Stand Ideas: Give Your Greenery A Stylish Lift with Repurposed Tomato Cages

Hey there, plant lovers and DIY enthusiasts! Robert Kline, your friendly neighborhood art and craft aficionado here, ready to share a fantastically easy and budget-friendly project that will add a touch of rustic charm to your indoor or outdoor spaces.
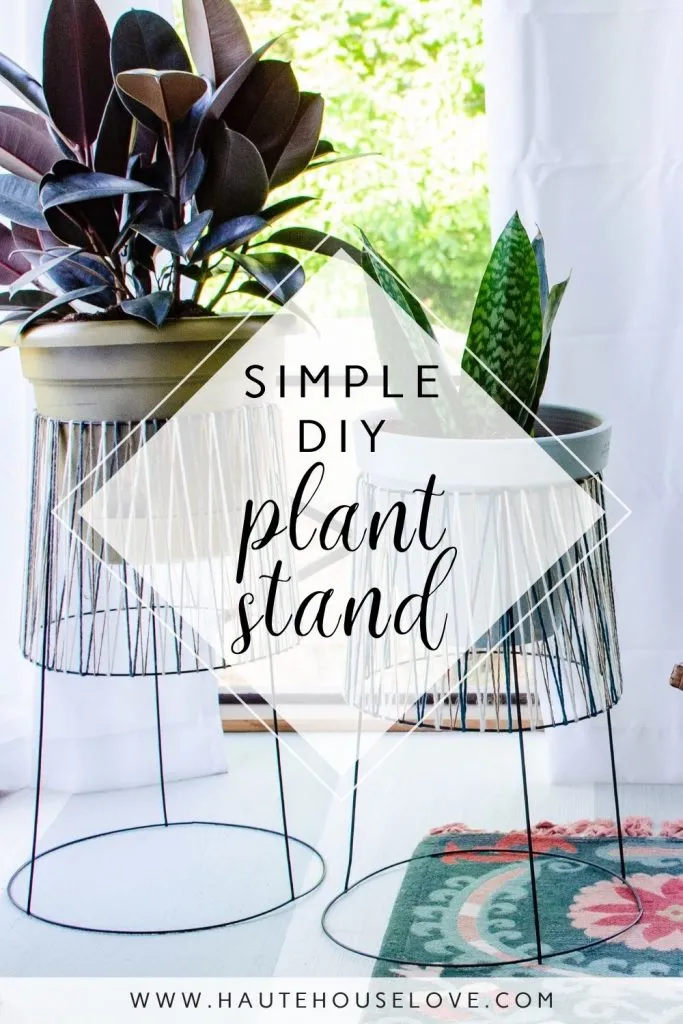
Remember those tomato cages patiently waiting in the garage after summer’s harvest? Well, get ready to give them a new lease on life! Today, we’re diving headfirst into the wonderful world of repurposing as we transform these humble garden helpers into eye-catching DIY plant stands.
 diy plant stand image with plant stands and house plants on porch
This project is perfect for both seasoned DIYers and beginners just dipping their toes into the creative waters. With just a few simple steps and a sprinkle of imagination, you’ll have handcrafted plant stands that are as unique as they are functional.
Gather Your Supplies
Before we embark on this crafty adventure, let’s gather our trusty tools and materials. You’ll need:
- Tomato cages: The stars of the show! Any size will do, depending on the height you desire for your plant stands.
- Spray Paint (optional): A fresh coat of paint can work wonders in transforming the look of your stands. Choose a color that complements your existing decor.
- Yarn or Jute Twine: Here’s where you can unleash your inner artist! Opt for colors and textures that tickle your fancy and add a personal touch to your creations.
- Glue Gun: Our trusty sidekick for securing the yarn or twine to the tomato cages.
- Plants in Planters: The heart and soul of our project! Select plants that will thrive in the chosen location for your new stands.
Crafting Your Masterpieces: A Step-by-Step Guide
Now, let’s roll up our sleeves and get those creative juices flowing!
Step 1: Free the Legs
Flip the tomato cage upside down and gently bend the hanging legs back and forth until they snap off.
Step 2: Paint Your Canvas (Optional)
If you’re going for a color makeover, now’s the perfect time to give your tomato cage a fresh coat of spray paint. Let it dry completely before moving on to the next step.
Step 3: Weaving Magic with Yarn or Twine
Secure the end of your chosen yarn or jute twine to the top of the tomato cage using a dab of hot glue. Then, start wrapping! There’s no right or wrong here – let your creativity guide you as you create your desired patterns.
Pro Tip: For a woven effect, try using multiple strands of yarn or twine in different colors. Wrap them together around the cage, securing the ends with hot glue.
Step 4: Adding a Finishing Touch
Once you’ve reached the desired height for your wrapping, secure the end of the yarn or twine with another dab of hot glue. Gently separate the strands to create a fuller, more textured look.
Step 5: Place Your Plants and Admire!
Carefully place your potted plants into the tops of your newly crafted stands. Step back and admire your handiwork – you’ve just transformed ordinary tomato cages into extraordinary plant stands!
Sharing Your Creations with the Robert Kline Art Community
There you have it! A simple, budget-friendly, and utterly charming way to add a touch of handcrafted elegance to your living spaces. We’d love to see your creative spins on this project. Share photos of your DIY plant stands with us on social media using the hashtag #RobertKlineArt. Happy crafting!
And don’t forget to explore the rest of the Robert Kline Art website for more inspiring DIY projects, artistic insights, and unique handmade gifts for your loved ones.
