Blog
Creating Stunning DIY Pebble Mosaics: A Step-by-Step Guide
Hey there, fellow art enthusiasts! Robert Kline here, and let me tell you, I’ve got a passion for turning ordinary pebbles into extraordinary works of art. My love affair with pebble mosaics began on a trip to Spain and Portugal. The intricate designs I saw, like the breathtaking Plaza de España in Seville, ignited a spark in me. I knew I had to bring this ancient art form home.
For years, I’ve been transforming my collection of stones into stunning mosaics, adorning patios, pathways, and even walls. Trust me, the possibilities are endless! And the best part? Creating your own pebble mosaic is easier than you might think. Let’s dive into the world of pebble mosaics together!
Gathering Your Materials: A Treasure Hunt for Nature’s Gems
Just like a painter needs their palette, we need to assemble our materials:
Tools:
- Contractor’s wheelbarrow
- Garden hoe
- Garden hose and spray nozzle
- Garden or concrete trowel
- Short stool
- Sturdy rubber gloves
- Dust mask
- Contractor’s-grade 1/2-inch thick plywood (3-foot by 3-foot sheet)
- Rags
- Respirator (for using muriatic acid)
Materials:
- Material for forms (2×6 lumber and stakes, or sturdy plastic edging or bender board)
- Crushed gravel (for the base)
- Premixed dry mortar in 60- or 80-pound bags (80 pounds covers roughly 3 to 4 square feet)
- Sorted pebbles (drain rock is a budget-friendly option)
- Muriatic acid (optional, for cleaning mortar film)
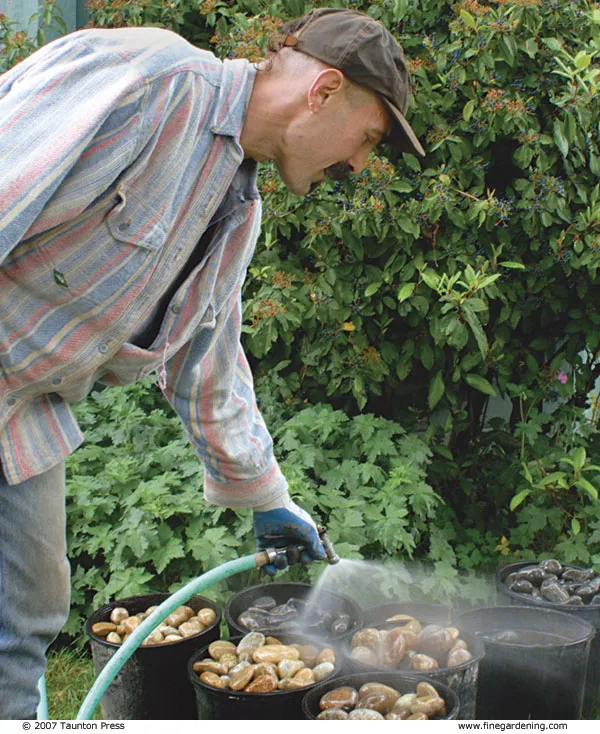
Now, let’s talk about those pebbles! I source mine from bulk drain rock, which is kind to the wallet, but requires a bit of sorting. I wet the rocks to reveal their true colors and patterns – it’s like uncovering hidden treasures! You can also find pre-sorted pebbles in bags, or even embark on your own rock-hunting adventure. Just remember to check local regulations and be mindful of the environment.
 Author wetting rocks in buckets to accentuate their color distinctions.
Designing Your Masterpiece: From Paper to Patio
Before we grab our trowels, let’s talk design. Whether you’re creating a simple stepping stone or an elaborate patio, sketching your vision on paper is key. This allows you to play with patterns and visualize the final result.
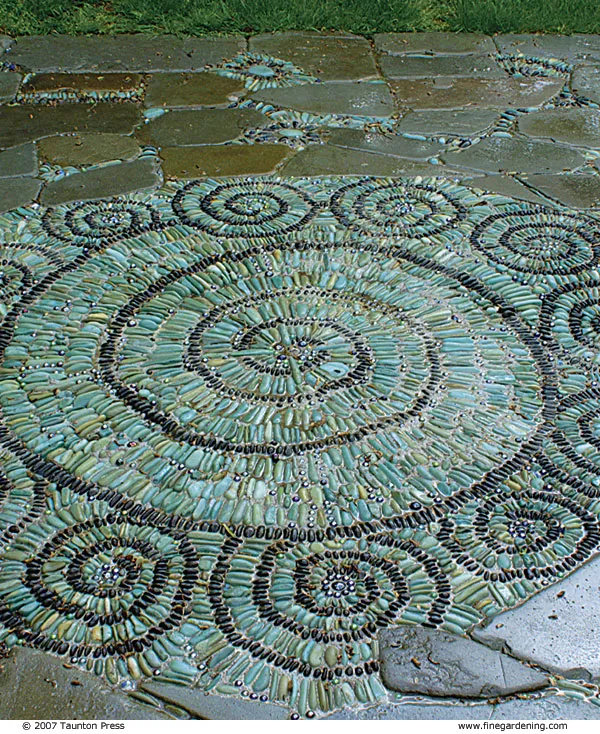 The outer spirals of this design represent the full moons of the year. It’s made with green and black pebbles and iridescent glass marbles.
Once you’re happy with your design, translate it to your chosen space. This is where things get exciting! Lay out your key stones to ensure they fit well and create the desired flow. Remember, practice makes perfect, so starting with a smaller project like a stepping stone is a great way to hone your skills.
Prepping the Site: Laying the Groundwork
A solid foundation is essential for any lasting masterpiece. Here’s how to prepare your site:
-
Excavate and Level: Dig out the area for your mosaic to a depth of 5 inches below the desired finished level. Ensure the base is level and smooth.
-
Add and Compact Gravel: Spread a 2-inch layer of crushed gravel evenly over the excavated area. Compact the gravel thoroughly by tamping it down with your feet or using a vibrating plate compactor for larger areas.
-
Forms (Optional): For designs with straight edges, build a form using stakes and 2×6 boards. For curved designs, flexible materials like plastic lawn edging or bender board work best.
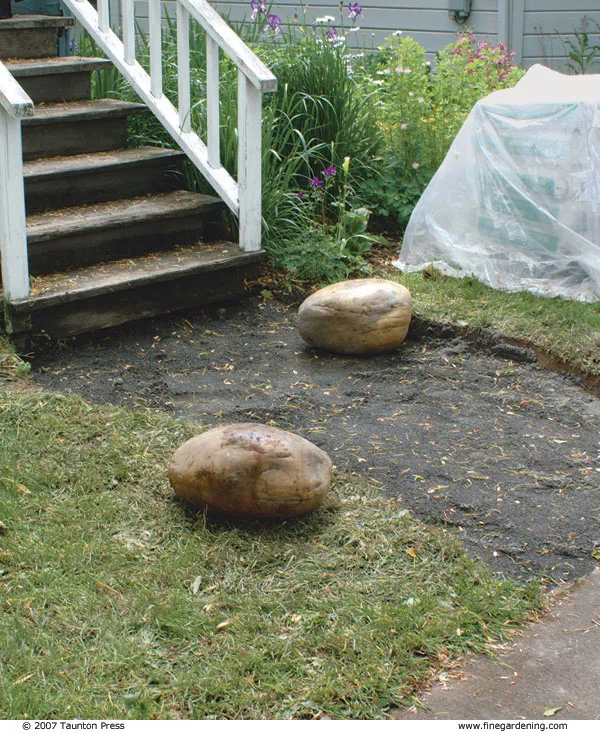 Dig a level base, then add well-tamped crushed gravel. The depth of the base depends on the climate
Bringing Your Mosaic to Life: Mortar and Pebbles in Harmony
Now, the moment we’ve all been waiting for – bringing those pebbles to life!
Mixing the Mortar:
- In your wheelbarrow, combine one part water with one part dry mortar mix.
- Using a garden hoe, thoroughly mix the mortar to a consistency of thick pudding.
Remember, mortar starts to set quickly, so work in manageable batches, especially on warmer days.
Placing the Pebbles:
-
Pour the mixed mortar onto the prepared gravel base, spreading it evenly to a depth of about half an inch below the finished grade.
-
Working quickly, start placing your pebbles! I like to begin at the edge and work my way inwards.
-
Press the pebbles firmly into the mortar, ensuring they are well-embedded and spaced closely together. Wetting the pebbles beforehand can help with adhesion.
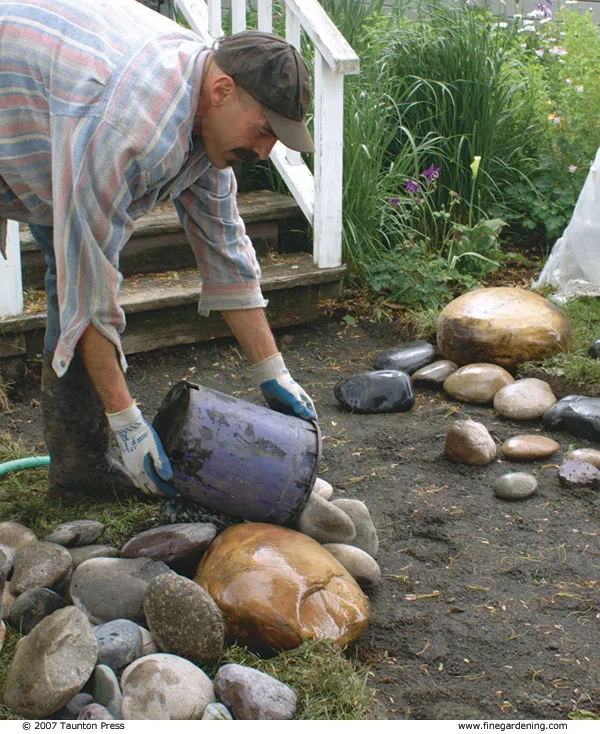 Author pouring stones onto walkway to begin layout.
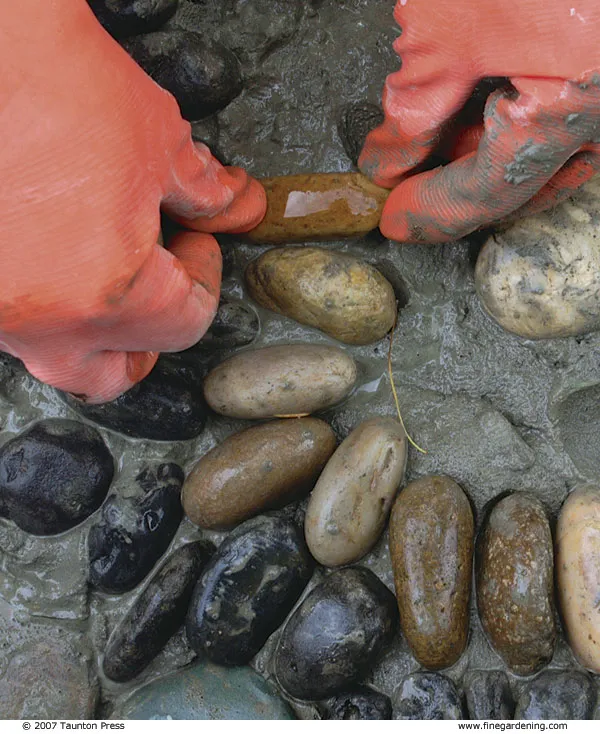 Close-up of author pressing small stones into mortar, wearing gloves.
Leveling and Cleaning:
-
Once a section of your mosaic is complete, lay a piece of plywood over it and step on it to level the pebbles with the top of the form.
-
Gently spray away any displaced mortar with a hose, revealing your stunning pebble design.
-
Use a trowel or chisel to clean up any excess mortar along the edges of your work area.
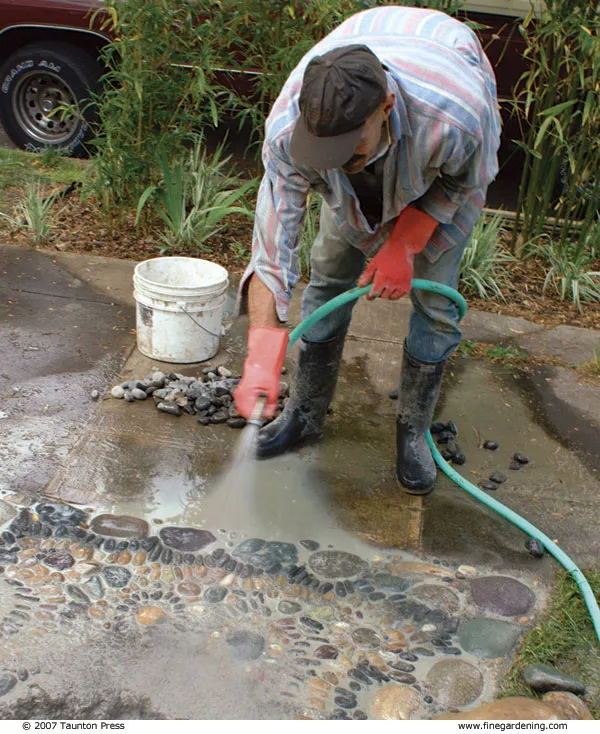 Author spraying mosaic with hose to clean off any displaced mortar.
Curing and Finishing Touches:
- Allow the mortar to cure completely. Keep the mosaic damp for a few days by misting it with water.
- Once dry, you can use muriatic acid (with proper safety gear) to remove any stubborn mortar film from the pebble surfaces.
Stepping into Your Creation: Enjoying Your DIY Masterpiece
Congratulations! You’ve transformed ordinary pebbles into a work of art. Now comes the best part – enjoying your creation. Imagine the joy of walking along your handcrafted pebble pathway or relaxing on your unique mosaic patio.
Creating DIY pebble mosaics is more than just a craft; it’s an opportunity to connect with nature, express your creativity, and add a touch of handcrafted beauty to your surroundings. So gather your pebbles, grab your tools, and let your imagination run wild! Who knows what stunning creations you’ll bring to life?
If you’re looking for more inspiration or want to explore unique handmade gifts, be sure to browse the Robert Kline Art website. And don’t forget to share pictures of your own pebble mosaics in the comments below! I can’t wait to see what you create.
