Blog
Crafting Enduring Beauty: A DIY Guide to Pebble Mosaic Garden Art
As an artist with a lifelong passion for transforming the mundane into extraordinary, I’ve always been captivated by the art of pebble mosaic. My grandparents, both geologists, instilled in me a love for the unique beauty found in natural stones. I vividly recall their garden, a tapestry of pebbles collected from their expeditions. It was there that my fascination with these miniature masterpieces began.
From the mesmerizing wave patterns adorning the Plaza de España in Seville to the intricate black-and-white designs gracing Lisbon’s sidewalks, pebble mosaic has the power to elevate any space into a work of art. Inspired by my travels, I embarked on a journey to master this craft, transforming my collection of pebbles into captivating mosaics.
Over the years, I’ve honed my skills, creating stunning stepping stones, enchanting pathways, and captivating patios, all adorned with these natural wonders. And now, I’m thrilled to share my knowledge with you.
Whether you’re a seasoned DIY enthusiast or just starting, this comprehensive guide will equip you with the tools and techniques to create your own pebble mosaic masterpiece. Let’s transform your garden into a breathtaking mosaic haven.
Gathering Nature’s Gems: Selecting and Sorting Your Pebbles
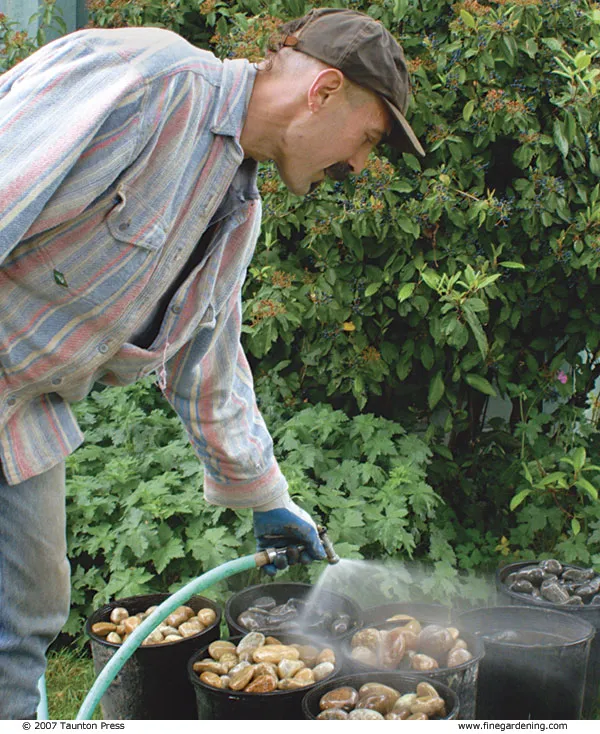
For a seamless mosaic experience, meticulous preparation is key. Begin by sorting your pebbles according to color and size, placing them in separate containers. I’ve discovered that large plastic nursery pots are ideal for this purpose.
Expert Tip: Wetting the rocks unveils their true colors and intricate striations, aiding in the sorting process.
Sourcing Your Pebbles:
- Bulk Drain Rock: An economical option, though it requires patience for sorting.
- Pre-Sorted Bags: Convenient but pricier.
- Nature’s Bounty: Explore riverbeds and gravel bars (always ensuring it’s legal to collect rocks).
 Author wetting rocks in buckets to accentuate their color distinctions.
Caption: Wetting the rocks reveals their beautiful color variations.
When selecting stones, envision how they’ll look embedded in mortar. Aim for rocks with relatively flat surfaces to ensure a smooth mosaic finish.
Tools and Treasures: Assembling Your Mosaic Arsenal
Before embarking on your mosaic adventure, gather the following:
Tools:
- Contractor’s Wheelbarrow
- Garden Hoe
- Garden Hose and Spray Nozzle
- Garden or Concrete Trowel
- Short Stool
- Sturdy Rubber Gloves
- Dust Mask
- Contractor’s-Grade 1/2-inch Thick Plywood (3-foot by 3-foot sheet)
- Rags
- Respirator (optional)
Materials:
- Material for Forms (2×6 lumber and stakes, sturdy plastic edging, or bender board)
- Crushed Gravel (for the base)
- Premixed Dry Mortar (60 or 80-pound bags – 80 pounds covers 3 to 4 sq. ft.)
- Sorted Pebbles
- Muriatic Acid (optional)
From Vision to Reality: Designing and Preparing Your Mosaic Site
Even with a spontaneous art form like pebble mosaic, a well-defined design is crucial. Sketch your vision on paper, experimenting with different patterns and color combinations.
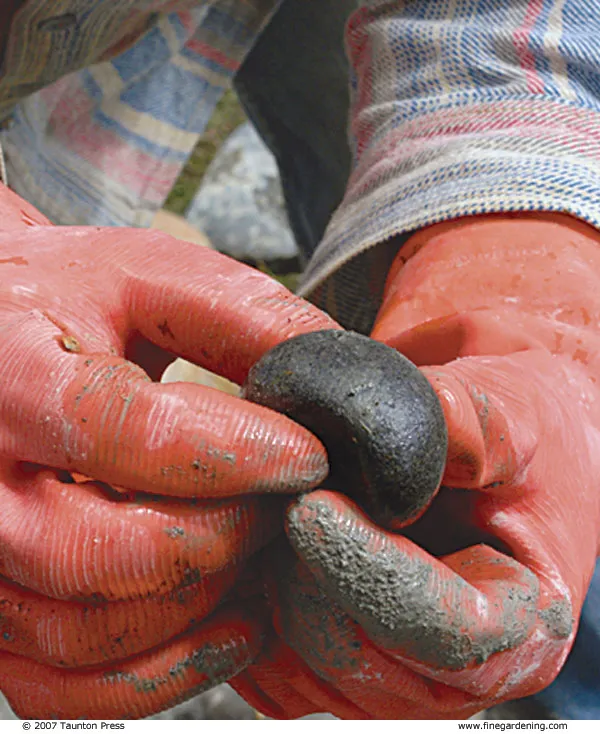 close-up of gloved hands holding a smooth rock.
Caption: Smooth stones with a flat side are ideal for mosaics.
Once you’re satisfied with your design, translate it to your chosen site. For larger projects like patios, consider using string levels to ensure accurate alignment.
Site Preparation:
- Excavation: Dig down 5 inches below the desired finished level, ensuring a smooth and level base.
- Drainage: Incorporate a 2% grade for proper drainage.
- Base Layer: Add a 2-inch layer of compacted crushed gravel, followed by a 3-inch bed of mortar.
Pro Tip: For areas prone to frost heave, consult with local experts to determine the appropriate base depth to prevent cracking.
Setting the Stage: Mastering the Art of Mortar Application
Mortar, unlike concrete, is the secret ingredient to a successful pebble mosaic. Its smooth consistency allows for precise stone placement and superior adhesion.
- Mixing Mortar: In your wheelbarrow, combine a bag of mortar mix with an inch of water, achieving a consistency similar to thick pudding. Remember to wear gloves and a dust mask during mixing.
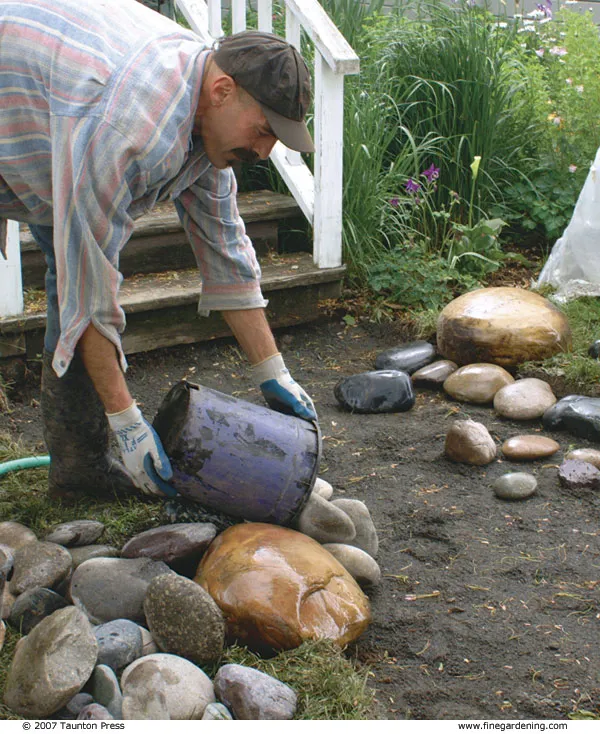 Author pouring stones onto walkway to begin layout.
Caption: Pour the stones onto the walkway to start arranging your design.
-
Pouring and Spreading: Apply the mortar to the prepared base, starting from an edge and maintaining a half-inch gap from the finished grade to accommodate the pebbles.
-
Placing Your Pebbles: Begin embedding your pebbles, ensuring they are firmly nestled in the mortar. Wetting the stones before placement enhances adhesion. Aim for minimal spacing between stones for a visually appealing finish.
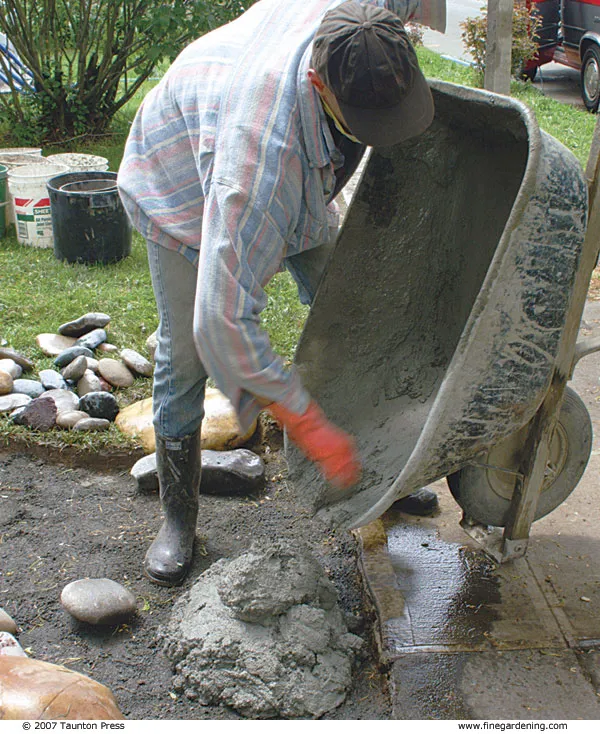 Author emptying mortar from wheelbarrow onto walkway.
Caption: Carefully pour the mortar onto the walkway, spreading it evenly.
-
Leveling Your Mosaic: Once a section is complete, place a plywood sheet over the area and gently step on it to level the stones with the form.
-
Cleaning and Curing: Spray away excess mortar and trim any leftover mortar along the edges. Allow the mortar to cure thoroughly, misting it with water for a few days to prevent cracking.
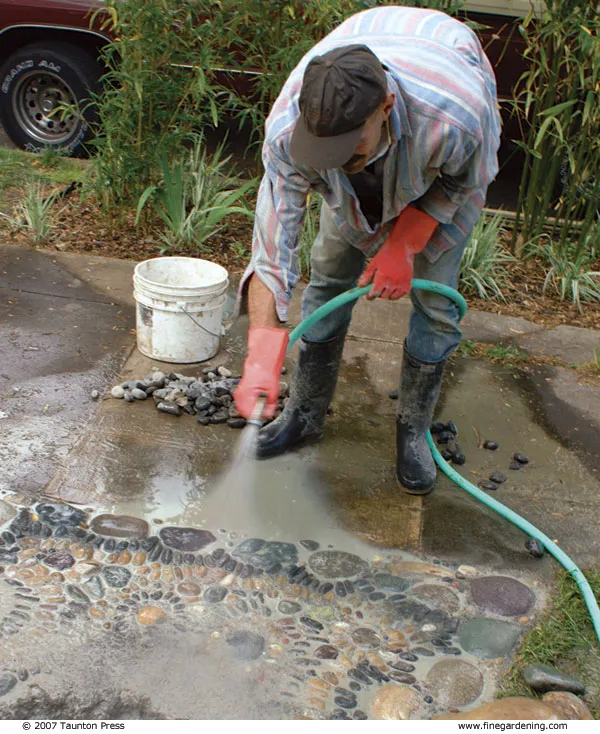 Author spraying mosaic with hose to clean off any displaced mortar.
Caption: Spray the mosaic gently to remove excess mortar and reveal the design.
Unveiling Your Masterpiece: Final Touches and Long-Term Care
-
Mortar Removal (optional): Once the mosaic dries, use muriatic acid to remove any mortar film on the pebbles, ensuring proper safety precautions.
-
Repairs: Use Thinset, a polymer product, to reattach any loose pebbles, applying sparingly to avoid discoloration.
Conclusion: Embrace the Enduring Beauty of Pebble Mosaic
With its captivating charm and endless creative possibilities, pebble mosaic is a rewarding art form that transforms outdoor spaces into mesmerizing masterpieces.
I invite you to embark on your own pebble mosaic journey. Explore the endless design possibilities, experiment with colors and textures, and let your imagination run wild.
Don’t forget to share your creations and inspire others with the enduring beauty of pebble mosaic! Visit Robert Kline Art for more DIY inspiration and discover unique handmade gifts for your loved ones.
