Blog
Creating the Ultimate DIY Fire Pit Seating Area
Hey there, fellow craft enthusiasts! Robert Kline, your resident artisan, here, ready to guide you on a journey of transforming your backyard into a haven of warmth and camaraderie. Today, we’re diving headfirst into the world of DIY with a project that’s as impressive as it is budget-friendly: crafting your very own outdoor fire pit seating area.
Igniting Inspiration: The Allure of a DIY Fire Pit
A fire pit is more than just a source of warmth; it’s a magnet for gatherings, a catalyst for conversations, and a beacon of relaxation under the open sky. And let me tell you, nothing beats the satisfaction of building one yourself!
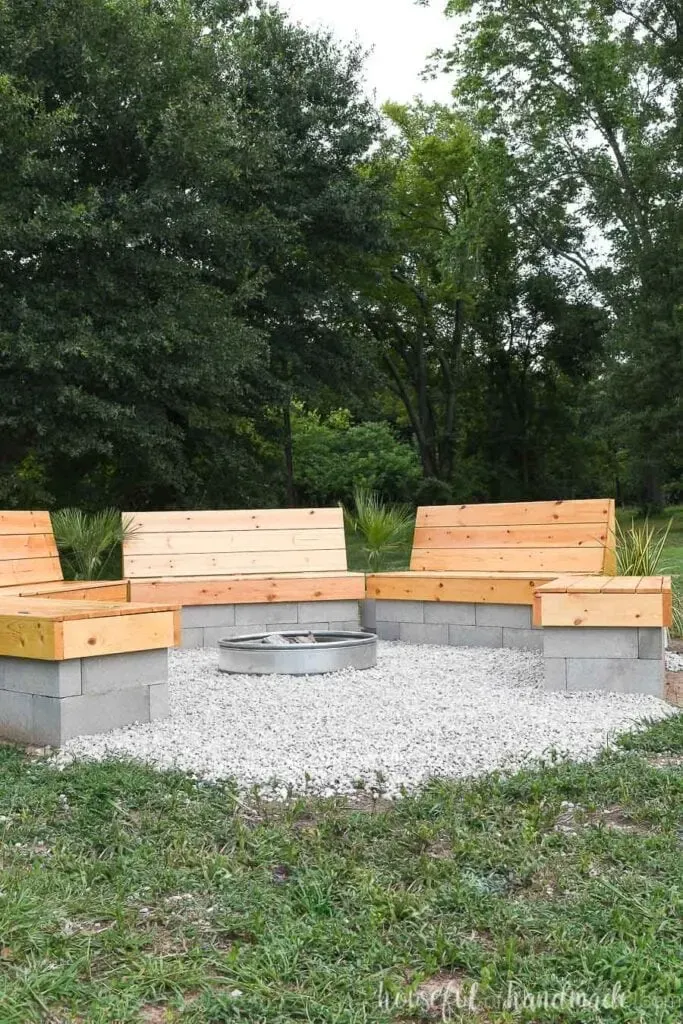
 Five benches in a hexagon around a fire ring with gravel between them and wooded area in the background.
Picture this: a hexagon of cozy benches encircling a crackling fire, inviting you and your loved ones to unwind under the stars.
Striking a Balance: Modern Aesthetics Meet Rustic Charm
For this project, we’re fusing the sleekness of modern design with the inviting warmth of rustic elements. Picture this: cool, gray cinder blocks juxtaposed against the rich, earthy tones of wood.
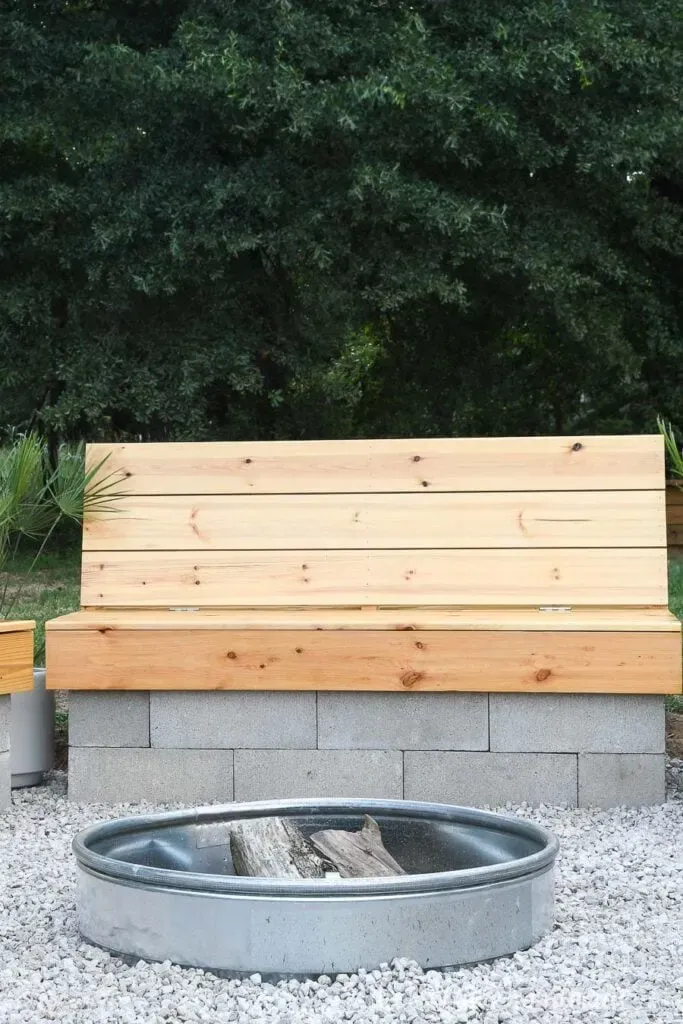 Close up of one of the wood benches in the fire pit area built with douglas fir and whitewood boards and sealed with Waterlox Marine finish.
The contrast is simply stunning – a testament to the power of blending different textures and materials.
More Than Meets the Eye: Unveiling Hidden Storage
Functionality is key, which is why I’m particularly proud of the hidden storage compartments incorporated into the bench design. Lift up the seat, and voila – a discreet space to keep firewood, tools, or any other fireside essentials within arm’s reach.
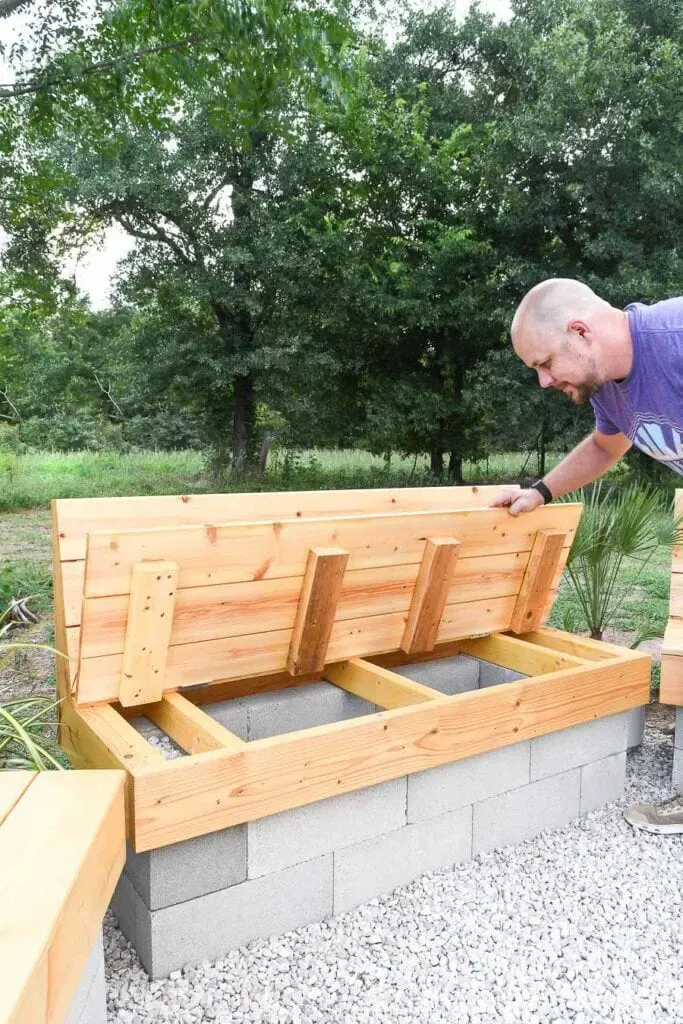 The fire pit bench being opened up to show the easy-access storage inside it.
It’s all about those clever little details that elevate a DIY project to the next level, wouldn’t you agree?
Gearing Up for Greatness: Tools and Materials
Before we embark on this creative journey, let’s gather our arsenal of tools and materials. Now, don’t worry, you won’t need a workshop full of fancy equipment. Most of these items are readily available at your local hardware store.
Recommended Tools:
- Miter saw (A sliding miter saw offers greater capacity, but a standard one will suffice for most projects)
- Table saw or circular saw (for precise cuts)
- Pocket hole jig (for creating strong, concealed joints)
- Finish nailer (for attaching trim and slats)
- Drill and impact driver (for drilling pilot holes and driving screws)
- Trim router (for rounding over edges, if desired)
- Sander (for smoothing out rough edges)
- Measuring tape, speed square, level, clamps (essential for accurate measurements and assembly)
- Large caulk gun (for applying construction adhesive)
- Shovels (for digging and leveling)
- Optional: Tiller (for breaking up compacted soil)
- Optional: Planer (for smoothing and flattening wood surfaces)
Supplies:
- Lumber (Refer to the detailed cut list in the PDF plans)
- Cinder blocks and caps (for the bench bases)
- Landscape construction adhesive
- Stakes and twine (for marking out the hexagon)
- Spray paint (for temporary ground markings)
- Weed barrier fabric
- Landscape staples
- Fire ring (to contain the fire)
- Rocks, sand, or gravel (for the fire pit base and surrounding area)
- Outdoor pocket hole screws
- Finish nails
- Outdoor screws
- Wood glue
- Stainless steel hinges (for the bench seats)
- Waterlox Universal Tung Oil Sealer (for prepping the wood)
- Waterlox Marine Sealer in Satin (for a durable, weather-resistant finish)
Laying the Foundation: A Step-by-Step Guide to DIY Fire Pit Seating
Phase 1: Preparing the Site
-
Staking Out the Hexagon:
- Start by marking the center of your fire pit area with a stake.
- Tie a string to the center stake and measure out the desired radius (in our case, 60 inches) to mark the corners of the hexagon.
- Drive stakes at each corner, ensuring they’re level and evenly spaced.
- Double-check your measurements to guarantee accuracy.
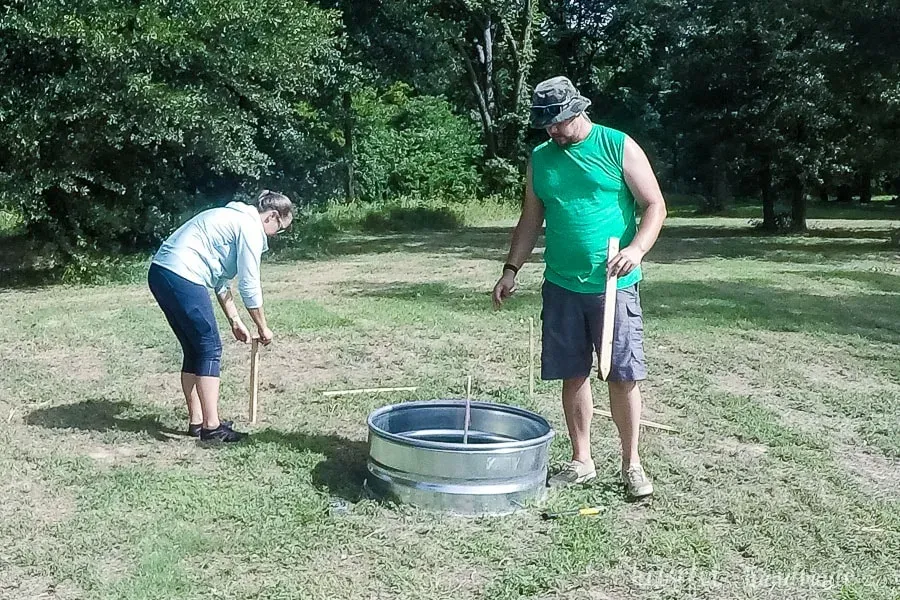 Starting to stake out the DIY fire pit by placing a dowel in the ground in the center of the fire ring.
Precision is key when laying the groundwork for your fire pit. -
Leveling the Ground:
- Clear the area of grass, rocks, and debris.
- Use a shovel and level to ensure a flat surface for the cinder blocks.
- For compacted soil, consider renting a tiller to loosen the ground.
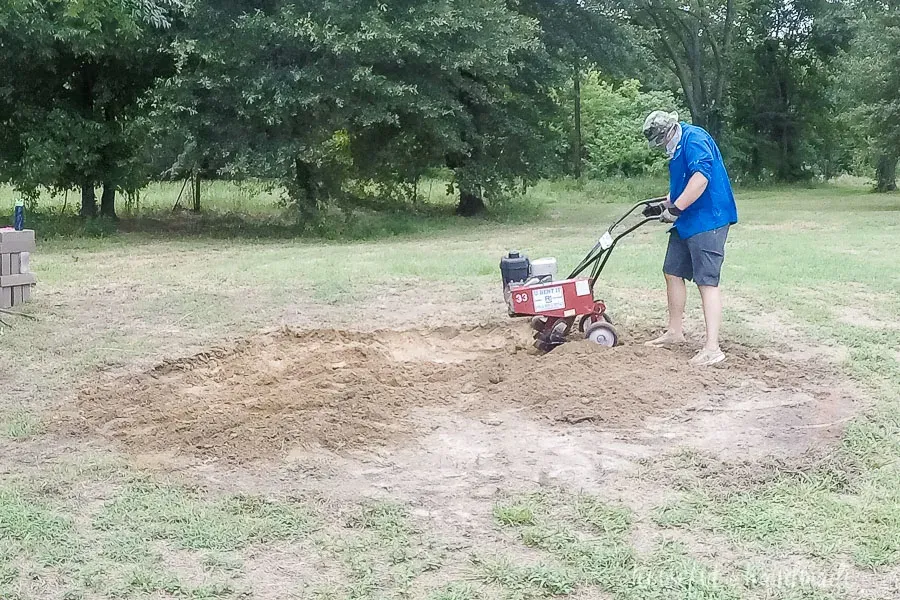 Using a front tine tiller to break up the ground for the DIY fire pit.
A level surface is crucial for stability, preventing any unwanted wobbling in your benches.
Phase 2: Building the Cinder Block Bases
-
Dry-Fitting the First Row:
- Begin with the back center section, placing cinder blocks and caps along the twine, ensuring they’re level and snug.
- This dry fit allows you to make adjustments and ensure a perfect alignment before permanently securing the blocks.
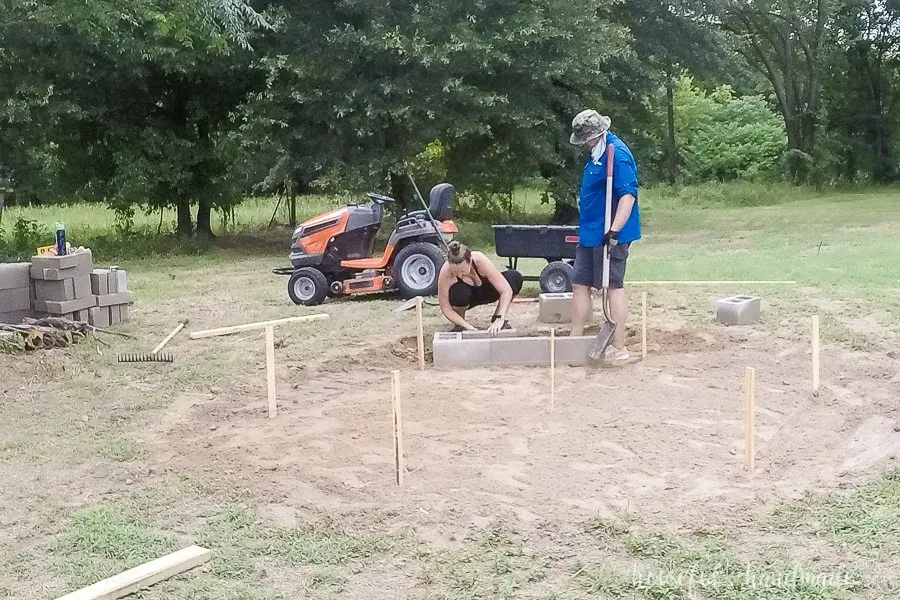 Leveling the first row of cinder blocks and cinder block caps for the base of the fire pit for the first of the hexagon.
Think of this as a dress rehearsal for your cinder blocks, ensuring a flawless performance in the final construction. -
Securing the Blocks:
- Lay down weed barrier fabric to prevent weeds from sprouting between the blocks.
- Apply construction adhesive to the bottom of each block and cap, pressing them firmly together.
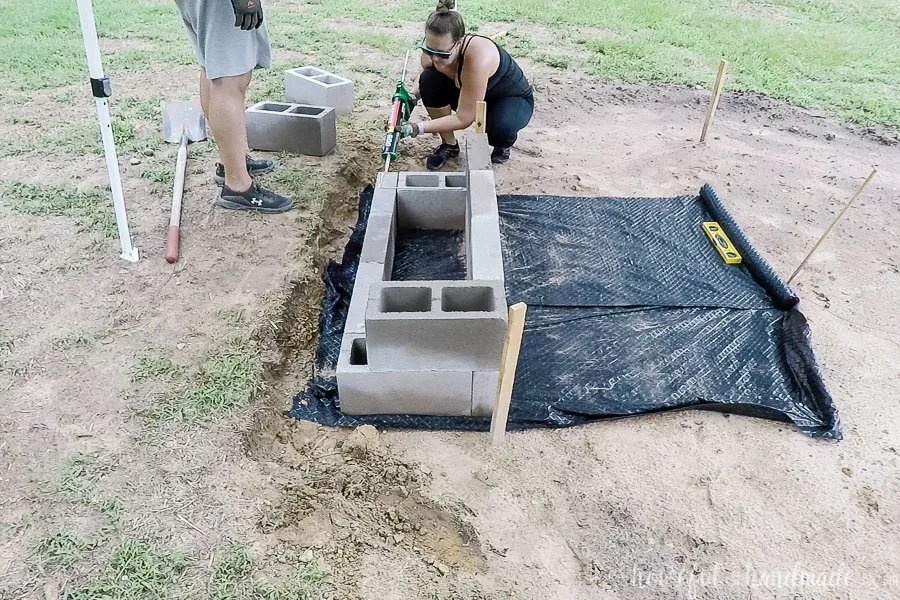 The base of the fire pit seating getting assembled with landscape adhesive and cinder blocks.
A strong adhesive ensures your cinder block bases can withstand the test of time and the elements. -
Building the Remaining Bases:
- Repeat the process for the other five sections, carefully leveling each block to create a seamless hexagon.
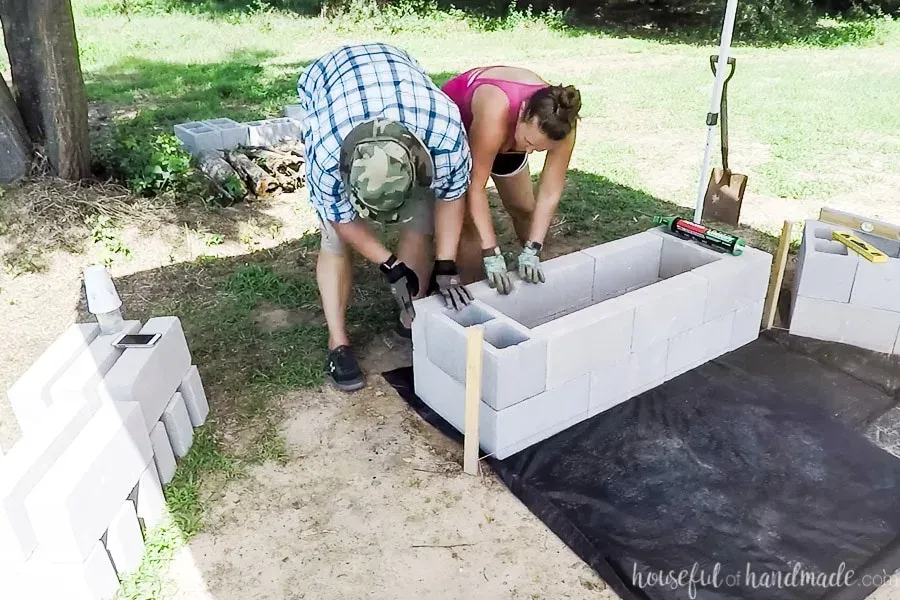 Finishing assembling the bases of concrete blocks for the DIY fire pit area.
With each base, you’re one step closer to realizing your vision of the perfect fire pit seating area.
Phase 3: Finishing Touches for the Fire Pit Area
-
Setting the Fire Ring:
- Position the fire ring in the center, ensuring it’s level and stable.
- Dig a shallow hole to recess the ring slightly into the ground for added stability.
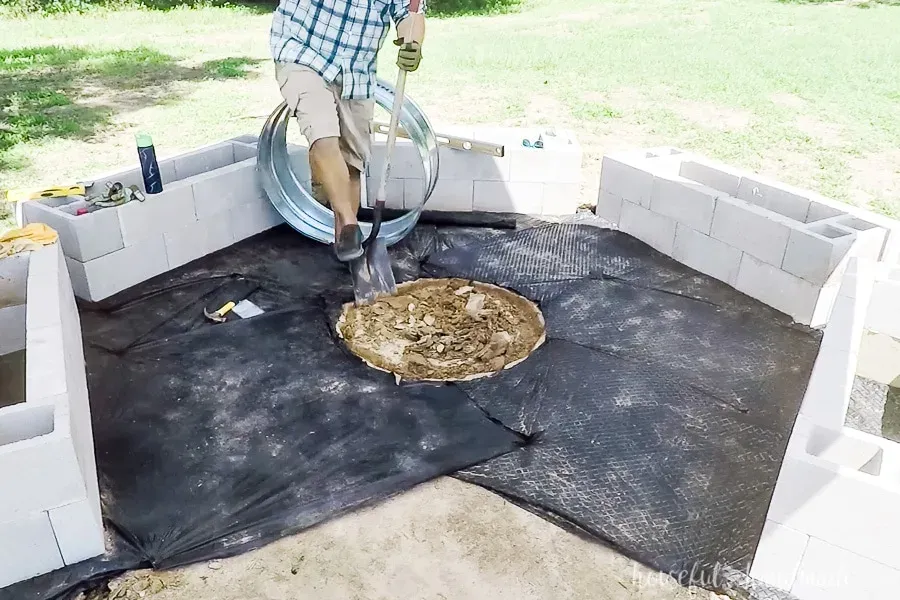 Digging out a hole in the center of the fire pit area to put the fire ring into.
The fire ring is the heart of your fire pit, so make sure it’s properly seated and ready to radiate warmth. -
Adding Rocks or Gravel:
- Fill the area around the bases and fire ring with your chosen material. This not only enhances the aesthetics but also helps to prevent weed growth and provides drainage.
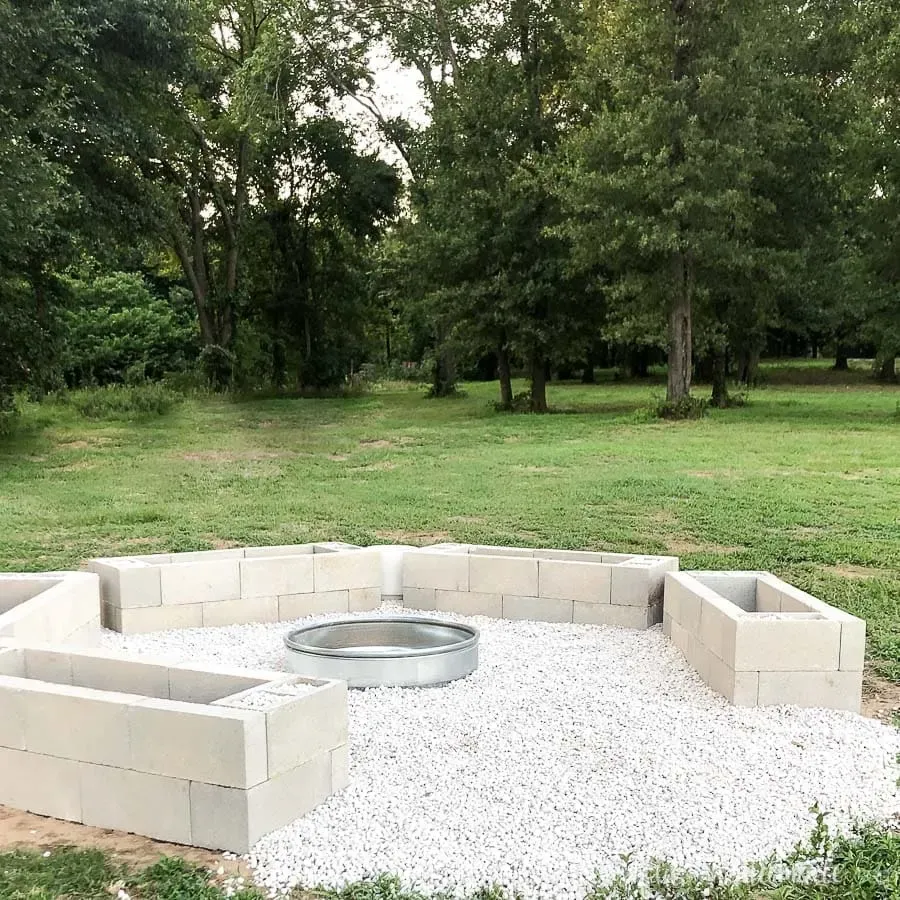 DIY fire pit area with stacked cinder blocks surrounding a metal fire ring and limestone pebbles between them.
This is where your creativity shines! Choose rocks or gravel that complement your style and the surrounding landscape.
Phase 4: Crafting the Bench Frames
-
Precise Measurements:
- Carefully measure the cinder block bases, noting any slight variations. Adjust your cuts accordingly to ensure a snug fit.
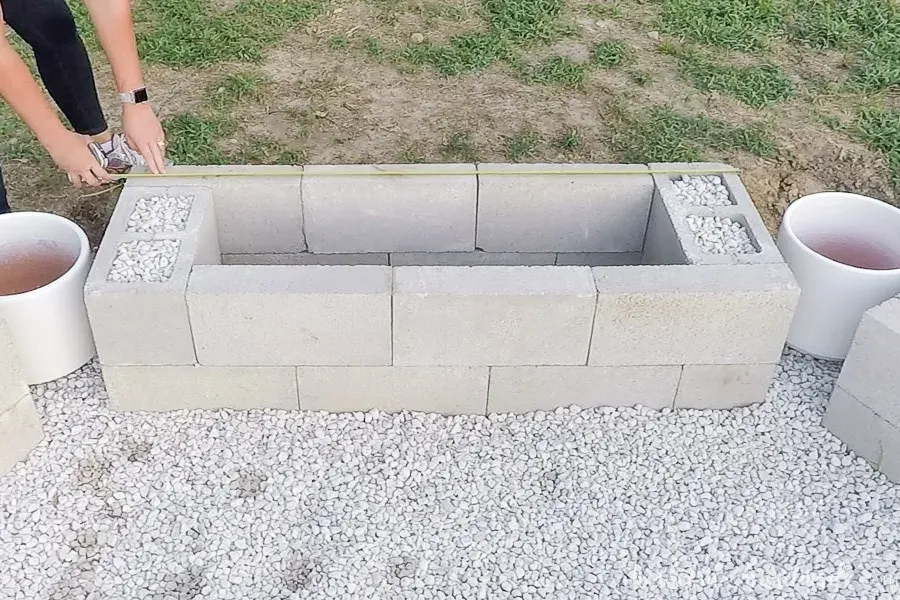 Measuring the cinder block base for the fire pit bench.
Remember, measure twice, cut once! Accurate measurements are the foundation of a well-built bench. -
Cutting the Frame Boards:
- Using your miter saw or circular saw, cut the 2×4 and 2×6 boards to the lengths specified in the PDF plans.
- If using lumber with rounded edges, consider planing one side of the 2×6 boards for a cleaner, more modern look.
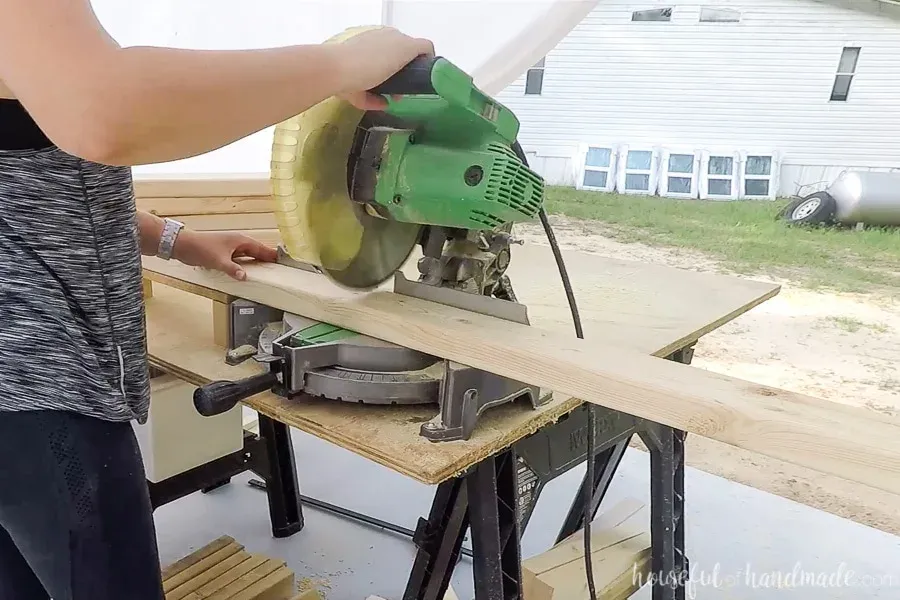 Cutting the 2x4s for the fire pit bench frames.
The satisfying whir of the saw, the scent of freshly cut wood – embrace the sights and sounds of creation. -
Assembling the Frames:
- Drill pocket holes where indicated in the plans.
- Attach the side boards to the front and back boards using wood glue and pocket hole screws, ensuring the edges are flush.
- Attach the 2×4 supports inside the frame, positioning them to sit on top of the cinder blocks.
- Dry-fit the frame on the base to ensure a perfect fit before proceeding.
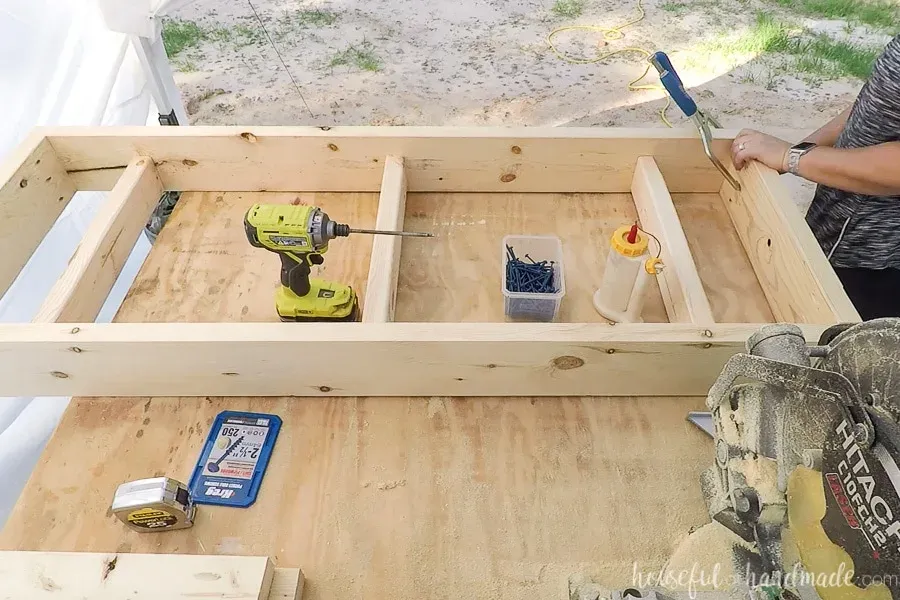 Finishing the bench frame by attaching the other 2×6 board.
As the frame takes shape, you’re building more than just a bench – you’re building memories.
Phase 5: Adding Style and Functionality
-
Creating the Bench Backs (Optional):
- For benches with backs, cut the 2×6 back rests to size, creating a gentle slope for comfort.
- Attach the back rests to the frame using pocket hole screws.
- Add a top support board to connect the back rests for added stability.
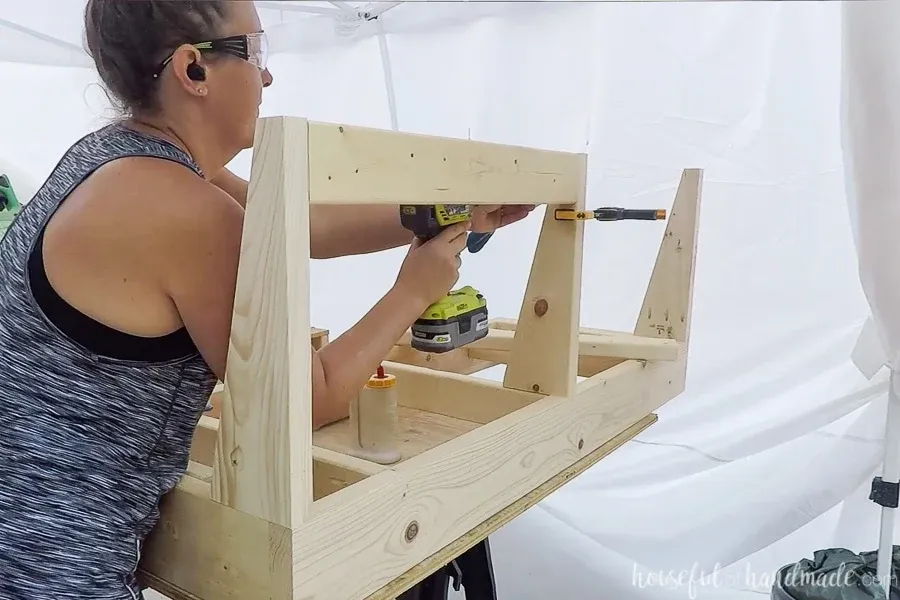 Finishing the fire pit bench back with support boards between the back rests.
Lean back and relax – these sturdy back rests will provide ample support for hours of fireside enjoyment. -
Adding Seat Slats:
- Cut the 1×6 slats to size, ensuring they’re long enough to span the frame.
- Attach the slats to the frame using wood glue and finish nails, leaving a small gap between each slat for drainage.
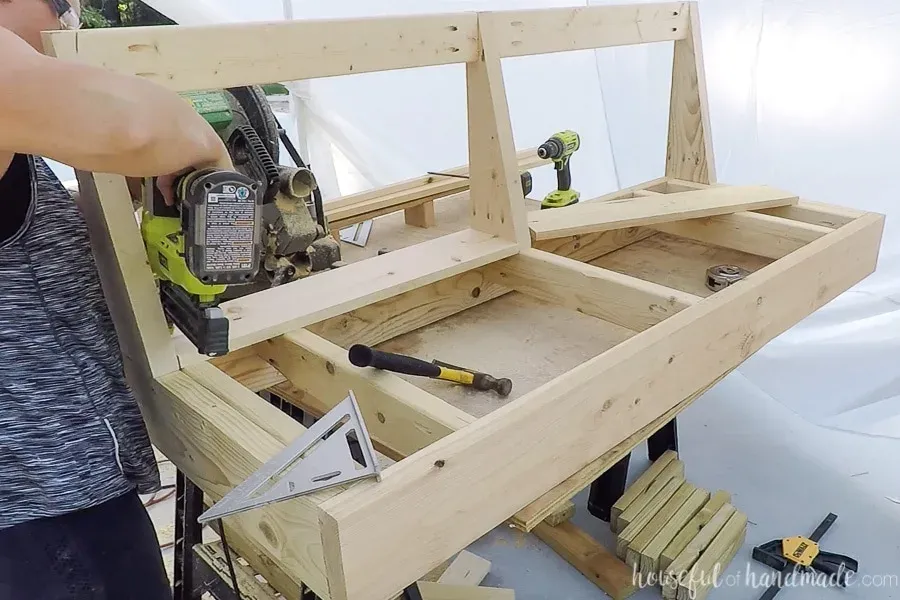 Nailing in the back slats for the seat with a battery powered nail gun.
The rhythmic tapping of the hammer, the scent of wood and glue – these are the sounds and smells of craftsmanship. -
Creating Hinged Seats (Optional):
- Cut additional 1×6 slats for the hinged seat sections.
- Attach these slats to 2×4 support boards using wood glue and screws, creating a solid panel that can be lifted for access to the storage compartment.
- Attach the hinged seat sections to the bench frame using hinges.
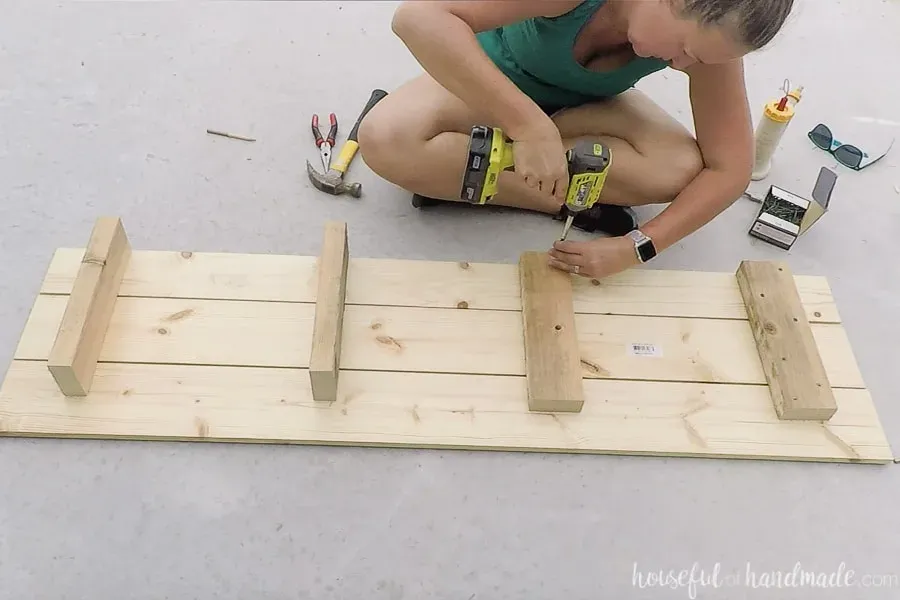 Building the hinged seats with 1×6 slats held together with 2×4 support boards and screws.
Hinged seats add a touch of ingenuity, seamlessly blending practicality with aesthetics.
Phase 6: Sealing and Protecting Your Masterpiece
-
Sanding for a Smooth Finish:
- Sand all surfaces of the benches thoroughly, starting with a coarser grit sandpaper and finishing with a finer grit for a smooth, splinter-free finish.
-
Applying the Base Coat:
- Apply a coat of Waterlox Universal Tung Oil Sealer (UTOS) to prepare the wood for the Marine finish.
- Work in small sections, buffing the sealer into the wood with a rag.
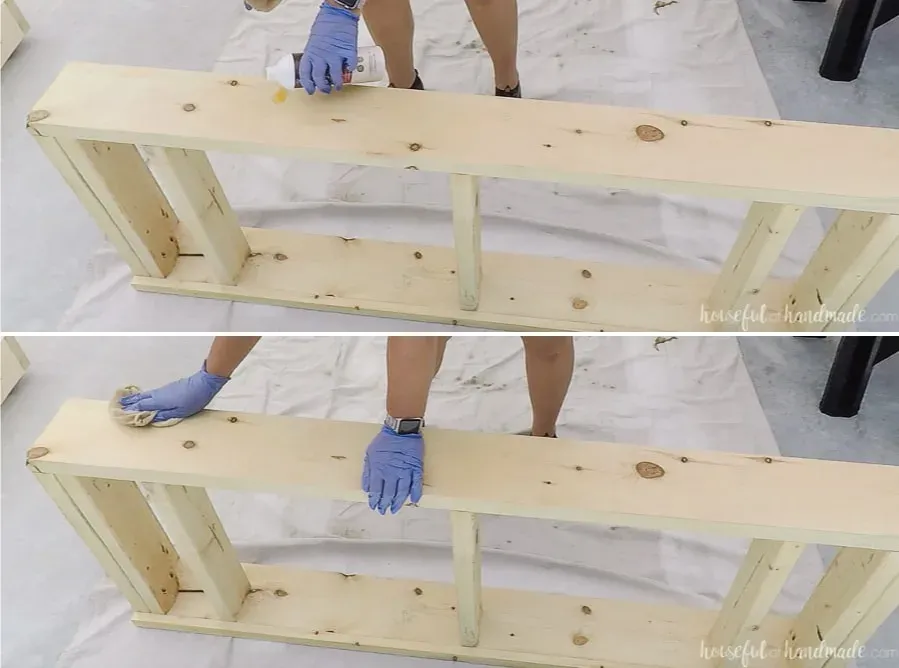 Applying the tung oil sealer as the first coat of the outdoor sealer.
Just as a painter prepares a canvas, a woodworker prepares the wood, ensuring a flawless finish that will stand the test of time. -
Applying the Marine Finish:
- Once the UTOS is dry, apply two coats of Waterlox Marine Sealer, allowing ample drying time between coats.
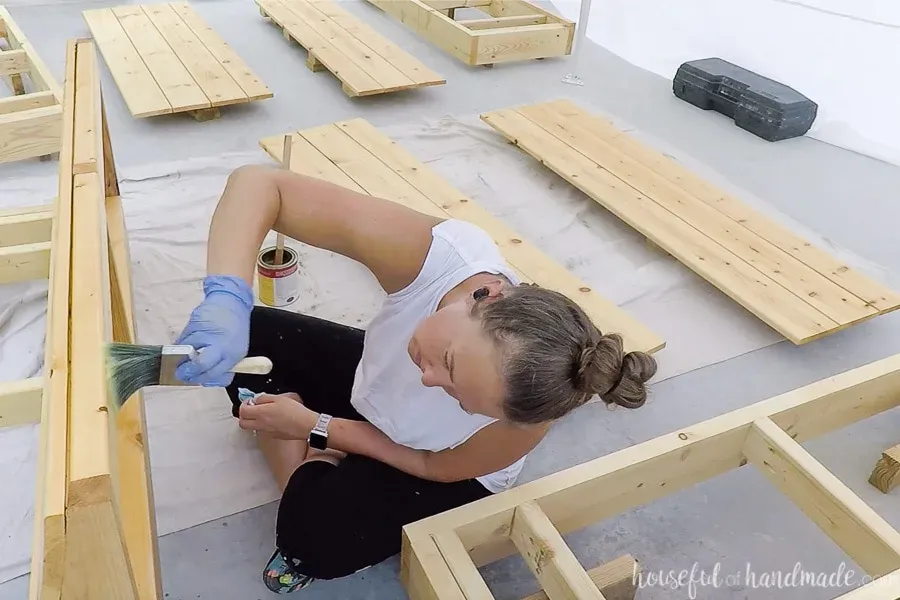 Applying the first coat of the Marine sealer to the fire pit benches with a paint brush surrounded by the rest of the benches.
The final coat of sealer, like a varnish on a painting, seals in the beauty and protects it for years to come.
Basking in the Glow: A Budget-Friendly Triumph
As a firm believer in making craftsmanship accessible, I’m happy to share that this DIY fire pit seating area can be built without breaking the bank. By using budget-friendly materials and embracing the DIY spirit, you can create a stunning outdoor oasis for a fraction of the cost of pre-made options.
From Spark to Flame: Igniting Your DIY Passion
And there you have it – a comprehensive guide to crafting your very own fire pit seating area. As an artisan who thrives on empowering others to embrace their creativity, I encourage you to dive headfirst into this project.
Share your creations with me, tag your social media posts with #RobertKlineArt, and let’s inspire a community of makers, one project at a time!
