Blog
Create a Charming DIY Outdoor Chandelier from an Old Fixture

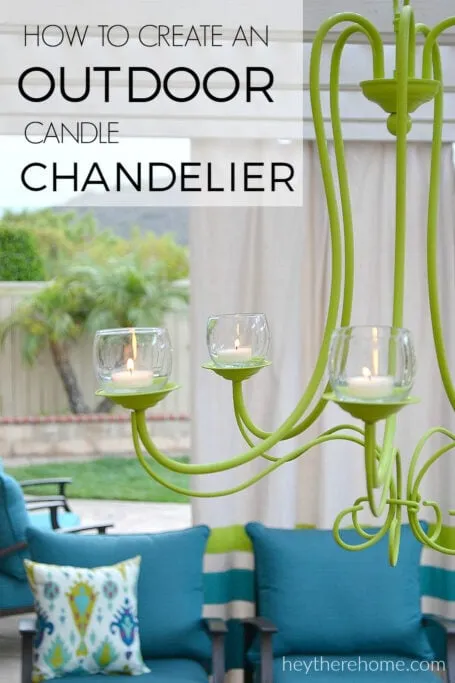
Hey there, fellow craft enthusiasts! Robert Kline here, and I’m excited to share a recent project that’s brightened up my patio: a charming DIY outdoor chandelier made from an old, unloved fixture. You know how much I love repurposing and breathing new life into discarded treasures, and this project is no exception. Let’s dive into how you can create your own budget-friendly, magical ambiance for those warm summer evenings.
From Drab to Fab: Giving an Old Chandelier a New Purpose
Remember that old chandelier gathering dust in your garage? The one you couldn’t bear to part with because it had potential? Well, it’s time to dust it off and give it a new lease on life! Just like I transformed my dining room with a fresh coat of paint and some creativity, this chandelier is about to embark on its own glow-up.
Gather Your Supplies: It’s All About Upcycling
The beauty of this project lies in its simplicity and affordability. Here’s what you’ll need:
- An old chandelier: Scour garage sales, thrift stores, or online marketplaces for a hidden gem.
- Spray paint: Choose a color that complements your outdoor space. I went with a vibrant “Key Lime” to match my outdoor curtains.
- Glass votives: Dollar stores are your best friend! Grab a handful of these to hold your candles.
- Super glue: This will secure the votives to your chandelier.
- Candles: I love the warm glow of real candles, but battery-operated LED tea lights are a safer alternative, especially in windy conditions.
- Basic tools: Wire cutters, pliers, and a screwdriver should do the trick.
Let’s Get Crafting: Transforming Your Chandelier Step-by-Step
-
Disassemble and Prep: Carefully remove the light bulbs, wires, and any unnecessary metal parts from your chandelier. This might seem tedious, but trust me, the transformation is worth it!
 Disassembled chandelier ready for paint
 -
Add a Pop of Color: Time to unleash your inner artist! Apply several light coats of spray paint to your chandelier, allowing it to dry completely between coats.
-
Reassemble and Hang: Put your chandelier back together, using the original chain for hanging. If any parts are missing, a quick trip to the hardware store should set you straight.
-
Attach the Votives: Apply a dab of super glue to the bottom of each glass votive and secure it to the chandelier arms.
-
Illuminate Your Patio: Insert your candles of choice and bask in the warm glow of your creation!
Enjoy the Ambiance: Your DIY Outdoor Oasis Awaits
Congratulations! You’ve successfully transformed an old chandelier into a stunning focal point for your outdoor space. Not only have you created a unique conversation starter, but you’ve also given new life to something old, proving that with a little imagination, the possibilities are endless.
Now it’s your turn! Don’t be afraid to experiment and add your own personal touch to this project. Share your creations with me in the comments below; I can’t wait to see what you come up with!
And while you’re here, be sure to explore Robert Kline Art for more inspiring DIY projects, crafting tips, and unique handmade gifts for your loved ones.
