Blog
DIY Fabric Memo Board: A Step-by-Step Guide

Hello, fellow craft enthusiasts! Robert Kline here, and I’m thrilled to share my latest project with you: a charming and functional DIY fabric memo board. This versatile creation is perfect for adding a personalized touch to any room while keeping your notes, reminders, and cherished photos organized in style.
Gathering Your Supplies
Before we embark on this creative journey, let’s gather our crafting essentials:
- An 18×24 inch canvas (feel free to adjust the size to fit your space!)
- Quilter’s batting, cut a few inches larger than your canvas
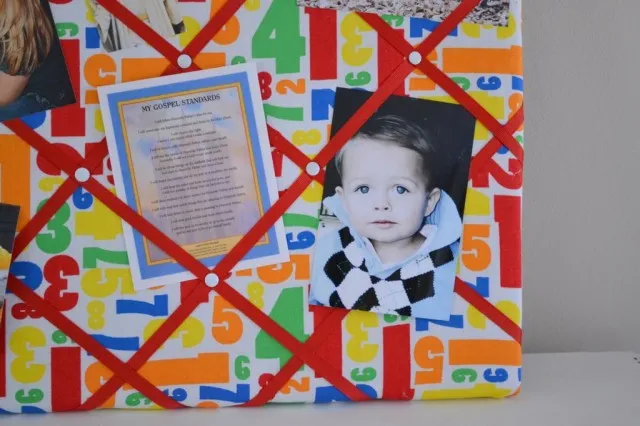
- Fabric of your choice, the same size as the batting. I found a beautiful number fabric at Joanns that added a playful touch to my project.
- A pack of tacks or brads (I’ll share a valuable lesson I learned about this later!)
- 6 yards of ribbon. Choose a color and pattern that complements your chosen fabric.
- A trusty hot glue gun and glue sticks
- Sharp scissors for precise cutting
Creating the Base: A Soft and Sturdy Foundation
- Prepare the batting: Lay your canvas face down on the batting, ensuring you have a couple of inches of excess batting around all sides.
- Secure the batting: Gently fold the batting edges over the back of the canvas, creating neat corners like you’re wrapping a present. Secure everything in place with tacks.
- Flip and admire: Flip your canvas over, and you’ll be greeted by a beautifully padded surface – the perfect foundation for your fabric!
Adding the Fabric: A Touch of Personality
- Center and secure: Place your padded canvas face down on your chosen fabric.
- Wrap and tack: Following the same wrapping technique used with the batting, carefully fold and secure the fabric to the back of the canvas with tacks.
Creating the Grid: Where Functionality Meets Flair
Now comes the fun part – creating the grid that will transform your padded canvas into a functional memo board.
- Ribbon placement: Starting at the top left corner, run a strip of ribbon horizontally across the canvas, securing it to the back with hot glue or tacks. Repeat this process, spacing your ribbon strips evenly to create approximately 5 horizontal rows.
- Vertical strips: Now, rotate your canvas and repeat the process with the ribbon running vertically. Aim for a similar spacing to create a visually appealing grid pattern.
- Secure intersections: To ensure your grid is extra sturdy and prevent sagging, secure the intersections of the ribbon with tacks or brads.
A Lesson Learned: The Importance of Brad Choice
Remember I promised to share a valuable lesson? While tacks worked well for securing the batting and fabric, I discovered that brads are the superior choice for the ribbon intersections. Tacks tended to loosen and posed a potential scratching hazard, requiring extra hot glue for stability. Brads, on the other hand, provide a more secure hold and often come in decorative styles that enhance the visual appeal of your memo board. You can find a fantastic selection in the scrapbooking aisle of your local craft store.
The Finishing Touch: A Personalized Masterpiece
And there you have it! Your very own DIY fabric memo board is complete. Experiment with different fabrics, ribbons, and embellishments to create a unique piece that reflects your style. I can’t wait to see your creations!
Share Your Crafting Journey
How did your memo board turn out? I’d love to hear about your experience in the comments below! And for more inspiring DIY projects and unique handmade gifts, be sure to explore the rest of the Robert Kline Art website.
Happy crafting!
 " width=
Preparing the batting for a fabric memo board
 " width=
A fabric memo board with a playful number fabric
 " width=
DIY fabric memo board with ribbon grid
 " width=
A close-up of the ribbon grid on a fabric memo board
 " width=
Securing the ribbon grid on a fabric memo board
 " width=
Creating a grid on a fabric memo board with ribbon
 " width=
Using brads to secure the ribbon intersections
 " width=
Detail of ribbon intersection on a fabric memo board
