Blog
DIY Hanging Spice Rack: An Affordable and Easy Organization Solution

As an artist who dabbles in various crafts, I’m always on the lookout for clever DIY solutions. And let me tell you, nothing sparks joy quite like a well-organized pantry! Today, I’m excited to share my budget-friendly spice rack hack using Dollar Tree cooling racks. Trust me, this simple project will transform your spice game and leave your pantry looking tidy and inspiring.
The Pantry Predicament: A Story as Old as Time
We’ve all been there: staring into the depths of a chaotic spice shelf, overwhelmed by the jumble of mismatched jars and forgotten ingredients. Believe me, my spice shelf was no exception! It was a recipe for disaster – duplicate spices, misidentified jars, and a constant struggle to locate the right ingredient.
Like any dedicated cook, I craved order amidst the culinary chaos. I yearned for a spice rack that would restore peace to my pantry and streamline my cooking process. However, the thought of splurging on expensive, store-bought options left me uninspired.
The Dollar Tree Inspiration: Turning Cooling Racks into Spice Racks!
Determined to find an affordable and practical solution, I ventured into my trusty Dollar Tree, my creative gears turning. I stumbled upon a set of wire cooling racks, the kind used for cooling freshly baked cookies. A lightbulb moment struck!
My ever-supportive husband had his doubts, concerned the welds wouldn’t hold up to my bending and shaping. But with a price tag of $1 per rack, I was ready to take the plunge! And guess what? It worked like a charm!
Creating Your DIY Hanging Spice Rack: A Step-by-Step Guide
This project is so simple, you’ll wonder why you haven’t done it sooner! Here’s what you’ll need:
- Dollar Tree cooling racks: Grab a few depending on your spice collection.
- Needle nose pliers: For precise bending.
- Screws with large heads: For mounting the racks.
- Woven ribbon or twine: For the optional side supports.
- Glue gun (optional): For securing the ribbon or twine.
Shaping the Spice Racks:
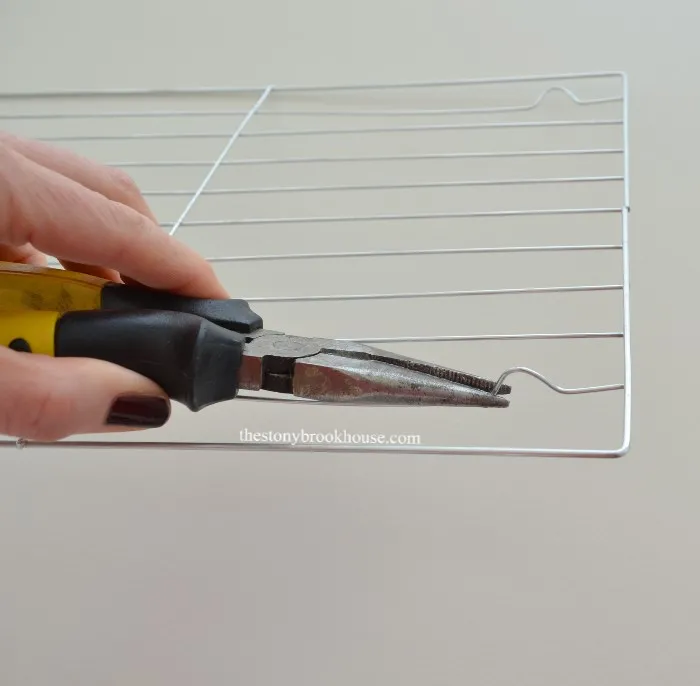
- Bend the Legs: Using your pliers, carefully bend the little legs of the cooling rack flat.
 Legs are bent flat
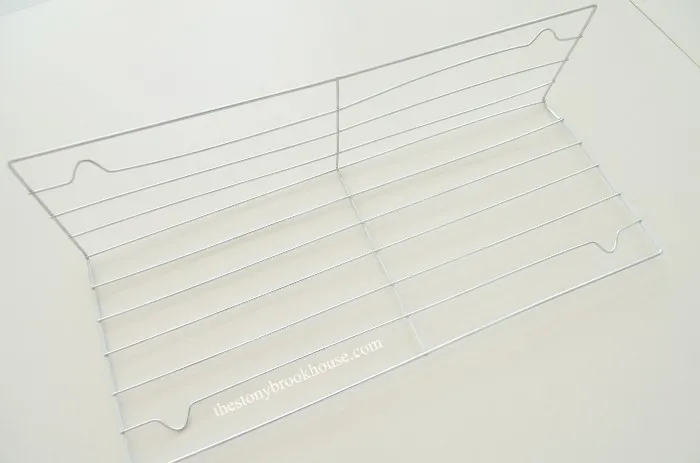
 - Create the Spice Shelf: Bend up one side of the rack at the 4th wire, then skip one wire and bend up the other side. This creates a little cradle to hold your spice jars.
 Both sides bent up
 - Adjust for Larger Jars: For larger spice containers, create a wider base by skipping two wires between the bends.
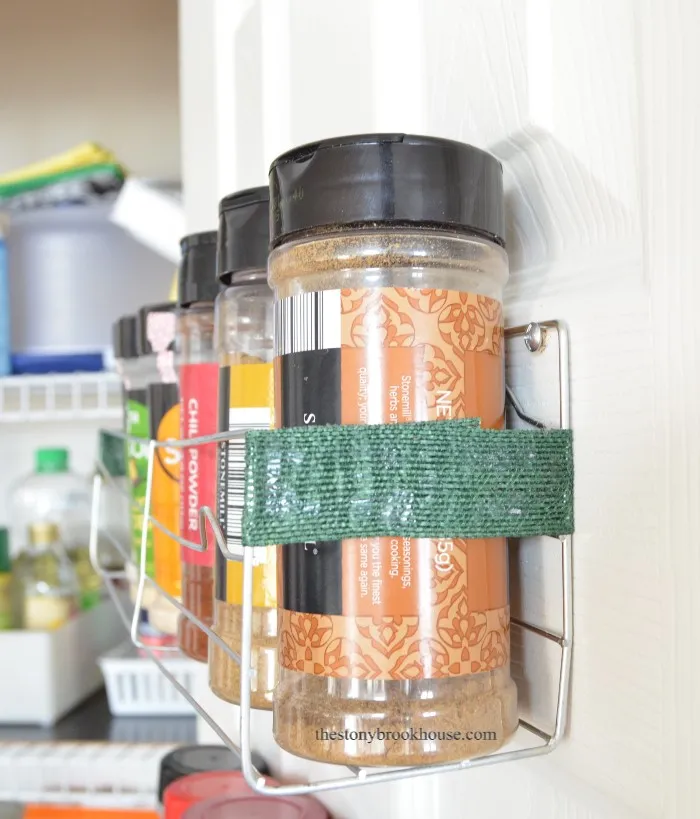
 Dollar Tree Spice Rack Complete
 - Optional Side Supports: If desired, glue a piece of ribbon or twine to the sides of the rack for added stability.
Mounting Your Spice Racks:
- Measure and Mark: Hold the racks against your pantry door or wall to determine the best placement.
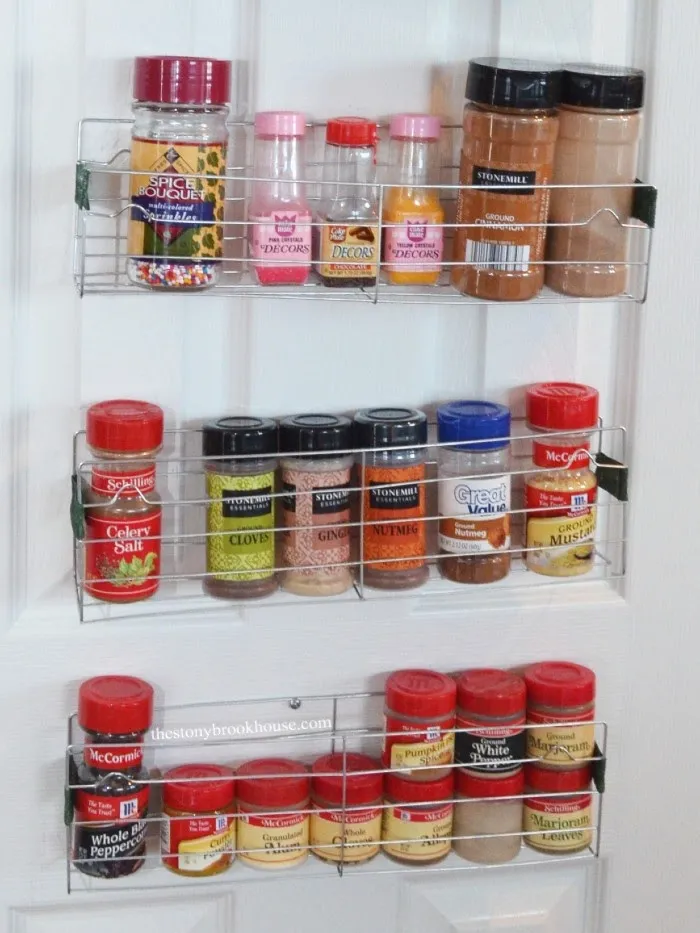
- Secure with Screws: Insert screws with large heads into the marked spots, leaving enough space for the bent legs of the racks to hang securely.
 DIY Pantry Organization
 - Tighten and Adjust: Hang the racks on the screws, ensuring they are level and secure. Tighten the screws as needed.
Reveling in Organizational Bliss
And there you have it! Your very own DIY hanging spice rack, crafted with a few Dollar Tree supplies and a dash of creativity. Not only will your spices be neatly organized and easily accessible, but you’ll also free up valuable shelf space.
Robert Kline Art: Your Guide to Creative DIY
Remember, this is just one of many ways to repurpose everyday objects into functional and stylish home organizers. Don’t be afraid to experiment, unleash your inner DIY enthusiast, and let your creativity shine!
I’d love to hear about your spice rack transformations! Share your experiences and photos in the comments below. And for more inspiring DIY projects and unique handmade gifts, be sure to explore the rest of the Robert Kline Art website. Let’s get crafting!
