Blog
DIY Pallet Shoe Storage Bench: A Rustic Touch to Your Home Organization

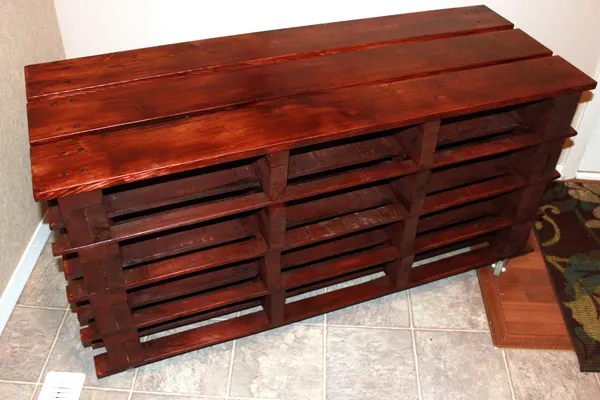
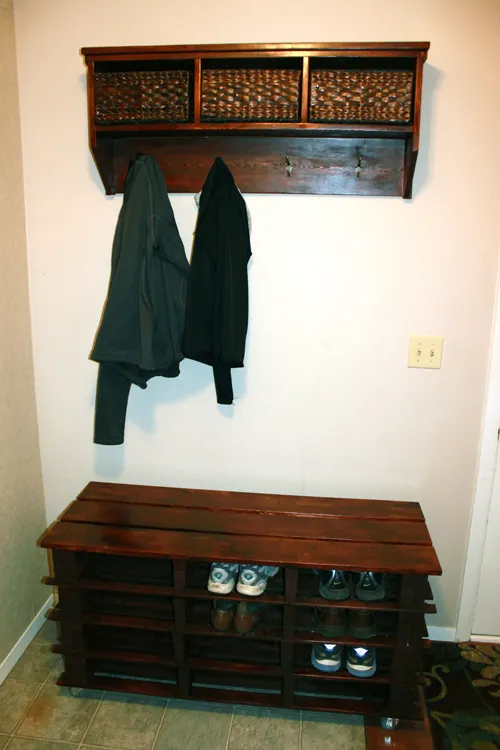
I know the feeling! Stepping over a minefield of shoes every time I walked through the door was not my idea of a welcoming home. Store-bought shoe organizers? Beautiful, but pricey. That’s when I dove into the world of DIY and discovered the magic of pallet furniture. Using repurposed pallets, I crafted a charming and functional shoe storage bench that added a rustic touch to my home. And guess what? You can too!
What You’ll Need for Your Pallet Shoe Storage Bench
Gathering your materials is the first step to conquering this project. Here’s what you’ll need:
Materials:
- Pallets: Two identical pallets in good condition, ideally with 2″x4″ middle boards.
- Wood:
- One 1″x6″x12′ board (for the top)
- One 2″x4″x6′ board (for center supports)
- Two 2″x4″x12′ boards (for side supports)
- One 2″x4″x12′ board (for bottom side supports, optional)
- Hardware:
- Wood screws (various lengths)
- Roofing nails (optional, for a rustic look)
- 4 casters (for easy movement)
Tools:
- Circular saw
- Hand saw
- Drill
- Hammer
- Chisel
- Tape measure
- Pencil
- Sandpaper (various grits)
- Wood stain (optional)
- Polyurethane (optional)
Don’t be intimidated by the list! Many of these tools are staples for DIY enthusiasts.
Building Your Pallet Shoe Storage Bench: A Step-by-Step Guide
Now, let’s roll up our sleeves and get building!
1. Prep Your Pallets:
-
Carefully remove the bottom boards from both pallets using a chisel and hammer. This creates more height for your shoes.
-
Cut both pallets in half widthwise using a circular saw. A hand saw will come in handy for finishing the cuts.
 Pallet cut in half
 -
You should now have four equal pieces. Arrange them to determine the front-facing side and desired shelf order, keeping the best-looking parts visible.
2. Reinforce the Shelves:
-
Cut Support Beams: Measure the width of your pallet. Cut eight pieces of 2″x4″ board to this length (these will be your 18″ support beams).
-
Attach Support Beams: Screw the 2″x4″ support beams along the outside edges of each pallet piece.
 Reinforcing the shelves of the pallet bench
3. Create Shelf Height Extensions (Optional):
- Measure and Cut: This step is optional but recommended for accommodating larger shoes. Measure the width between the support beams you just installed and the width of your middle supports. Cut eight pieces of 2″x4″ (or 2″x3″ if you milled a board down) to 18″ long.
- Attach Extensions: Screw the 2″x3″ (or 2″x4″) pieces to the top of the support beams on each shelf.
4. Add Center Supports:
- Cut Supports: Cut six 2″x4″x18″ boards (two were already used for the bottom shelf) and eight 2″x2″x18″ boards.
- Attach Supports: Starting with the bottom shelf, screw two 2″x2″x18″ center support boards to the top of the support beams.
5. Assemble the Bench:
-
Stack & Secure: Stack the second pallet shelf on top of the bottom shelf, using the overhang to screw it into place.
-
Add Side Supports: Place a 2″x4″x18″ side support piece on the pallet overhang. Position a 2″x3″x18″ piece on top of the side supports. Screw the top piece down to secure the side piece and attach it to the shelf.
-
Repeat: Repeat this process for the remaining shelves.
 The completed frame of a pallet bench
6. Attach the Top:
- Cut the Top Boards: Measure the width of your bench (including overhangs) and cut your 1″x6″ pine board into three equal pieces.
- Attach to the Bench: Place the boards across the top of the bench. Pre-drill holes to prevent splitting, then use screws or nails to attach the top boards.
7. Add Casters (Optional):
- Flip the bench over and attach the casters to the bottom for mobility.
8. Finishing Touches:
- Sanding: This is the most time-consuming part but essential for a smooth finish. Sand down any rough edges.
- Staining and Sealing: Apply wood stain and a protective layer of polyurethane for a polished look.
You Did It!
Congratulations! You’ve transformed simple pallets into a stylish and functional storage solution. Not only have you conquered clutter, but you’ve also created a unique piece that reflects your creativity and love for DIY.
Tips From Robert Kline Art
- Pallet Selection: Choose pallets carefully! Look for sturdy ones without extensive damage.
- Safety First: Wear appropriate safety gear like gloves and eye protection.
- Get Creative: Customize your bench with paint, stencils, or decorative hooks.
- Share Your Success: Show off your handiwork! Share pictures of your pallet shoe storage bench with the Robert Kline Art community.
Looking for More DIY Inspiration?
Explore more handcrafted treasures and unique gift ideas on Robert Kline Art. Let’s unleash our creativity together!
