Blog
Craft Your Own Unique Hanging Shelves: A Step-by-Step DIY Guide

Are you tired of knick-knacks cluttering your space? Do you find joy in transforming simple materials into stunning, functional pieces? If so, you’re in the right place! This guide will walk you through creating your own DIY hanging shelves, a project that’s as fun to make as it is easy on the eyes.
These shelves, crafted from raw wood and strong rope, offer a rustic yet modern aesthetic, perfect for showcasing your favorite plants, books, or treasures. As someone who cherishes the blend of utility and artistry, I find these shelves to be the perfect embodiment of handmade charm.
Let’s dive into crafting your own!
Gathering Your Materials
Before we embark on this creative journey, let’s gather our tools and materials:
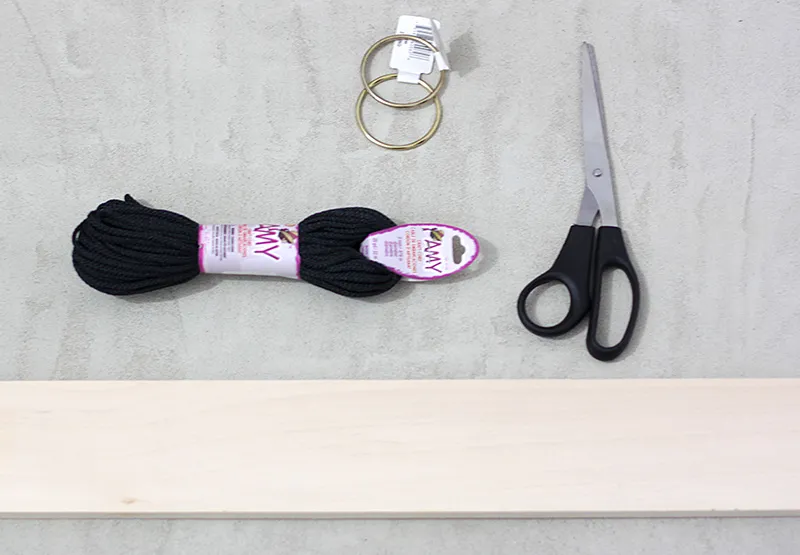
- Wooden board(s): Choose a wood type and size that speaks to your style. I opted for a 24″ board, later cut in half for two separate shelves.
- Rope cord: Select a durable rope with a thickness that complements your shelves.
- Metal rings: These will serve as the anchor for your hanging shelves. Choose a size that aligns with your aesthetic and rope size.
- Scissors: For trimming the rope.
- Saw: To cut the wood to your desired size.
- Drill: Essential for creating the holes where the rope will pass through.
 Materials for shelves
Image Caption: Essential materials for crafting DIY hanging shelves – wood, rope, and metal rings.
Crafting Your Hanging Shelves: A Step-by-Step Guide
Step 1: Preparing Your Wooden Canvas
Begin by cutting your wooden boards to the desired size. Remember to measure twice, cut once! If you’re working with a pre-cut board like my 24″ one, assess whether it needs further trimming.
Step 2: Creating the Rope Pathways
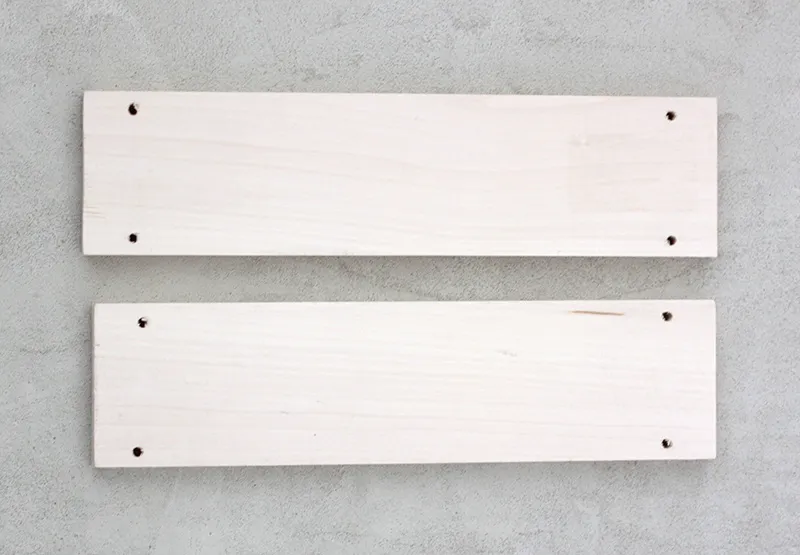
Next, we’ll create the pathways for our rope. Using your drill, carefully bore two holes on opposite ends of each board. Don’t fret too much about exact measurements – a bit of freehand adds to the handcrafted charm!
 drilled holes in wood pieces for shelves
Image Caption: Drilling holes in the wood for the rope to pass through.
Step 3: Mastering the Lark’s Head Knot
Now, for the fun part! Cut two lengths of rope to your desired length. Keep in mind that this length will determine how low your shelves hang, so leave ample room for adjustments and the knotted ends. I found 40″ to be a good starting point.
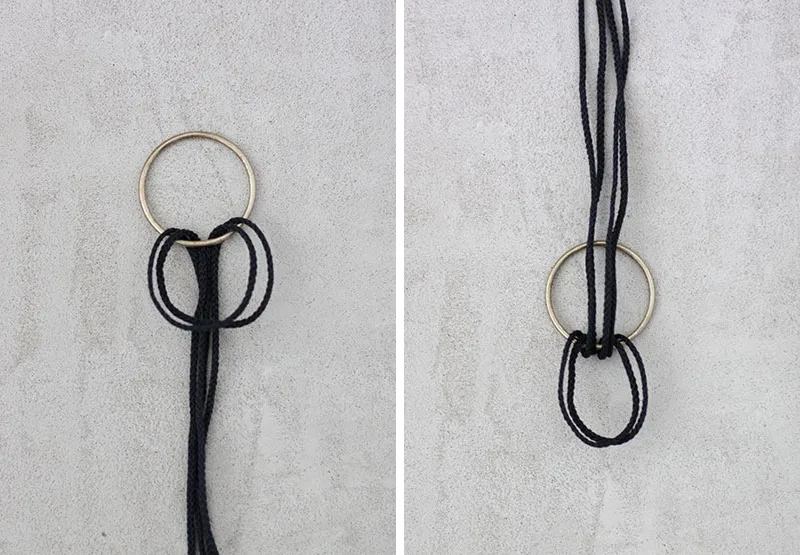
To attach the rope to the metal rings, we’ll employ the elegant Lark’s Head Knot:
- Fold your rope pieces in half.
- Place the folded end beneath the metal ring.
- Bend the folded end over the ring.
- Pull the remaining rope up and through the loop you’ve created.
- Tighten by pulling the rope taut.
Voila! You’ve mastered the Lark’s Head Knot.
 attach rope to metal ring
 attach rope to metal ring
Image Caption: Creating the Lark’s Head Knot to attach the rope to the metal ring.
Step 4: Threading the Rope and Final Touches
Thread the separated strands of rope through the drilled holes on one side of the board, then repeat on the other side. Adjust the rope length to achieve your desired hanging height.
Secure each rope end with a sturdy knot, ensuring your shelves will hang gracefully. Trim any excess rope, aiming for a clean, polished look.
 Hanging Shelves
 Hanging Shelves
Image Caption: Threading the rope through the holes and adjusting the height.
Step 5: Adorning Your Creation
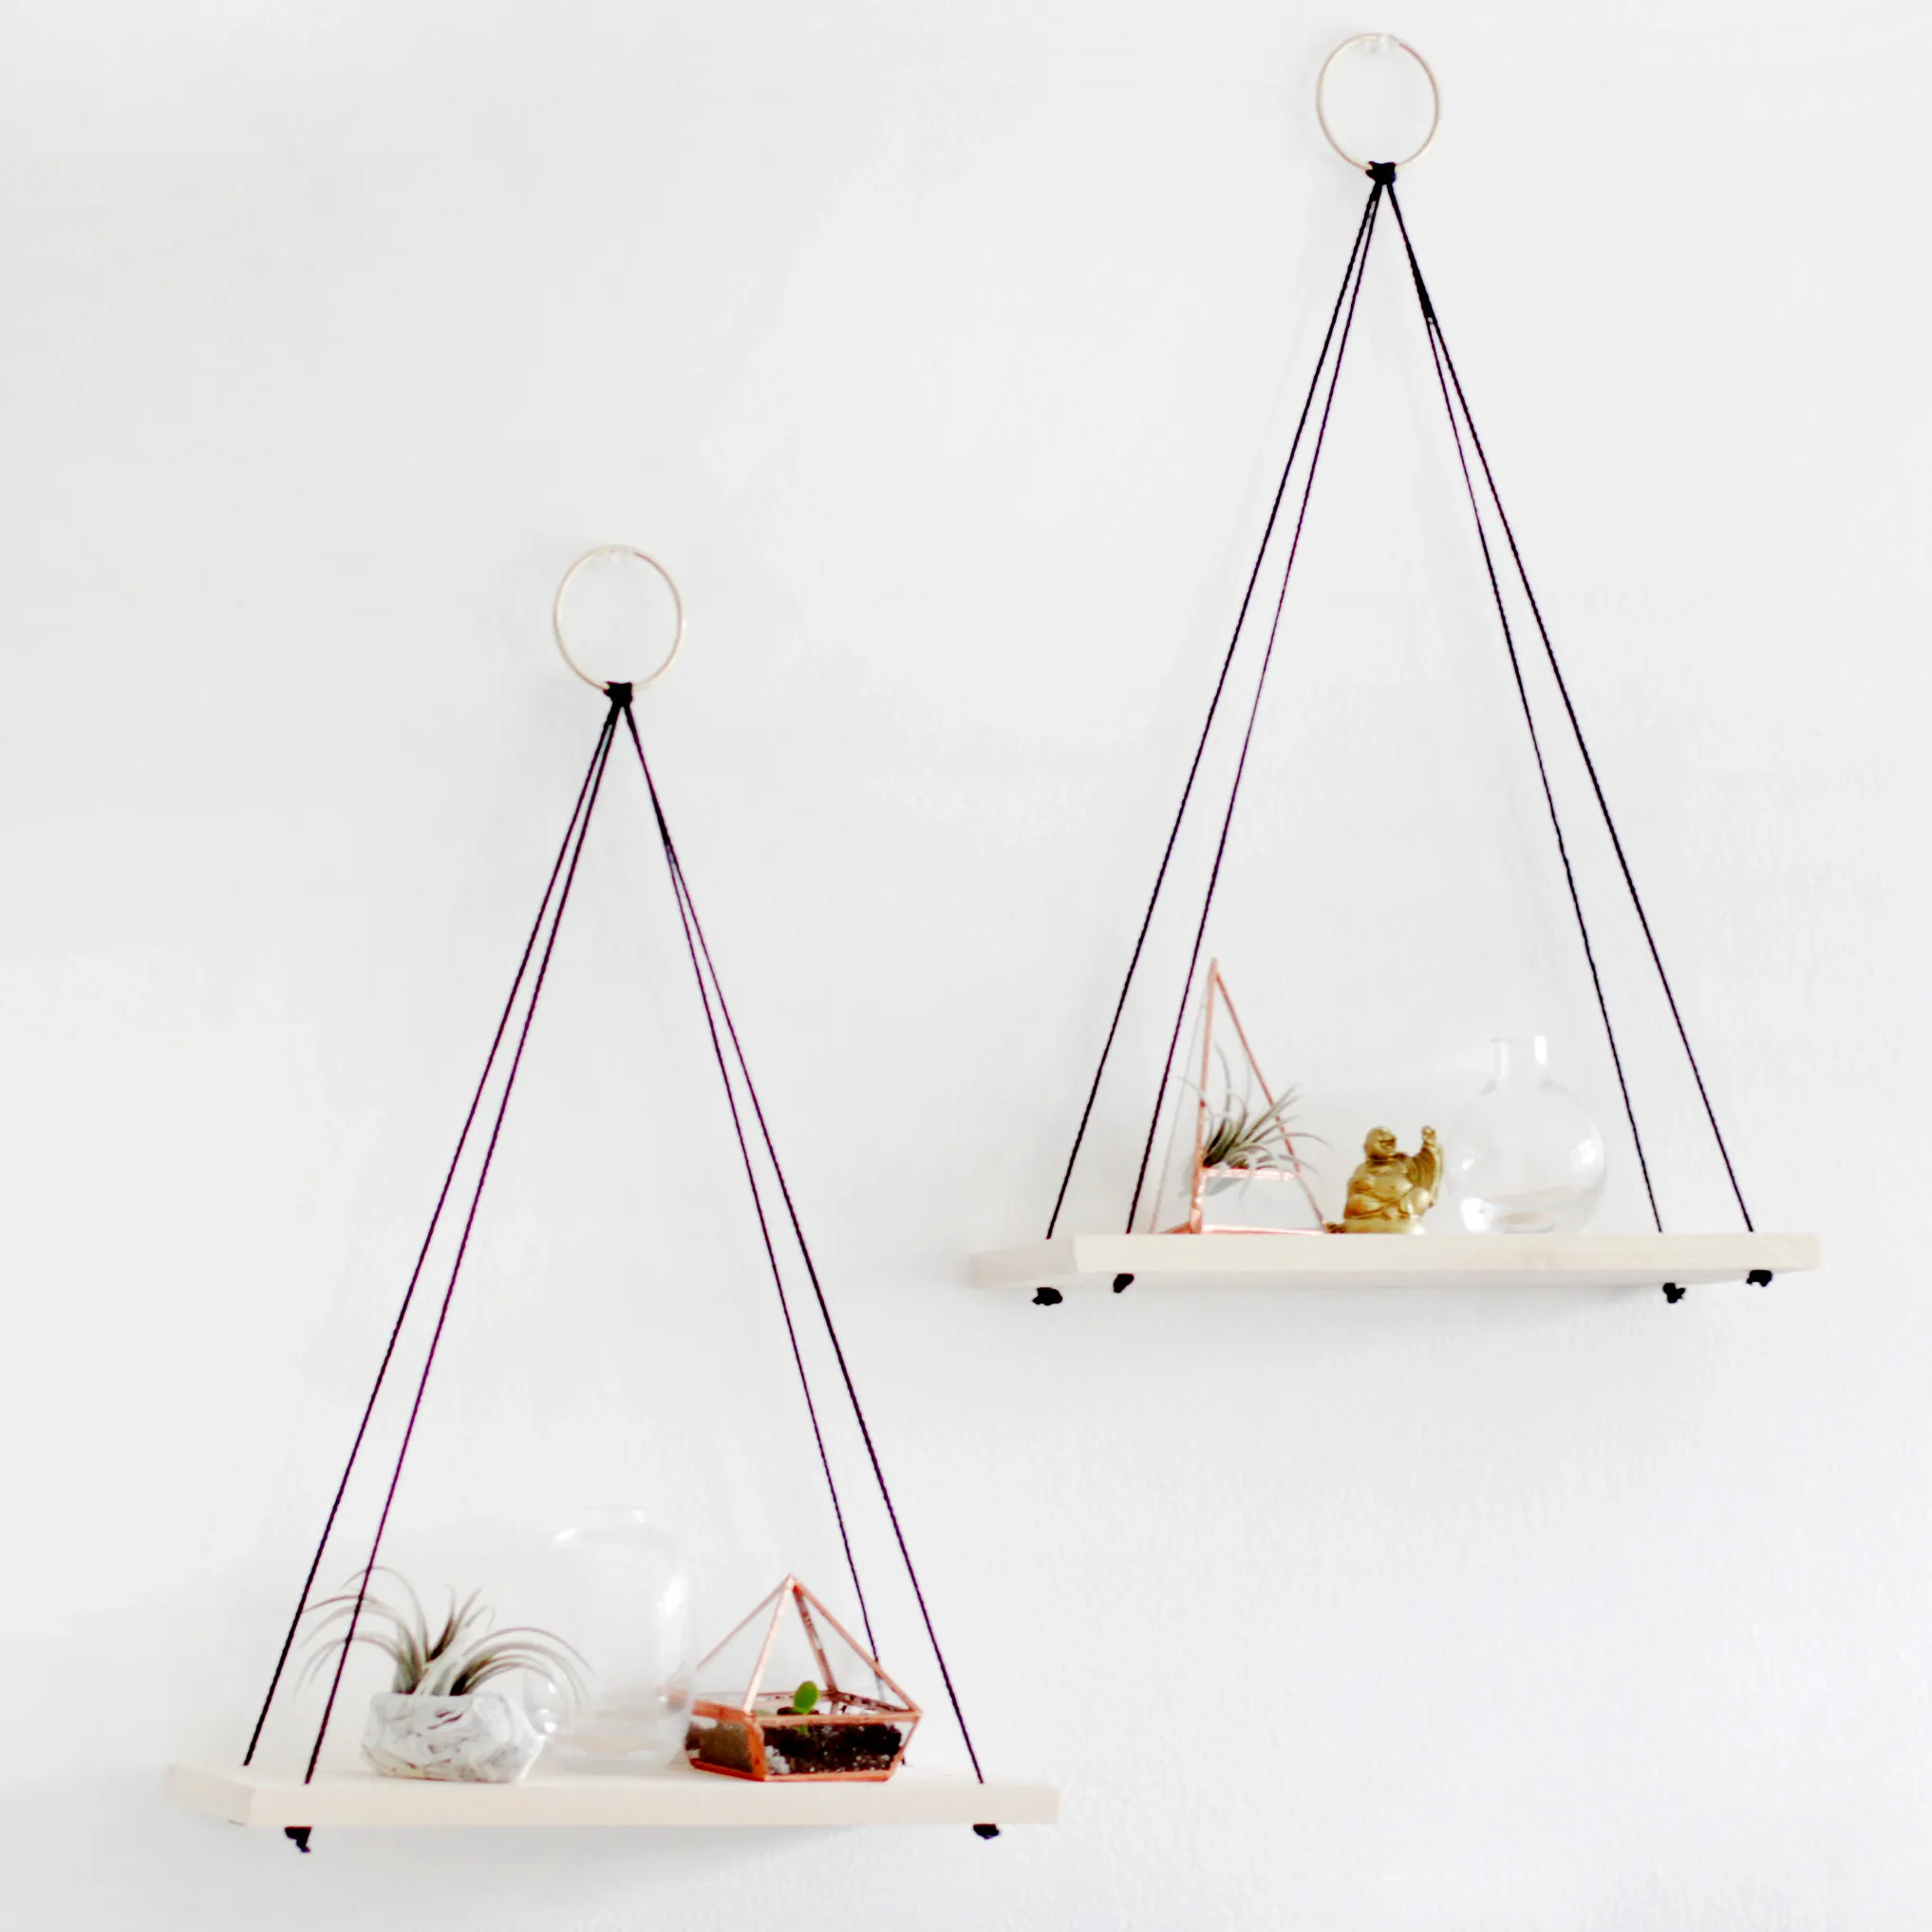
Hang your newly crafted shelves, and watch as they transform your space! Whether you fill them with lush greenery, cherished books, or unique artwork, these shelves promise to add a touch of handcrafted elegance to your décor.
 Hanging Shelves
 Hanging Shelves
 Hanging Shelves
 Hanging Shelves
Image Caption: Hanging the finished shelves and adding decorative elements.
Final Thoughts: The Beauty of Handmade
There’s something truly satisfying about creating functional and beautiful pieces with your own hands. These DIY hanging shelves are a testament to that spirit. They remind us that sometimes, the simplest designs, crafted with care and intention, are the ones that truly elevate our living spaces.
As an artist who deeply values the handmade, I encourage you to embark on this rewarding project. Don’t be afraid to experiment with different wood types, rope colors, or decorative accents. Infuse your unique style and personality into every knot and cut.
Share your creations with us! Leave a comment below with your experience or any unique twists you’ve incorporated. And for more handmade inspiration and unique gift ideas, explore the Robert Kline Art website. Happy crafting!
