Blog
How to Make Handmade Paper from Recycled Materials: A Step-by-Step Guide
Ready to embark on a journey of creativity and sustainability? Here at Robert Kline Art, we believe in the magic of transforming the old into something new and beautiful. In this comprehensive guide, we’ll delve into the art of making handmade paper from recycled materials, a process that is both satisfying and eco-friendly.
Whether you’re a seasoned crafter or a curious beginner, this tutorial will equip you with the knowledge and confidence to create your own unique paper. Let’s dive in!
Gathering Your Papermaking Supplies
Before we begin, let’s gather the necessary tools and materials. Most of these items can be found around your home or at your local craft store:
- Water: The lifeblood of our papermaking endeavor.
- Scrap Paper: Gather those old receipts, junk mail, newspapers, and even those watercolor paintings you thought were beyond saving. The beauty of handmade paper lies in its ability to give new life to discarded treasures.
- Plastic Storage Tub: This will serve as our papermaking vat.
- Kitchen Blender: A trusty tool for transforming paper into pulp. If you’re hesitant to use your everyday blender, consider picking up a used one from a thrift store specifically for crafting.
- Mould & Deckle: These are essential tools for forming sheets of paper. Don’t worry, we’ll guide you through making your own or suggest where to buy one.
- 2 Wood Boards (OR a Sponge & Rolling Pin): These will help us press the water out of our newly formed paper sheets.
- Stiffened Felt Sheets, Towels, Wool Blankets, Cloth, Kitchen Towels, Pellon, Sham-Wows, or other flat absorbent materials: You’ll need these absorbent materials for the couching process (more on that later!).
 paper making, tutorial, diy, how to, handmade paper, papermaking, instructions
Step 1: Prepare the Paper Pulp
- Cut or tear your scrap paper into small pieces, roughly 1 inch squares. This makes it easier for the blender to break down the fibers.
- Soak the paper pieces in water for a few hours or overnight. This helps to soften the fibers and prepare them for pulping.
Expert Tip: “For higher-quality paper, use papers made from strong fibers like cotton rag. Experimenting with different types of paper will yield unique textures and colors in your finished product,” says renowned paper artist, Emily Carter.
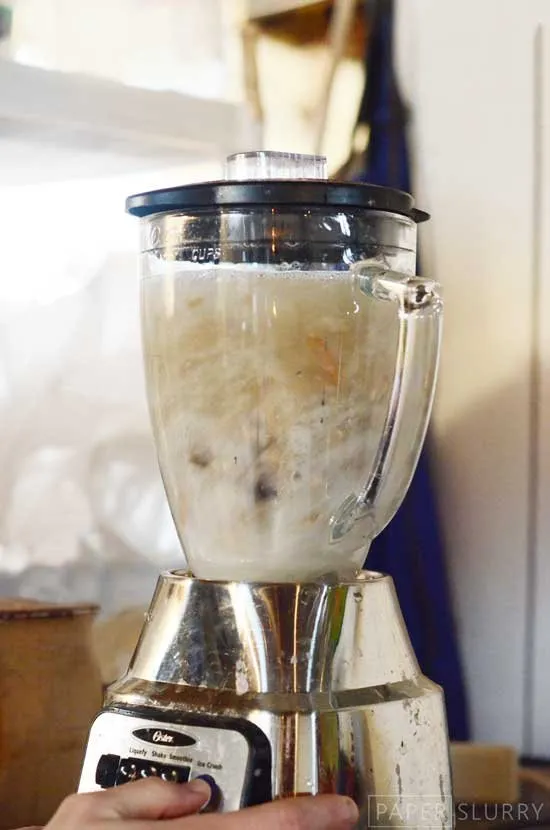 making handmade paper with a blender
- Fill the blender with water and add a handful or two of the soaked paper.
- Blend the mixture until it transforms into a smooth pulp. Avoid overloading the blender to prevent motor burnout.
- Pour the blended pulp into your plastic storage tub, filling it about 1/3 to 1/2 full. Add more water to achieve your desired paper thickness. Remember, a higher pulp-to-water ratio will result in a thicker, more textured sheet.
Step 2: Create a Sheet Using the Mould and Deckle
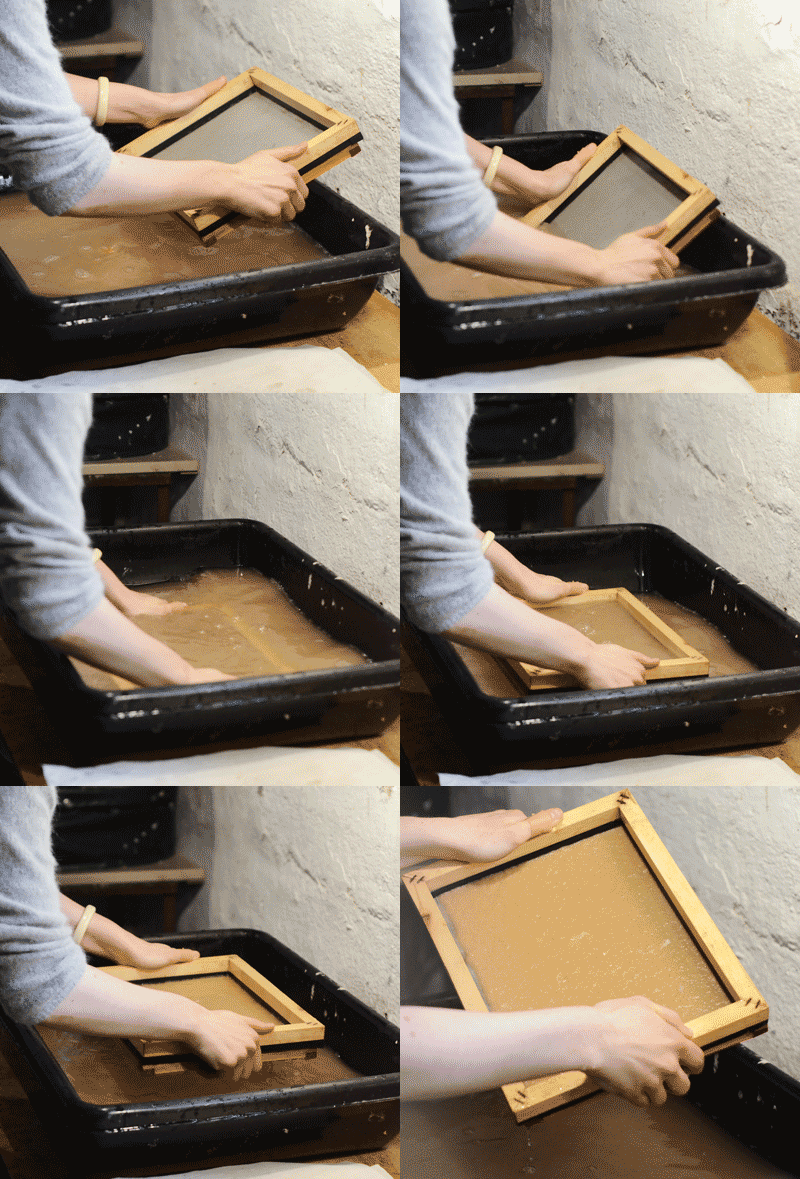
- Stir the pulp mixture in your vat.
- Hold the mould (the frame with the screen) horizontally with the screen facing upwards.
- Place the deckle (the frame without the screen) on top of the mould, ensuring they are aligned.
- Hold the mould and deckle together at a 45-degree angle and submerge them into the pulp vat.
- Gently lift the mould and deckle straight up, scooping a layer of pulp.
- As you lift, gently shake the mould and deckle back and forth and side to side. This helps distribute the fibers evenly and create a uniform sheet. Stop shaking before the water fully drains.
- Allow the water to drip off the mould.
Step 3: Couching: Transferring Your Paper
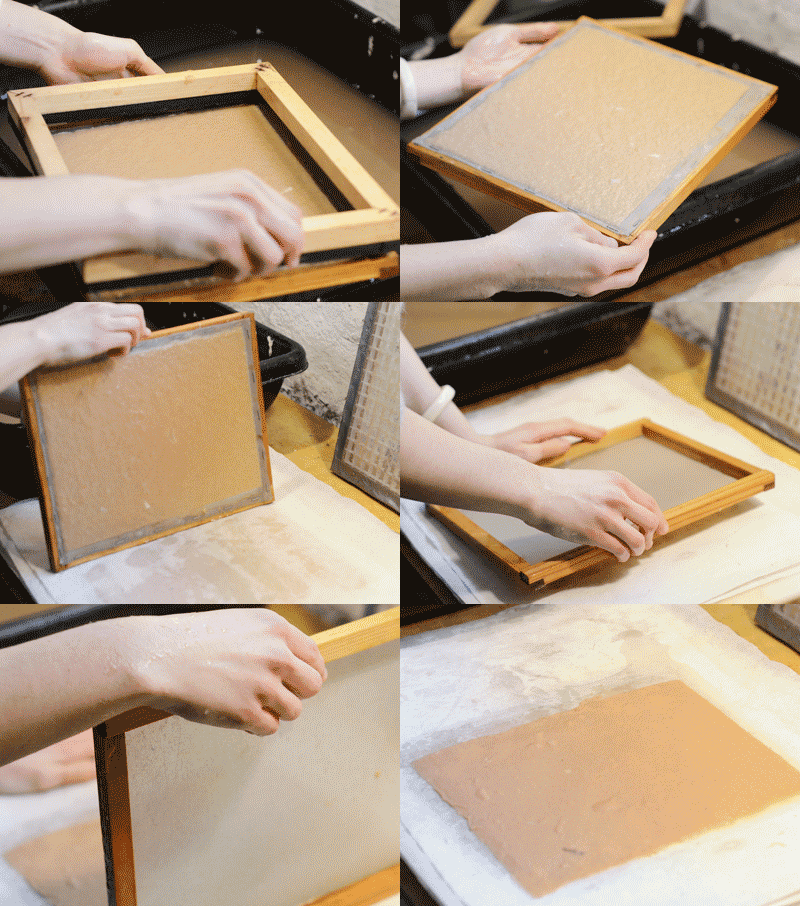
“Couching,” pronounced “koo-ching,” refers to the process of carefully transferring the wet paper sheet from the mould to a flat, absorbent surface.
- Prepare your couching materials by placing a piece of felt or other absorbent material on a flat surface. Have extra pieces ready for layering.
- Carefully remove the deckle from the mould.
- Align one long edge of the mould with the edge of your couching material.
- In a swift and fluid motion, flip the mould over, pressing it onto the couching material. Apply even pressure to ensure the entire sheet transfers.
- Carefully lift the mould away from the couching material. Congratulations, you’ve just couched your first sheet of paper!
Step 4: Pressing: Removing Excess Water
Now, let’s remove the excess water from our paper sheet. You can choose from two methods:
Option 1: Hand Pressing
- Place a piece of pellon or a paper towel over the freshly couched sheet.
- Using a sponge, apply gentle pressure at first, gradually increasing the pressure as much as possible.
- For additional pressure, use a rolling pin or an old paint roller to squeeze out more water.
Option 2: Board Pressing
- Place another piece of felt or absorbent material on top of your couched sheet.
- Continue couching additional sheets, layering felt or absorbent material between each.
- Place a final piece of felt on top of your stack and sandwich it between two wood boards.
- Take the stack to a sturdy, flat surface (like a concrete floor).
- Apply pressure to the top board by standing on it. This will help squeeze out the water.

 " data-load=
Step 5: Drying Your Handmade Paper
The final step is to dry your newly pressed paper. There are several methods you can use:
Option 1: Surface Drying
- Find a flat, non-porous surface such as a smooth wood board, plexiglass, window, or Formica countertop.
- Carefully place your damp paper sheet onto the surface, ensuring the edges are pressed down firmly.
- Allow the paper to air dry for 1-3 days. Drying time will vary depending on the humidity and the paper’s thickness.
- Once dry, gently peel the paper from the drying surface.
Option 2: Exchange Drying
- Gather absorbent materials like blotters, towels, or other dry, flat fabrics.
- Layer the materials, placing your wet handmade paper on top of the first layer.
- Repeat the layering process, creating a stack of absorbent materials and paper sheets.
- Place a wood board or a heavy book on top of the stack to weigh it down.
- Every day, exchange the damp absorbent materials with dry ones. Continue this process until the paper is completely dry.
Option 3: No Restraint Drying
- For a more organic, textured look, simply lay your wet paper sheet on a flat surface and allow it to dry freely. This method will result in wavy, crinkled edges.
Option 4: Dry on Pellon or Cloth
- After pressing the paper, carefully peel the pellon or cloth (with the wet paper still attached) from the couching surface.
- Hang the pellon or cloth with the paper on a clothesline, using clothespins to secure the top edge. The pellon or cloth will act as a support, allowing the paper to dry with a slight wave.
- Once dry (typically 1-2 days), gently peel the paper from the pellon or cloth.
 " data-load=
 " data-load=
Congratulations!
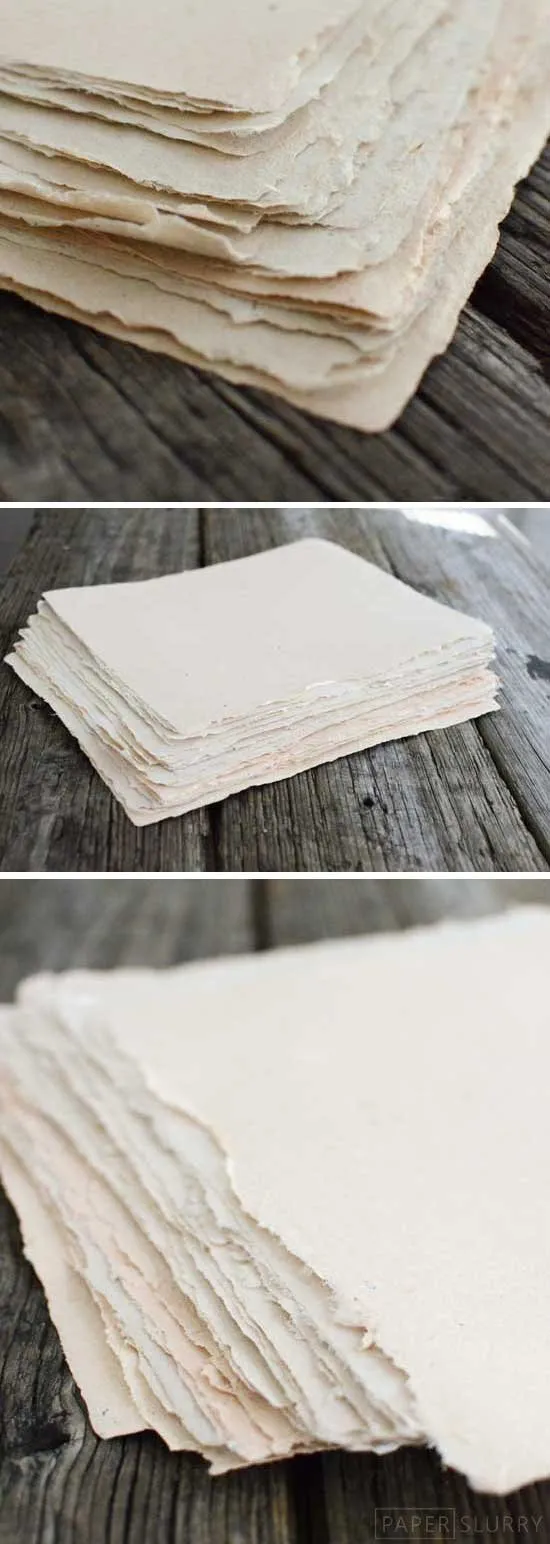
You’ve successfully transformed recycled materials into beautiful, handmade paper! This versatile craft allows for endless creativity and experimentation. Play with different colors, textures, and drying techniques to discover your unique papermaking style.
Don’t forget to share your creations with us! We’d love to see what you come up with. Here at Robert Kline Art, we celebrate the beauty of handmade crafts and the joy of giving new life to old materials.
