Blog
Build Your Own Home Bouldering Wall: A DIY Guide for Climbing Enthusiasts

As an avid crafter and artist at Robert Kline Art, I’m always drawn to projects that combine creativity, functionality, and a touch of adventure. That’s why I’m thrilled to share my experience building a home bouldering wall – a project that has truly transformed my garage into a personal climbing haven!
Remember those days when you longed to climb but couldn’t find the time or resources to visit the gym? I’ve been there! But then I discovered the magic of DIY and built a home bouldering wall that’s perfect for quick training sessions or family fun. If you’re looking for a cost-effective way to fuel your passion for climbing, then building your own wall might be just what you need. Trust me, it’s not as daunting as it sounds!
Planning Your Ascent: Design and Budget
Before you grab your tools, take a moment to meticulously plan your climbing wall. Consider these crucial factors:
- Location: Choose a spacious area with ample headroom. A spare room, garage, or even a sturdy outdoor wall can work.
- Wall Size and Angle: Determine the dimensions that suit your climbing style and skill level. Beginners might prefer a less steep angle (20-30 degrees), while experienced climbers could opt for a steeper challenge.
- Budget: Set a realistic budget for materials. Surprisingly, you can build a fantastic bouldering wall without breaking the bank.
Expert Tip from John Miller, Experienced Climbing Wall Builder: “Utilize free 3D modeling software like Sketchup to visualize your design and experiment with different layouts before starting construction.”
Gathering Your Gear: Essential Tools and Materials
Building a home bouldering wall is remarkably similar to constructing a standard wall, requiring familiar tools and readily available materials. Here’s a list to get you started:
Tools:
- Drill
- Skill Saw or Jigsaw
- Measuring Tape
- Carpenter’s Speed Square
- Hammer
- Allen or T-Handle Wrench (for tightening climbing hold bolts)
Materials:
- Frame: 4’x8′ plywood sheets, 2×4 lumber for studs, wood screws
- Support: Joist hangers, additional lumber for top beam and support posts
- Climbing Surface: T-nuts, climbing holds with bolts
Budget-Friendly Tips:
- Sourcing Plywood: Explore local classifieds or online marketplaces like Craigslist for discounted plywood sheets. Consider using slightly thinner plywood (⅝”) if you want to save on costs.
- Lumber Savings: Look for “farm-grade” or reclaimed lumber at lumber yards or building material suppliers. These options might have some imperfections but are perfectly suitable for a climbing wall and offer substantial cost savings.
- Climbing Holds: Research local climbing hold manufacturers in your area. Some might offer discounts or even free holds to local climbers. You can also find affordable climbing hold sets online.
 Imagine the thrill of conquering your own custom-built climbing wall. It's an exhilarating experience that combines fitness and fun!
Step-by-Step Construction: Your Climbing Wall Blueprint
Once you’ve gathered the necessary materials, it’s time to start building. Follow these steps to construct your very own home bouldering wall:
-
Prepare the Plywood: Drill holes for the t-nuts, spacing them evenly across the plywood sheets. T-nuts will provide secure anchor points for your climbing holds.
-
Build the Wall Frame: Assemble the wall frame on the floor using 2×4 lumber. Use two 2x4s as top and bottom plates, and attach them to vertical studs.
-
Attach Plywood to Frame: Securely fasten the plywood sheets to the front of the stud frames using screws. Use a consistent screw spacing for optimal strength.
-
Position the Wall: Carefully lift and position your wall frame in your chosen location. Use temporary bracing to keep it stable and plumb.
-
Install Support Beams: Install a sturdy top beam using joist hangers to connect it to the vertical wall section and a 4×4 support post.
-
Frame Angled Sections (Optional): If you’re incorporating angled sections, cut 2×6 lumber to the desired angle and attach them to the frame using screws and joist hangers.
-
Attach Plywood to Angled Sections: Securely attach plywood sheets to the angled sections using the same screw spacing as the vertical wall.
-
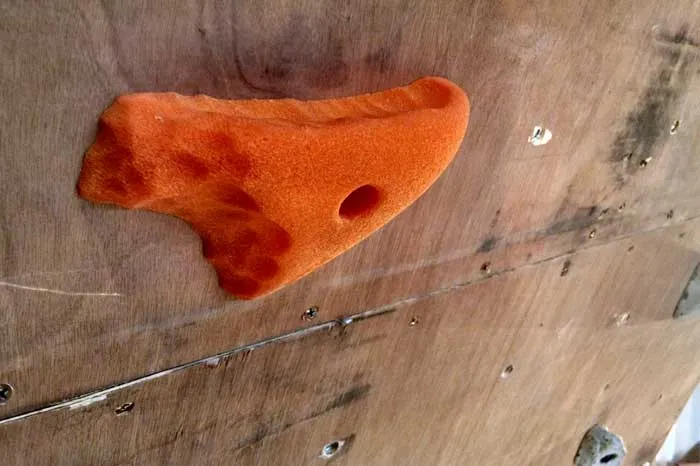
Mount Climbing Holds: This is the fun part! Begin attaching your climbing holds to the plywood using bolts and t-nuts. Experiment with different hold types and arrangements to create challenging climbing routes.
Safety First: Essential Precautions
Climbing, even at home, carries inherent risks. Prioritize safety by following these crucial tips:
- Spotters are Essential: Always climb with a spotter, especially when attempting challenging routes.
- Invest in Crash Pads: Cover the floor beneath your wall with thick crash pads to cushion falls.
- Regularly Inspect Holds and Bolts: Before each climbing session, thoroughly inspect all climbing holds and bolts to ensure they are secure and in good condition.
Embrace the Climb: Your Home Bouldering Wall Awaits
Building your own home bouldering wall is a rewarding project that lets you personalize your climbing experience and provides countless hours of fun and fitness. With careful planning, some basic carpentry skills, and a touch of creativity, you can turn your climbing dreams into a reality.
Now, it’s your turn! What exciting features are you planning to incorporate into your home bouldering wall? Share your thoughts and questions in the comments below. And for more unique DIY projects and craft inspiration, be sure to explore the rest of our website, Robert Kline Art.
