Blog
Building Your Own DIY Outdoor Bar with Built-in Cooler
Hey there, fellow craft enthusiasts! As the summer heat settles in, it’s time to take our crafting endeavors outdoors. Nothing spells summertime bliss quite like a refreshing drink shared with friends and family on a beautifully crafted outdoor bar. And what better way to elevate that experience than by building your very own DIY outdoor bar with a built-in cooler?
At Robert Kline Art, we believe in adding a personal touch to everything we do. In this comprehensive guide, we’ll walk you through the step-by-step process of building this backyard showstopper. You don’t need to be a master craftsman to tackle this project – with a bit of time and the right guidance, you’ll have a stylish and functional addition to your outdoor living space in no time.
Gathering Your Tools and Materials
Before diving into the build, let’s gather all the necessary tools and materials. Having everything on hand will streamline the process and prevent any last-minute trips to the hardware store.
Materials:
- Douglas Fir Lumber:
- 7 pieces of 2″ x 3″ x 8′
- Common Pine Boards:
- 1 piece of 1″ x 4″ x 10′ (for trim)
- 2 pieces of 1″ x 12″ x 12′
- 4 pieces of 1″ x 12″ x 8′
- Pressure-Treated Plywood:
- 1 sheet of 72″ x 25″ x 3/4″ (for the bar top)
- Cooler:
- 1 48-quart cooler
- Outdoor Wood Stain:
- 1 quart (choose your desired color)
- Screws:
- Various sizes (check project steps for specific recommendations)
Tools:
- Measuring Tape: Precision is key!
- Saw: A circular saw or miter saw will be your best friend for this project.
- Drill: For driving screws and pre-drilling holes.
- Screwdriver: Unless you want a serious arm workout, a power drill with a screwdriver bit is highly recommended.
- Level: No one likes a wonky bar!
- Safety Glasses: Protect your eyes from sawdust and flying debris.
- Work Gloves: Keep your hands clean and splinter-free.
- Paintbrush or Paint Sprayer: For applying the wood stain.
Step-by-Step Building Guide
Now that we have our tools and materials prepped, let’s get started:
Step 1: Building the Frame
-
Cut the Douglas Fir: Begin by cutting two of the 8-foot Douglas fir pieces down to 56 1/2″. From the remaining wood, cut two more pieces at 38 1/2″.
-
Create the Initial Frame: Take two more of the 8-foot Douglas fir pieces and cut two additional 38 1/2″ sections. From the leftover wood, cut four 20″ sections.
-
Assemble the Frame: Screw the sections of wood together at 90-degree angles to create the initial rectangular frame (refer to the image below for reference).
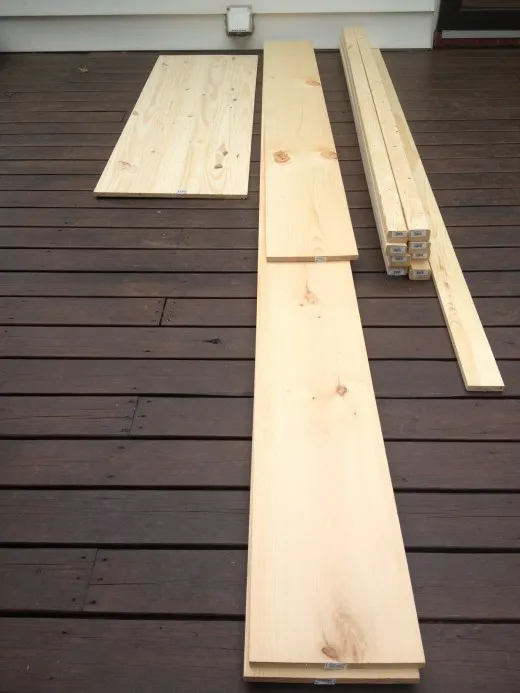
 Supplies for outdoor bar
Step 2: Reinforcing the Bar Structure
- Additional Cuts: Using the remaining Douglas fir, cut a 15″ section and a 16″ section. Then, take three more of the 8-foot pieces and cut them all down to 53 1/2″.
- Strengthen the Frame: Turn the frame around so you’re working “behind the bar.” Take one of the 53 1/2″ sections and mount it horizontally in front of the rear 38 1/2″ vertical sections from Step 1.
- Adding Support: 14″ down from the top of the piece you just installed, affix another 53 1/2″ section horizontally to the front of the same 38 1/2″ vertical sections.
- Final Support: Repeat the previous step to affix the remaining 53 1/2″ section to the front 38 1/2″ vertical sections.
- Center Supports: Measure 27 1/4″ from the left side of the frame. Mount the 16″ section of 2″ x 3″ between the front and back top crossbars at this point. Directly below this 16″ section, mount the 15″ section, connecting the upper 53 1/2″ crossbar to the lower one.
Step 3: Enclosing the Bar
-
Panel Preparation: Take the two 1″ x 12″ x 12′ common pine boards and one of the 1″ x 12″ x 8′ boards. Cut these into nine sections of 39 1/4″.
-
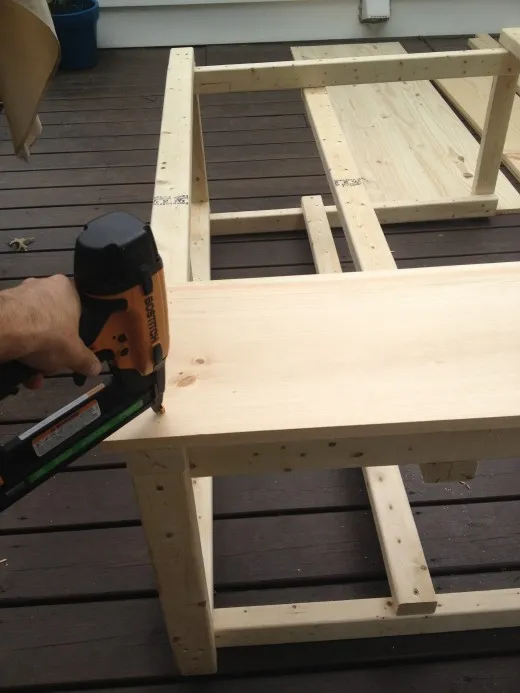
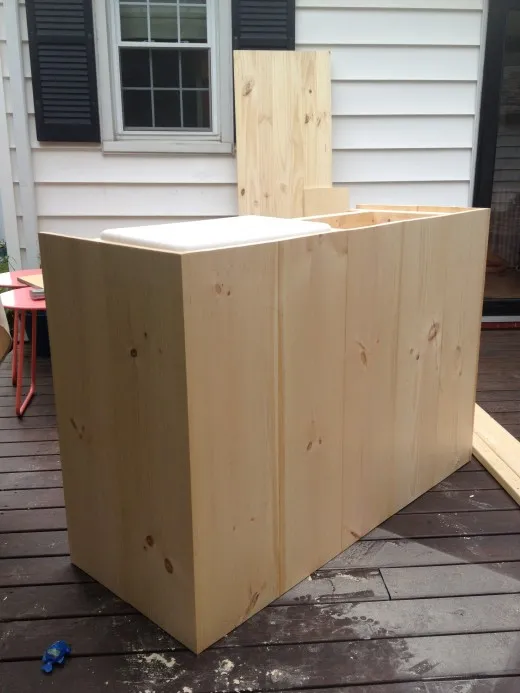
Wrap the Frame: Lay the frame down on its back. Carefully wrap the frame with the nine cut sections, creating the bar’s front and side panels. You should have five panels across the front and two on each side.
-
Panel Alignment: Ensure the bottom of these panels is flush with the bottom of the frame. The top should overhang by 3/4″.
 Slide1
 Slide1
 buildingsides
 sidescompleted
Step 4: Installing the Shelf
-
Cut the Shelf Supports: Use the remaining 1″ x 12″ pine boards to cut supports for the interior shelf. The length of these supports will depend on the desired depth of your shelf.
-
Install the Shelf Supports: Secure the shelf supports to the interior sides of the bar frame at your desired height.
-
Cut and Install the Shelf: Measure the interior width of the bar frame. Cut the remaining 1″ x 12″ x 8’ board to this length to create the shelf. Place the shelf on top of the supports and secure it with screws.
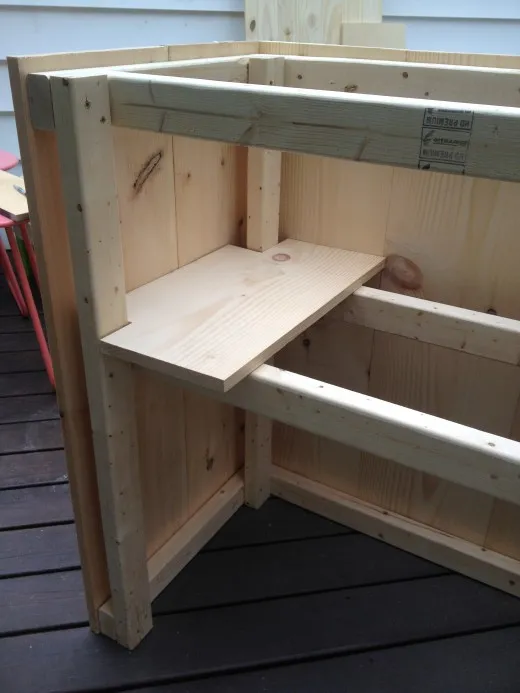 cutoutonshelf
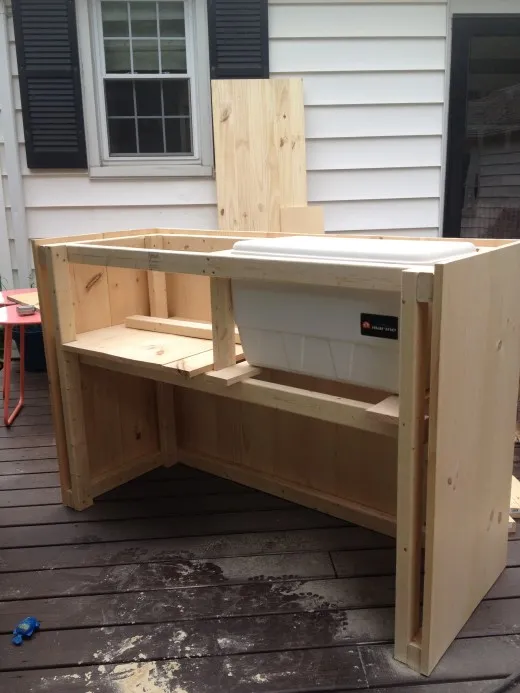 OUTDOORBARSHELF
Step 5: Framing the Cooler Door
-
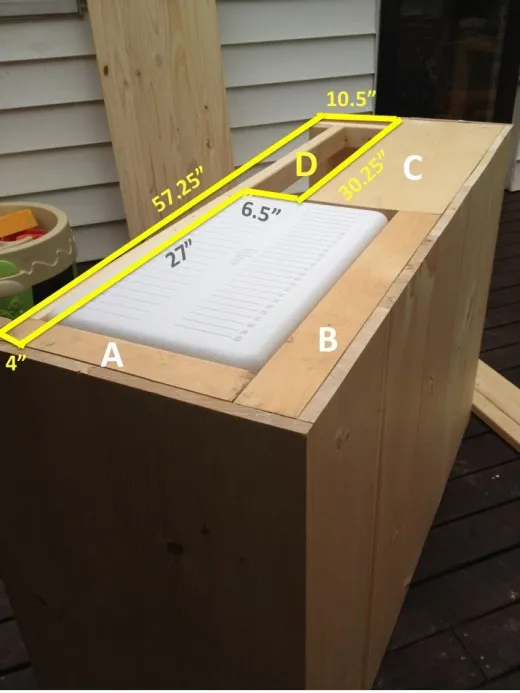
Measure and Cut: You’ll need to cut four sections of wood from a piece of 1″ x 12″ pine board to create the frame for the cooler door. The dimensions are:
- A: 14 1/2″ x 2 1/2″
- B: 26 1/2″ x 3″
- C: 30 1/4″ x 11 1/4″
- D: Refer to the photo below for the measurements.
 Slide1
 -
Assemble the Cooler Door Frame: Using the cut pieces, assemble the frame for the cooler door. This frame will be installed on the bar top, providing access to the cooler.
Step 6: Creating the Bar Top
-
Measure and Cut the Bar Top: Since we’re incorporating a built-in cooler, one side of the bar top will be hinged, allowing access to the cooler. Measure and cut the 72″ x 25″ x 3/4″ pressure-treated plywood sheet to create the two sections of the bar top.
-
Cut the Trim: Cut the 1″ x 4″ x 10′ common pine board into two pieces that are 22 1/2″ long (for the sides) and one piece that is 59 1/2″ long (for the front).
-
Attach Cooler Top: Unscrew the top of your cooler. This will be attached to the underside of the finished bar top section that covers the cooler.
-
Assemble the Bar Top: Attach the bar top sections to the frame. Remember, one side will be hinged to open, while the other will be fixed in place.
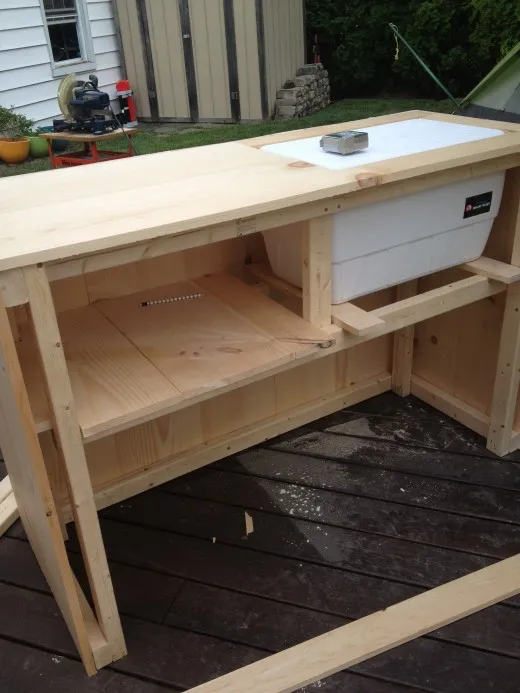 topofcooler
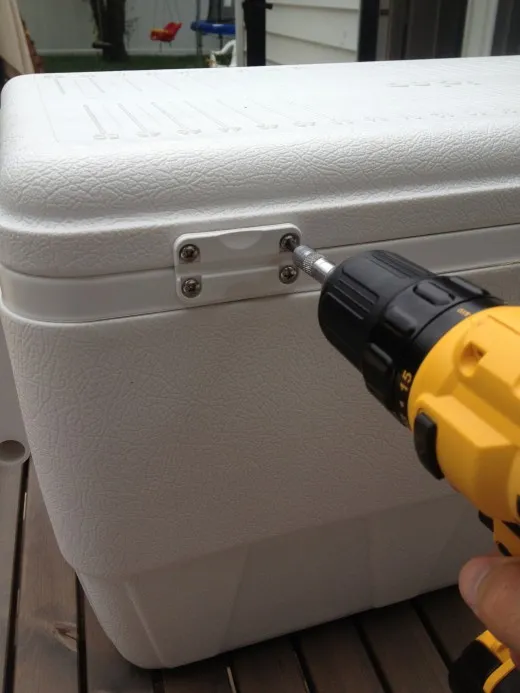 unhingecooler
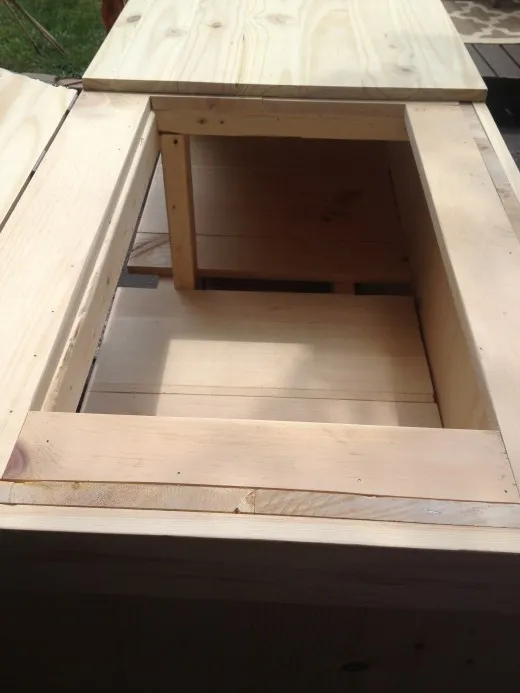 finishedtop
Step 7: Adding the Finishing Touches
-
Staining the Bar: Now for the fun part – adding color and protection! You can use paint or stain for this step. If using stain, apply it evenly to all surfaces of the bar, including the underside of the bar top. A paint sprayer works wonders for this, but a good old-fashioned brush works well too!
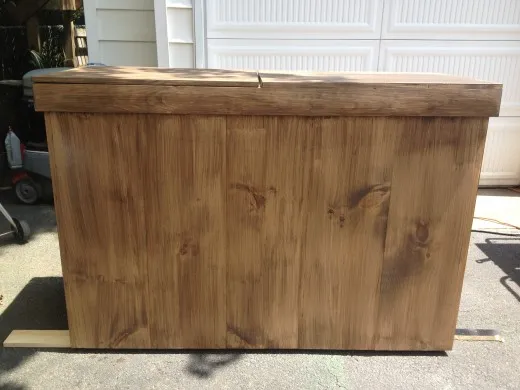 finishedstain
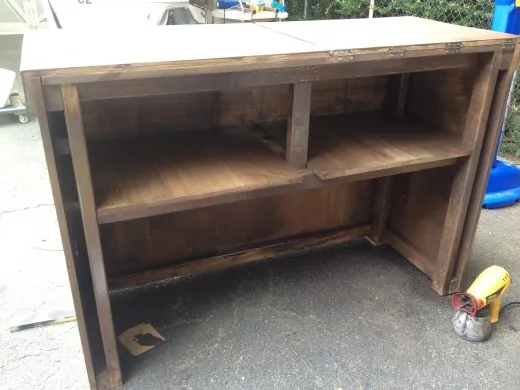 finishedstainbackside
Step 8: Time to Relax and Enjoy!
Congratulations! You’ve officially built your very own DIY outdoor bar with a built-in cooler. Invite your friends and family over, mix up some refreshing drinks, and let the good times roll!
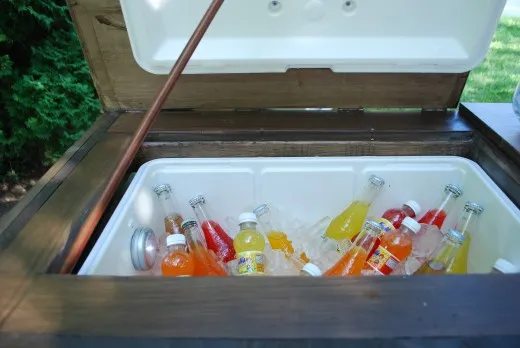 outdoor bar with built in cooler
 outdoor bar with built in cooler
 outdoor bar with built in cooler
 outdoor bar with built in cooler
 outdoor bar with built in cooler
 outdoor bar with built in cooler
 outdoor bar with built in cooler
 outdoor bar with built in cooler
 DSC_0408
 DSC_0418
Tips from Robert Kline Art
Here are a few extra tips to ensure your DIY outdoor bar project is a resounding success:
- Double-Check Your Measurements: I know I’ve said it before, but accurate measurements are crucial in carpentry. Take your time and measure twice (or even three times!) before making any cuts.
- Pre-Drill Holes: When working with hardwoods, pre-drilling holes before screwing pieces together can prevent splitting and make assembly much smoother.
- Sand for Smoothness: Before applying stain or paint, give all surfaces of your bar a good sanding. This will eliminate any rough edges and create a professional-looking finish.
- Consider Adding Personal Touches: This is your chance to let your creativity shine! Add some string lights, decorative hooks for bar tools, or even a chalkboard paint section for a fun menu.
Remember, at Robert Kline Art, we believe that anyone can create beautiful and functional items with their own two hands. Don’t be afraid to put your own spin on this project and make it uniquely yours.
Let me know in the comments below if you have any questions. Happy crafting!
Looking for more handcrafted inspiration? Explore the Robert Kline Art website for unique, one-of-a-kind gifts and DIY project ideas!
