Blog
Building a Floating Deck: A DIY Guide to Enhance Your Backyard
Hey there, fellow DIY enthusiasts! Robert Kline here, your guide to all things handmade and crafty. Today, we’re diving into the world of woodworking with a project that’s both rewarding and surprisingly achievable: building a floating deck.
A few summers back, I transformed my own backyard with a charming 10′ x 12′ floating deck, and believe me, if I can do it, you can too! This guide will walk you through the process step-by-step, sprinkled with my own experiences and tips to ensure your deck-building journey is smooth sailing.
Planning and Preparation: Laying the Groundwork
Before we pick up a hammer, let’s get organized.
1. Local Regulations: First and foremost, familiarize yourself with your local building codes and obtain any necessary permits. Requirements for joist spacing, deck height, and even material choices can vary.
2. Material Roundup: Based on my 10′ x 12′ deck, here’s a list of materials you’ll need. Adjust the quantities based on your desired deck size:
- 12 Deck Blocks
- 4 – 10′ 2×6 Brown Pressure Treated Wood (Beams)
- 10 – 14′ 2×6 Brown Pressure Treated Wood (Joists)
- 1 – 8′ 4×4 (Posts)
- 1 Roll of Landscape Fabric
- 1 Box of Landscape Staples
- 12 Hurricane Ties & Screws
- Joist Hangers
- 1 Small Pail 3″ Galvanized Nails
- Hidden Flange Joist Hangers & Screws
- 26 – 12″ Deck Boards
- 1 – 14″ Deck Board (Border)
- 1 Box Deck Screws
Pro-Tip: Pressure-treated lumber is your best bet for outdoor projects as it resists moisture and insects.
Building Your Floating Deck: From Foundation to Finishing Touches
Now, let’s roll up our sleeves and get building!
Setting the Stage: Footing Placement
-
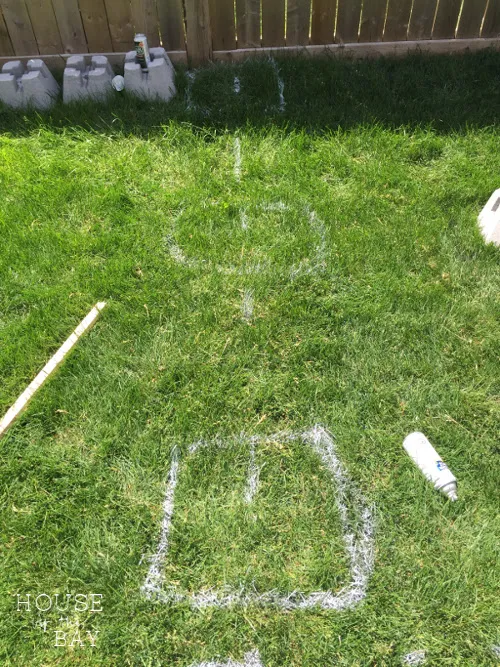
Mark and Dig: Using spray paint, outline the placement of each deck block, leaving a slightly larger area for digging. I spaced my footings evenly within the 10′ x 12′ area, allowing for a 12″ overhang for the rim joist.
 floating_deck_spray_paint
Spray paint helps visualize the footing placement. -
Leveling is Key: Dig down about 3-4 inches for each footing, ensuring the base is as level as possible. If your yard has a slope, you may need to adjust the depth to maintain a consistent deck height.
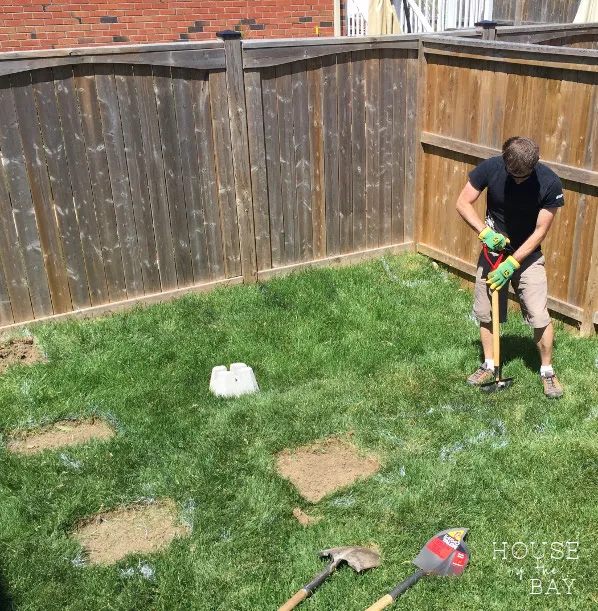 floating_deck_digging
Digging and leveling ensures a stable foundation. -
Sturdy Foundation: Fill each hole with a layer of pea gravel, compact it well, and set a deck block on top. Double-check the levelness of each block. This step is crucial for a stable deck.
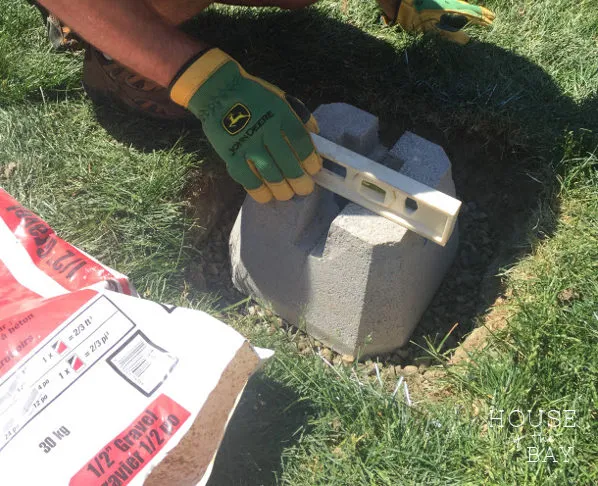 floating_deck_level_block
Leveling each block ensures a flat and stable deck surface.
Framing the Deck: Beams, Posts, and Joists
-
Setting the Cornerstone: Choose a corner as your starting point and determine your desired deck height. This corner will be your benchmark for levelness. I opted for the highest point in my yard.
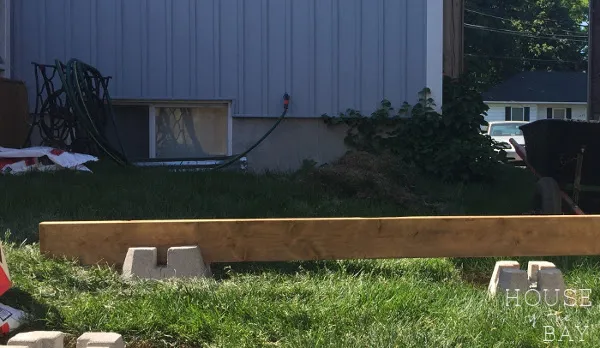 floating_deck_corner
Start with a corner as the benchmark for levelness. -
Posts for Support: Cut 4×4 posts to size and position them within the footings to support the beams. Ensure all posts are level with one another – this is non-negotiable!
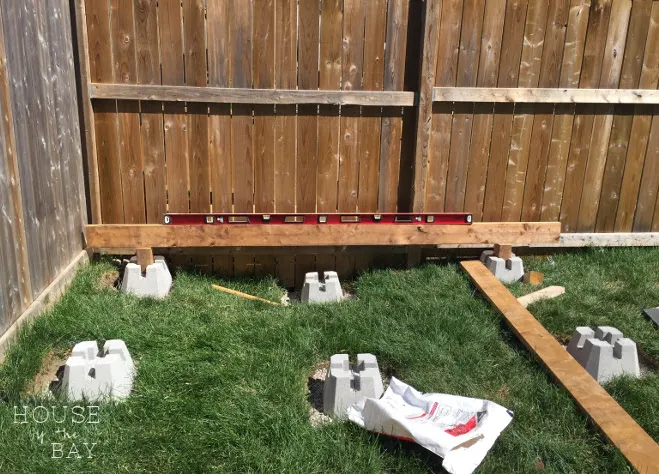 floating_deck_level_beam
Level posts are critical for a structurally sound deck. -
Beam Installation: Securely attach the beams atop the posts using hurricane ties and screws.
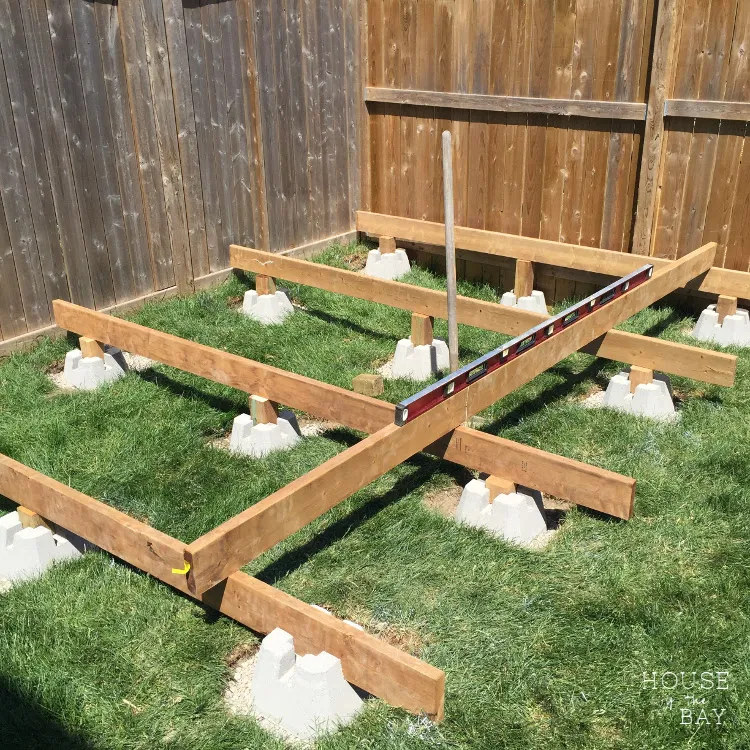 floating_deck_level beams
Securely fastened beams provide the framework for the deck. -
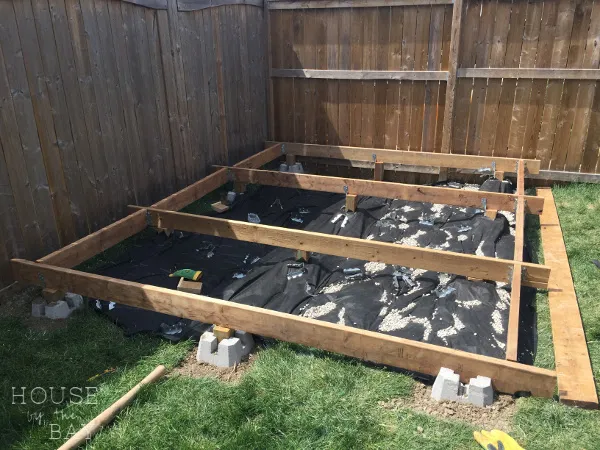
Weed Barrier (Optional): If you’re like me and prefer a weed-free zone, lay down a layer of landscape fabric before installing the joists. This step saves you from battling pesky weeds later on.
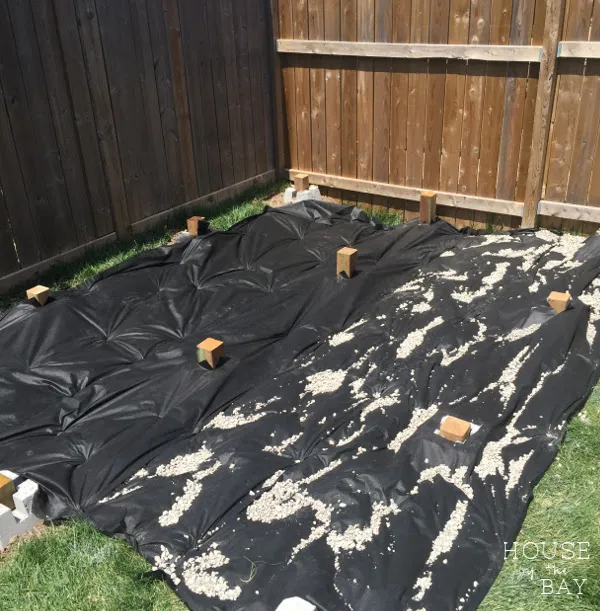 floating_deck_weed_sheet
A weed barrier keeps your deck looking neat and tidy. -
Joist Placement and Installation: Mark the joist placement, maintaining a consistent spacing (16″ on center in my case). Install joist hangers to ensure the joists are flush with the beams.
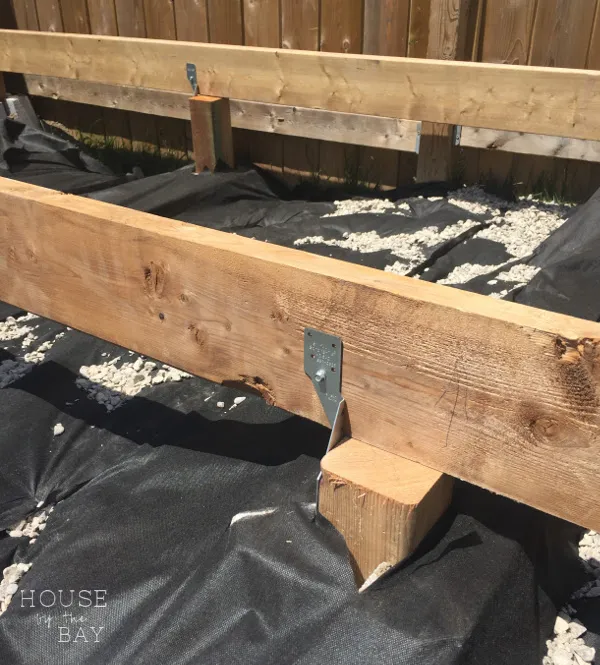 floating_deck_ties
Joist hangers ensure proper support and alignment.Pro-Tip: Enlist a helping hand! Having someone to assist with measuring, cutting, and installing the joists makes the process much smoother.
 floating_deck_joists
Installing the joists is a rewarding step towards completion. -
Rim Joist Installation: Install the rim joist(s) along the outer edge of the beams using deck screws. This provides a finished look and helps hide the footings. Depending on your deck placement, you may need special concealed-flange joist hangers.
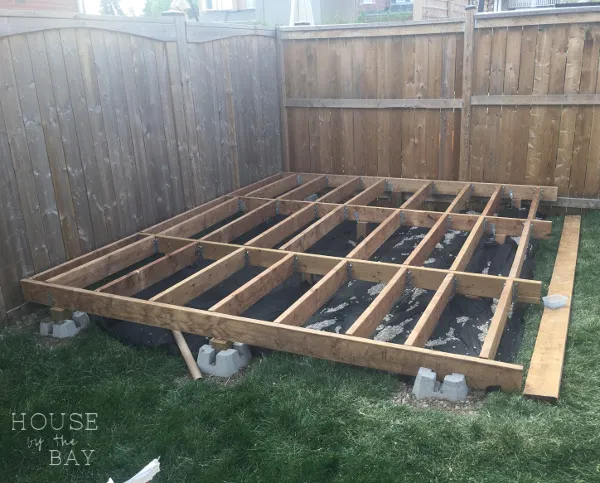 floating_deck_rim_joist
The rim joist adds a polished edge to the deck frame.
Adding the Deck Boards: Bringing Your Vision to Life
-
First Board Placement: Starting from one end, position your first deck board, running parallel to the beams. Use deck screws to attach it securely to the joists.
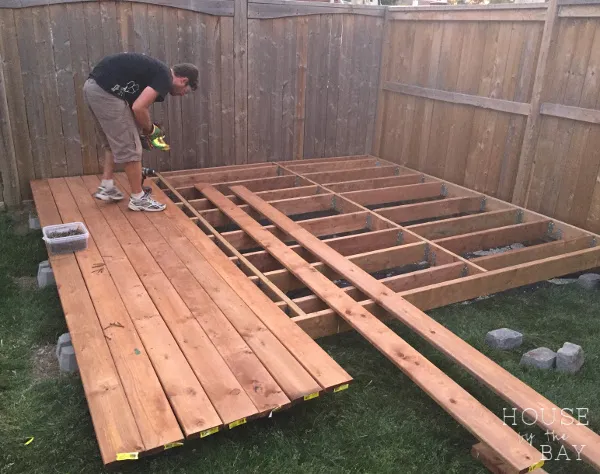 floating_deck_boards
Attaching the deck boards is a satisfying visual transformation. -
Consistent Spacing: Maintain a consistent spacing between boards, taking into account whether your boards are dry or have moisture. Dry boards may require a small gap for expansion, while moist boards can be installed closer together.
-
Finishing Touches: Once all deck boards are in place, trim the ends using a circular saw to align with the rim joist.
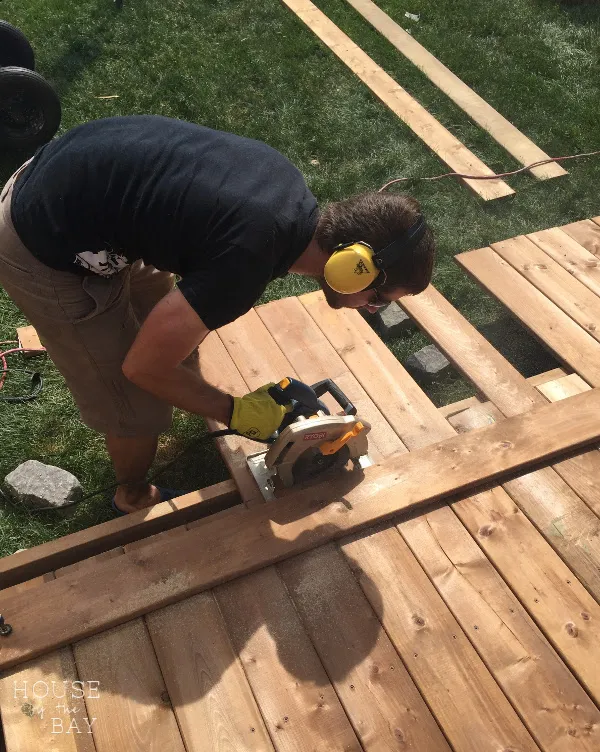 floating_deck_trim
Trimming the edges gives the deck a clean and professional look. -
Adding a Border (Optional): To elevate the aesthetic, create a border using deck boards with mitered corners. This adds a touch of elegance and sophistication.
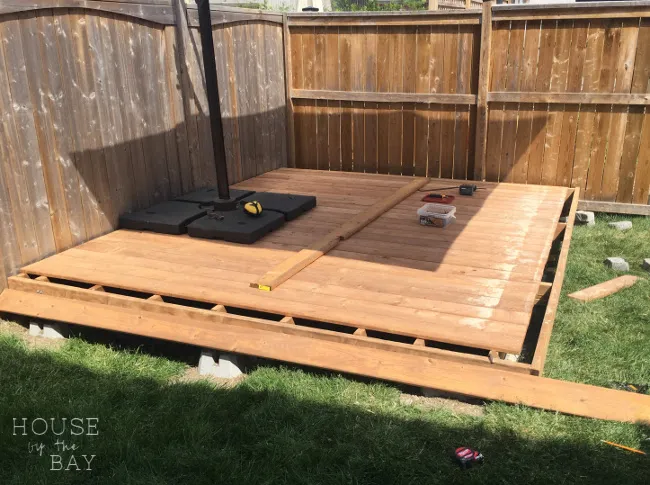 floating_deck_almost done
A border adds a touch of sophistication and visual appeal.
Admiring Your Handiwork: Enjoying Your New Outdoor Oasis
Congratulations! You’ve successfully built your very own floating deck.
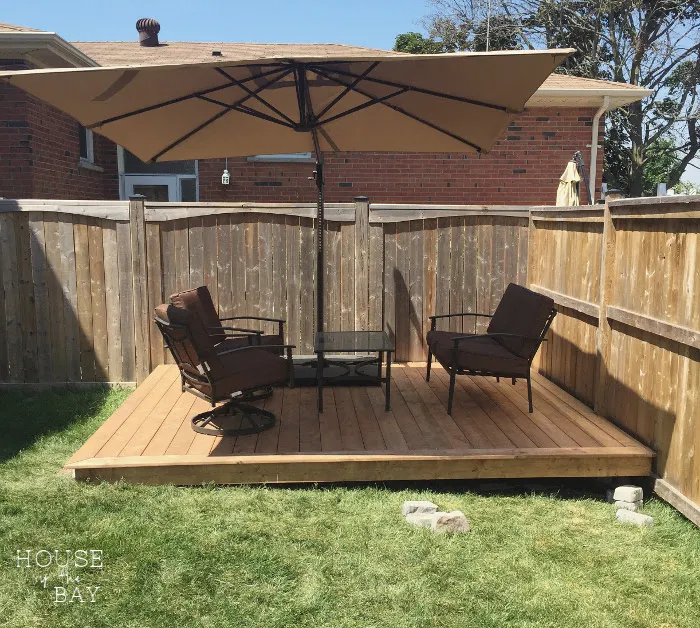 class=
Step back, admire your work, and enjoy your new outdoor space!
To prevent critters from taking up residence under your deck and for a polished final look, consider adding some skirting around the perimeter.
From Deck to Décor: Explore More Handmade Inspiration
Building a floating deck is a fantastic way to enhance your outdoor living space while flexing your DIY muscles. It’s a testament to the power of handmade creations and the satisfaction that comes from building something with your own two hands.
Ready to infuse your backyard with more handmade charm? Check out these inspiring DIY projects:
-
DIY Stone Flowerbeds: Create stunning flowerbeds that complement your new deck.
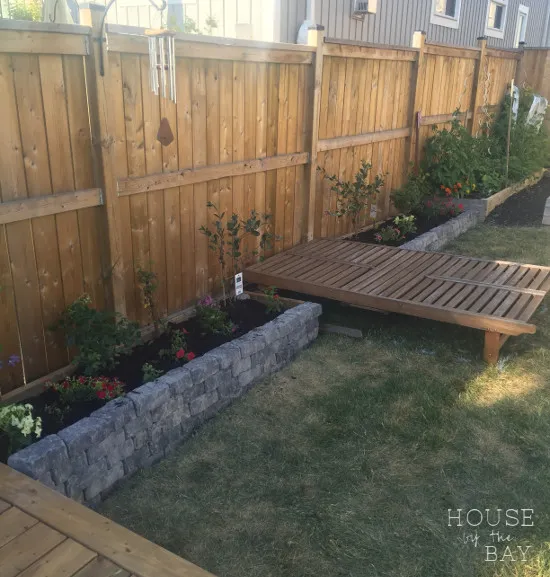 diy stone flowerbeds
Beautiful stone flowerbeds perfectly complement the deck. -
Raised Vegetable Garden Tutorial: Embrace your green thumb with a bountiful raised garden.
Let your creativity blossom! Don’t forget to share pictures of your finished deck in the comments below. I can’t wait to see your masterpieces.
For more handmade inspiration and unique DIY gift ideas, browse through the collection on the Robert Kline Art website.
Happy crafting!
