Blog
Unlock Hidden Potential: Building DIY Under-Stair Storage Drawers
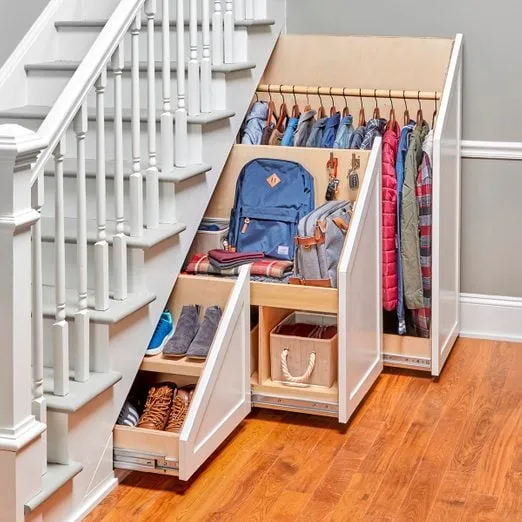
Hey there, fellow DIY enthusiasts! Have you ever looked at that awkward space under your stairs and thought, “There’s gotta be a better use for this”? Well, you’re not alone. As an avid crafter and advocate for smart storage solutions, I’m here to tell you there absolutely is! Today, we’re diving into the world of under-stair storage drawers, a project that’s not only practical but adds a touch of custom craftsmanship to your home.
Why Under-Stair Storage Drawers?
Let’s face it, most builders treat the space under the stairs as an afterthought, sealing it up with drywall. But why waste this valuable real estate? Here at Robert Kline Art, we believe in maximizing every inch of your home. These drawers offer:
- Organized Storage: Say goodbye to clutter! Store shoes, coats, books, or anything else that needs a home.
- Customizable Design: Tailor the size and number of drawers to fit your exact storage needs.
- Visual Appeal: Transform an unused area into a stylish and functional part of your home.
Gathering Your Tools and Materials
Before we get started, let’s make sure you have everything you need. This project does require some woodworking skills and tools, but don’t be intimidated! With a bit of patience and the right guidance, you can totally tackle this.
Tools:
- Circular Saw
- Table Saw
- Brad Nail Gun
- Drill Driver
- Orbital Sander
- Framing Square
- Combination Square
- Putty Knife
- Caulk Gun
- 2-ft. Level
Materials:
- 1 x 6 x 8-ft. Poplar (for trim)
- 1/2-inch & 3/4-inch Baltic Birch Plywood
- 1-1/4-inch Wood Screws
- 2-inch & 2-1/4-inch Construction Screws
- 1-3/4-inch Extra Heavy Duty Drawer Slides (500 lb. capacity)
- 218-gauge Brad Nails (5/8-inch, 1-1/4-inch, 2-inch)
- Wood Glue
- Primer
- Satin Enamel Paint
- Waterborne Polyurethane
- Shims
- Spackling Compound or Wood Filler
Building Your Under-Stair Storage Drawers: A Step-by-Step Guide
Now for the fun part – the actual building! We’ll break this down into manageable steps.
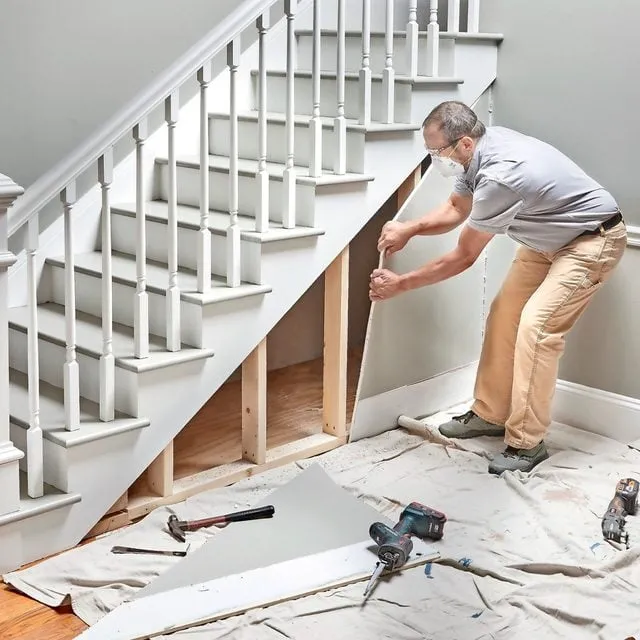
Step 1: Opening the Wall
- Safety First! Before you start tearing down drywall, make sure there are no electrical wires or plumbing lines in the area.
- Carefully remove the baseboard and drywall to expose the space under the stairs.
- I always recommend cutting a small inspection hole first, just to be safe!
 Inspecting the wall before cutting
Step 2: Reframing for Drawers
- Remove existing studs within the opening, salvaging what you can.
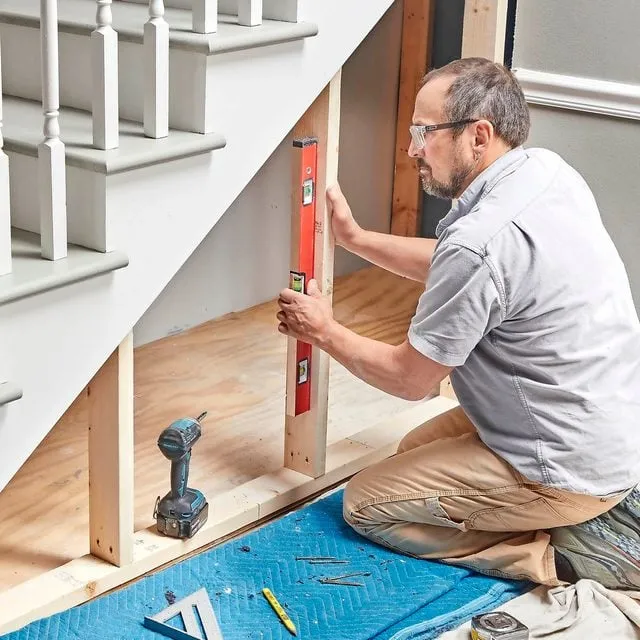
- Frame out the opening for your drawers using new studs. Remember to account for the width of your drawers and any trim!
- Ensure your framing is plumb and square to avoid future headaches.
 Framing the under-stair opening
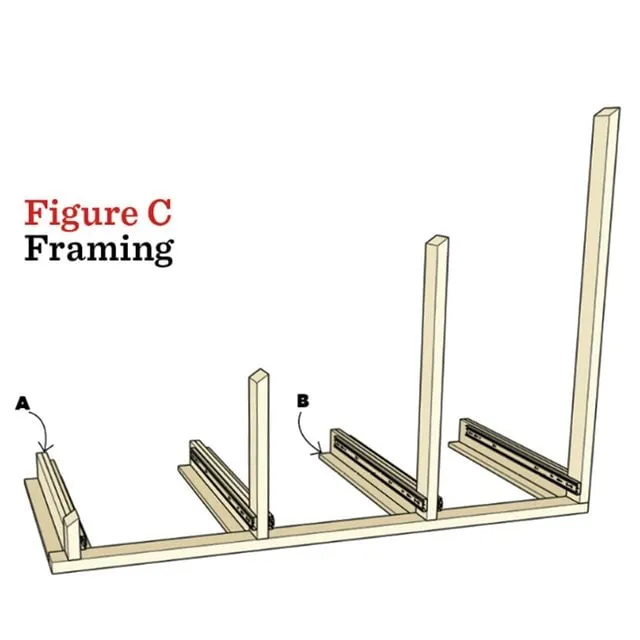
Step 3: Drawer Slide Support System
- Create T-shaped supports for your drawer slides using plywood scraps. These provide a solid mounting point.
- Securely attach the supports to the framing using construction adhesive and screws.
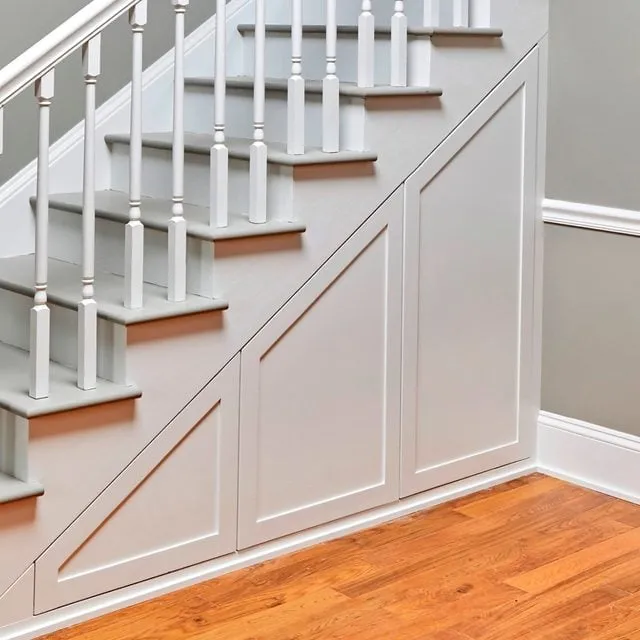 Building drawer slide supports
Step 4: Installing the Drawer Slides
- Install your drawer slides onto the supports. Make sure they’re perfectly level to prevent drawers from jamming!
- The type of slides I recommend don’t separate, so follow the manufacturer’s instructions for proper installation.
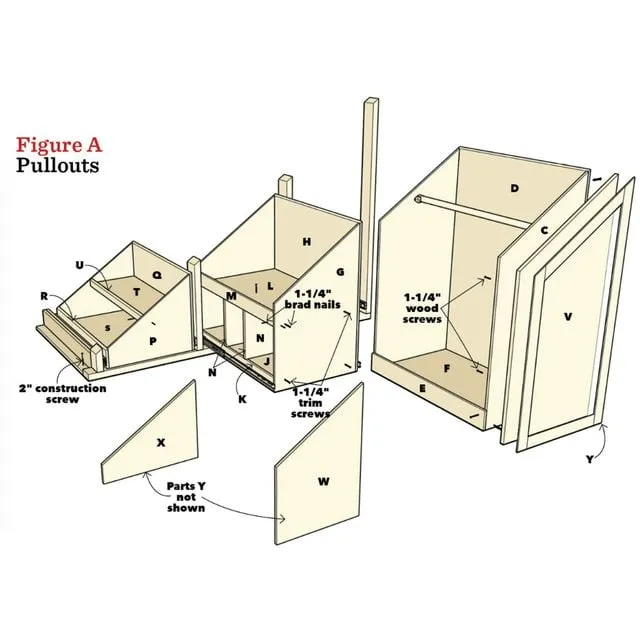 Attaching the drawer slide supports
Step 5: Building the Drawer Boxes
- Measure carefully to determine the correct dimensions for your drawer boxes. Remember to account for the slides and any clearance needed.
- Assemble the drawer boxes using wood glue and brad nails, adding screws for extra strength.
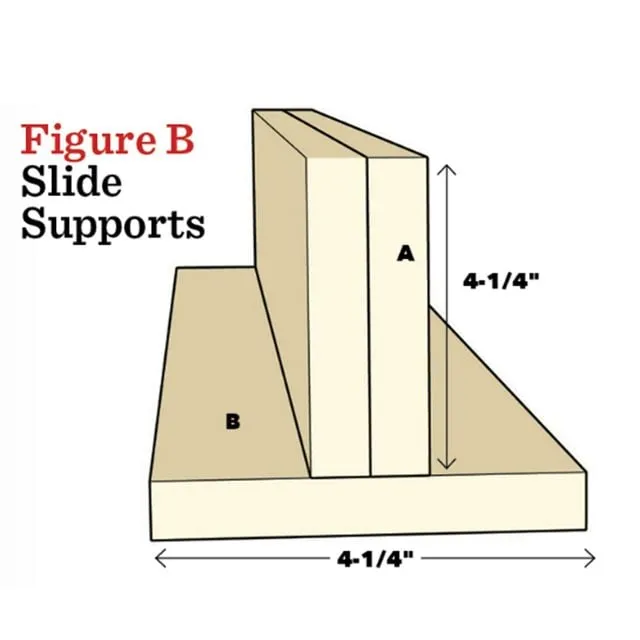 Diagram of drawer slide and support measurements
Step 6: Crafting Drawer Fronts
- To achieve that classic frame-and-panel look, I like to use a hardwood frame around the plywood drawer fronts.
- Cut the frame pieces and attach them to the plywood using glue and brad nails.
 Attaching framing for the drawer openings
Step 7: Finishing Touches
- Fill any gaps or nail holes with wood filler and sand smooth for a professional finish.
- Prime and paint your drawer fronts in your desired color. I always recommend at least two coats for durability.
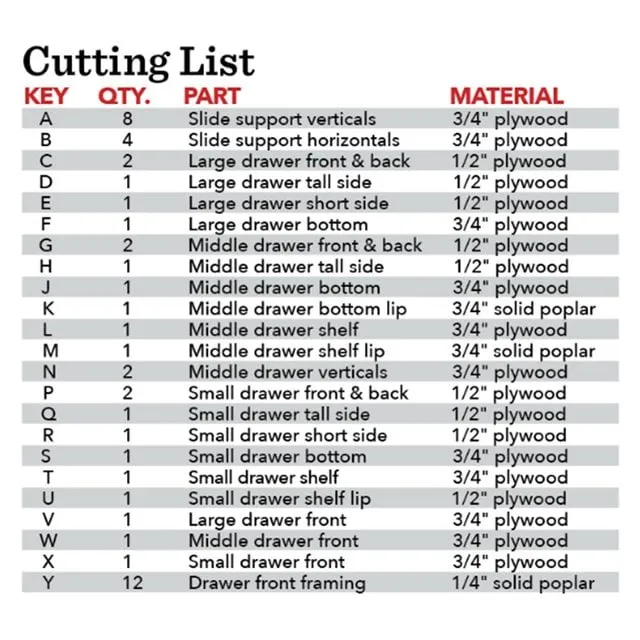 Project cut list
Step 8: Installing the Drawers
- Attach the drawer boxes to the slides, ensuring they move smoothly.
- Now for the tricky part – installing the drawer fronts! Use shims to create even gaps and attach them securely.
 Attaching a drawer slide to the support
Step 9: Adding Hardware
- Finally, install your chosen hardware, such as knobs or pulls. Push latches are a great option for a sleek, minimalist look.
 Securing the drawer slide with screws
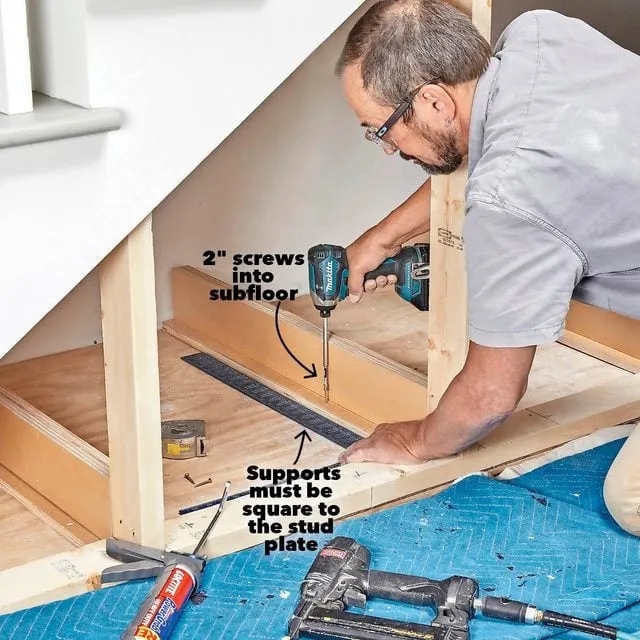 Testing the drawer slide
Conclusion
And there you have it! You’ve successfully transformed that wasted space into a functional and stylish storage solution. Remember, this is just a basic guide. Feel free to customize the design, add your personal touch, and create something truly unique.
“I love seeing DIYers embrace projects like this,” says Sarah M., a home organization expert. “Not only are you adding value to your home, but you’re also gaining valuable skills and a sense of accomplishment.”
So, are you ready to unlock the hidden potential of your under-stair space? I encourage you to give this project a try and share your creations with us! And don’t forget to explore Robert Kline Art for more inspiring DIY projects, crafting tips, and unique handmade gifts for every occasion.
