Blog
DIY Laundry Chute: Make Laundry Day a Breeze

Here at Robert Kline Art, we believe in making life easier and more enjoyable through DIY projects. A laundry chute might seem like a luxury, but it’s a surprisingly achievable upgrade that can transform your laundry routine. No more lugging heavy baskets, no more piles of clothes cluttering your living spaces – just a seamless system that whisks laundry away as if by magic!
Planning Your Laundry Chute
As Steve Pink, a lead project manager for a renowned custom construction firm, says, “I get requests for laundry chutes so often that I now ask clients if they want one during our initial plan review. It’s much easier to incorporate this feature from the beginning.”
Key Considerations:
- Location, Location, Location: The ideal spot for your chute is near a main waste line, like the one from your master bathroom. This often provides a 2×6 wall to work with, minimizing the need for extensive framing.
- Size Matters: Don’t skimp on size! A chute measuring at least 8″ x 8″ is crucial for handling bulky items like jeans and towels. A more generous 12″ x 12″ is ideal.
- Smooth Operator: Choose materials that create a smooth, snag-free surface. Metal ductwork is highly recommended for its durability, ease of installation, and ability to be angled around obstacles.
- Safety First: Incorporate fireblocking measures to meet IRC safety codes. A simple upstairs hatch and a closed cabinet at the bottom provide essential protection.
Constructing Your Chute: A Step-by-Step Guide
1. Mapping Your Route

- Carefully plan the chute’s path, identifying potential obstacles such as plumbing pipes or electrical wiring.
- Before cutting any large holes, always drill pilot holes to confirm your layout.
2. Creating the Inlet

- Once your layout is confirmed, use a wallboard saw to cut the hole in your ceiling.
- Proceed to the floor above and cut out the corresponding section for the chute inlet, using a circular saw and oscillating multitool.
3. Building the Upstairs Cabinet

- A sturdy bench with a self-closing lid not only houses the chute inlet but also adds a functional and stylish element to your room.
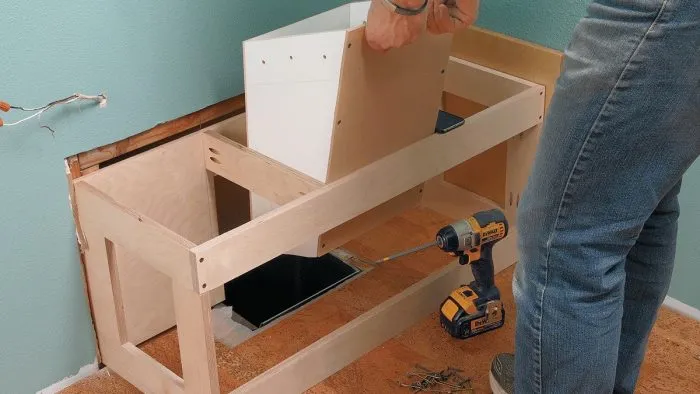
- Construct a frame from plywood, ensuring it fits snugly against the studs. Cut out the back for the duct and add rails to support the hopper.
4. Crafting the Hopper

- The hopper creates a wider opening for easier loading.
- Use a combination of 3/4″ and 1/4″ melamine, screwing the pieces together to create a sturdy, tapered shape.
5. Assembling the Upstairs Cabinet

- Attach the hopper to the cabinet rails, ensuring a secure connection.
- Install the exterior panels of the bench, screwing them into the frame and securing the right side to the adjacent wall.
- Hinge the lid to ensure it closes securely.
6. Building the Downstairs Cabinet

- A wall cabinet strategically placed above your laundry area serves as the perfect housing for the chute’s lower end.
- Carefully cut a hole in the cabinet top for the ductwork, reinforcing the top with hardwood ribs for added strength.
7. Finishing Touches

- Extend the ductwork to the bottom of the cabinet, concealing it with a plywood box for a polished look.
- Place a laundry basket beneath the chute to catch your clothes.
Enjoy Laundry Freedom

Congratulations! You’ve successfully banished laundry day woes with your very own DIY laundry chute. This simple yet ingenious addition not only streamlines your chores but also adds a touch of luxury to your home.
At Robert Kline Art, we believe that everyone has the power to create extraordinary things. Share your DIY journey with us! We’d love to hear your stories and see your creations.
For more inspiring DIY projects and unique handmade gifts, explore the rest of our website. Let’s get crafting!
