Blog
How to Build a Large Kitchen Island with Prefab Cabinets
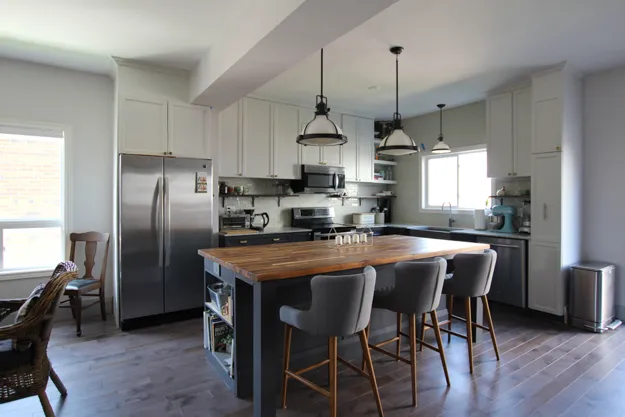
Hey there, fellow DIY enthusiasts! Robert Kline, the artist behind Robert Kline Art, here. Today, I’m going to share a project that’s near and dear to my heart—building a stunning, one-of-a-kind kitchen island that’s both functional and beautiful.
You see, I recently went through a major kitchen renovation, knocking down walls to achieve that coveted open-concept look. While I loved the newfound spaciousness, I was faced with a dilemma: finding an island that fit the scale of the room without breaking the bank.
The solution? Building my own!
Trust me, it’s not as daunting as it sounds. Using readily available prefab cabinets, some basic carpentry skills, and a dash of creativity, we can create a showstopping island that would make any professional envious.
 Kitchen Renovation Makeover Reveal
Planning Your Island Paradise
Before you even think about picking up a hammer, let’s map out your dream island. This step is crucial for ensuring your island perfectly complements your kitchen space and meets your functional needs.
1. Size and Placement
The beauty of a DIY island is the freedom to customize its size. Consider your kitchen’s dimensions and traffic flow to determine the ideal island footprint.
Expert Tip: A good rule of thumb is to allow for at least 36 inches of clearance around all sides of the island for comfortable movement.
2. Cabinet Selection
Prefab cabinets are the superheroes of this project, offering affordability and convenience. Head to your local home improvement store and explore the options. Choose base cabinets that suit your storage needs and overall island design.
3. Countertop Considerations
Butcher block countertops are an excellent choice for DIY islands, thanks to their durability, warmth, and forgiving nature. You can find them pre-cut to size or opt for a DIY approach by laminating two pieces together.
Building the Island Base: A Solid Foundation
Now, let’s build the bedrock of your island—the sturdy base that will support your cabinets and countertop.
1. Gathering Your Materials
- 2x4s for the island base and support wall
- L-brackets
- Measuring tape
- Saw
- Drill
2. Calculating the Base Dimensions
To determine the base size, consider the cabinet dimensions and desired overhang. For example, if your cabinets have a combined width of 78 inches and you want a 2.5-inch overhang on the front and one side, you’d subtract 2.5 inches from the width to get 75.5 inches.
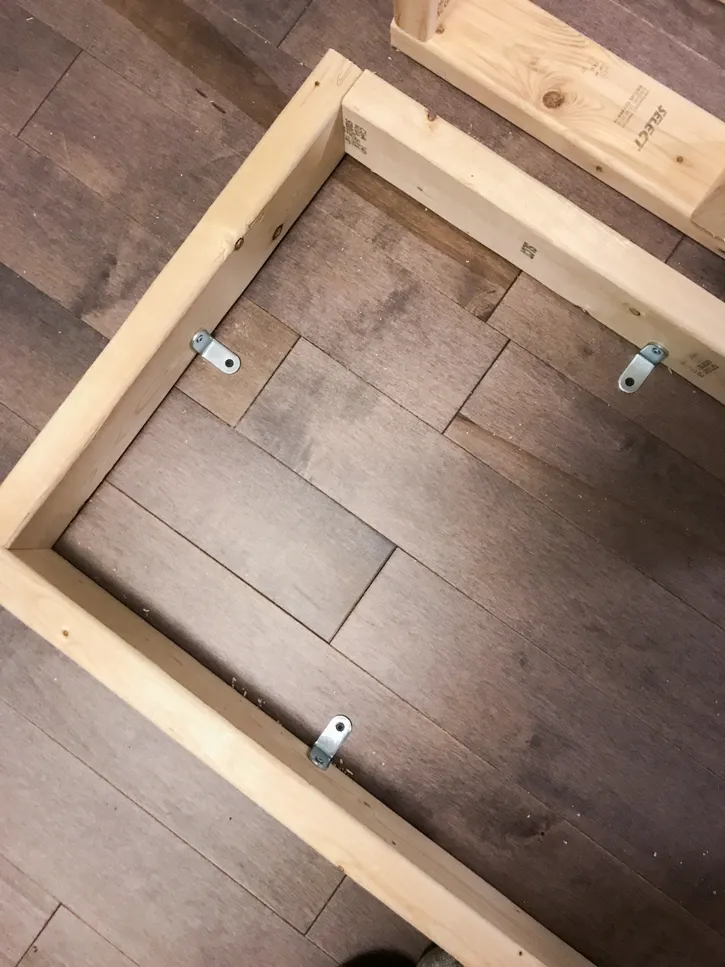 DIY Island Base from 2x4s
3. Constructing the Base Frame
Using the calculated dimensions, cut the 2x4s to create a rectangular frame. Use wood glue and screws to assemble the frame, ensuring it’s square and sturdy.
4. Securing the Base
Attach the base frame to the floor using L-brackets, ensuring it’s level and securely anchored.
Adding Support and Structure
With the base in place, it’s time to add a mini stud wall for extra countertop support, especially if you’re using a heavy material or joining two countertop pieces.
1. Building the Stud Wall
Construct a small stud wall using 2x4s and secure it to the base frame and the floor. Space the studs according to your countertop’s length and weight requirements.
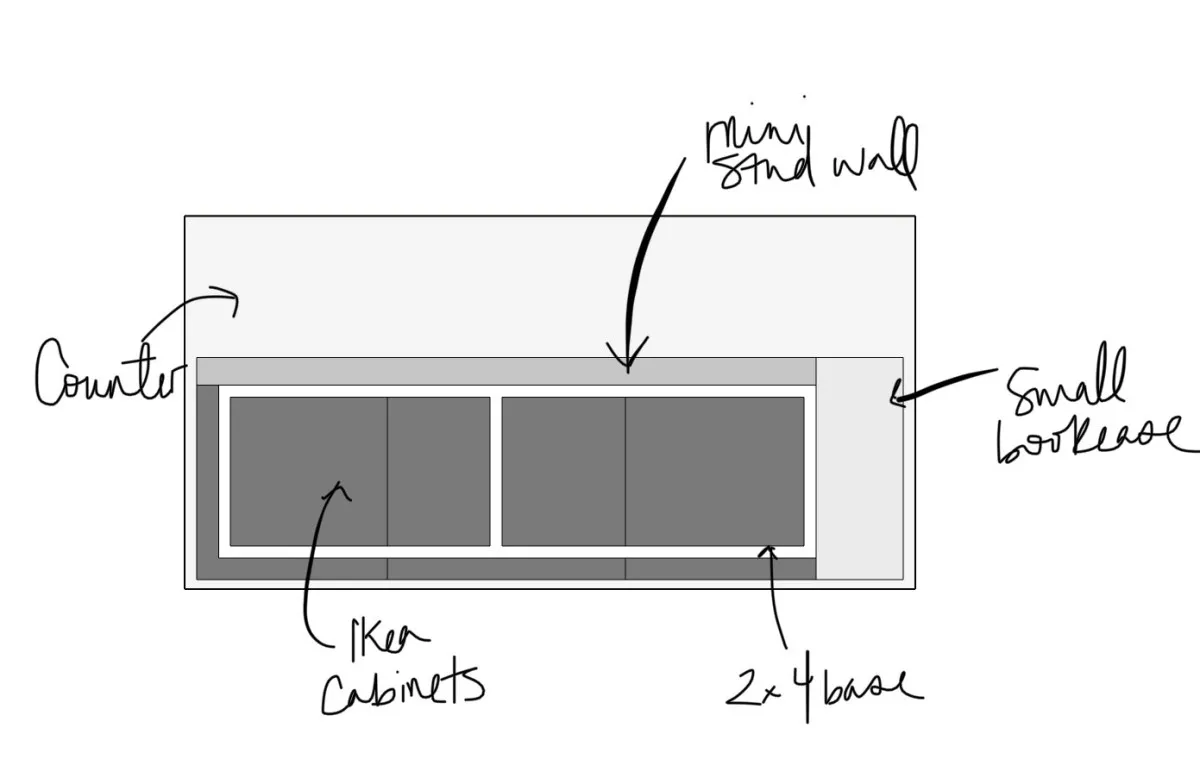 Island Base
Assembling and Installing the Cabinets
With a solid base and support structure, it’s time to bring in the cabinets.
1. Cabinet Assembly
Follow the manufacturer’s instructions to assemble the cabinets.
Expert Tip: Install drawer slides and shelves before attaching the cabinets to the base for easier access.
2. Cabinet Attachment
Position the cabinets on the base, ensuring they’re aligned and level. Secure the cabinets to the base and the stud wall using screws.
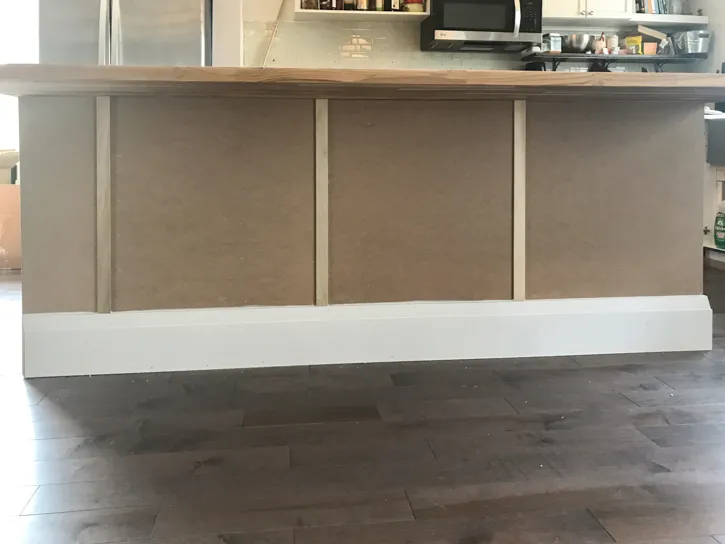 DIY Island
Installing the Countertop: The Crowning Jewel
Now for the satisfying part—installing the countertop that will transform your island into a functional masterpiece!
1. Countertop Preparation
If you’re joining two butcher block pieces, follow the manufacturer’s instructions for lamination.
2. Countertop Attachment
Position the countertop on the cabinets, ensuring it’s centered and overhangs evenly. Secure the countertop to the cabinets and the stud wall using screws.
 DIY Island
Adding Finishing Touches and Customization
With the structural elements in place, it’s time to unleash your creativity and add those finishing touches that will make your island uniquely yours.
1. Cover Panels and Trim
Use MDF panels to conceal the support wall and create a seamless look. Install decorative trim around the base and edges for a polished finish.
 DIY Island
2. Island Legs (Optional)
Consider adding legs for additional support and a touch of style. You can find pre-made legs or DIY your own using wood or metal.
 DIY Island
3. Priming and Painting
Prime and paint all surfaces, including the cabinets, trim, and legs, for a cohesive look that complements your kitchen’s aesthetic. Choose a paint specifically designed for cabinets for a durable and washable finish.
 DIY Island
Bask in the Glory of Your DIY Island
Congratulations! You’ve successfully built a stunning, one-of-a-kind kitchen island that reflects your personal style and craftsmanship. Take a moment to admire your handiwork and imagine all the culinary creations and gatherings this new centerpiece will inspire.
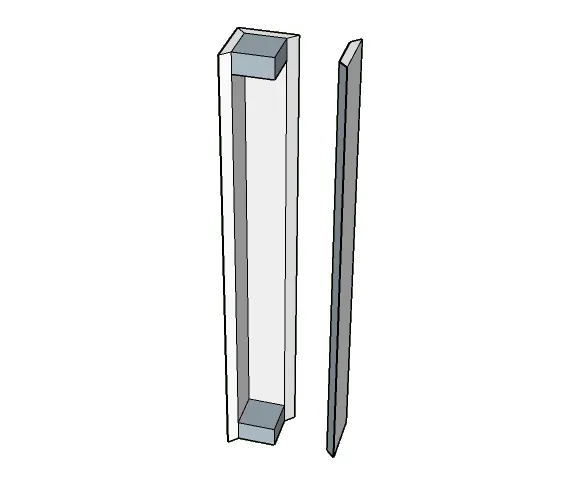 Island Legs
Remember, at Robert Kline Art, we’re all about embracing the joy of handmade creations. Don’t be afraid to personalize your island with decorative elements, unique hardware, or a bold paint color that speaks to your artistic sensibilities.
Now, I’d love to hear from you! Have you tackled a kitchen island project or have any questions about this one? Share your thoughts and experiences in the comments below. And if you’re feeling inspired, head over to Robert Kline Art for more unique handmade crafts and DIY inspiration.
Happy crafting!
Robert Kline
