Blog
Building a Simple Yet Sturdy Garage Workbench
Every DIY enthusiast knows that a reliable workbench is the backbone of a productive workspace. It’s where creativity flows, projects take shape, and dreams become reality.
Here at Robert Kline Art, we’re passionate about equipping fellow makers with the tools and knowledge they need to bring their artistic visions to life. That’s why I’m excited to share a step-by-step guide on constructing a basic yet sturdy garage workbench. This project is perfect for beginners and can be easily customized to fit your space and needs.
Let’s dive in!
Gathering Your Tools and Materials
Before we begin, let’s gather our arsenal of tools and materials:
Tools:
- Miter Saw
- Circular Saw
- Drill
- Tape Measure
- Clamps
- Level
- Speed Square
- Pencil
- Safety Glasses
- Ear Protection
Materials:
- (7) 2x4s @ 8′
- (1) 3/4″ Full Sheet of Particleboard (or plywood)
- 2 1/2″ Screws
- 1 1/4″ Screws
Expert Tip: Using high-quality lumber and screws will ensure the longevity and stability of your workbench.
Planning Your Cuts
Accurate cuts are crucial for a stable and square workbench. Here’s what you’ll need to cut from your lumber:
- (4) 2x4s @ 36″ (Legs)
- (4) 2x4s @ 21″ (Frame Sides)
- (4) 2x4s @ 68″ (Frame Front & Back)
- (1) Particleboard @ 25″ x 72″ (Tabletop)
- (1) Particleboard @ 21″ x 71″ (Bottom Shelf)
Pro Tip: Double-check your measurements before making any cuts to avoid wasting material.
Assembling Your Workbench
Now that we have our materials prepped, let’s start building!
Step 1: Building the Frames
 How to Build a Workbench step 1
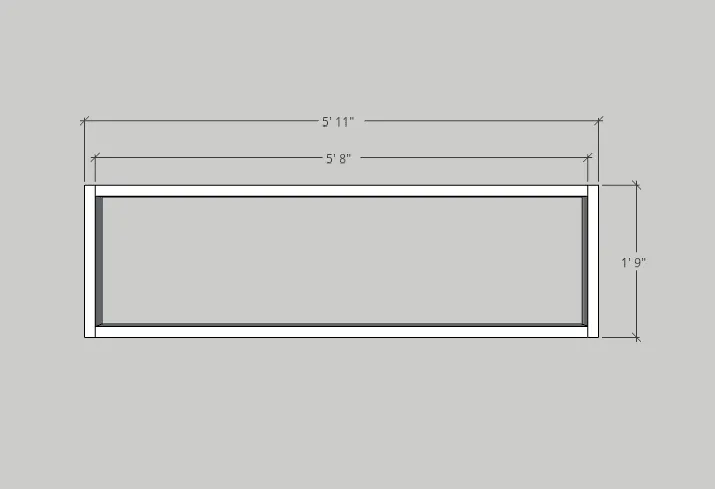
Alt: A wooden frame laying on the ground, ready for legs to be attached
Begin by constructing the top and bottom frames of your workbench.
- Take two of the 68″ 2x4s (frame front and back) and attach a 21″ 2×4 (frame side) to each end using 2 1/2″ self-tapping wood screws.
- Use four screws through each side, ensuring two are on both ends of each 21″ piece (one on the top and one on the bottom).
- Repeat this process to create two identical frames.
Step 2: Attaching the Top Frame to the Legs
 How to Build a Workbench step 2
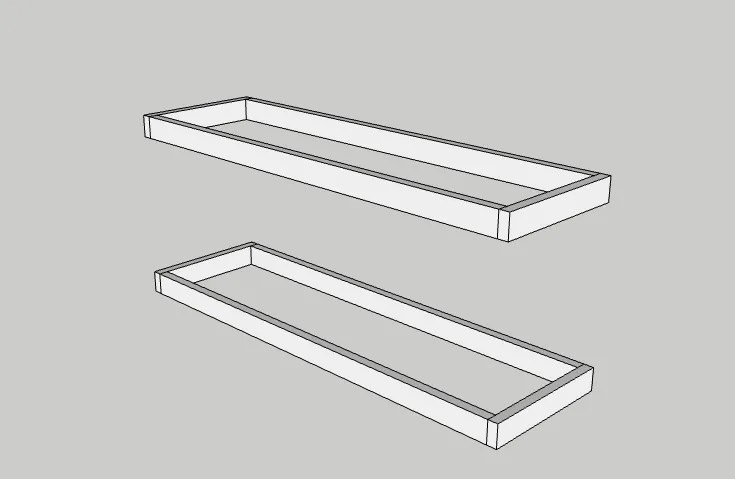
Alt: A workbench turned upside down, with the top frame attached to the legs
- Flip the top frame upside down.
- Position the legs at each corner of the frame and secure them using 2 1/2″ self-tapping screws.
- Drive four screws through each leg, ensuring two go into the front/back frames and two into the side frames.
Step 3: Attaching the Bottom Frame
 How to Build a Workbench step 3
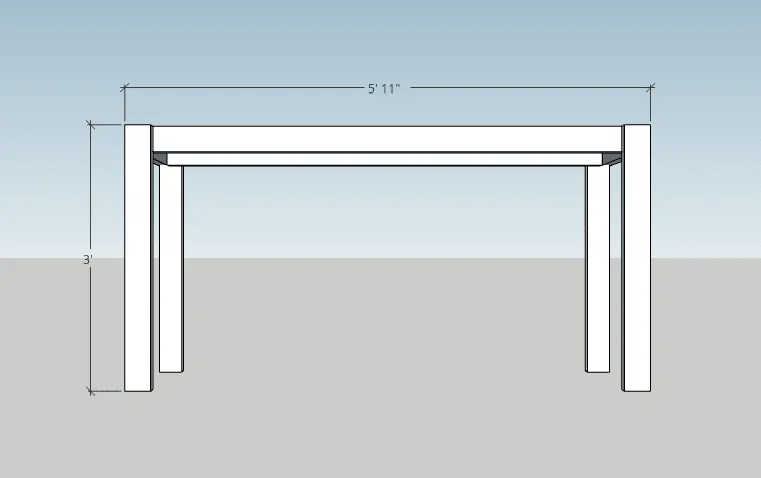
Alt: The bottom frame being attached to the workbench legs
- Carefully set the bench on its side.
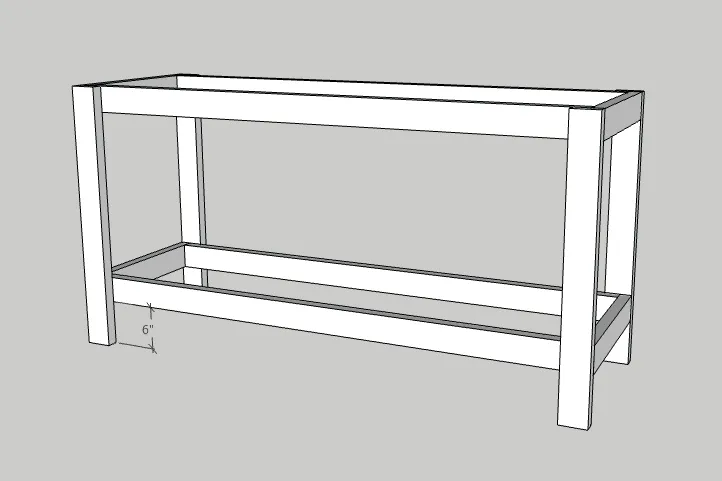
- Measure and mark a point 6″ up from the bottom of each leg.
- Position the bottom frame level with your marks and clamp it securely.
- Attach the bottom frame to the legs using 2 1/2″ self-tapping screws, following the same screw pattern as Step 2.
Step 4: Adding the Bottom Shelf
 How to Build a Workbench step 4
Alt: Attaching the bottom shelf to the workbench
- Place the bottom shelf onto the bottom frame.
- Attach the shelf to the frame using 1 1/4″ self-tapping screws.
- Drill directly through the particleboard and into the frame, countersinking the screws for a clean look.
Step 5: Securing the Tabletop
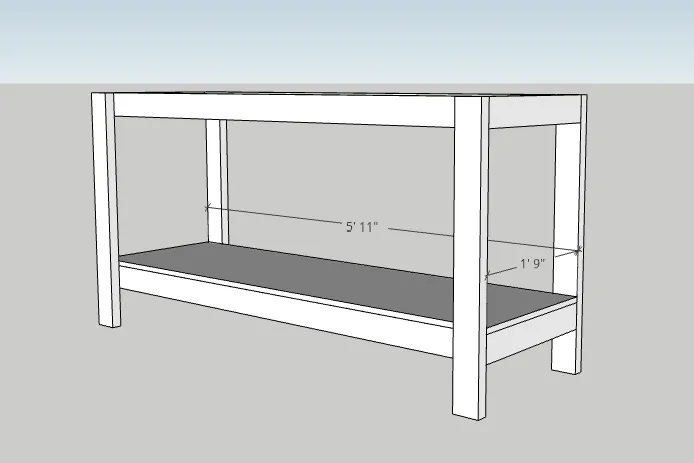 How to Build a Workbench step 5
Alt: Attaching the tabletop to the workbench
- Carefully center the tabletop on the top frame, ensuring a 1/2″ overhang on all sides.
- Attach the tabletop to the frame using 1 1/4″ self-tapping screws.
- Drill directly through the particleboard into the frame, countersinking the screws.
- Use a screw in each corner and two in the middle, making sure to hit the frame in the middle for added stability.
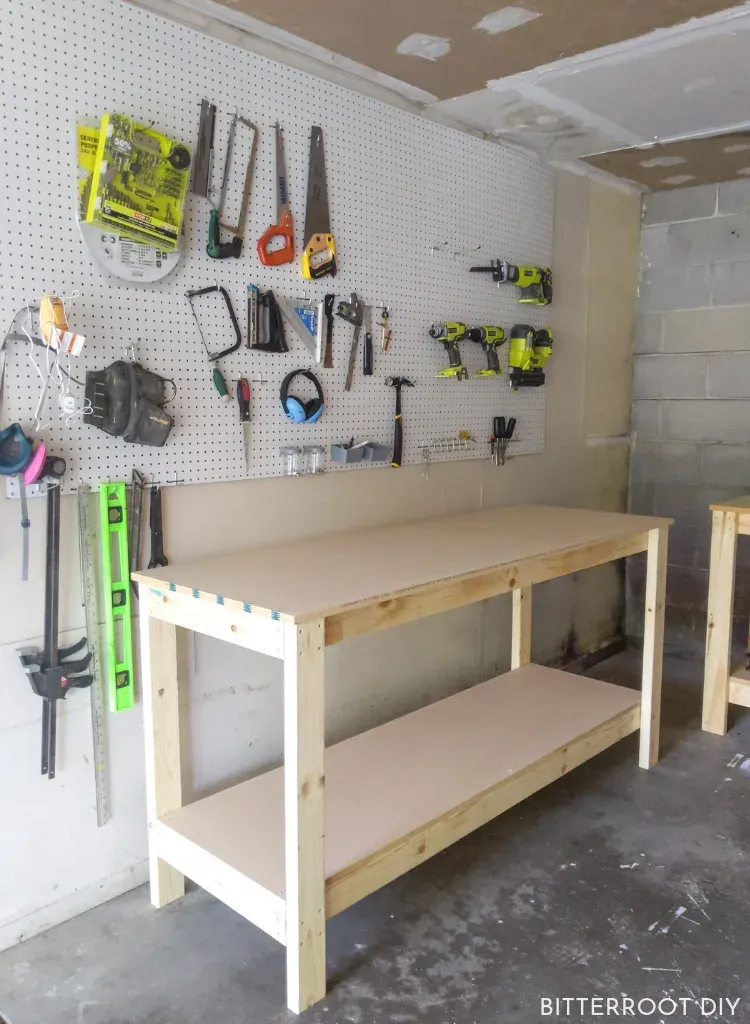 How to Build a Workbench
Alt: The completed DIY workbench
Congratulations! You’ve just built a sturdy and reliable workbench that will serve you well for years to come.
Conclusion
Building your own furniture is incredibly rewarding, and this DIY workbench is no exception. It’s a testament to your craftsmanship and a functional addition to your workspace. Remember to personalize it further by adding your own finishing touches, such as a coat of paint or stain, to match your style.
Here at Robert Kline Art, we believe everyone has the potential to create amazing things. So roll up your sleeves, get building, and don’t forget to share your creations with us!
We’d love to hear from you! Share your workbench-building experiences, tips, and tricks in the comments below. And for more inspiring DIY projects and handcrafted gift ideas, be sure to explore the rest of the Robert Kline Art website.
