Creating a Vertical Garage Garden Tool Rack: Maximize Your Space

Summertime! The kids are home, the pool toys are out, and the garden tools…well, they might be in a bit of disarray. Sound familiar? We’ve all been there! A well-organized garage is a thing of beauty, a haven for your car and your tools. But achieving this zen-like state can be tricky, especially when your garage pulls double duty as a workshop, storage unit, and maybe even a gym. Don’t worry, Robert Kline Art is here to guide you! Let’s turn that chaotic jumble into a symphony of organization with a DIY vertical garden tool rack!
Why Vertical is the Way to Go
Remember the wise words: “Up is always better than out!” This is especially true in the garage, where floor space is precious. By utilizing your vertical space, you’re effectively creating more room for your car, your workbench, or even just a clear path to walk through.
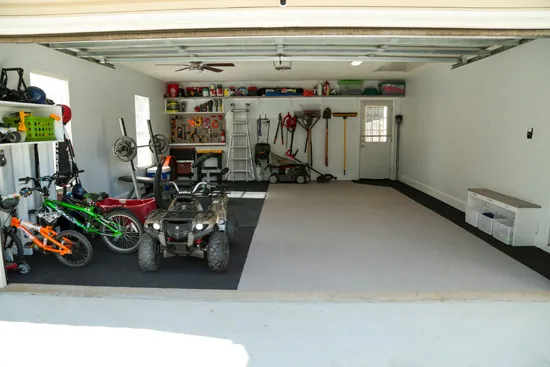
 Family Garage All Tidy After Purging and Organizing
Image: An example of a well-organized garage with maximized vertical space. Doesn’t this spark joy?
Building Your Vertical Garden Tool Rack: A Step-by-Step Guide
Materials You’ll Need:
- Wooden planks (1″ x 4″ for the back, 2″ x 4″ for the supports)
- Measuring tape
- Pencil
- Saw (hand saw or circular saw)
- Drill
- Screws
- Wall anchors (if hanging on drywall)
- Level
- Stud finder
- Paint or stain (optional)
- Hooks or tool holders
Assembling Your Masterpiece:
-
Measure and Plan: Measure the height and width you desire for your tool rack. Consider the length of your tools and how much space you need between them. Sketch a simple design to guide you.
-
Cut the Wood: Using your trusty saw, cut the wooden planks to the desired lengths based on your measurements. Remember the adage “measure twice, cut once!”
-
Assemble the Frame: Attach the 2″ x 4″ supports to the 1″ x 4″ back piece using screws. These supports will give your rack the strength and stability it needs to hold those heavy-duty tools.
-
Locate and Mark Studs: Use a stud finder to locate studs in your garage wall. These are your anchor points for maximum sturdiness.
-
Hang the Frame: Carefully lift your assembled frame and align it with the marked studs. Use a level to ensure it’s perfectly straight, then secure it to the wall with screws. If you’re not able to mount directly into studs, use wall anchors for extra support.
-
Add Hooks and Holders: Now for the fun part! Screw in your chosen hooks or tool holders to the frame. Space them strategically to accommodate your gardening equipment – rakes, shovels, weed whackers, you name it!
-
Personalize and Organize: Let your creative juices flow! Consider painting or staining the wood to match your garage aesthetic. Then, hang your tools with pride.
Robert Kline Art Tips for Success
- Safety First: Always wear safety glasses when using power tools.
- Prioritize Your Tools: Place frequently used tools at arm’s reach, while less-used items can occupy higher spots.
- Get Creative with Storage: Utilize baskets or small shelves for smaller gardening essentials.
- Maintain Your Domain: Regularly inspect your rack for wear and tear. A quick touch-up of paint or tightening of screws can go a long way!
A Place for Everything and Everything in its Place
Creating a vertical garden tool rack not only maximizes your garage space but also brings a sense of order and satisfaction. We at Robert Kline Art believe that a well-organized workspace inspires creativity. So go ahead, roll up your sleeves, and give your gardening tools the home they deserve!
Share your thoughts in the comments below! We’d love to see pictures of your newly organized garage. For more creative DIY projects and unique handmade gifts, explore the wonderful world of Robert Kline Art. Happy crafting!
