Blog
DIY Overhead Garage Storage: Reclaim Your Space
Is your garage floor disappearing under a mountain of bins and boxes? Do you long for a clutter-free haven where your car can actually, well, park? At Robert Kline Art, we feel your pain. That’s why we’re excited to share this step-by-step guide to building your own overhead garage storage system. It’s easier than you think, and it’s a game-changer for maximizing your garage space.
Why Choose Overhead Garage Storage?
Let’s face it, garages are magnets for clutter. Seasonal decorations, camping gear, sporting equipment—the list goes on. Overhead storage is a brilliant solution, making use of that often-wasted space above your garage door.
This DIY project utilizes sturdy plastic totes, making it easy to organize and access your belongings. Plus, it’s a budget-friendly alternative to pricey pre-made storage systems.
Gather Your Tools and Materials
Before you begin, round up these essential tools and materials:
Tools
- Circular saw
- Cordless drill
- Drill bit set
- Hammer
- Level
- Miter saw
- Safety glasses
- Socket/ratchet set
- Step ladder
- Stud finder
Materials
- (1) 1/2 in. x 1 in. x 8 ft. pine stop strip
- (1 box) 1/4 in. x 2 in. wood screws
- (6) 23-1/2 in. x 19-1/2 in. x 13 in. plastic totes (or adjust size to fit your needs)
- (2) 2×4 x 8 in.
- (16) 3-1/2 in. lag screws and washers
- (1 box) 3 in. wood screws
- 4 ft. x 8 ft. sheet of 3/4 in. plywood
- (1 pint) Carpenter’s glue
Pro Tip: Reinforced plastic totes, available online and at some home improvement stores, offer greater weight capacity for this project.
Building Your Overhead Garage Storage System
Follow these steps to create your own overhead storage haven:
Step 1: Measure Twice, Cut Once
- Measure the width of your tote rims (typically around 3/4 inch).
- Determine the desired size of the bottom flanges for your carriages (we recommend three inches).
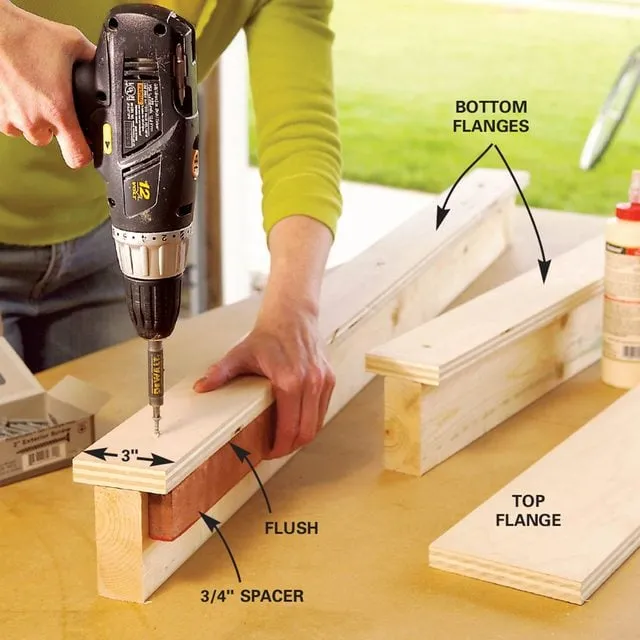
Step 2: Construct the Carriage Bottom Flanges
- Cut 3/4 in. plywood strips to the width you determined for your bottom flanges (3 inches in our example).
- Center these strips on 4-foot-long 2x4s.
- Secure them using glue and 2-inch wood screws, spacing the screws every 10 inches.
 bottom flange for storage
Securely attach the plywood flanges to the 2x4s for sturdy carriage construction.
Step 3: Assemble the Carriages
- Flip the carriage assemblies over.
- Cut 5-inch wide plywood strips for the top flanges.
- Center the top flanges and attach them using glue and screws, just like you did with the bottom flanges.
Step 4: Locate and Mark Ceiling Joists
- Use a stud finder to locate the ceiling joists in your garage.
- Snap chalk lines to mark the center of each joist.
- Double-check your lines by probing with a finish nail to ensure accuracy.
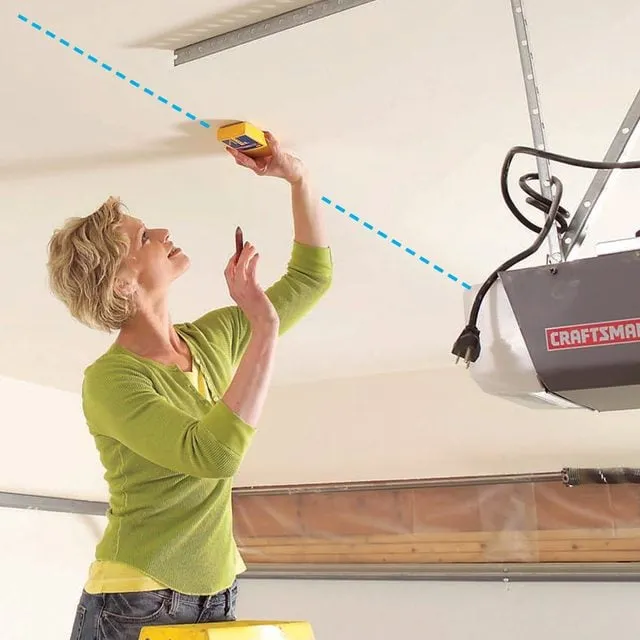 mark joists for installing shelves
Accurate joist marking is crucial for a safe and secure overhead storage system
Step 5: Position and Secure the First Carriage
- Mark a spot 12 inches from the end of one carriage.
- Align this mark with the center of a ceiling joist.
- Temporarily screw the carriage to the joist through one side of the flange using 3-inch screws.
Step 6: Mark Remaining Carriage Locations
- Create a 2×4 template matching the width of your tote.
- Use this template to mark the location of the next carriage’s top edge, ensuring proper spacing for your totes.
- Repeat this process, marking the location of all carriages along your joists.
- Temporarily secure each carriage on one side only.
Step 7: Test Fit Your Totes
- Place a tote in the first two carriages to ensure a snug fit. The tote rims should rest fully on the lower flanges.
- Make any necessary adjustments to carriage spacing.
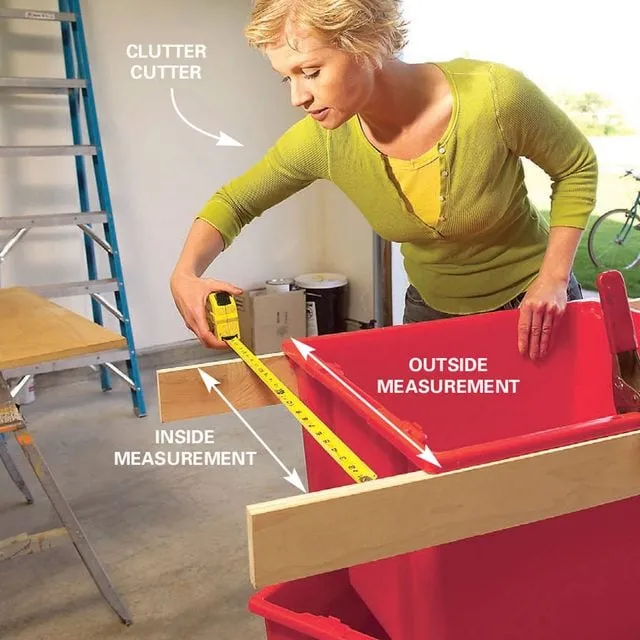 measure totes
Test-fitting ensures your totes will slide in and out of the carriages with ease.
Step 8: Permanently Anchor the Carriages
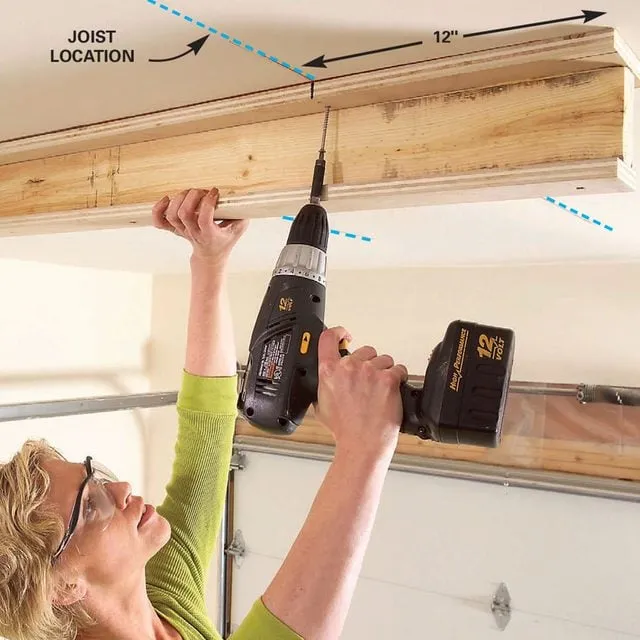
- Drill 3/16-inch pilot holes through the top flanges of the carriages, into the ceiling joists.
- Drive 3-1/2-inch lag screws through these pilot holes, using a pair of lag screws per joist.
- As you go, remove the temporary screws you used for initial positioning.
- Use a minimum of four lag screws per carriage for maximum strength.
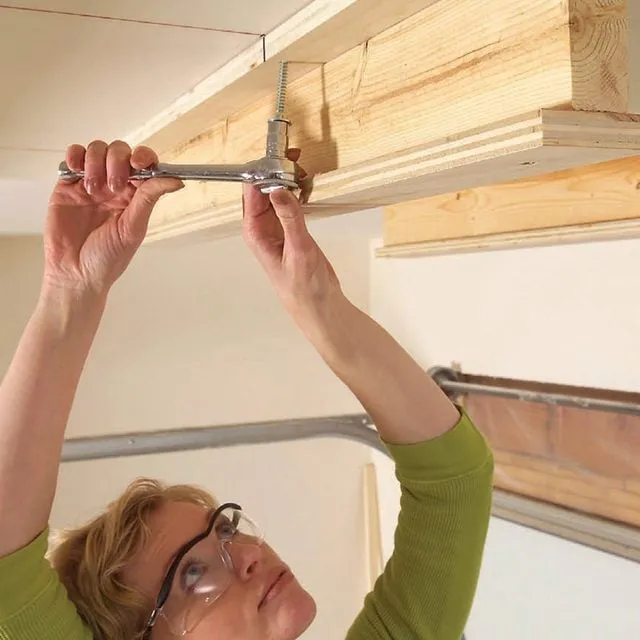 driving lags
Lag screws provide the strength and security your overhead storage system needs.
Step 9: Install Tote Stops
- Mark the center point of each carriage.
- Attach a 1×2 stop strip along these marks using screws. This prevents totes from sliding out the back of the carriages.
 screwing sliding brackets
Tote stops add an extra layer of security, keeping your belongings safely stored.
Step 10: Maximize Your Garage Space
- Install your overhead storage system in any area with sufficient ceiling height.
- Maintain a safe distance (at least 2 feet) from garage doors, lighting, and other obstructions.
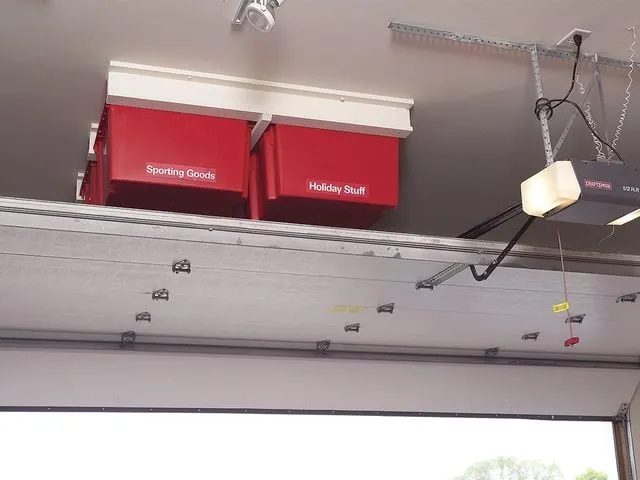 storage above garage door
Overhead storage is perfect for maximizing unused space above your garage door.
Step 11: Choose the Right Totes
- Consider the weight capacity of your totes. Reinforced totes are ideal for heavier items.
- Select tote sizes that suit your storage needs and available ceiling clearance.
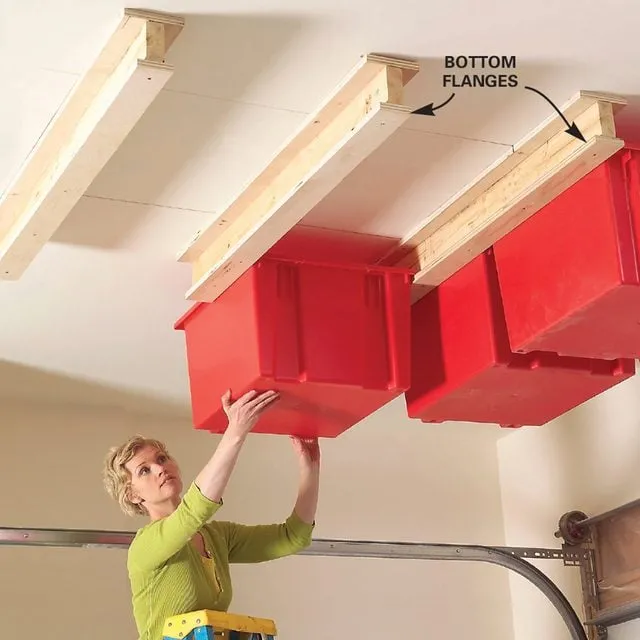 Different sizes Family Handyman
Explore various tote sizes to accommodate different items and maximize storage efficiency.
Step 12: Enjoy Easy Access
- Your new overhead storage system makes it simple to retrieve items. Use a sturdy step ladder for safe access.
- To prevent overloading, store extremely heavy items on garage shelving units rather than overhead.
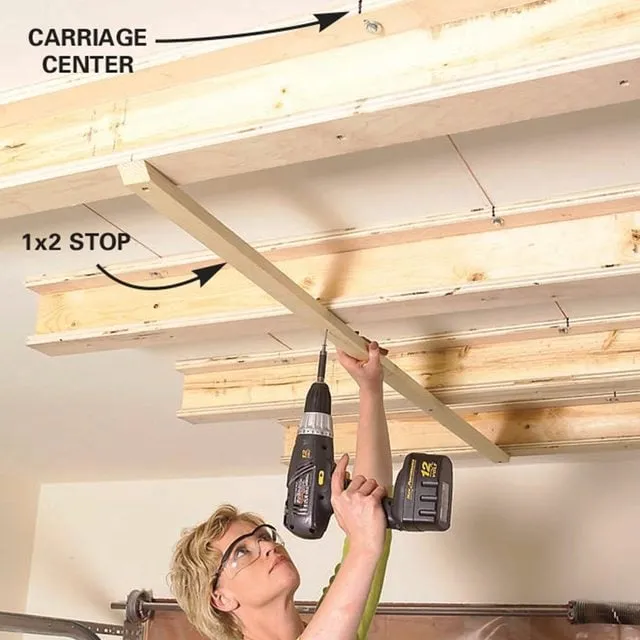 Easy access Family Handyman
A well-designed system provides effortless access to your stored belongings.
Congratulations!
You’ve conquered the clutter and created valuable storage space. Now, step back and admire your handiwork. At Robert Kline Art, we believe everyone can embrace their inner maker. This DIY overhead garage storage system is just one example of the amazing things you can achieve with a little creativity and effort.
Ready for more inspiring DIY projects and creative ideas? Explore the world of Robert Kline Art and discover unique handmade gifts, crafting supplies, and artistic inspiration.
