Blog
DIY Overhead Garage Storage: Reclaim Your Space with This Simple Solution
Is your garage a chaotic mess of cardboard boxes and forgotten treasures? Do you long for a clutter-free haven where your car can actually, you know, park? If you’re nodding along, then friend, you’ve come to the right place. At Robert Kline Art, we believe in the power of DIY, and today, we’re going to conquer that garage chaos with a simple yet brilliant solution: overhead storage!
This isn’t just about shoving things out of sight; it’s about creating an organized, accessible system that maximizes your garage’s vertical space. Imagine clear-labeled bins neatly tucked away, freeing up valuable floor space for your workbench, tools, or even (gasp!) your car.
Let’s Get Down to Building
This overhead garage storage system is designed around sturdy plastic totes, cradled in custom-built carriages that attach securely to your ceiling joists. It’s surprisingly easy to build, even for beginner DIYers, and you can have it up and running in a single day!
Gather Your Tools and Materials
Here’s what you’ll need for this project:
Tools:
- Circular saw
- Cordless drill
- Drill bit set
- Hammer
- Level
- Miter saw
- Safety glasses
- Socket/ratchet set
- Stepladder
- Stud finder
Materials:
- (1) 1/2″ x 1″ x 8′ pine stop strip
- (1 box) 1/4″ x 2″ wood screws
- (6) 23-1/2″ x 19-1/2″ x 13″ plastic totes (or adjust size to fit your needs)
- (2) 2×4 x 8″
- (16) 3-1/2″ lag screws and washers
- (1 box) 3″ wood screws
- (1) 4′ x 8′ sheet of 3/4″ plywood
- (1 pint) Carpenter’s glue
Expert Tip: “When choosing totes, opt for reinforced ones designed for heavier loads. They cost a bit more but offer peace of mind and prevent sagging,” advises veteran DIYer and Robert Kline Art contributor, Sarah M.
Building Your Overhead Garage Storage System
Step 1: Measure Twice, Cut Once
- Measure the width of your tote rims and the desired size of the carriage bottom flanges (3 inches is a good starting point). This ensures the totes sit snugly.
Step 2: Constructing the Carriages
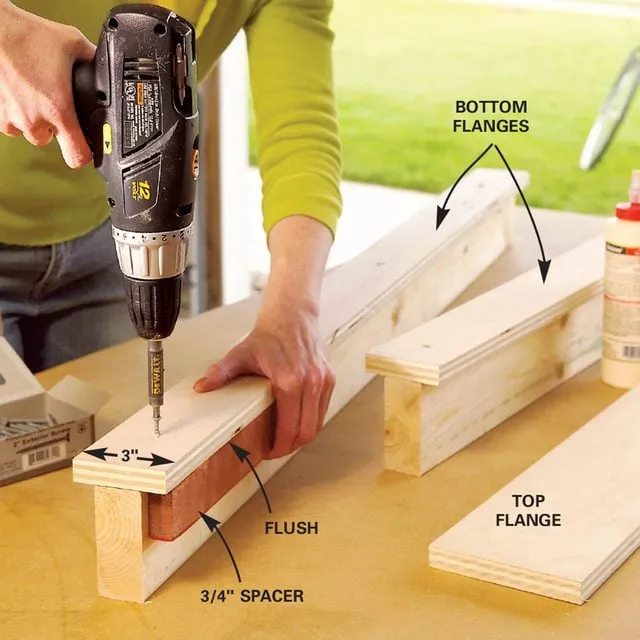
- Cut the 3/4″ plywood into strips for your bottom flanges (3 inches wide in our example).
- Center these strips on your 2x4s.
- Securely attach the plywood strips to the 2x4s using glue and 2-inch screws, spacing the screws approximately every 10 inches.
 bottom flange for storage
Caption: A sturdy base is key! Ensure your plywood flanges are securely attached.
Step 3: Completing the Carriages
- Flip the carriage assemblies over.
- Center and attach the 5-inch plywood top flanges using glue and screws, creating the upper support for the totes.
Step 4: Mapping Out Your Ceiling Joists
- Use a stud finder to locate the ceiling joists.
- Mark their location with chalk lines. To double-check, probe with a finish nail. Accuracy here is crucial!
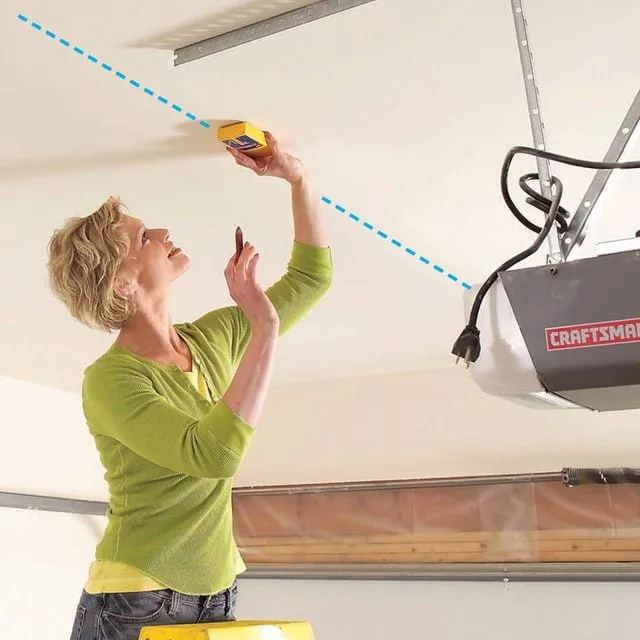 mark joists for installing shelves
Caption: Precisely marking your joists ensures a strong and secure mounting system.
Step 5: Temporary Carriage Placement
- On each carriage, mark a point 12 inches from the end. This mark will align with your joist locations.
- Temporarily screw one side of each carriage to a joist using 3-inch screws.
Step 6: Spacing Your Carriages
- Create a simple 2×4 template based on your tote dimensions to ensure proper spacing between carriages.
- Use this template to mark the placement of the top edge of the next carriage.
- Screw the second carriage in place, again using temporary screws on one side.
- Repeat this process for all remaining carriages.
Step 7: The Tote Test
- Before finalizing, do a test run! Place a tote in each carriage, ensuring the rims rest fully on the lower flanges.
- Make any necessary adjustments to carriage spacing now.
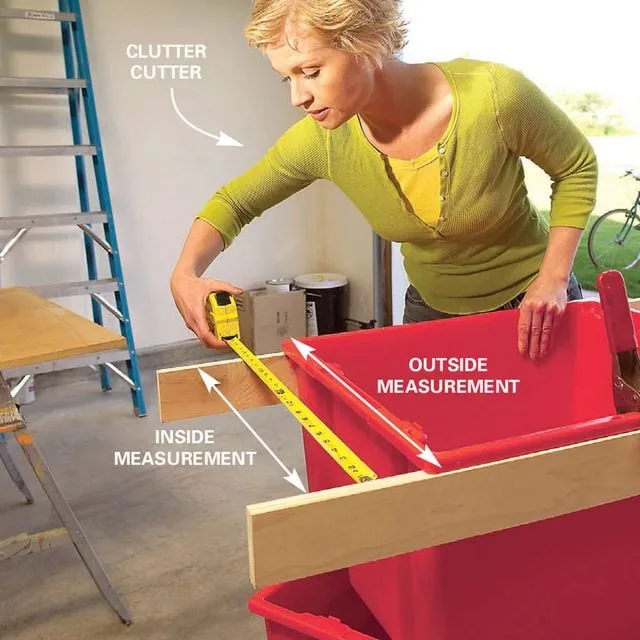 measure totes
Caption: Testing ensures your totes fit perfectly within your new storage system.
Step 8: Locking It Down with Lag Screws
- Drill 3/16-inch pilot holes into the top flanges of each carriage, directly above the joist locations.
- Now, drive those 3-1/2-inch lag screws through the pilot holes and into the joists.
- Use at least four lag screws per carriage for maximum strength.
- As you go, remove the temporary 3-inch screws.
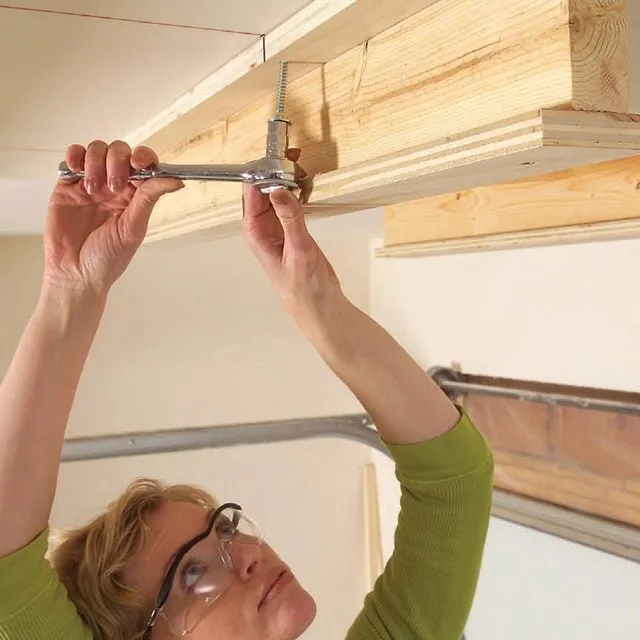 driving lags
Caption: Lag screws provide the muscle to support those totes full of goodies!
Step 9: Preventing Tote Slippage
- Find the center point of each carriage and attach a 1×2 stop along those marks. This prevents the totes from sliding too far back.
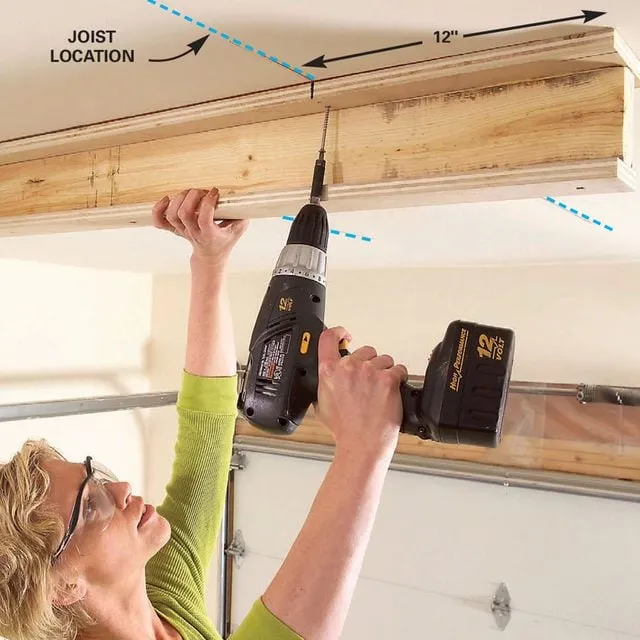 screwing sliding brackets
Caption: A simple stop keeps your totes secure and easy to access.
Step 10: Location, Location, Location
- While the space above your garage door is prime real estate, you can install this system anywhere in your garage with exposed joists.
- Just remember to keep the totes at least 2 feet away from garage door openers, lights, and springs.
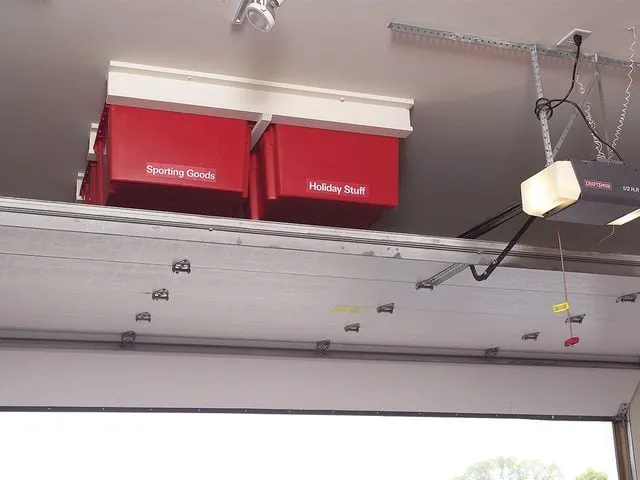 storage above garage door
Caption: Reclaim that underutilized space above your garage door!
Step 11: Tote Talk: Size and Strength
- The beauty of this system lies in its adaptability. Choose totes that fit your needs and ceiling height.
- Reinforced totes are highly recommended, especially for heavier items.
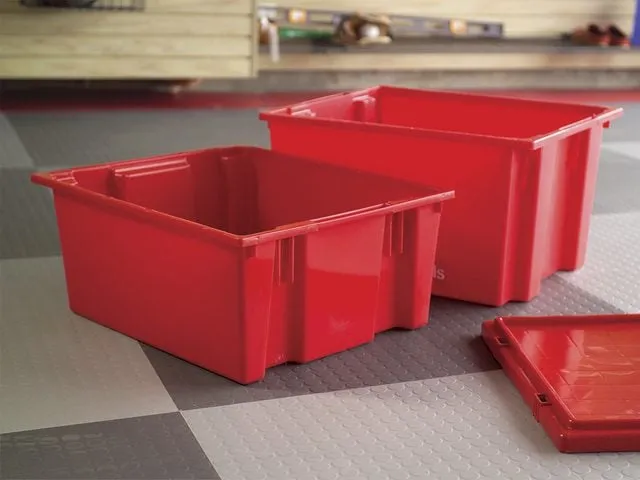 Different sizes Family Handyman
Caption: A variety of tote sizes allows you to customize your storage solution.
Step 12: Enjoy Effortless Accessibility
- With your totes in place, you’ll be amazed at how easily you can retrieve items, even while standing on a ladder.
- For added organization, label the totes clearly!
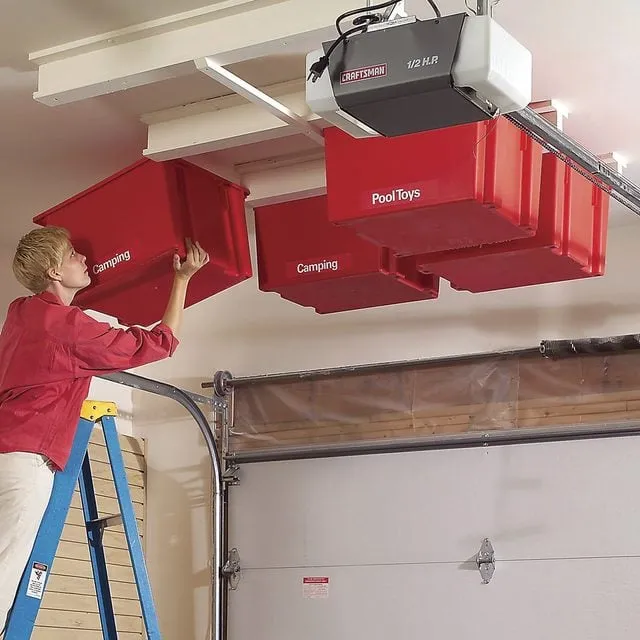 Easy access Family Handyman
Caption: No more precarious stacking! Your stored belongings are now within easy reach.
Congratulations, You’ve Leveled Up Your Garage Game!
You did it! You transformed your chaotic garage into an organized haven. Not only have you created valuable storage space, but you’ve also gained a sense of accomplishment that comes with conquering a DIY project.
Now, what are you waiting for? Grab those totes, load them up, and bask in the glory of your newly organized garage.
Share Your Craftsmanship!
We’d love to see your overhead garage storage masterpiece! Share your photos in the comments below. And while you’re at it, tell us about your favorite storage solutions and DIY projects.
Looking for More Unique Handmade Gift Ideas?
Visit [Robert Kline Art](your website link) for a curated collection of one-of-a-kind, handcrafted treasures. From personalized gifts to home décor, we have something special for everyone!
