Blog
DIY Drawer Dividers: An Easy Solution for Organized Drawers

Tired of rummaging through cluttered drawers? At Robert Kline Art, we believe that a well-organized drawer is a thing of beauty, bringing a sense of calm and order to your daily life. Today, we’re diving into the world of DIY drawer dividers – a simple, budget-friendly solution to transform your drawers from chaotic catch-alls to neatly compartmentalized spaces.
Why DIY Your Drawer Dividers?
While pre-made drawer organizers have their place, crafting your own comes with a unique set of advantages that make it a truly rewarding endeavor.
Cost-Effective Organization
Let’s face it, outfitting your entire home with store-bought organizers can put a dent in your wallet. DIY drawer dividers, on the other hand, are incredibly budget-friendly, especially if you utilize materials like leftover cardboard boxes. This allows you to achieve organizational bliss without breaking the bank.
Customized to Perfection
Every drawer has its own unique dimensions and storage needs. With DIY dividers, you’re not limited by pre-determined sizes or layouts. This means you can create compartments that perfectly accommodate everything from art supplies to kitchen utensils, maximizing every inch of space.
Embrace Sustainability
Opting for DIY drawer dividers crafted from cardboard or foam board aligns with a sustainable lifestyle. These materials are readily available, often lying around the house, and can be easily recycled or repurposed when your organizational needs change.
Gather Your DIY Drawer Divider Supplies
Ready to embark on your drawer organization journey? Here’s what you’ll need to get started:
- Foam Core or Sturdy Cardboard: Choose the material that best suits your needs, ensuring it’s thick enough to provide sturdy dividers. Remember to measure your drawers beforehand to determine the appropriate board size.
- Multipurpose Cable Clips: These ingenious little helpers play a key role in ensuring your dividers stay securely in place, preventing them from shifting or collapsing.
- Decorative Contact Paper or Shelf Liner (Optional): Elevate the aesthetics of your drawers by lining them with a pattern or color that sparks joy.
- Essential Tools: A flexible tape measure, sharp craft knife or rotary cutter, ruler with a self-healing mat, and a pencil are crucial for accurate measuring, cutting, and marking.
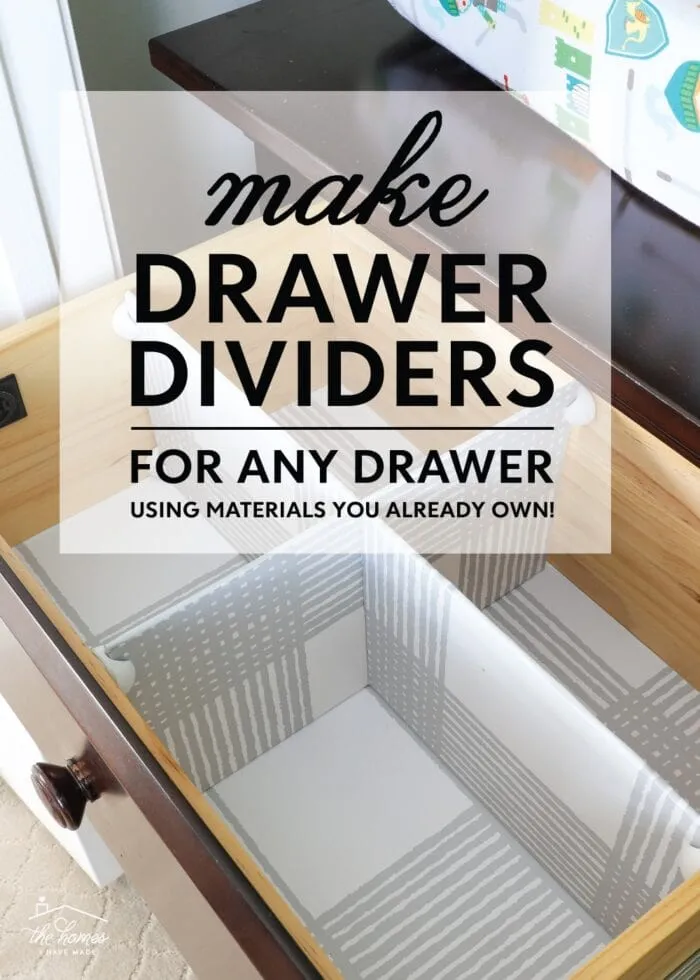
 Grey DIY drawer dividers inside a wooden drawer
Image Alt: A set of grey DIY drawer dividers neatly organizing a wooden drawer.
The Power of Cable Clips: A Tip from Robert Kline
“Over the years, I’ve learned that incorporating cable clips into my DIY drawer dividers significantly enhances their stability and longevity. They offer a bit of ‘wiggle room’ during the cutting process and prevent those frustrating collapses.”
Step-by-Step Guide to DIY Drawer Dividers
-
Measure Your Drawers: Begin by carefully measuring the height, width, and depth of the drawer you’re organizing. Precision is key here to ensure a snug fit for your dividers.
-
Optional: Line Your Drawer: Add a touch of personalization and protect your drawer surfaces by lining them with decorative contact paper or shelf liner.
-
Cut Your Divider Boards: Using your trusty ruler and craft knife, cut your foam core or cardboard to the correct dimensions, taking into account the space required for the cable clips.
-
Strategic Cable Clip Placement: Before permanently attaching the cable clips, perform a “dry fit” by temporarily securing the clips to the divider boards and placing them in the drawer. This allows you to mark the ideal clip positions for a secure hold.
-
Optional: Enhance with Decorative Coverings: Elevate the visual appeal of your dividers by covering them with contact paper, shelf liner, or even peel-and-stick wallpaper. This step adds a touch of personality and creates a cohesive look within your drawer.
-
Create Interlocking Dividers: To achieve that classic “+” formation, carefully cut out intersecting slits in your divider boards. This allows them to fit together seamlessly, creating separate compartments.
-
Assemble and Organize: With your dividers prepped and ready, slide them into the secured cable clips within your drawer. Adjust the intersecting slits as needed to ensure a flush fit. Now, the fun part begins – organize your belongings to your heart’s content!
Adapt and Conquer: DIY Drawer Dividers for Any Space
The beauty of this method lies in its adaptability. You can easily customize the size and configuration of your dividers to fit any drawer, from shallow cutlery trays to deep clothing drawers. Get creative with your layouts, experimenting with different compartment sizes and arrangements to perfectly suit your organizational needs.
Ready to Embrace Organized Bliss?
DIY drawer dividers are an empowering project that empowers you to take control of your space without breaking the bank. Explore the unique selection of handmade organizational solutions and inspiring ideas available at Robert Kline Art to further elevate your home organization game. Share your own DIY triumphs and connect with a community of fellow craft enthusiasts in the comments below!
