Blog
DIY Blanket Ladder: The Easy and Affordable Way to Cozy Up Your Home

Looking for a simple and stylish way to organize your blankets and add a touch of rustic charm to your home decor? Look no further than a DIY blanket ladder! Forget spending a fortune at high-end furniture stores – this tutorial will guide you through creating your own blanket ladder using readily available materials and basic tools. In just an afternoon, you’ll have a functional and decorative piece that’s sure to impress.
Gather Your Supplies
Before you embark on your DIY blanket ladder journey, make sure you have everything you need. Here’s what you’ll need for a 5ft. tall and 18-inch wide blanket ladder (adjust measurements for different dimensions):
Materials:
- Wood: 16 feet of 1 ⅜ x 1 ⅜ inch wood (furring strips work great and are budget-friendly!)
- Screws: Eight 2 ½ inch wood screws
- Wood Glue: A small bottle will suffice
- Stain: Choose your desired shade for a rustic finish (optional)
- Clear Coat: Protect your stain and blankets (optional)
Tools:
- Drill: For making pilot holes and driving screws
- Saw: A chop saw makes clean cuts, but a hacksaw works too
- Measuring Tape: Ensure accurate cuts
- Pencil: Mark your cuts
- Optional: Felt pads to protect your wall, sandpaper for smoothing edges
Let’s Get Building!
Now that you have your tools and materials ready, let’s break down the building process into manageable steps.
Step 1: Measure and Cut Your Wood
- Sides: Cut two pieces of wood to your desired ladder height (e.g., 5 feet each).
- Rungs: Cut four pieces of wood to your desired ladder width (e.g., 18 inches each).
- Pro Tip: Double-check your measurements before making any cuts!
Step 2: Plan Your Rung Placement
Before attaching the rungs, decide on their spacing for both functionality and aesthetics.
- Equal Spacing: For a classic look, divide the side rails into equal sections, ensuring the top and bottom spaces accommodate your blankets.
- Custom Spacing: Consider leaving more space at the bottom for larger blankets or adjusting the spacing to create visual interest.
Step 3: Assemble Your Ladder
- Apply Glue: Add a dab of wood glue to the ends of each rung.
- Secure with Screws: Align each rung with your spacing marks on the side rails and attach them using two screws per rung (one on each side).
- Pilot Holes: Pre-drilling pilot holes can prevent the wood from splitting.
Step 4: Finishing Touches (Optional)
- Sanding (Optional): Lightly sand any rough edges for a polished look.
- Staining (Optional): Apply your chosen stain evenly to all surfaces, following the manufacturer’s instructions. Allow ample drying time.
- Sealing (Optional): If you stained your ladder, consider applying a clear coat to protect the finish and prevent color transfer to your blankets.
Congratulations, You Did It!
You’ve successfully built your very own DIY blanket ladder! Now comes the fun part – styling and enjoying your creation.
Styling Tips and Beyond
While a blanket ladder is inherently practical, it also presents endless styling opportunities:
- Cozy Corner: Drape blankets in varying textures and colors to create a cozy reading nook.
- Seasonal Flair: Swap out blankets to reflect the changing seasons – think chunky knits for winter and lightweight throws for summer.
- Beyond Blankets: Get creative! Use your ladder to hang towels in the bathroom, display plants in the living room, or organize scarves in the bedroom.
Conclusion: Celebrate Your DIY Spirit
Creating your own home decor is incredibly rewarding. Not only have you saved money, but you’ve also crafted a unique piece that reflects your personal style. So, gather your supplies, unleash your inner DIY enthusiast, and transform your space with a beautiful and functional blanket ladder.
What are your favorite ways to style a blanket ladder? Share your ideas in the comments below!
Looking for more unique and handmade home decor ideas? Explore our collection of one-of-a-kind pieces perfect for gifting or adding a personal touch to your home on the Robert Kline Art website.
 diy blanket ladder plans
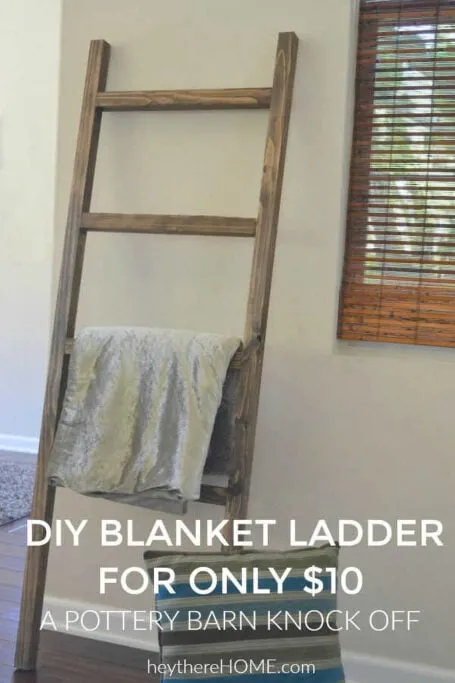
Image Description: A beautifully stained DIY blanket ladder leaning against a wall, draped with cozy blankets in neutral tones.
