Blog
Building a Charming DIY Bathroom Wall Cabinet for Over-Toilet Storage

Hey there, fellow DIY enthusiasts! Robert Kline, your friendly neighborhood art and craft aficionado, here. Ever peeked into your bathroom and wished for a touch more storage and a dash of handcrafted charm? Today, we’re diving headfirst into creating a simple yet elegant over-toilet bathroom wall cabinet, perfect for adding that extra storage space and personalized touch.
This project is near and dear to my heart, as I recently built one for my parents’ powder room. The compact design fit perfectly in their small space, providing much-needed storage for toiletries and showcasing a touch of handcrafted love.
This tutorial will guide you through each step, from selecting the right wood to adding those finishing touches. Whether you’re a seasoned DIYer or just starting out, I encourage you to grab your tools and join me on this rewarding journey. Let’s turn that unused space above your toilet into a charming storage haven!
Planning Your Masterpiece: What to Consider
Before we roll up our sleeves and get to building, let’s take a moment to map out our project.
Dimensions and Customization
The beauty of DIY lies in its flexibility. Feel free to adjust the dimensions provided to perfectly match your bathroom’s layout and storage needs. Want to add a personal flourish? Experiment with different molding styles or door designs. The sky’s the limit!
Choosing the Right Wood
For this project, I opted for a combination of ¾” hardwood plywood for its durability and pre-primed pine for the door frames and moldings, which I planned to paint. However, if you prefer a natural wood finish, opt for clear, unfinished lumber for the frames and trim.
Remember, the type of wood you choose can significantly influence the overall look and feel of your cabinet. Consider the existing décor of your bathroom and select a wood type that complements it best.
Gathering Your Tools and Materials
Every masterpiece begins with the right tools. Here’s a checklist to ensure you have everything you need:
Tools:
- Circular Saw
- Cutting Guides (Kreg Rip Cut & Kreg AccuCut are great options)
- Miter Saw
- Drill/Driver
- Pocket Hole Jig
- Brad Nailer
- Shelf Pin Jig
- Concealed Hinge Jig
Materials:
- (1) 4’x8′ sheet ¾” plywood
- (1) 2’x4′ piece ¼” plywood
- (2) 1″x3″ pine boards (for door frames)
- (1) 8′ stick crown molding (optional, for added flair)
- 1 ¼” pocket hole screws
- 1 ¼” & 2 ½” wood screws
- Shelf Pins
- Edge Banding
- (2) pairs of concealed hinges for frameless overlay doors
- Wood Finish of your choice (paint, stain, or clear coat)
Building Your Bathroom Wall Cabinet: A Step-by-Step Guide
Now, let’s transform those raw materials into a stunning storage solution!
Step 1: Cutting the Plywood Pieces
Using your trusty circular saw and cutting guides, cut the plywood sheet into the required pieces for the cabinet box and shelves. For precise measurements and a handy visual guide, I’ve included a detailed cut diagram in the printable plans.
Pro Tip: Applying edge banding to the front edges of the side panels and top/bottom pieces will give your cabinet a polished look.
Step 2: Assembling the Cabinet Box
This step is where your pocket hole jig will come in handy! Drill pocket holes into the ends of the support strips and smaller top/bottom pieces, then assemble the main cabinet box using 1 ¼” pocket hole screws. Remember to position the pocket holes strategically to keep them hidden in the final assembly.
Next, attach the larger top/bottom panels to the cabinet box using wood glue and 1 ¼” screws, ensuring a ¾” overhang on the sides and a 1 ½” overhang at the front. Once the glue dries, conceal the screw holes with wood putty and sand them smooth.
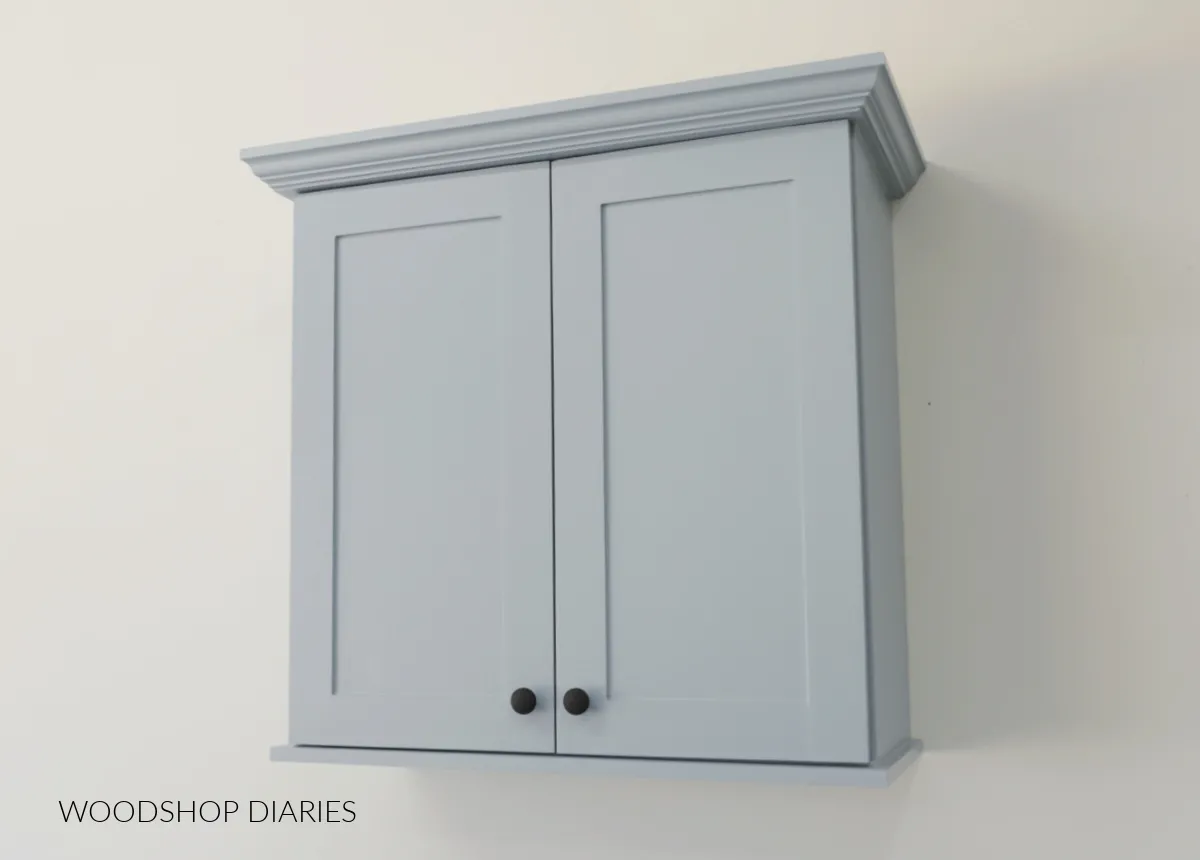
Optional Flourish: Add a touch of elegance by installing crown molding around the top of the cabinet.
Step 3: Crafting the Cabinet Doors
With the cabinet box ready, let’s shift our attention to the doors. You can choose from a variety of door styles based on your preference and skill level. I opted for overlay doors for this project. Remember to size your doors appropriately to ensure a seamless fit.
Step 4: Adding Your Finishing Touches
Before attaching the doors, I recommend finishing the cabinet and doors separately. This allows for easier handling and a more even application.
Step 5: Installing the Shelves and Doors
Using a shelf pin jig, drill shelf pin holes along the inside of the cabinet sides. This will allow you to adjust the shelf height according to your storage needs.
Next, install concealed hinges onto the cabinet doors and attach them to the cabinet box. You can now choose to hang the cabinet on the wall before or after inserting the shelves—the choice is yours!
Step 6: Hanging Your Masterpiece
Your cabinet is now ready to take its rightful place in your bathroom! Securely mount it to the wall studs using 2 ½” wood screws, ensuring it’s anchored to at least two studs for maximum stability.
Finally, adjust the doors for seamless alignment and insert the shelves at your desired heights.
 SW Stardew painted bathroom wall cabinet with double doors and crown molding
Congratulations!
You’ve successfully built a beautiful and functional bathroom wall cabinet! Not only have you created a charming storage solution, but you’ve also added a touch of your own personality and craftsmanship to your bathroom.
Feel free to share your creations with me; I’m always excited to see how fellow DIYers bring their visions to life! And remember, the world of art and craft is brimming with endless possibilities. Don’t hesitate to explore, experiment, and most importantly, have fun! For more inspiring projects and unique handcrafted gift ideas, be sure to browse the Robert Kline Art website.
