Blog
How to Create the Perfect Backyard Fire Pit Area for Cozy Evenings

Hey there, fellow craft enthusiasts! Robert Kline here, and let me tell you, there’s nothing quite like gathering around a warm fire pit on a cool evening, sharing stories and laughter with loved ones. A dedicated fire pit area instantly transforms your backyard into an inviting oasis, perfect for relaxation and entertainment.
Today, I’m excited to share my personal journey of crafting the ultimate backyard fire pit area, drawing from my years of experience in DIY and design. I’ll guide you through each step of the process, offering tips and insights to help you create a cozy retreat that reflects your unique style.
Planning Your Fire Pit Area
Before we jump into the building process, let’s take a moment to plan out your dream fire pit area:
1. Location, Location, Location:
First things first, choose a safe and level spot in your yard. Remember, safety is paramount! Keep the fire pit at least 10 feet away from any structures, trees, or overhanging obstacles. Always check with your local fire codes and homeowner’s insurance for specific regulations.
Expert Tip: “When choosing a location, consider the prevailing wind direction to minimize smoke blowing towards your seating area,” advises landscape architect, Sarah Williams.
2. Size and Seating:
Think about how many people you’d like to accommodate comfortably. A 10-12 foot diameter circle provides ample space for six to eight Adirondack chairs.
3. Fire Pit Selection:
You have options! Purchase a ready-made fire pit, opt for a portable option like the Solo Stove (my personal favorite for its smokeless design!), or embrace your inner builder and construct one yourself using bricks or stones.
Gathering Your Materials
Now that you have a vision, it’s time to gather your materials. Here’s a list to get you started:
- Weed eater & weed killer
- Landscaping fabric and stakes
- Stake, string, and light-colored spray paint (for marking)
- Pavers or other border material (we love flagstone!)
- Construction adhesive
- Pea gravel (or your choice of gravel)
- Rake or shovel
- Wheelbarrow (optional, but handy)
- Fire pit (Solo Stove, portable pit, or DIY kit)
- Adirondack chairs or other seating
- Optional: String lights, outdoor pillows, side tables for that extra touch of ambiance
Step-by-Step Guide to Building Your Fire Pit Area
Ready to roll up your sleeves? Let’s build!
1. Prep the Ground:
Clear the area of any grass, weeds, or debris. You can scalp the ground or use a tiller for this step.
2. Mark Your Territory:
Using a stake, string, and spray paint, mark out the perimeter of your fire pit area. A perfect circle adds a touch of elegance.
3. Level the Playing Field:
Ensure your area is relatively level for optimal enjoyment. If needed, make minor adjustments to create a flat surface.
4. Lay the Foundation:
Lay down landscaping fabric to prevent weeds and grass from invading your beautiful creation. Secure the fabric with landscaping stakes.
5. Place Your Fire Pit:
Center your chosen fire pit within the marked circle. If building a fire pit, follow safety instructions carefully and consider adding gravel or sand beneath.
6. Build a Border:
Use pavers, flagstone, or another border material to create a raised edge around the perimeter. This keeps your gravel contained and adds a polished look. Secure the border with construction adhesive.
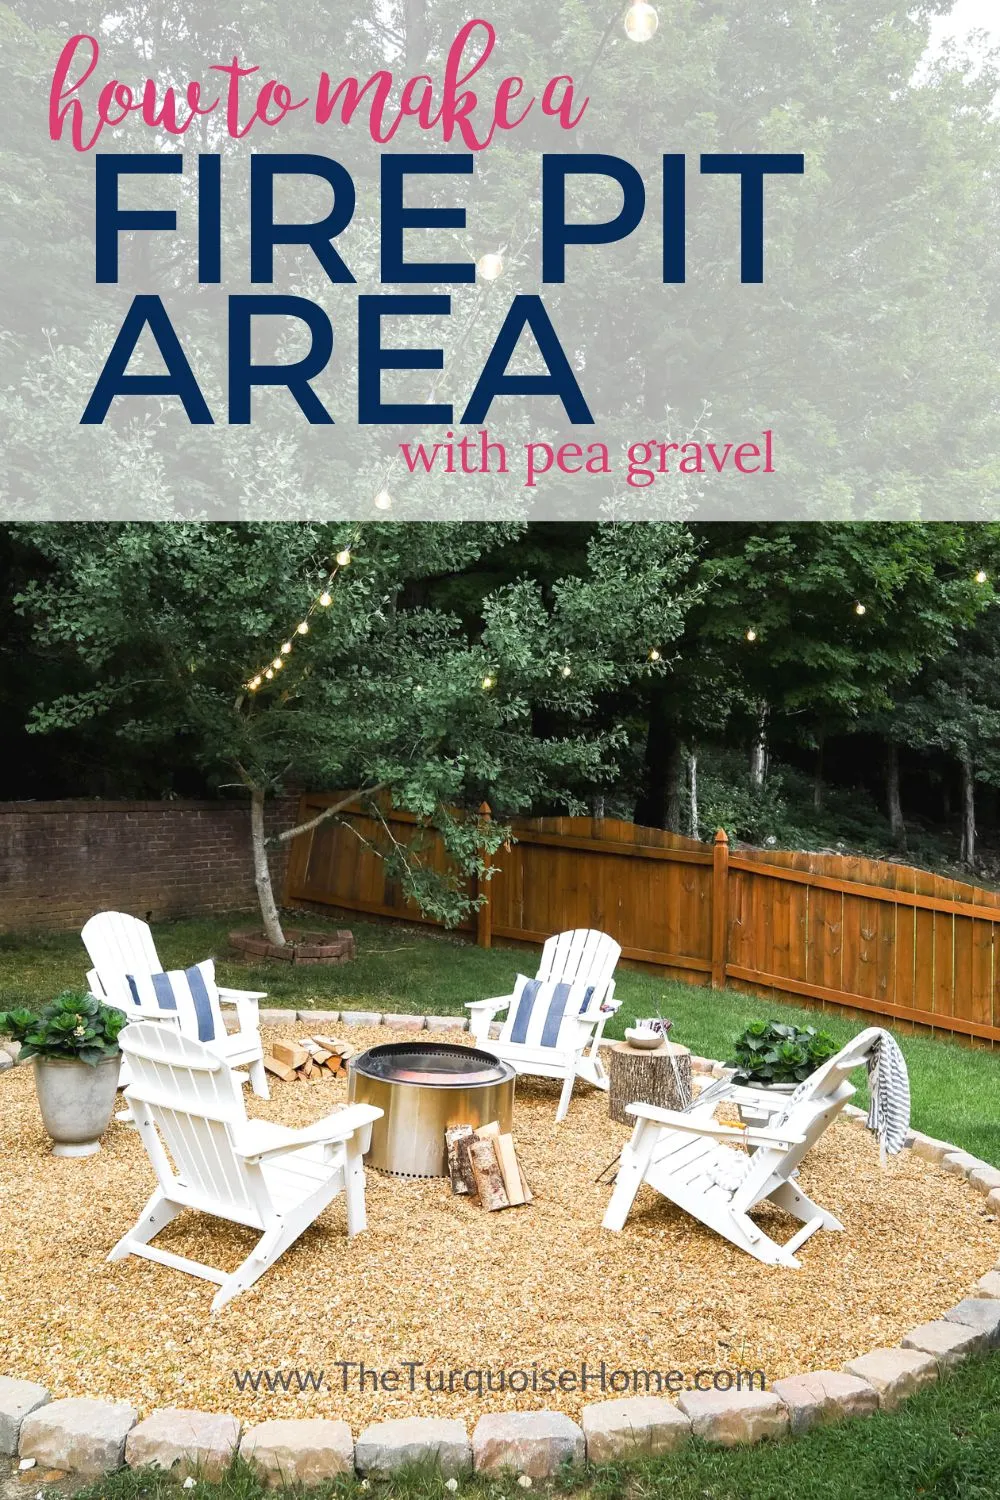
 Fire pit area with pea gravel
7. Add Gravel:
Spread a 3-inch layer of pea gravel or your preferred gravel within the bordered area. Rake it smooth for a clean finish.
8. Time to Get Cozy:
Arrange your Adirondack chairs or other seating around the fire pit. Now for the fun part – add string lights, outdoor pillows, and side tables to create a magical ambiance.
Enjoy Your Cozy Oasis!
Congratulations! You’ve successfully crafted the perfect backyard fire pit area. Invite your loved ones over, light up the fire, and bask in the warmth and joy of your creation.
Don’t forget to share your experiences and photos in the comments below. And for more unique handmade gift ideas and craft inspiration, be sure to explore the rest of Robert Kline Art!
