Blog
Crafting a Rustic Chic Bathroom: A Simple DIY Scrap Wood Towel Rack

Hey there, fellow craft enthusiasts! Robert Kline, your friendly neighborhood artist, here, with a project that’s close to my heart – turning scraps into treasures. If you’re anything like me, you probably have a stash of leftover wood just begging for a new purpose. Today, we’re tackling that pile and building a charming, rustic towel rack that’s perfect for adding a touch of warmth to your bathroom.
This project is all about simplicity and resourcefulness, proving that you don’t need fancy tools or expensive materials to create something beautiful and functional. Let’s get started!
Gathering Your Supplies
Before we dive in, let’s gather our tools and materials. Here’s what you’ll need for this project:
Materials:
- 2×2 scrap wood pieces (See cut list below)
- Wood glue
- 2 ½” and 3″ wood screws
- Wood finish (I prefer a simple stain and polyurethane combo for a classic look)
Tools:
- Miter saw (or a hand saw and a steady hand!)
- Drill and driver
- Measuring tape
- Pencil
- Stud finder
- Clamps
- Sandpaper
- Safety glasses
Cut List:
- (2) 2×2 @ 12″ long (back supports)
- (4) 2×2 @ 5″ long (side supports)
- (2) 2×2 @ 24″ long (front rails)
Pro Tip: Don’t have perfectly square 2x2s? No problem! You can easily make your own from larger scrap lumber for a fraction of the cost.
Building Your Rustic Towel Rack: A Step-by-Step Guide
Step 1: Assembling the Back and Sides
Start by grabbing your two 12″ back support pieces and four 5″ side support pieces. Apply wood glue to the ends of two side supports and sandwich a 12″ back support between them, creating an “H” shape.
Pro Tip: For extra sturdiness, pre-drill holes before driving in your 2 ½” wood screws through the back support and into the side supports. Remember, these screw holes will be facing the wall, so they won’t be visible. Repeat this step for the other back and side supports.
Step 2: Attaching the Front Rails
With the back and side assemblies complete, it’s time to attach the front rails. Apply wood glue to the top of the side supports and carefully position your 24″ front rails, ensuring they are flush with the sides. Use clamps to hold them in place while the glue dries.
Pro Tip: For added security, you can drive in 2 ½” wood screws or use brad nails to secure the front rails.
Step 3: Finishing Touches and Installation
Once the glue is dry, give your towel rack a light sanding to smooth out any rough edges or glue residue. Now comes the fun part – choosing your finish! I opted for a warm Early American wood stain followed by a couple of coats of polyurethane for a durable, moisture-resistant finish.
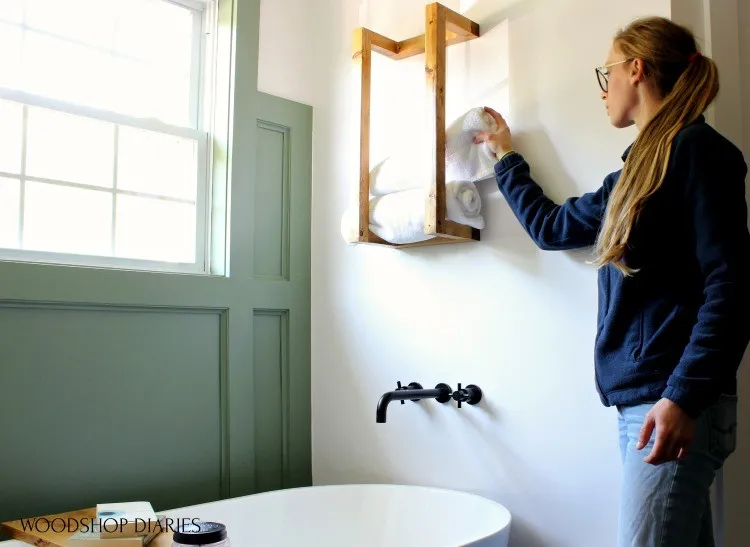
 Shara Woodshop Diaries removing towel from scrap wood towel rack hanging on wall above tub
Hanging Your Masterpiece:
- Use a stud finder to locate a wall stud in your desired location.
- Pre-drill holes through the back supports of your towel rack.
- Drive 3″ wood screws through the pre-drilled holes and into the wall stud.
Pro Tip: If you can’t hit a stud, use drywall anchors for a secure hold.
Bringing Rustic Charm to Life
And there you have it – a beautiful and functional scrap wood towel rack that adds a touch of rustic charm to your bathroom without breaking the bank.
This project is a testament to the beauty of simplicity and the satisfaction of creating something with your own two hands. Remember, crafting is all about experimentation and personalization. Don’t be afraid to put your own spin on this project – try different wood species, finishes, or even add decorative elements.
Let me know what you think of this project in the comments below. I’d love to see your creations! And don’t forget to explore Robert Kline Art for more unique, handcrafted gifts and DIY inspiration. Happy crafting!
