Blog
DIY Gift Wrap Station: The Ultimate Guide to Organization
Are you tired of gift wrap chaos taking over your home every holiday season? I’ve been there! That’s why I decided to take matters into my own hands and build a DIY gift wrap station that would make Martha Stewart proud. Trust me, this project is easier than it looks, and the results are truly life-changing. Imagine having all your wrapping paper, ribbons, tags, and tools neatly organized and easily accessible. No more frantic searching through cluttered drawers or tripping over stray rolls of wrapping paper.
This comprehensive guide will walk you through every step of building your very own DIY rolling gift wrap station, from gathering your materials to putting on the finishing touches. Get ready to reclaim your space and become the ultimate gift-wrapping guru!
Planning Your Dream Gift Wrap Station
Before you dive into sawing and hammering, let’s take a moment to plan your DIY gift wrap station. This step is crucial to ensure your finished product meets your specific needs and fits seamlessly into your crafting space.
Measurements and Dimensions
Consider the available space in your craft room, closet, or wherever you plan to store your gift wrap station. Measure the height, width, and depth of the area to determine the maximum dimensions for your station.
Remember, this guide provides a basic framework. Feel free to adjust the measurements to accommodate larger gift bags, taller rolls of wrapping paper, or a specific number of ribbon spools.
Design Inspiration
Browse online platforms like Pinterest or browse crafting blogs for design inspiration. Pay attention to features that catch your eye, such as:
- Number of shelves and compartments: Determine how many shelves and compartments you need to store all your gift wrap essentials.
- Rolling vs. stationary: Decide whether you want a rolling station for easy maneuverability or a stationary one for a more permanent fixture.
- Additional features: Do you want to include specialized storage for gift bags, tissue paper, or even a built-in cutting surface?
Gathering Your Materials
Now that you have a vision for your DIY gift wrap station, let’s gather the materials you’ll need to bring it to life.
Wood:
- ¾” plywood
- ¼” MDF (Medium-Density Fiberboard)
Hardware:
- 4 swivel casters (choose locking casters if you prefer the station to stay put when not in use)
- 3/4″ wood screws (for attaching casters)
- 1 1/2″ wood screws or pocket screws
- Finishing nails
- Drawer handle or knob
- Wood glue
- Sandpaper
- Wood filler
- ¼” dowels
Tools:
- Measuring tape
- Pencil
- Saw (circular saw or jigsaw)
- Drill
- Screwdriver
- Clamps (optional)
- Kreg Jig (optional, but makes for stronger joints)
Paint or Stain:
- Choose your favorite paint color or stain to match your crafting aesthetic.
Step-by-Step Building Guide
Get ready to put your DIY skills to the test! This detailed step-by-step guide will walk you through the construction process, making it easy to create a professional-looking gift wrap station.
Step 1: Create the Base
-
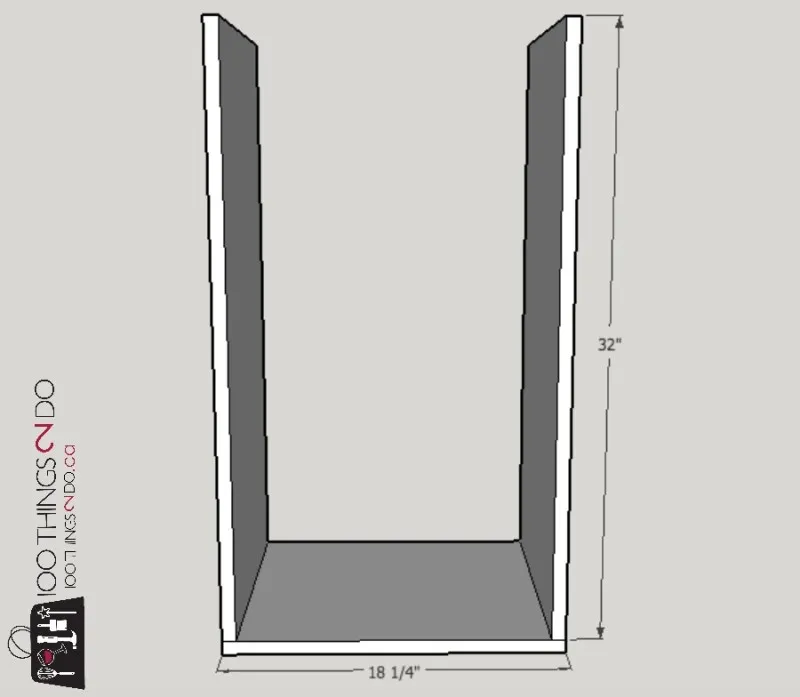
Begin by cutting the plywood according to the provided measurements. You’ll need pieces for the base, sides, drawer shelf, center divider, shelves, and drawer components.
-
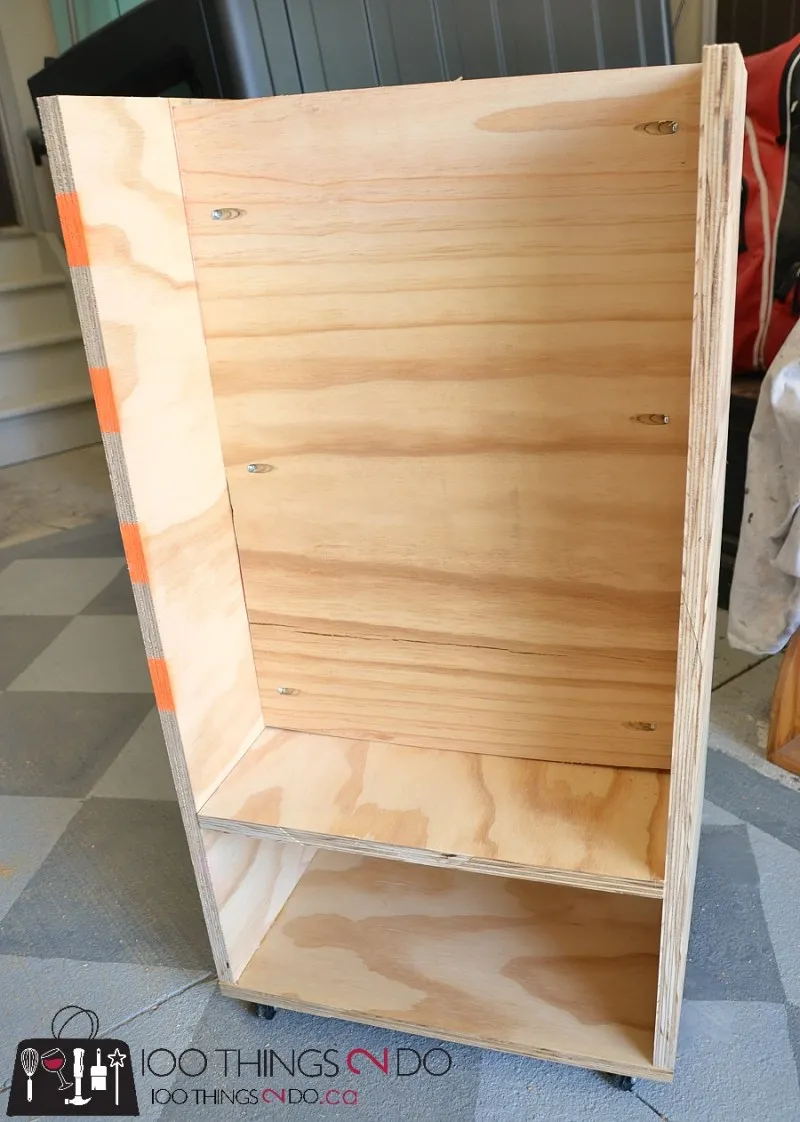
Attach the side pieces to the base using wood glue and 1 1/2″ wood screws, ensuring they are flush with the edges of the base.
-
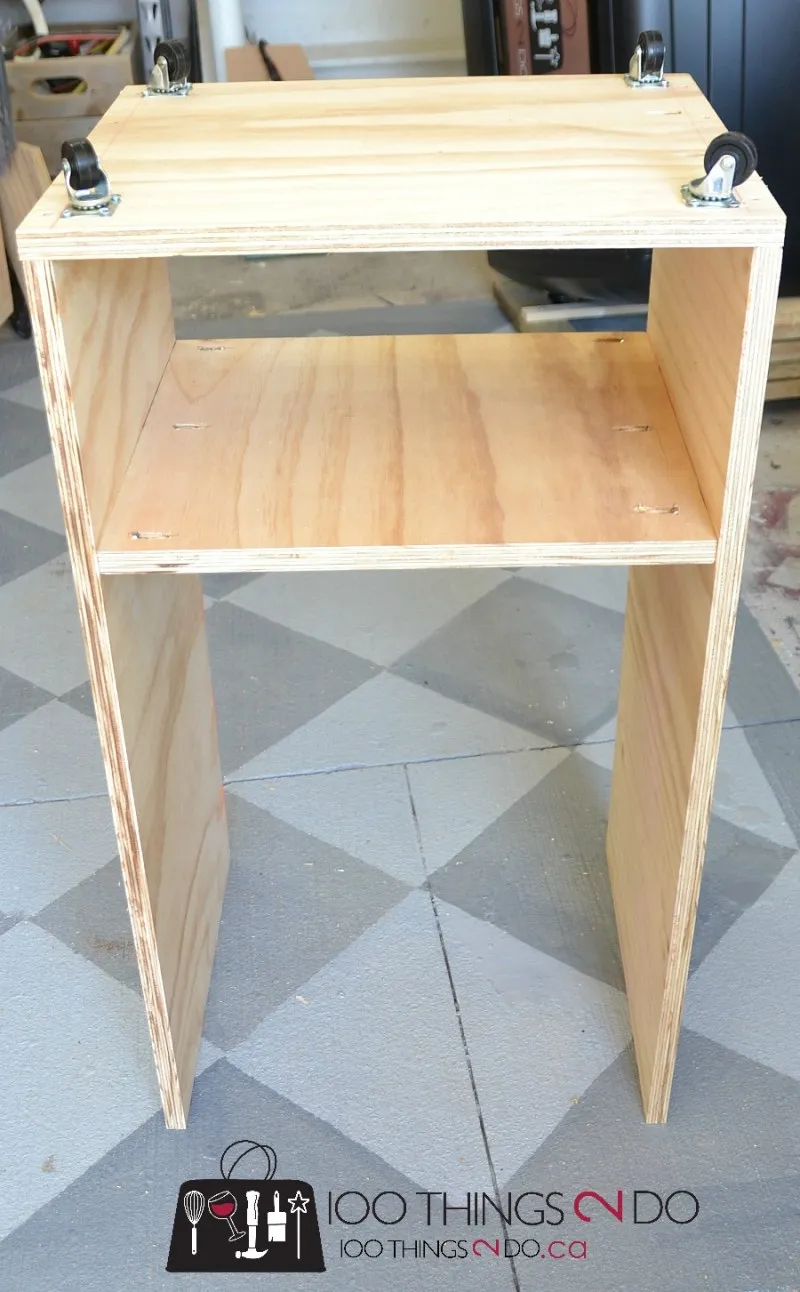
Secure the casters to the underside of the base using the 3/4″ wood screws, positioning them in each corner for stability.
Step 2: Building the Storage Compartments
-
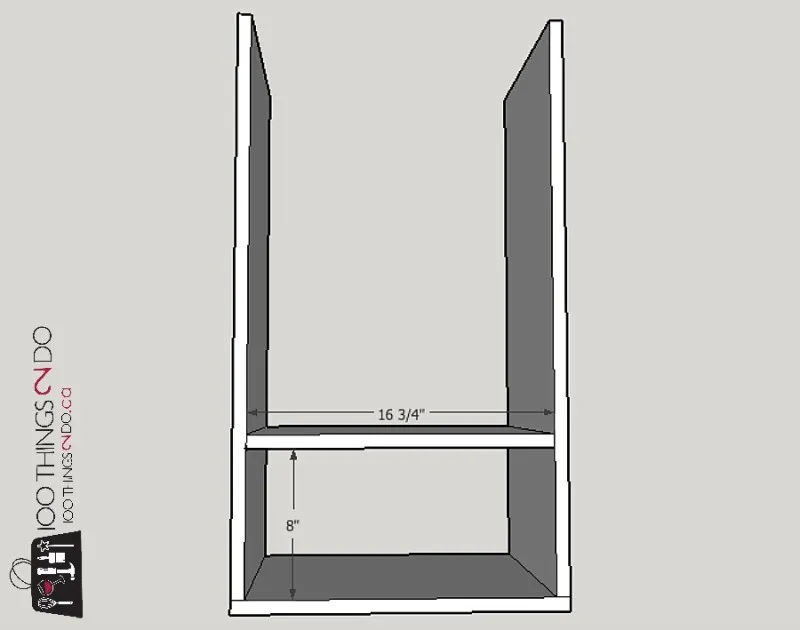
Install the drawer shelf by measuring up 8 inches from the base on both sides and marking the positions. Attach the shelf using pocket screws or wood screws, ensuring it is level and secure.
-
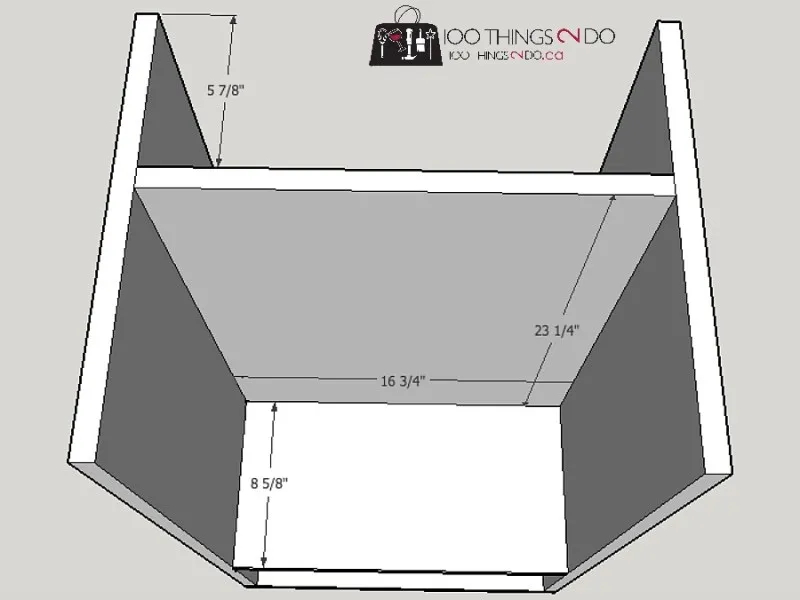
Next, insert the center divider. Measure and mark 8 5/8 inches from the front edge of the base on both sides. Pre-drill holes on one side of the divider using a Kreg Jig (if you have one), and attach it to the side panels using pocket screws or wood screws.
-
Add the top shelf by measuring down 2 3/8 inches from the top edge of the center divider on both sides. Pre-drill holes and attach it using pocket screws or wood screws, leaving the front edge open for now.
-
To create a finished look, attach the shelf edge piece to the front edge of the top shelf, covering the exposed edge of the shelf bottom.
-
Now it’s time for the mid-shelf. Determine the desired height for this shelf based on your storage needs and mark the position on the side panels. Pre-drill holes, and attach the shelf securely.
Step 3: Enclosing the Back
- Attach the ¼” MDF back panel to the back of the gift wrap station using wood screws or finishing nails. You can opt to cut out a section of the MDF to accommodate taller rolls of wrapping paper if desired.
Step 4: Crafting the Drawer
-
Assemble the drawer by attaching the drawer sides to the drawer front using wood glue and pocket screws. Ensure the sides are positioned slightly inward to allow the drawer to slide smoothly.
-
Attach the drawer back to the drawer sides using the same method, ensuring all corners are square and secure.
-
Create a lip for the drawer bottom by attaching 3/4″ square dowels along the bottom edge of all four sides, using wood glue and finishing nails.
-
Cut the remaining piece of ¼” MDF to size and drop it into place as the drawer bottom. You can secure it with glue or finishing nails if desired.
-
Center and attach your chosen drawer handle or knob.
Step 5: Ribbon Dowel Holders
-
To make the ribbon dowel holders, cut a 2″ x 1.5″ piece of 3/4″ plywood for each holder. Drill a ¼” hole in the center of each piece to fit your dowels.
-
Securely clamp each plywood piece and use a saw to cut from the top edge down to the outer edge of the drilled hole, creating a slot for the dowel.
-
Sand all surfaces smooth.
Step 6: Finishing Touches
-
Fill any screw holes or imperfections with wood filler and let it dry completely.
-
Sand all surfaces of your gift wrap station until smooth.
-
Prime and paint or stain your station in your desired color, applying multiple coats for a durable finish.
-
Once the paint or stain is dry, attach the ribbon dowel holders to the sides of the station using wood glue and finishing nails. Space them evenly based on your ribbon storage needs.
Step 7: Organize and Enjoy!
Congratulations! Your DIY rolling gift wrap station is complete! Now comes the fun part: organizing all your gift wrap supplies. Place your wrapping paper rolls, ribbon spools, gift bags, tissue paper, scissors, tape, tags, and other essentials in their designated compartments.
Tips for a Successful Project
Here are some additional tips to ensure your DIY gift wrap station project is a resounding success:
-
Pre-drill holes: Pre-drilling holes before screwing into the plywood will prevent splitting and ensure a clean, professional finish.
-
Sand thoroughly: Take your time sanding all surfaces of your gift wrap station to create a smooth and splinter-free finish. This will make painting or staining much easier and result in a more polished final product.
-
Use quality materials: Investing in quality plywood, hardware, and paint or stain will ensure your DIY gift wrap station is sturdy, durable, and looks great for years to come.
-
Get creative with customization: Once you’ve completed the basic construction, don’t hesitate to personalize your gift wrap station with additional features. You could add hooks for scissors, a small shelf for a label maker, or even a chalkboard panel to jot down gift ideas.
-
Enjoy the process: Remember, building your own DIY gift wrap station should be an enjoyable and rewarding experience. Don’t be afraid to experiment, put your own spin on the design, and have fun with it!
Now that you have all the tools and knowledge to create your own DIY rolling gift wrap station, there’s no excuse for disorganized wrapping paper chaos. Gather your materials, put on your crafting hat, and get ready to transform your gift-giving game! And for more unique handmade gifts and craft ideas, be sure to explore the rest of Robert Kline Art. Happy crafting!
 Organized gift wrap station with wrapping paper, ribbon, and tags
 Close-up of ribbon dowel holders on gift wrap station
 Gift wrap station with a drawer open, revealing gift boxes and bags
 Top view of gift wrap station with organized supplies
 Close-up of drawer construction with dowel lip
