Blog
DIY Rolling Craft Table: The Ultimate Guide to Building Your Dream Workspace

Hey there, fellow craft enthusiasts! As an artist who thrives on hands-on creativity, I’m always on the lookout for ways to optimize my workspace. A dedicated craft table is a game-changer, providing a dedicated area to let your creative juices flow. Today, I’m thrilled to share my step-by-step guide to building a simple yet stylish rolling craft table with ample storage. The best part? This project can be completed in an afternoon using readily available prefab cabinets and countertops. Let’s dive right in!
Planning Your Craft Table
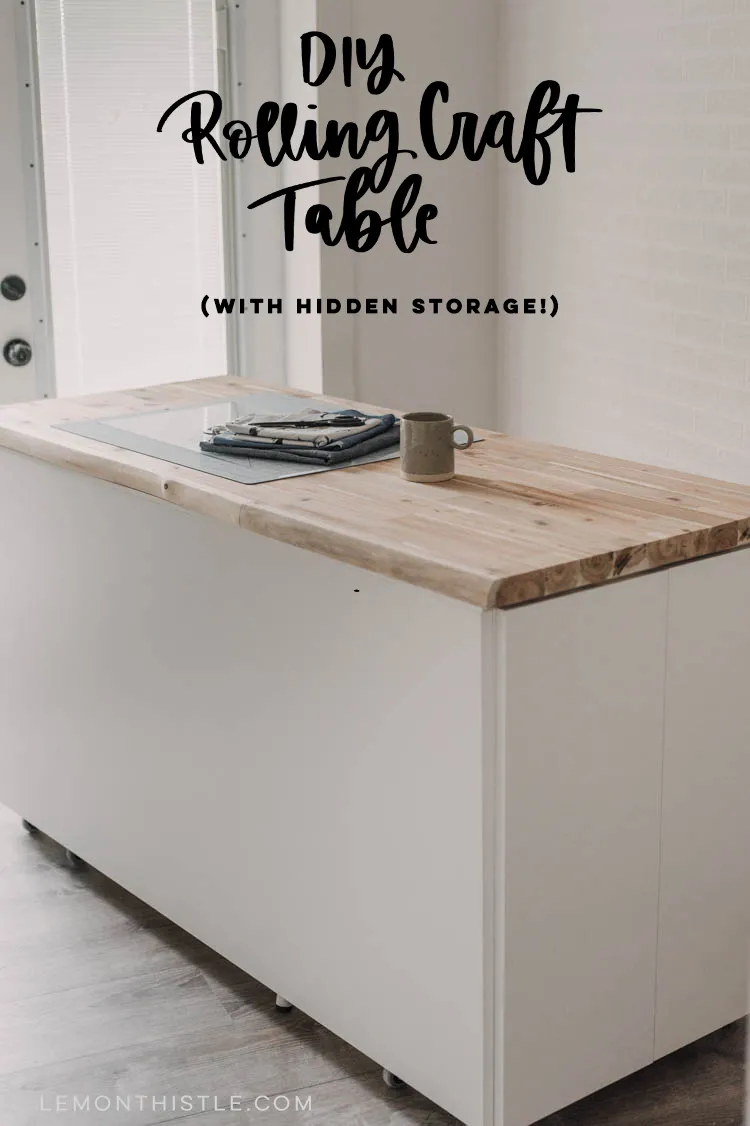
 DIY craft table with hidden storage- love the counter height!
Image: A stunning DIY rolling craft table with a spacious countertop and hidden storage.
Before we jump into the construction process, let’s plan your dream craft table.
Determine the Dimensions
Consider the size of your workspace and the types of crafts you’ll be working on. My craft table measures 5 feet wide and just over 2 feet deep, providing ample workspace while fitting perfectly in my studio.
Choose Your Materials
For this project, I opted for prefab cabinets and a countertop for their ease of assembly and polished look. Two 24″ upper cabinets and a melamine tabletop form the sturdy base, while a beautiful live-edge wood countertop adds a touch of natural elegance.
Gathering Your Supplies
Head over to your local home improvement store and gather the following materials:
- Two 24″ upper cabinets
- One melamine tabletop
- One live-edge wood countertop
- Eight 3″ casters (four locking swivel, four fixed)
- 3/4″ particle board screws
- 1 1/4″ particle board screws
- Wood shims
- Doorstop
- Flat panel doors (optional)
- Cabinet hardware (optional)
Assembling Your Rolling Craft Table
Building the Base
- Assemble the two upper cabinets according to the manufacturer’s instructions.
- Attach the casters to the bottom of the cabinets, using the 3/4″ particle board screws. Install the fixed casters on the front corners and the locking swivel casters on the back corners for optimal stability and mobility.
- Lay the melamine tabletop on top of the cabinets, aligning the edges carefully.
- Secure the tabletop to the cabinets by driving 1 1/4″ particle board screws through the shelf pin holes, using two screws on the top and bottom of each cabinet. Add an additional screw in the center of each cabinet for extra support.
Adding the Countertop
- Carefully flip the base over with assistance to avoid any damage.
- Shim the live-edge wood countertop to ensure a snug fit and allow for easy opening and closing of the cabinet doors.
- Cut the countertop to your desired width using a table saw.
- Attach the countertop to the front and back edges of the cabinets using screws, creating a clean and finished look.
- Insert wood shims between the countertop and the melamine tabletop for added stability. Secure the countertop by driving screws through the shims into the cabinets.
- Attach a doorstop to the back edge of the countertop and secure it with screws. This will provide additional support and prevent the countertop from sliding when the table is moved.
Finishing Touches
- Optional: Install flat panel doors on the cabinets for a streamlined appearance.
- Optional: Add cabinet hardware to your liking.
- Consider Your Ideal Height: While countertop height is standard, you can adjust the height by using different caster sizes or adding a bar-height stool for added comfort.
Conclusion
Congratulations! You’ve successfully built a stunning and functional rolling craft table that’s ready to be adorned with your creative projects. This DIY craft table is not only a beautiful addition to your workspace but also a testament to your craftsmanship. Now, gather your supplies, unleash your creativity, and let the crafting adventures begin!
Don’t forget to share your creations and experiences with me in the comments below. I can’t wait to see what you make! And be sure to explore Robert Kline Art for more unique, handmade gifts and inspiration for your next crafting project!
