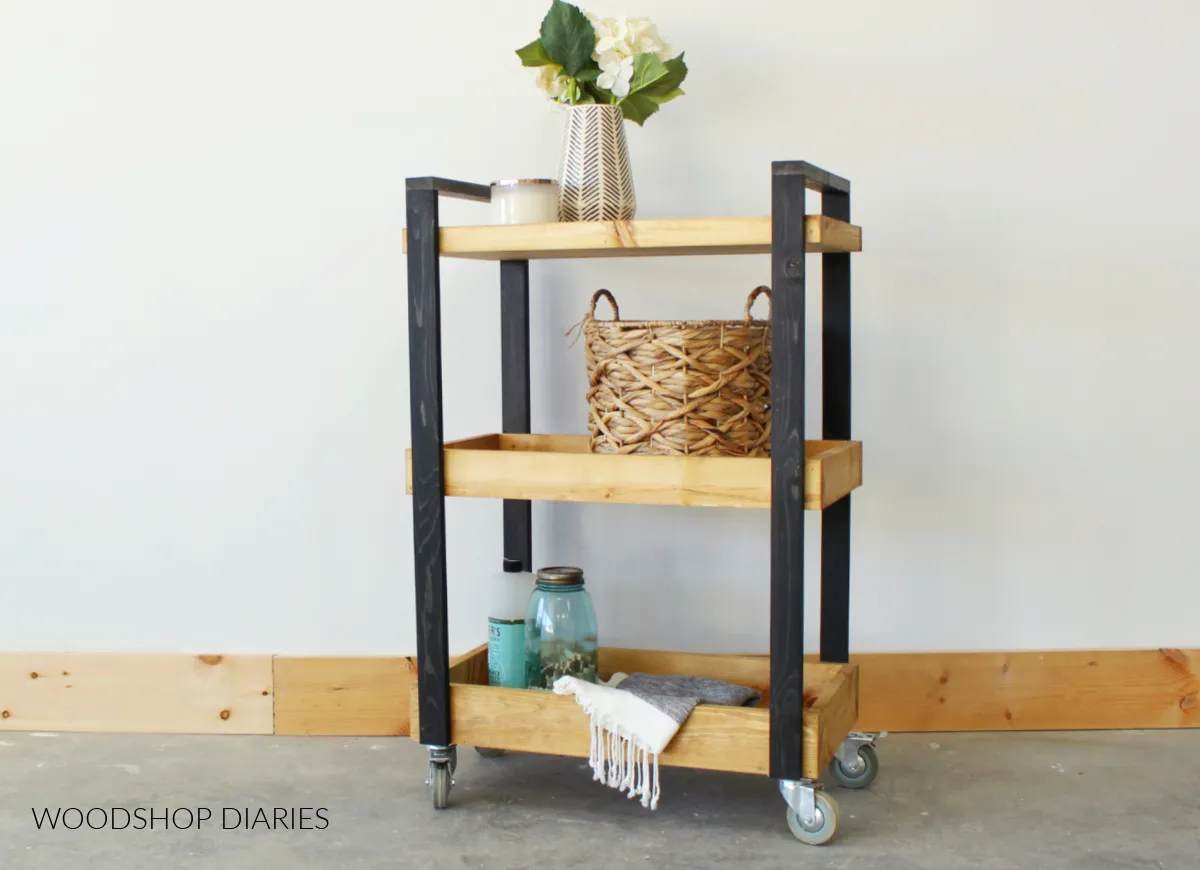
Craft Room Organization: Build Your Own Rolling Storage Cart

Are you tired of a cluttered craft space? Do you dream of effortless organization and easy access to all your supplies? As a craft enthusiast myself, I understand the struggle. That’s why I’m excited to share my simple yet effective DIY rolling storage cart. It’s the perfect solution for wrangling those unruly art supplies, whether you’re a painter, a scrapbooker, or a mixed-media master.
This mobile storage cart is not only practical but also incredibly easy to build. With a few basic tools and materials, you can have a custom-designed storage solution that fits your specific needs and adds a touch of handmade charm to your workspace. Let’s get started!
Tools and Materials You’ll Need
Gathering your tools and materials beforehand can streamline your building process. Here’s what you’ll need for this project:
Tools:
- Miter Saw
- Circular Saw
- Straight Edge Guides (for accurate plywood cuts)
- Drill/Driver
- Finish or Brad Nailer
- Clamps
Materials:
- (3) 1x2x8 wood boards
- (1) 1x3x8 wood board
- (1) 1x4x8 wood board
- (1) ¾” plywood sheet (24” x 48”)
- (4) Caster wheels
- 1 ¼” wood screws
- 1 ¼” brad or finish nails
- Wood Glue
- Your choice of stain or paint
- Sandpaper (optional, for smoothing edges)
Crafting Your Rolling Storage Cart
This DIY rolling storage cart features three tiers, each with a different lip height to keep your supplies securely in place. I’ve designed it this way to accommodate a variety of craft items, from rolls of paper to jars of beads.
Step 1: Creating the Cart Shelves
-
Cut the Plywood: Begin by cutting three pieces of ¾” plywood to 10 ½” x 22 ½”. These will serve as the bases for your shelves.
-
Create the Frames:
- Top Shelf: Cut two pieces of 1×2 lumber to 10 ½” and two pieces to 24″. These will form the frame for your top shelf.
- Middle Shelf: Repeat the process with the 1×3 lumber for the middle shelf frame.
- Bottom Shelf: Finally, use the 1×4 lumber to create the frame for your bottom shelf.
-
Assemble the Shelves: Apply wood glue to the edges of each plywood base and secure the frames using 1 ¼” nails or screws.
Pro Tip: If you prefer a uniform look, feel free to use the same lumber size for all three shelf frames.
Step 2: Assembling the Cart Frame
-
Prepare the Legs: Cut four pieces of 1×2 lumber to 32″ for the cart legs.
-
Attach the Shelves:
- Position the bottom shelf flush with the bottom of two legs, leaving a 1″ overhang on each side.
- Place the top shelf 2″ from the top of the legs, also with a 1″ overhang on each side.
- Center the middle shelf between the top and bottom shelves.
- Secure each shelf to the legs using wood glue and 1 ¼” wood screws.
-
Install the Remaining Legs: Repeat the process to attach the remaining two legs to the opposite side of the shelves.
Step 3: Adding Finishing Touches
-
Install Handles (Optional): Cut two pieces of 1×2 lumber to fit between the top legs. Attach them securely using wood glue and nails for easy maneuverability.
-
Add Mobility with Casters: Flip the cart upside down and attach the caster wheels to the bottom of each leg using 1 ¼” wood screws and washers for added stability.
-
Sand and Finish: Sand down any rough edges for a polished look. Apply your preferred stain or paint to protect the wood and enhance the cart’s appearance.
 Black and wood tone three tiered mobile storage cart with cleaning supplies and storage basket
Customizing Your Craft Storage Solution
The beauty of DIY projects is the freedom to customize! Here are a few ideas to make this rolling storage cart truly your own:
- Color Coordinate: Paint each shelf a different color to create visual organization for your craft supplies.
- Add Hooks and Baskets: Install hooks on the sides for hanging scissors or measuring tapes. Use baskets or containers to store smaller items within each shelf.
- Personalize It: Decorate your cart with stencils, paint pens, or decorative hardware to match your creative style.
Conclusion
This DIY rolling storage cart is more than just a storage solution—it’s a testament to your creativity and craftsmanship. I encourage you to personalize this project and enjoy the satisfaction of creating a functional and stylish addition to your craft space. Share your creations and let’s inspire each other! Don’t forget to explore Robert Kline Art for more unique handmade gifts and craft ideas.
