Blog
Craft Your Own Rolling Art Supply Cart: The Ultimate Guide

I hear you. As an artist, my studio often feels like a whirlwind of creativity (and sometimes, a bit of chaos!). That’s why I decided to create a DIY rolling art supply cart, a game-changer that keeps everything organized and easily accessible.
This project is perfect for anyone looking to streamline their creative space, whether you’re a seasoned artist or just starting out. The best part? It’s easier than you think! In this comprehensive guide, I’ll walk you through every step of the process, sharing my personal tips and tricks along the way.
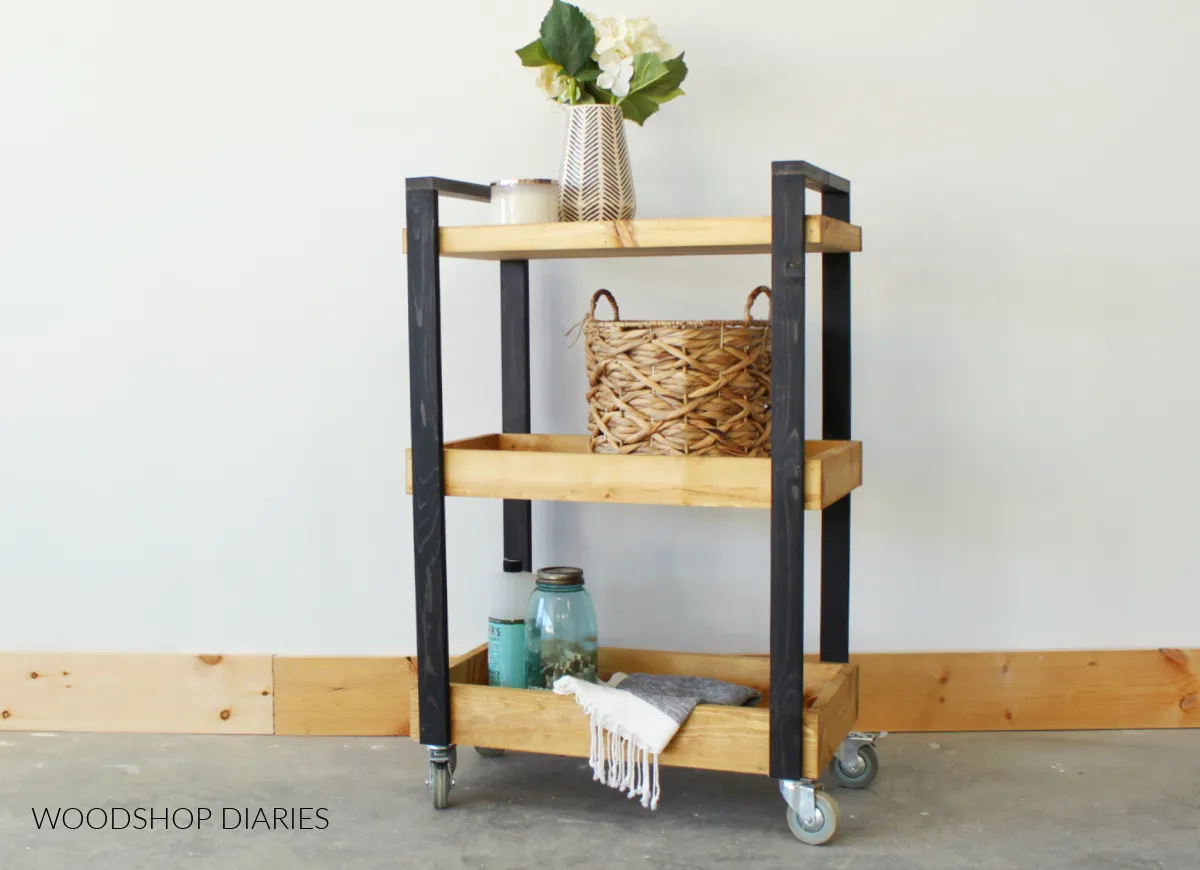
 Black and wood tone three tiered mobile storage cart with cleaning supplies and storage basket
Why You Need This Cart in Your Life
Imagine this: no more frantic searches for your favorite paintbrush or tangled tubes of acrylics. This mobile art supply storage solution puts everything within arm’s reach, making your creative process smoother and more enjoyable.
But the benefits go beyond organization.
- Customizable: Tailor the size, shelves, and even the color to match your specific needs and artistic style.
- Space-Saving: Perfect for studios of all sizes, this cart tucks away neatly when not in use.
- Budget-Friendly: Save money by building it yourself with readily available materials.
Ready to unleash your inner DIYer? Let’s dive into the building process!
Gathering Your Materials and Tools
Every masterpiece starts with the right tools. Here’s what you’ll need:
Materials
- (3) 1x2x8 wood boards
- (1) 1x3x8 wood board
- (1) 1x4x8 wood board
- (1) ¾” plywood sheet (24” x 48”)
- (4) Caster wheels
- 1 ¼” wood screws
- 1 ¼” brad nails or finish nails
- Wood glue
Tools
- Miter saw
- Circular saw
- Straight edge guides (for accurate plywood cuts)
- Drill/driver
- Finish or brad nailer
- Clamps
Optional Extras:
- Sandpaper (for smoothing rough edges)
- Wood filler (for a polished finish)
- Paint or stain (to match your aesthetic)
- Polyurethane or sealant (for added durability)
Step-by-Step Building Guide
Step 1: Creating the Cart Shelves
- Cut It Out: Begin by cutting three identical plywood pieces, each measuring 10 ½” x 22 ½”. These will form the bases of your shelves.
- Frame It Up: For each shelf, you’ll create a frame using the wood boards. The top shelf gets a 1×2 frame, the middle gets a 1×3 frame, and the bottom gets a 1×4 frame. This staggered design adds visual interest and functionality.
- Secure the Frame: Use wood glue and brad nails (or finish nails) to attach the frames to the plywood bases. Make sure the corners are flush for a professional look.
Step 2: Assembling the Cart Frame
- Cut the Legs: Cut four 1x2s to 32” long. These will act as the vertical supports for your cart.
- Position and Attach: Place the bottom shelf upside down on your work surface. Position two of the 32” legs flush with the sides of the shelf base, ensuring they extend about 1” beyond the front and back edges. Secure the legs to the shelf using wood glue and screws.
- Repeat for the Top Shelf: Position the top shelf upside down, about 2” down from the top of the legs, leaving room for handles. Secure it to the legs as you did with the bottom shelf.
- Center the Middle Shelf: Center the middle shelf between the top and bottom shelves and attach it to the legs using wood glue and screws.
- Install the Remaining Legs: Repeat steps 2-4 to attach the remaining two legs to the opposite side of the cart.
Step 3: Adding Handles and Casters
- Craft the Handles: Cut two 1×2 pieces to fit between the legs at the top of the cart. Attach these using wood glue and nails to create sturdy handles.
- Mount the Casters: Flip the cart upside down. Attach the caster wheels to the bottom of the cart frame using screws. Ensure they are evenly spaced for stability.
Step 4: Finishing Touches
- Sand and Smooth: Lightly sand any rough edges for a polished finish.
- Personalize with Paint or Stain: Now comes the fun part! Let your creativity shine by painting or staining the cart to match your studio décor.
- Seal for Durability: Apply a coat of polyurethane or sealant for extra protection and longevity.
Congratulations, you’ve done it!
You’ve transformed simple materials into a stunning and functional rolling art supply cart. Not only will it help you stay organized, but it also adds a touch of personalized charm to your creative space.
Don’t forget to share your finished masterpiece with me! I’d love to see your unique take on this project. You can connect with me on [Robert Kline Art social media platforms] or leave a comment below. Happy crafting!
Looking for more DIY inspiration? Head over to Robert Kline Art for a treasure trove of creative projects, tips, and techniques.
