Blog
Craft a Cozy Outdoor Oasis: Building a DIY Boho Picnic Table

Summer is synonymous with long, sun-drenched days and evenings spent enjoying the warm breeze. What better way to embrace the season than by transforming your backyard, patio, or deck into an inviting gathering spot? Imagine intimate dinners under the stars or casual afternoon picnics with loved ones, all made possible with a touch of DIY magic.
In this step-by-step guide, we’ll embark on a journey to create a charming low-profile picnic table, perfect for elevating your outdoor space with a touch of bohemian flair. This project is perfect for both seasoned DIY enthusiasts and beginners looking to dip their toes into the world of crafting. As someone who cherishes creating special memories with my daughters, I can attest to the joy a handmade picnic table brings, offering countless opportunities for shared laughter and connection.
Gathering Your Supplies: A Symphony of Wood and Tools
Before we delve into the creative process, let’s gather our tools and materials. Just like a painter gathers their brushes and palette, we too must prepare for the masterpiece we’re about to create.
For this project, you will need:
-
Lumber:
- (5) 5/4 x 6 x 8′ treated deck boards or cedar boards (I recommend MicroPro Sienna for its durability and beautiful color)
- (1) 2 x 2 x 8′ treated lumber board
-
Tools:
- Miter saw (a circular saw can be used as an alternative)
- Sanding block or electric sander
- Measuring tape
- Drill
- Screwdriver
-
Fasteners:
- 2 1/2″ and 2″ deck screws
-
Finishing Touches (Optional):
- Stain or MicroPro Sienna’s Cut N’ Seal
- Foam brush
- Pencil
Dimensions: The finished table will measure approximately 48″ x 27.5″ x 12″.
Cut List: Prepare your lumber by cutting the pieces according to these measurements:
- (5) 5/4 x 6 deck boards at 4 feet long
- (2) 2 x 2 boards at 21″ long
- (4) 2 x 2 boards at 11″ long
Building Your Dream Table: A Step-by-Step Guide
With our materials prepped and ready, let’s begin constructing our boho picnic table.
Phase 1: Preparing the Lumber
Step 1: Selecting and Cutting:
Begin by carefully selecting your lumber, ensuring the pieces are straight and free of major imperfections. Using your miter saw (or circular saw), cut the lumber according to the cut list.
Step 2: Smoothing the Edges:
Using a sanding block or electric sander, smooth the surface and edges of each piece. This step is crucial for preventing splinters and ensuring a polished finish. Remember to remove any dust or debris after sanding.
Phase 2: Assembling the Tabletop
Step 3: Creating the Frame:
Lay the five 4-foot deck boards side by side on a flat surface, ensuring the ends are aligned. Position one of the 21″ 2×2 boards about 4″ from one of the short sides of the table, centering it horizontally. Repeat this process with the other 21″ 2×2 board at the opposite end of the tabletop.
Step 4: Securing the Frame:
Attach the 21″ 2x2s to the tabletop using 2″ deck screws and a screwdriver. For optimal stability, use two screws per plank.
Pro Tip: Drilling pilot holes before inserting screws can prevent the lumber from splitting. Additionally, consider applying wood glue to the 2x2s for added strength.
Phase 3: Attaching the Legs
Step 5: Adding the Support System:
Using 2 1/2″ wood screws, attach the 11″ 2×2 legs to the ends of the 21″ 2×2 pieces. Insert a screw from the outside of each leg through the side of the 21″ pieces. To further enhance stability, flip the table on its side and add two more 2 1/2″ screws from the tabletop down through each leg.
Phase 4: Infusing Your Style
Step 6: Personalizing with Paint or Stain:
Now that the structure is complete, it’s time to infuse your personality! Choose your favorite paint or stain colors to decorate the tabletop and legs. Embrace the freedom to experiment with different designs and techniques, such as distressing, stenciling, or color blocking. For a natural look, consider using MicroPro Sienna’s Cut N’ Seal to protect the wood and enhance its rich color.
Styling Your Boho Haven: A Tapestry of Textures and Colors
 Easy Hem Curtains
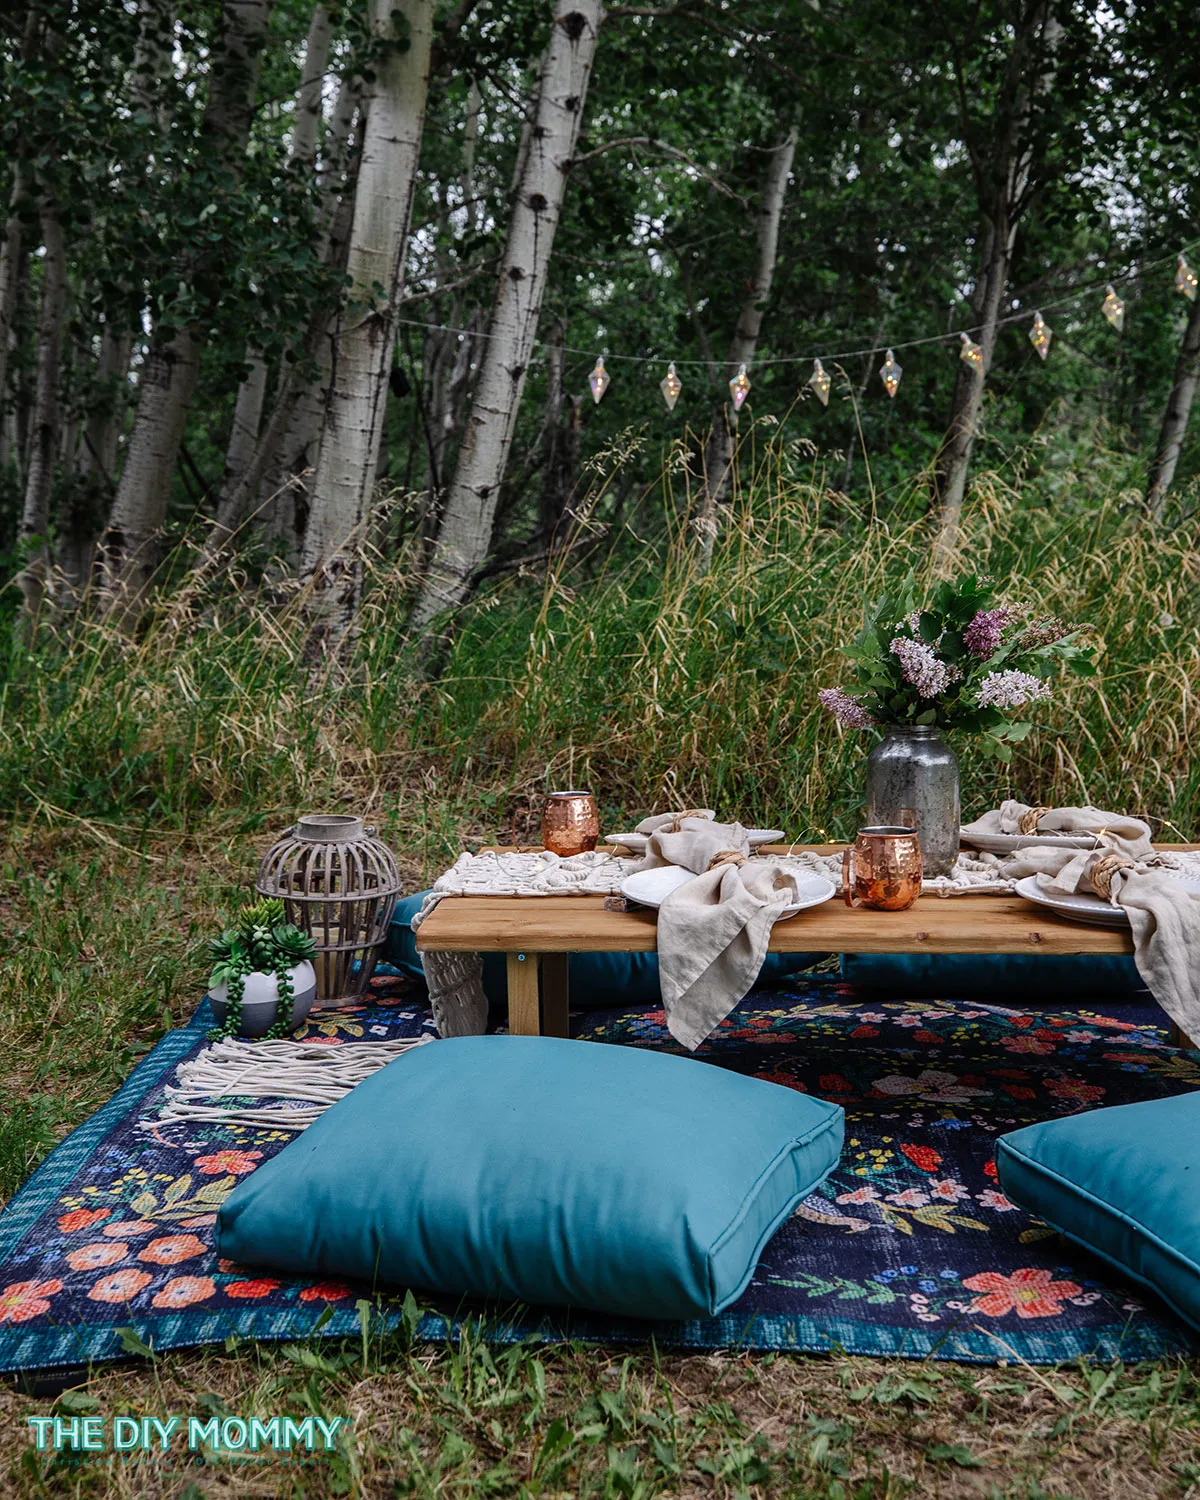
Your DIY boho picnic table is now ready to become the centerpiece of your outdoor haven. Here are some tips for styling it to perfection:
- Textile Delights: Layer on cozy textiles like blankets, pillows, and a macrame table runner to create a welcoming and visually appealing atmosphere.
- Rustic Charm: Incorporate natural elements like a floral rug, a picnic basket, and freshly cut flowers to enhance the bohemian vibe.
- Ambient Lighting: As dusk settles, add lanterns or string lights to create a magical ambiance.
- Comfort is Key: Arrange outdoor cushions around the table for comfortable seating.
This versatile table comfortably accommodates four people, but you can easily create a larger gathering space by building two tables and arranging them side by side.
Building a DIY boho picnic table is a rewarding experience that allows you to unleash your creativity while crafting a functional and beautiful addition to your outdoor living space. Share your creations and tag Robert Kline Art on social media – we’d love to see your unique interpretations!
