Blog
Build Your Own Relaxing Oasis: A DIY Hammock Chair Stand With Pergola
Hey there, fellow craft enthusiasts! Robert Kline here, your guide to the world of handmade havens. Remember those carefree days spent swinging at the playground? That feeling of blissful swaying is something we can recreate at home, and I’m here to show you how!
Today, we’re diving into a project that’s close to my heart: building a sturdy and stylish hammock chair stand, complete with a pergola top for added shade and charm. Imagine yourself relaxing in your very own hanging sanctuary, gently swaying in the summer breeze. Sounds idyllic, right? Let’s get crafting!
Crafting Your Dream Swing: Gathering Your Tools and Materials
Before we embark on this rewarding journey, let’s gather our crafting arsenal. Don’t worry, I’ll guide you through every step of the way, ensuring you have everything you need to bring this vision to life.
Recommended Tools:
- Pocket Hole Jig XL (for sturdy joints in 4×4 and 2×4 lumber). For the 2×4 lumber, a standard Kreg Jig 320 would work as well.
- Miter saw (for angled cuts with precision)
- Circular saw (for straight cuts and tackling those longer boards)
- Hand saw (for those finishing touches and hard-to-reach areas)
- Flush cut saw (for achieving those perfectly flush surfaces)
- Drill (your trusty sidekick for creating pilot holes and securing screws)
- Impact driver (optional, but oh-so-handy for effortless screw driving)
- Jigsaw or Bandsaw (for creating those graceful curves)
- Chisel (for refining shapes and cleaning up cuts)
- Clamps (your extra pair of hands, holding everything securely in place)
Supplies:
- Printable PDF Woodworking Plans (for a detailed roadmap of our project)
- Wood products (the backbone of our sturdy structure)
- (4) 4×4 boards, 6′ long (for direct ground contact, if needed)
- (1) 4×4 board, 6′ long (for the top post)
- (1 1/2) 2×4 boards, 8′ long (for ground contact, if needed)
- (2) 2×6 boards, 8′ long (for the base support)
- 4″ long XL pocket hole screws (for those heavy-duty connections)
- 2 1/2″ long pocket hole screws (for securing the 2x lumber)
- Heavy duty eye screws (the crucial hanging points for your hammock chair)
- Heavy duty carabiners (for easy and secure hammock attachment)
- Hammock chair (the star of the show, ready to provide ultimate relaxation)
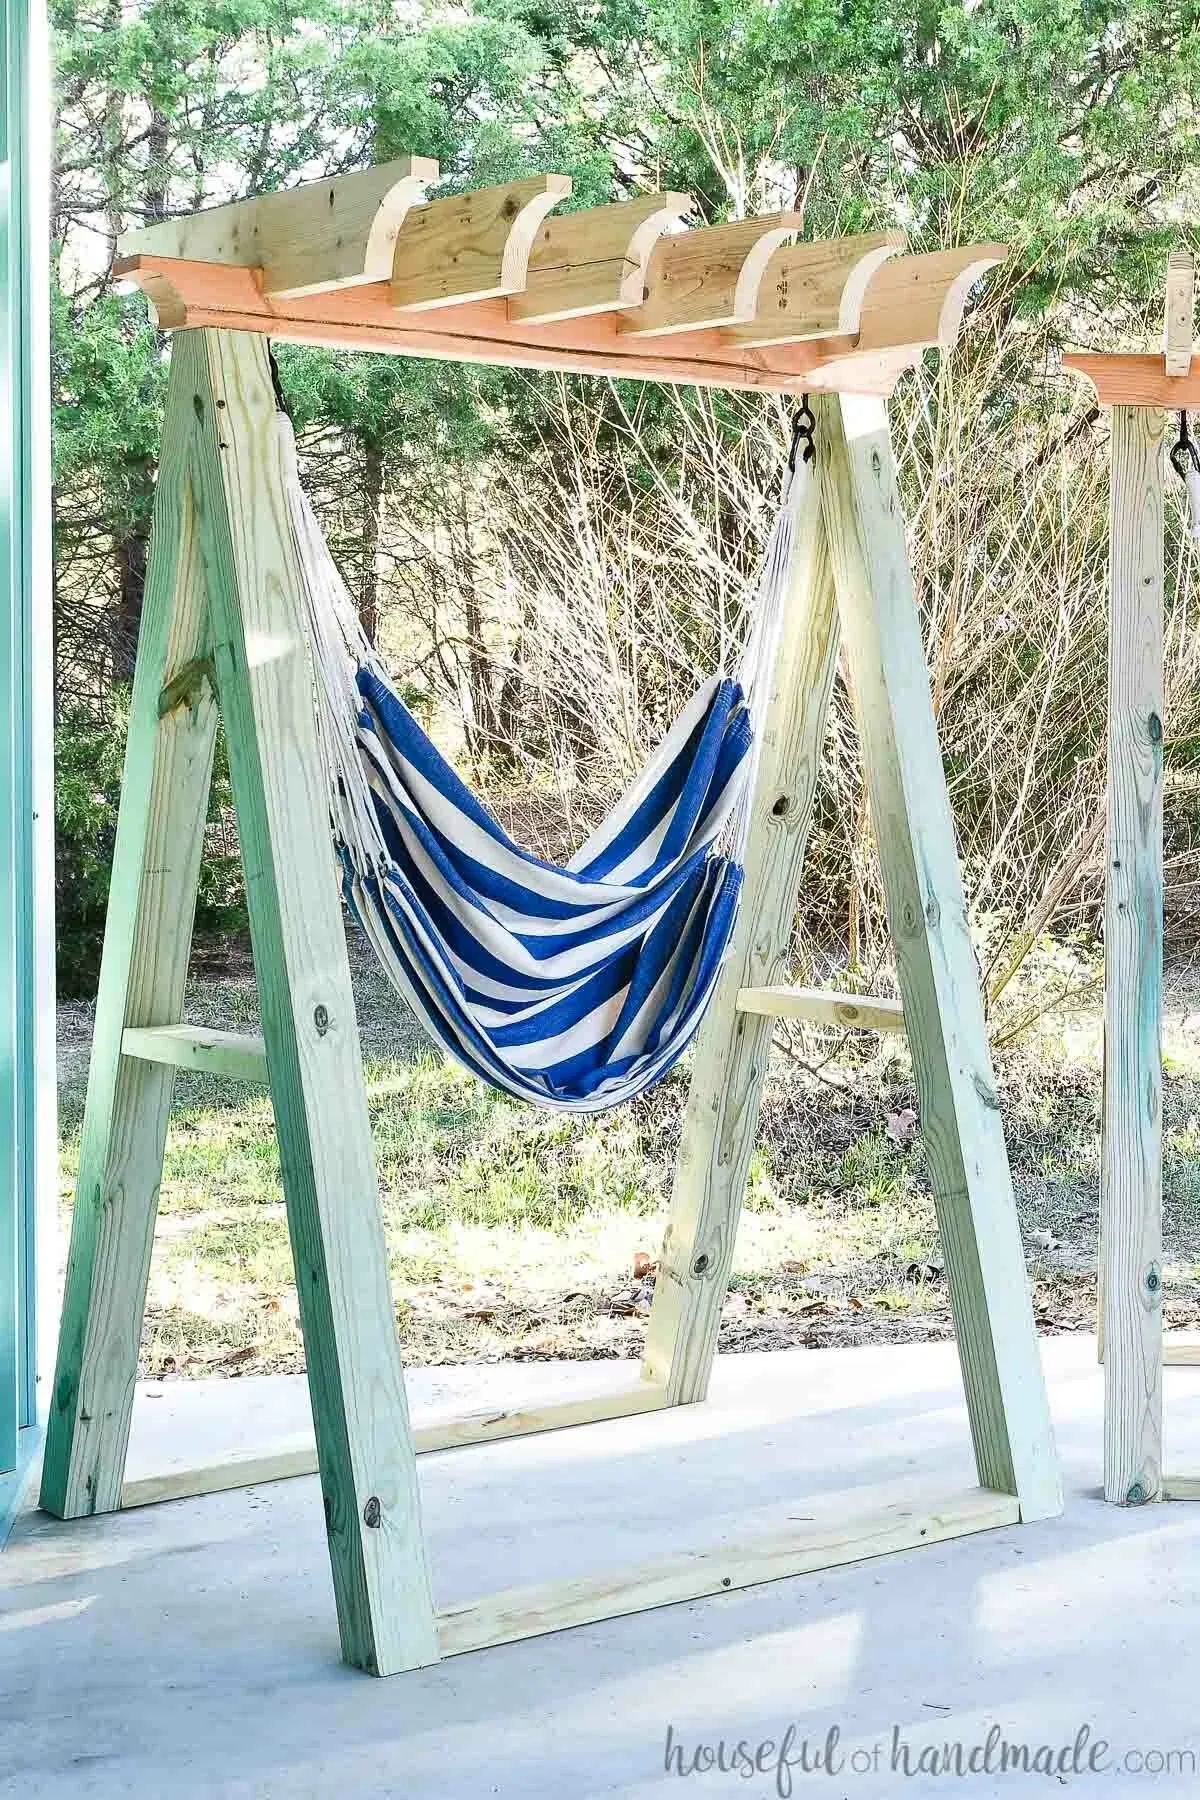
 Hanging chair with stand that is an A-frame made of 4×4 posts with a pergola top for shade.
Building a Solid Foundation: Constructing the A-Frame
With our tools prepped and supplies at hand, let’s start building our masterpiece!
Step 1: Creating the Angled Legs
-
Begin by cutting your 4×4 leg posts at a precise 15-degree angle. Remember, precision is key for a sturdy and symmetrical stand. Ensure all four legs are identical in length after making the angled cuts.
-
Grab two leg boards and position them on your workbench, mirroring each other to form an ‘A’ shape. The angled cuts should be at the bottom, ensuring the legs will rest flat on the ground.
-
On the top of each leg board, measure 1 3/4″ inward from the outside edge. Using a square, draw a line from this point at a 90-degree angle to the 15-degree angled edge.
-
Set your circular saw to its maximum depth and carefully cut along the line you just drew. Since the saw won’t cut all the way through the 4×4, finish the cut using a hand saw. For a polished look, use a flush cut saw for the final pass.
-
Repeat these steps for the remaining legs, ensuring you mirror them correctly to maintain the ‘A’ frame structure.
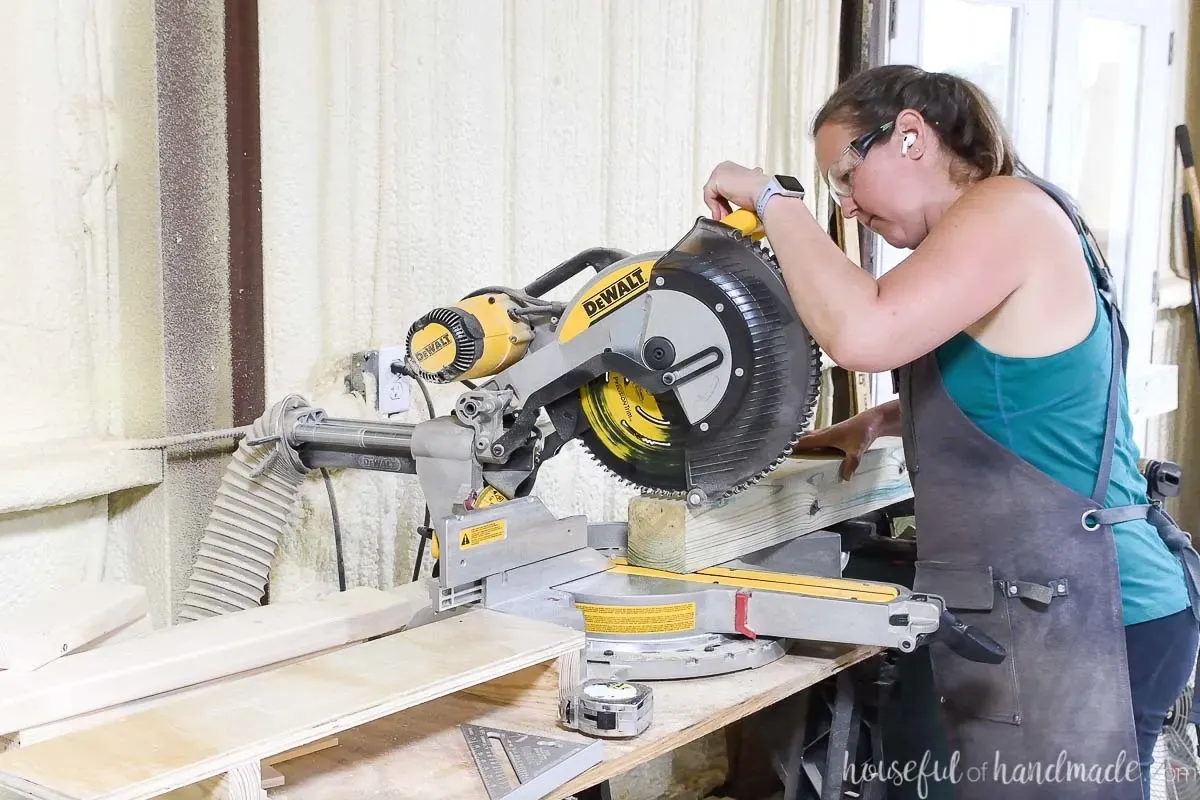 Cutting 4×4 boards on a miter saw at a 15 degree angle.
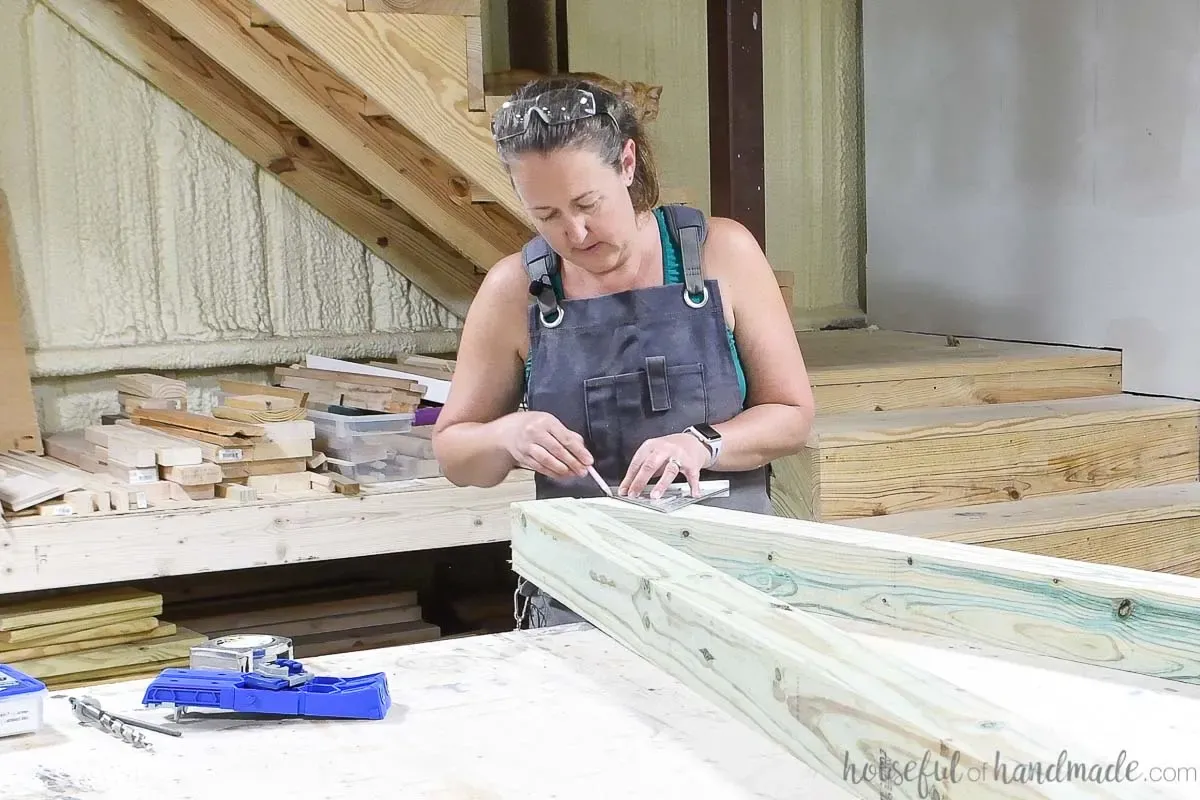 Drawing the line for the angled cut with a speed square.
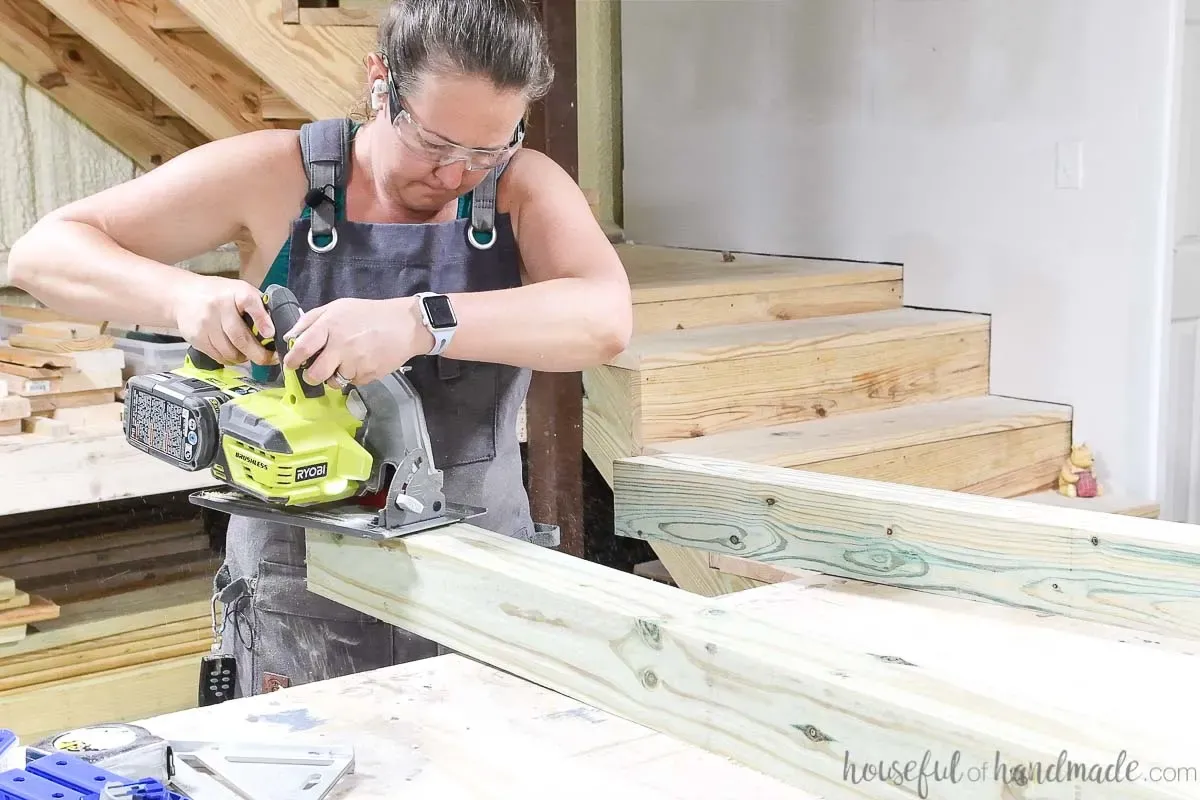 Cutting the long angle on the top of the 4×4 board with a circular saw.
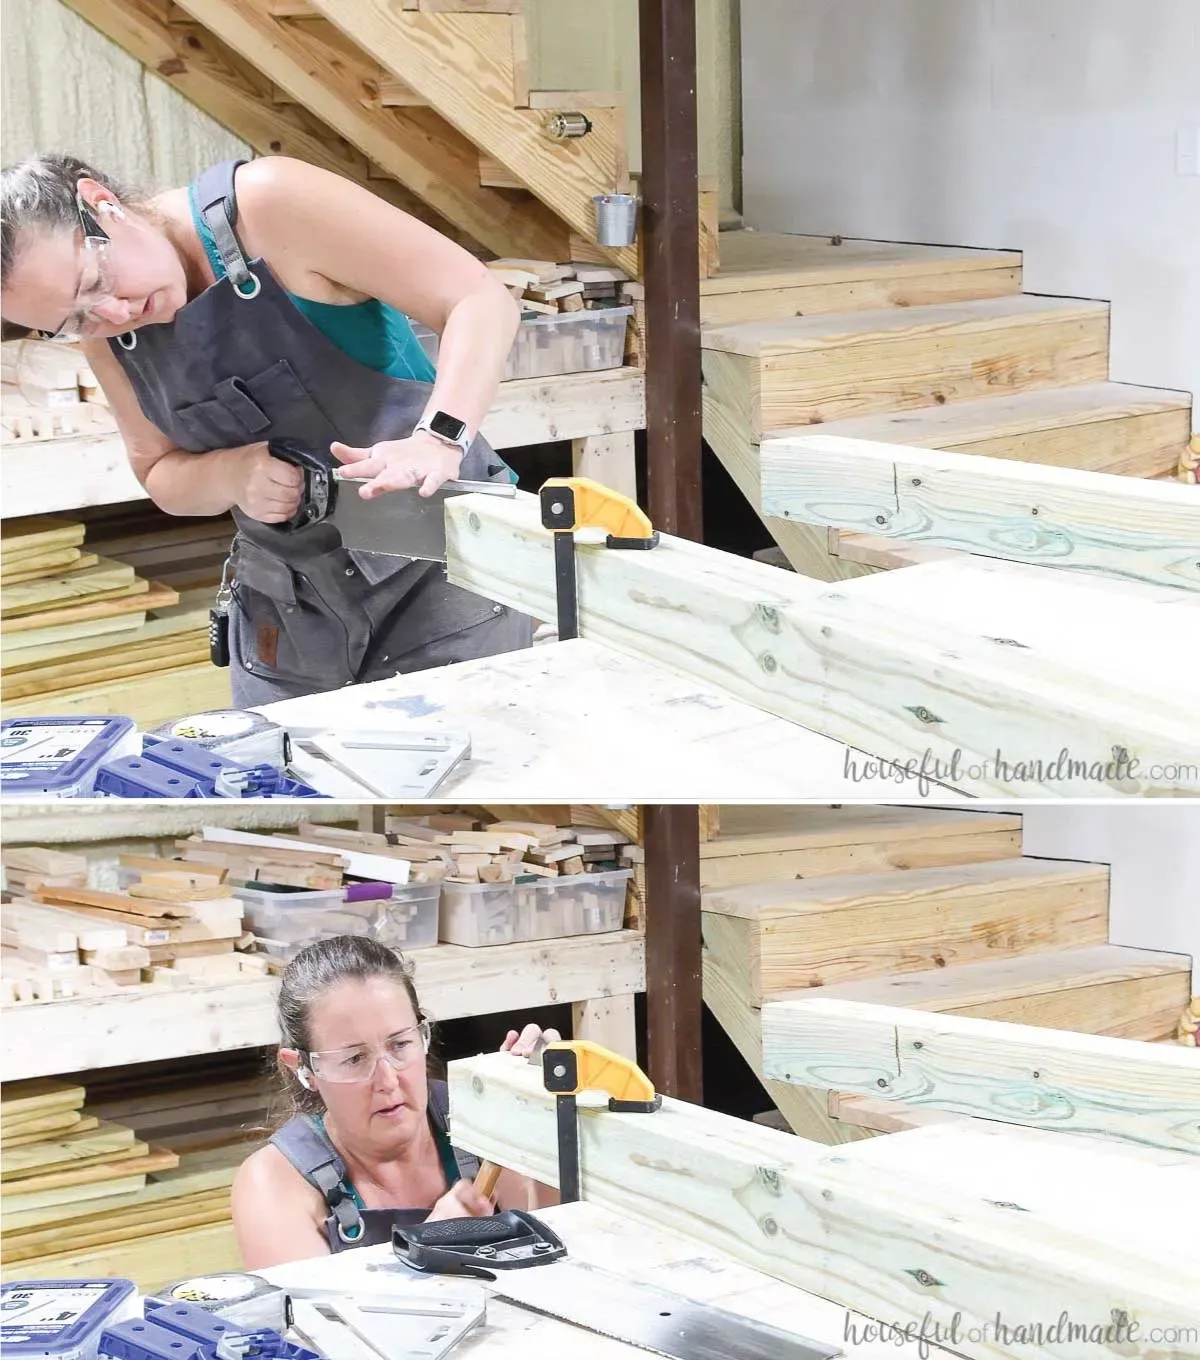 Cutting the angle on the top of the hammock chair stand legs with hand saws.
Step 2: Joining the Legs for a Sturdy Frame
-
With our angled legs prepped, let’s bring them together. Grab your Kreg Pocket Hole Jig XL and drill two pocket holes on one of the angled cuts of a leg board.
-
When positioning the pocket holes, place one near the bottom of the angle and the other towards the center. Ensure you’re using the XL pocket hole jig drill bit, as the regular one won’t be compatible.
-
Securely clamp the two leg boards together, aligning the edges carefully. Then, drive in those sturdy 4″ pocket hole screws to join them.
-
Flip the assembled legs and repeat the process on the other side, creating two mirrored leg assemblies. Remember to drill the second set of pocket holes on the opposite side to avoid any screw interference.
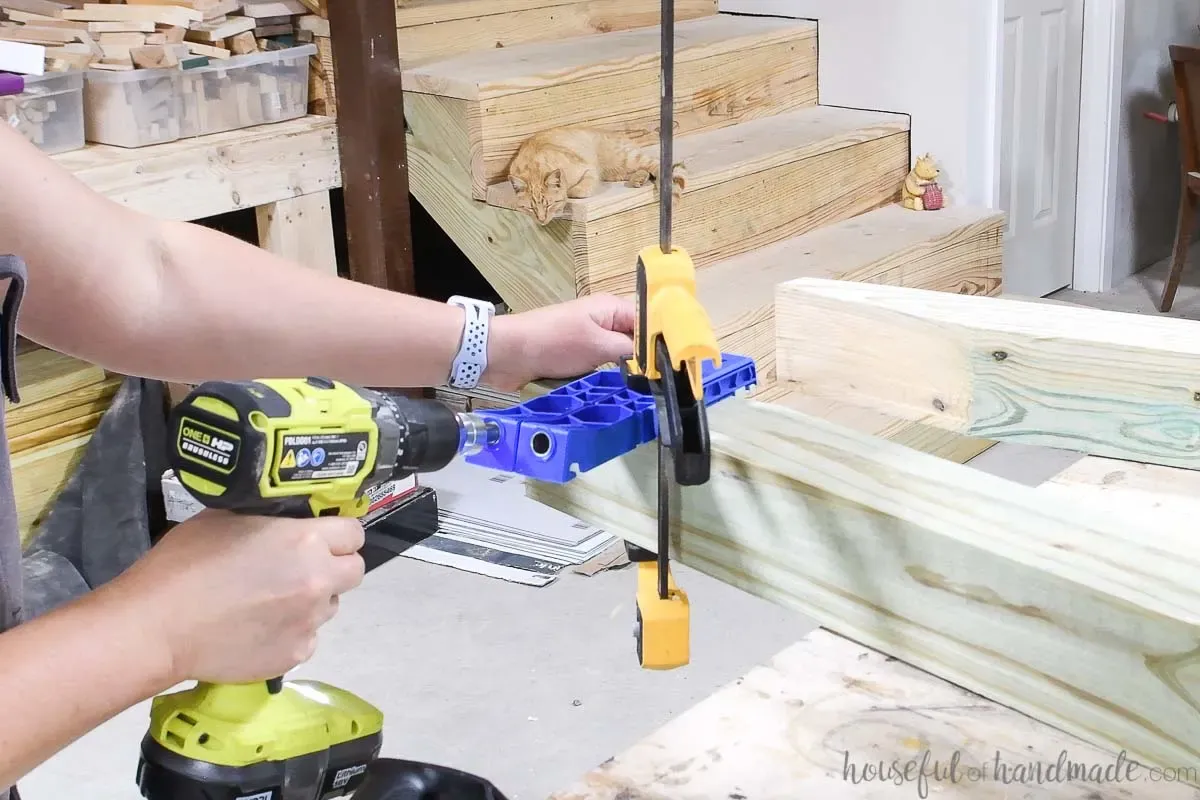 Drilling a pocket hole in the 4×4 board with the Kreg pocket hole XL jig.
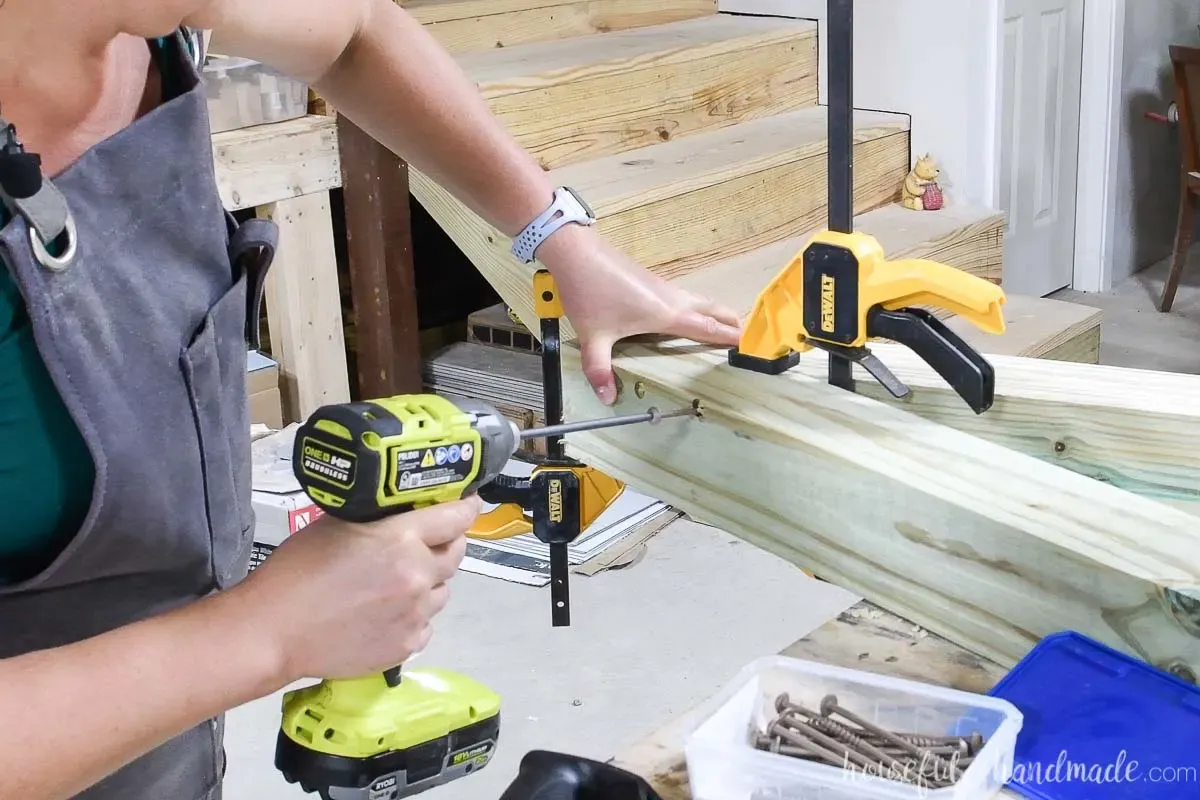 Securing the two leg boards together with XL pocket hole screws.
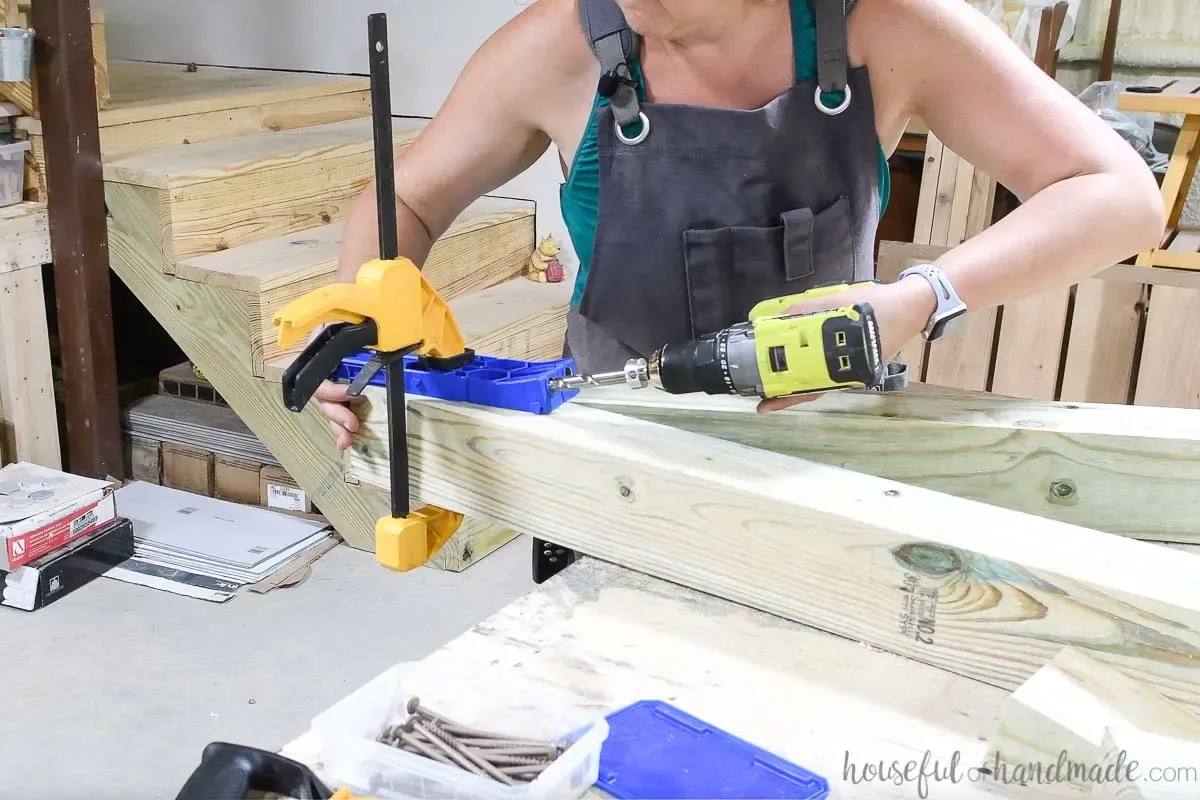 Drilling XL pocket holes in the top of the hanging chair stand legs.
Step 3: Adding Support and Shaping the Top
-
Let’s add some extra stability to our A-frame. Cut the side support pieces according to your plans, ensuring both ends have 15-degree angles that point towards each other.
-
Drill pocket holes on both ends of the longer side of the support boards, setting your jig for 1 1/2″ thick material.
-
Measure 29″ up from the bottom of the assembled legs and mark a line. This will be the reference point for attaching the side supports.
-
Position the brace boards at the marked points on both legs, ensuring they align perfectly to maintain a level base. Secure them in place with 2 1/2″ pocket hole screws.
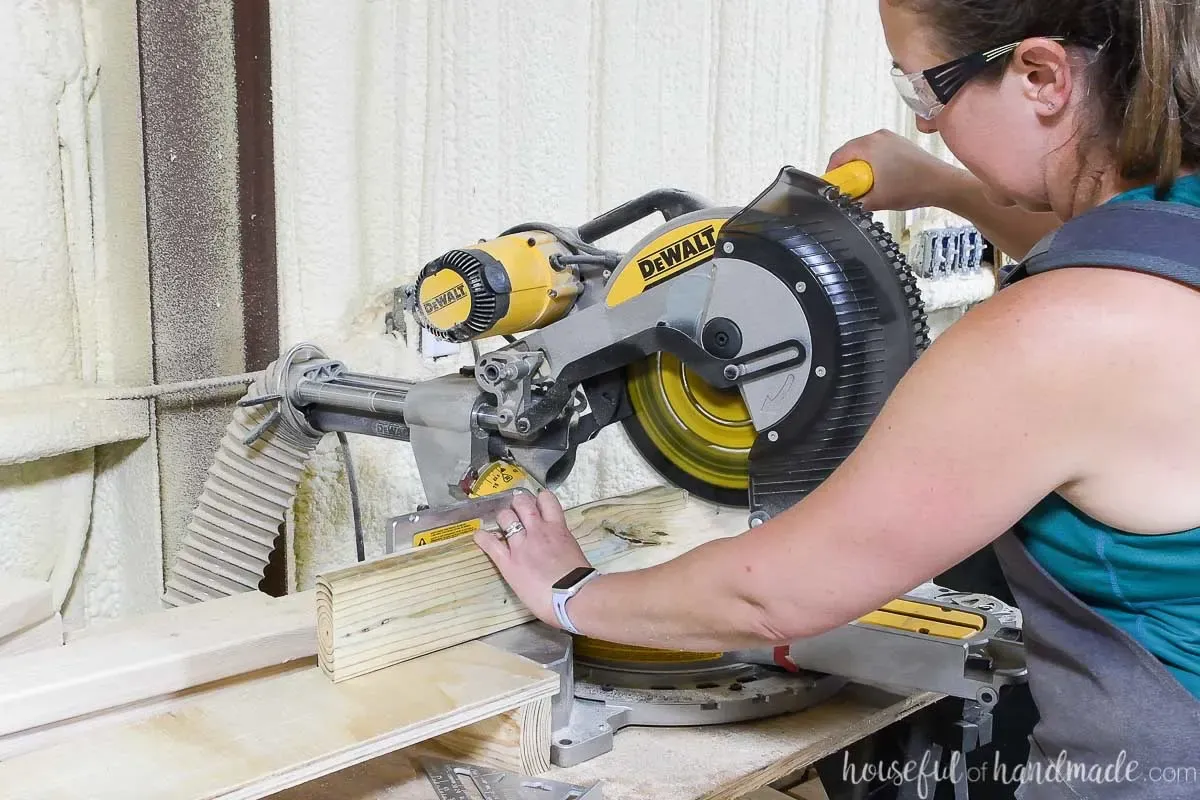 Cutting 2×4 braces with a 15 degree angle on the miter saw.
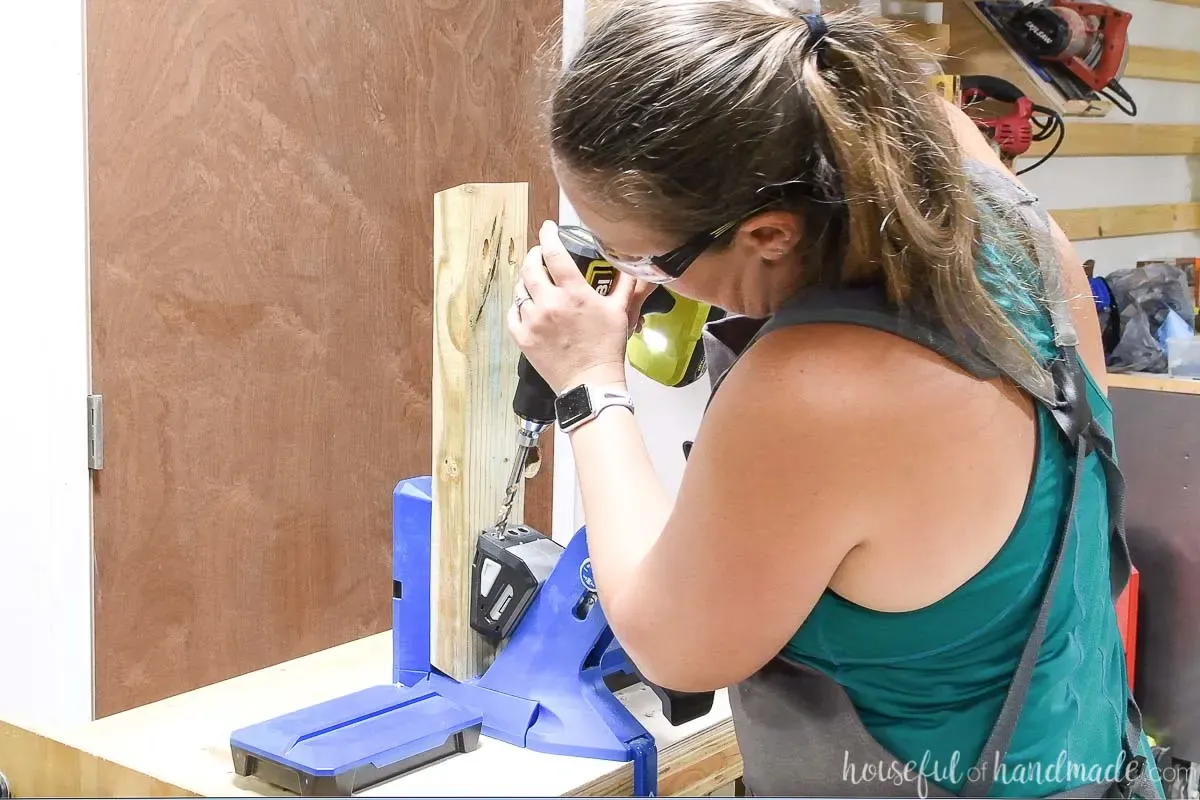 Drilling pocket holes in a 2×4 with the Kreg pocket hole jig 720Pro.
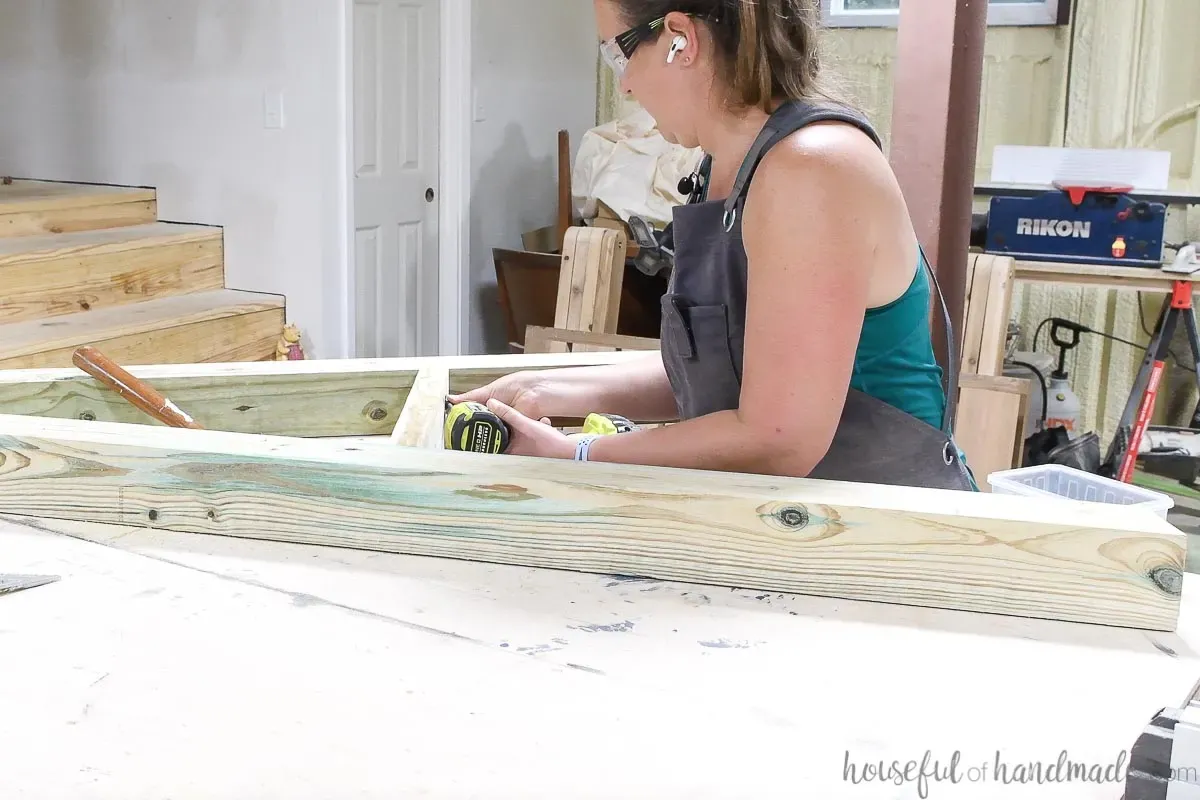 Attaching the 2×4 brace between the 4×4 legs on the hammock chair stand.
-
Now, let’s focus on the top piece. Cut it to size according to your plan and mark a gentle 2 1/2″ curve at each end.
-
Using a jigsaw or bandsaw, carefully cut along the curves to create that elegant pergola-inspired look.
-
Finally, position the shaped top piece atop the assembled legs, ensuring a 1″ overhang on each side. Secure it in place with those trusty 4″ pocket hole screws.
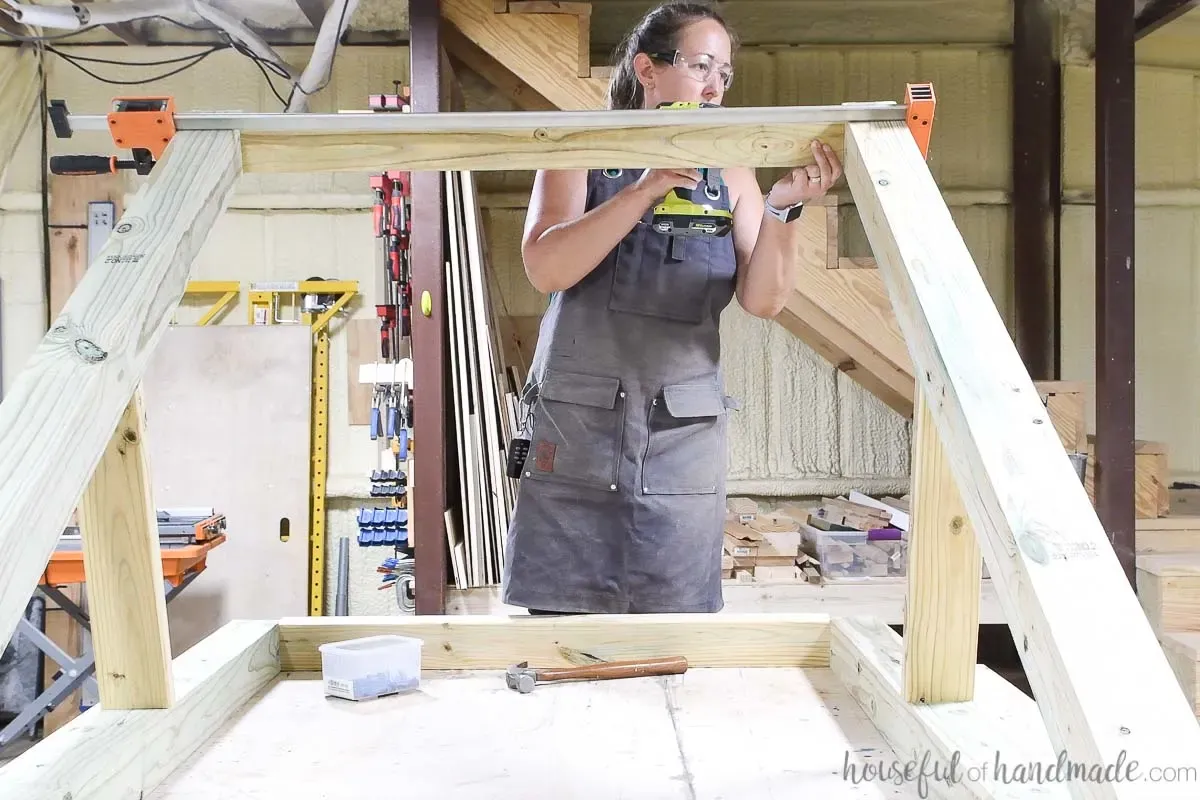 Connecting the legs of the hanging chair stand together at the bottom with 2×4 boards.
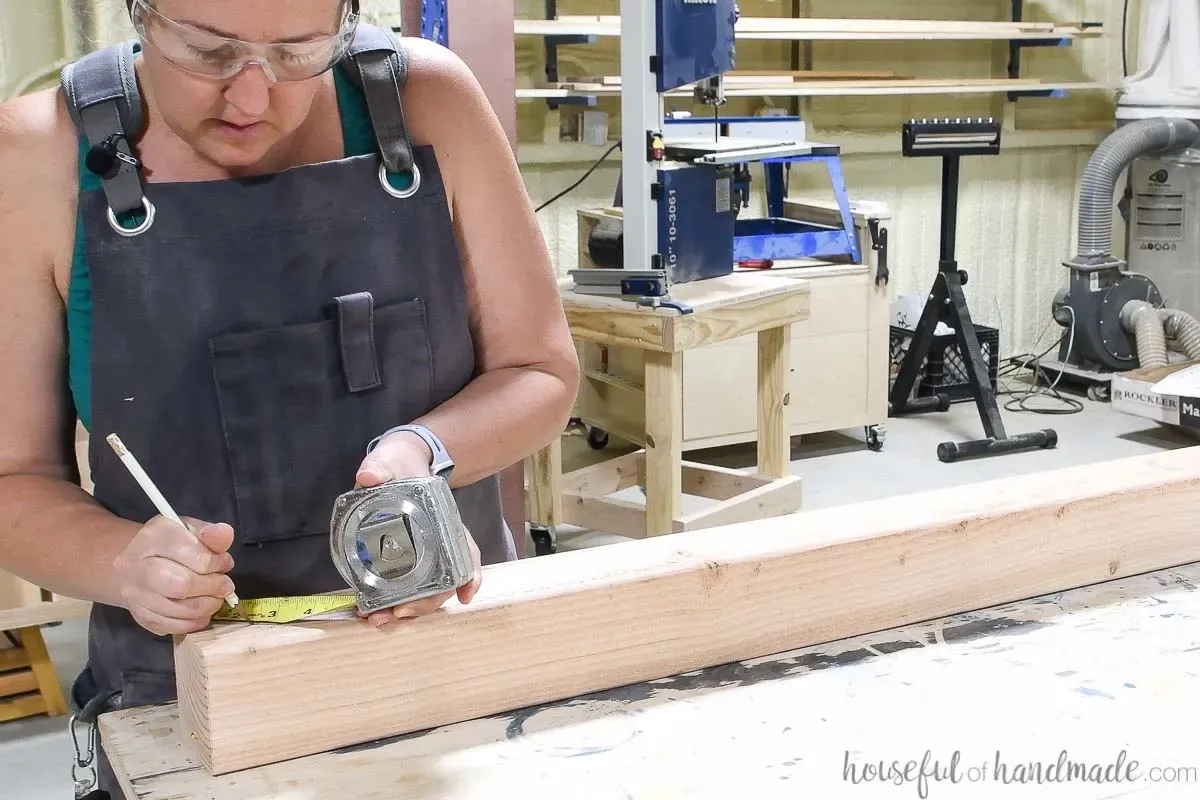 Drawing the line for the curve on the top post.
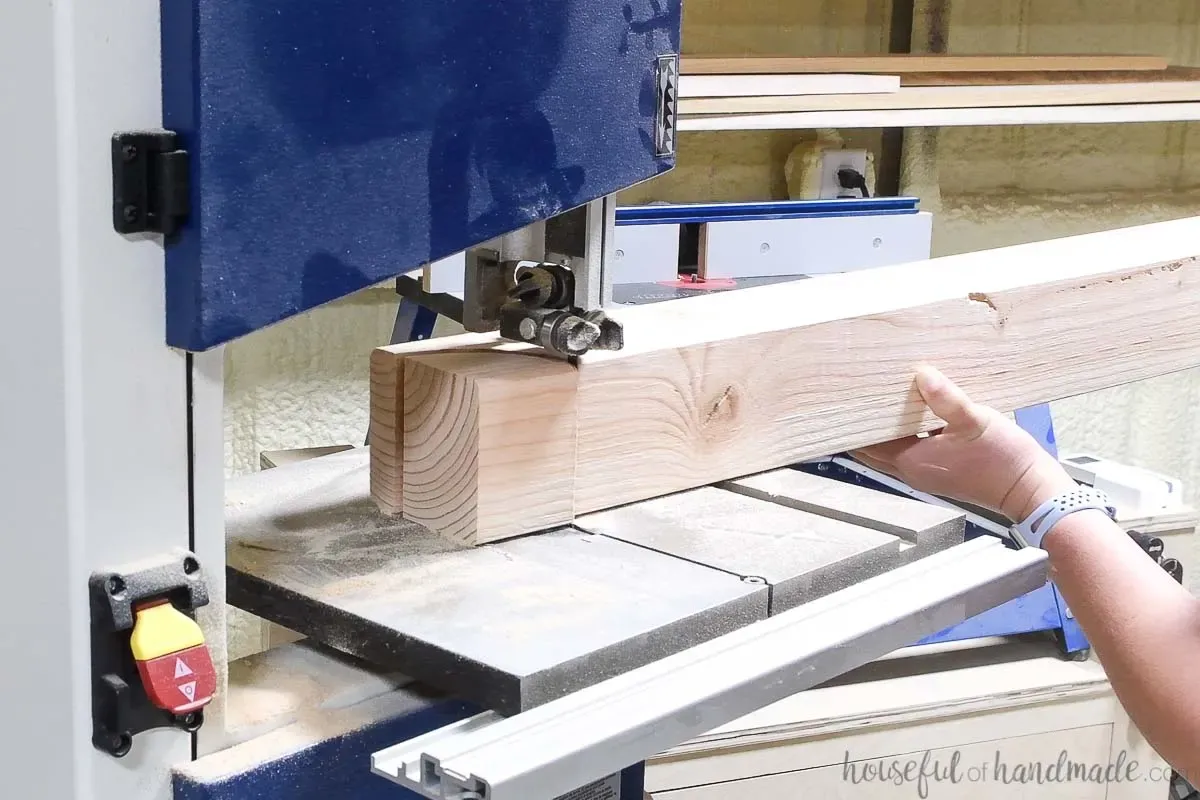 Cutting the circle on the top post with a bandsaw.
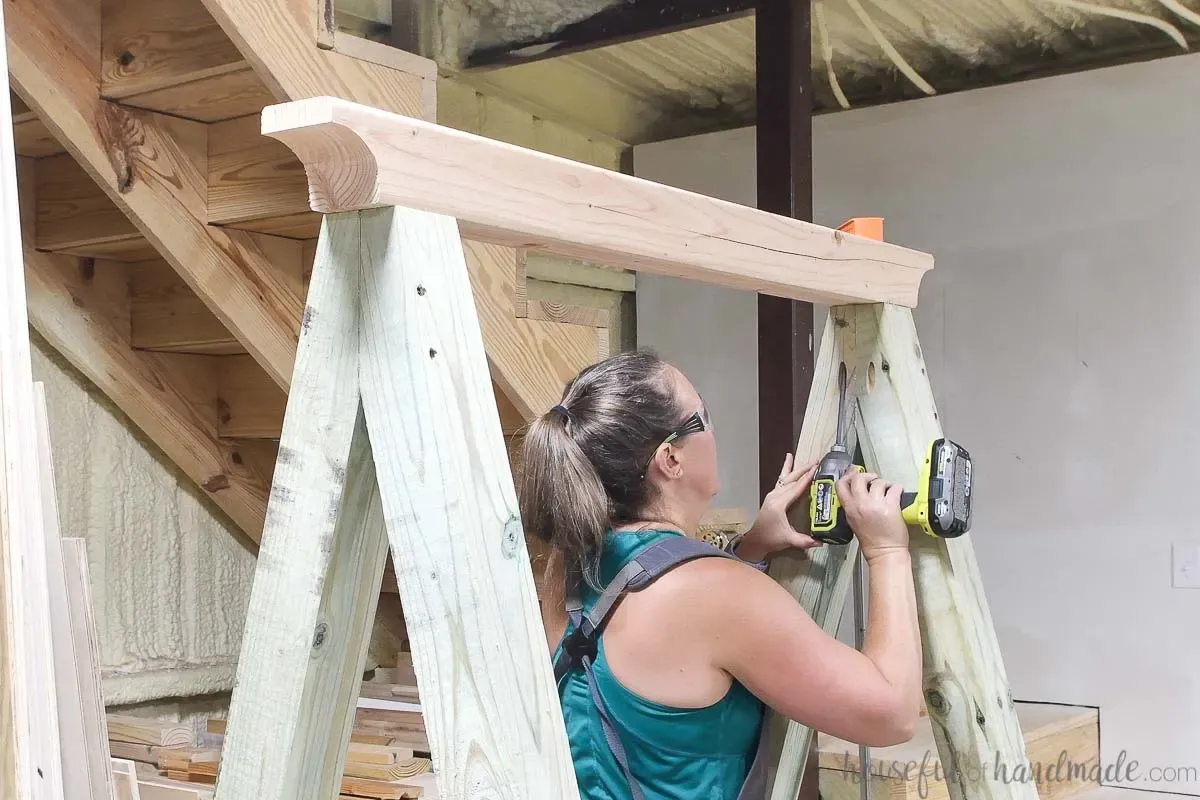 Attaching the top post with XL pocket holes.
Adding a Touch of Elegance: Constructing the Pergola Top
-
Moving on to the pergola rafters, cut them to size based on your chosen dimensions.
-
Clamp the rafter boards together for efficient cutting. Measure and mark a 3 1/2″ section in the center of each board.
-
Set your circular saw blade to a depth of 1 1/2″ and carefully cut along the inside of your markings. Make several passes, spacing the cuts closely together.
-
Using a chisel, remove the remaining material within the marked section, creating a notch that fits snugly over the 4×4 top post.
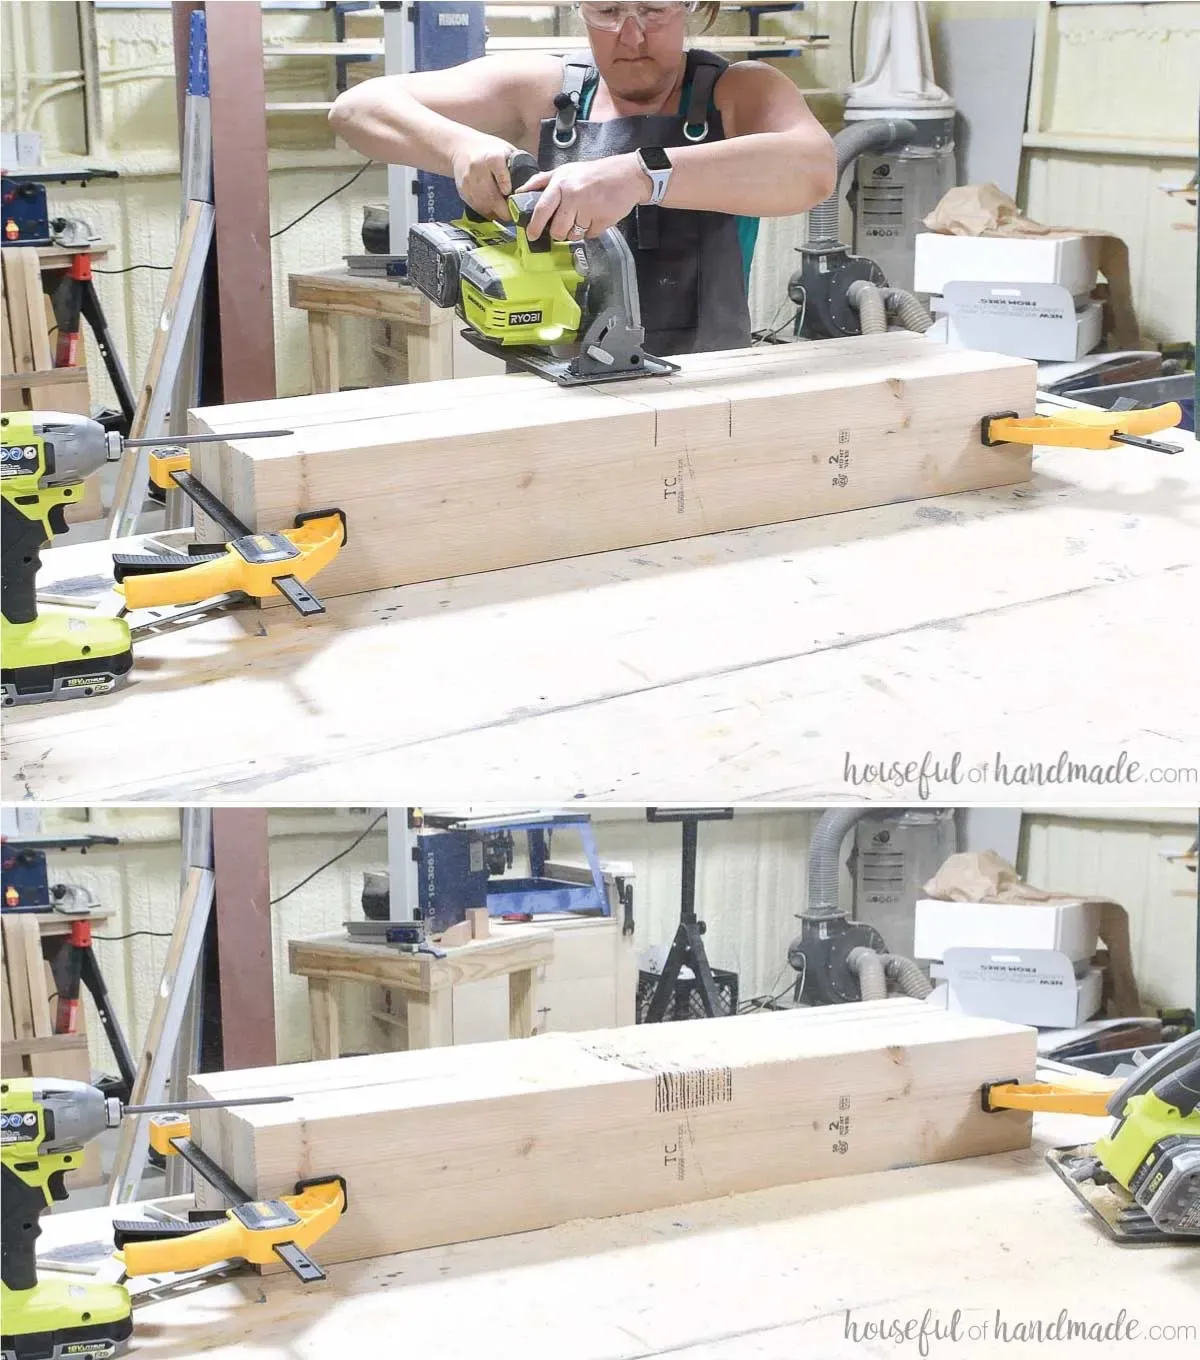 Cutting lots of lines in the stack of pergola rafters with a circular saw to create a notch.
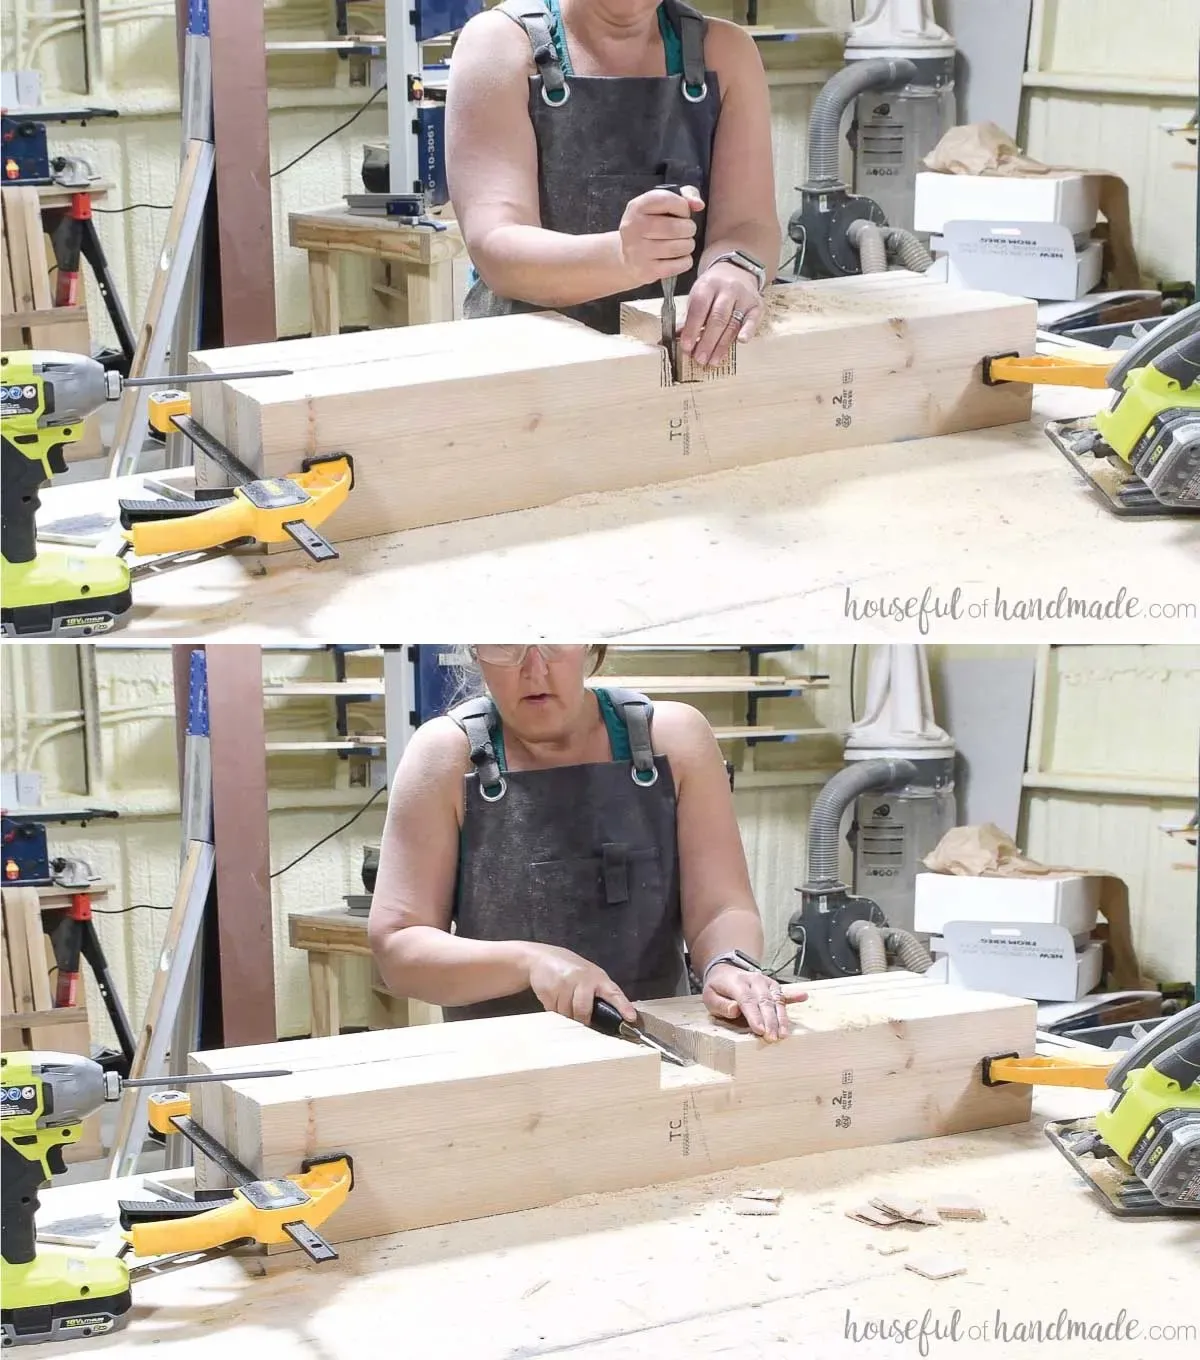 Clearing out the material in the notch with a chisel.
-
On one of the rafter boards, mark a graceful 4 1/2″ curve at the end, leaving a 1″ point at the top. Carefully cut out the curve using a jigsaw.
-
Use this cut-out piece as a template to trace the same curve onto the remaining rafter boards. Cut out the curves on all the boards, ensuring uniformity.
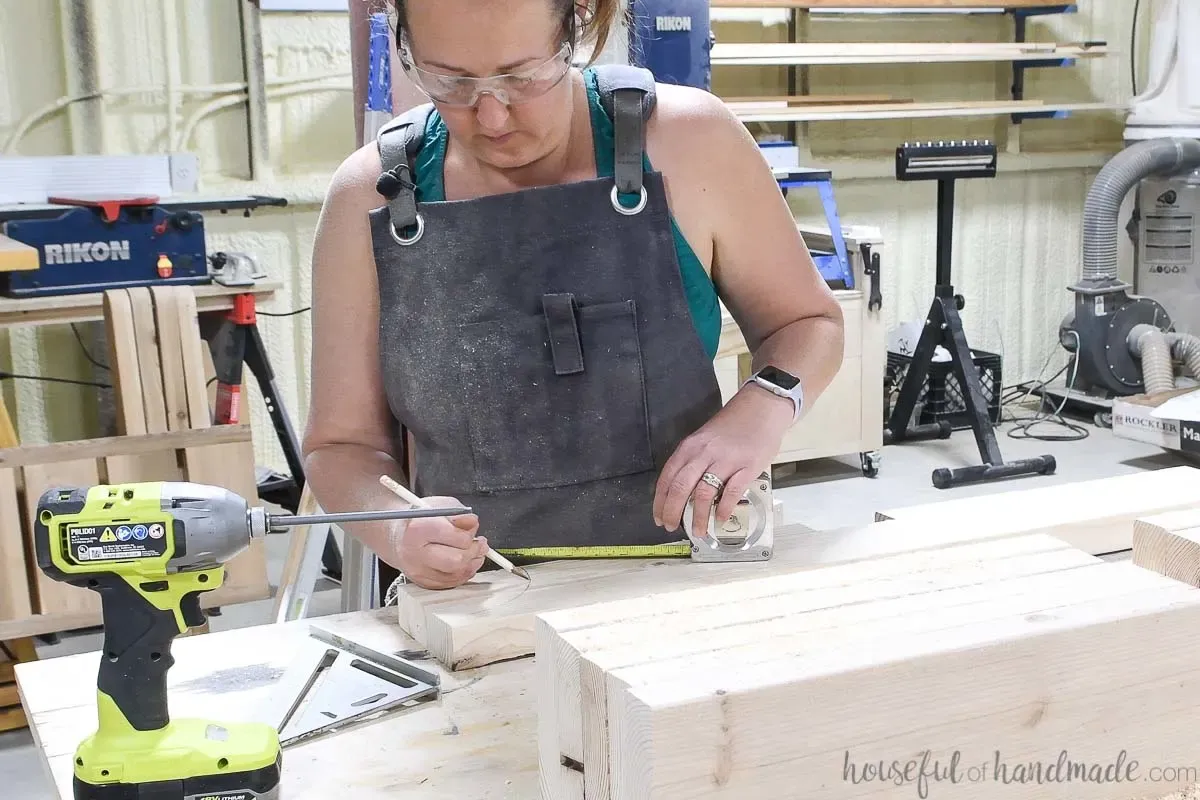 Drawing the curve on the sides of the pergola rafter boards.
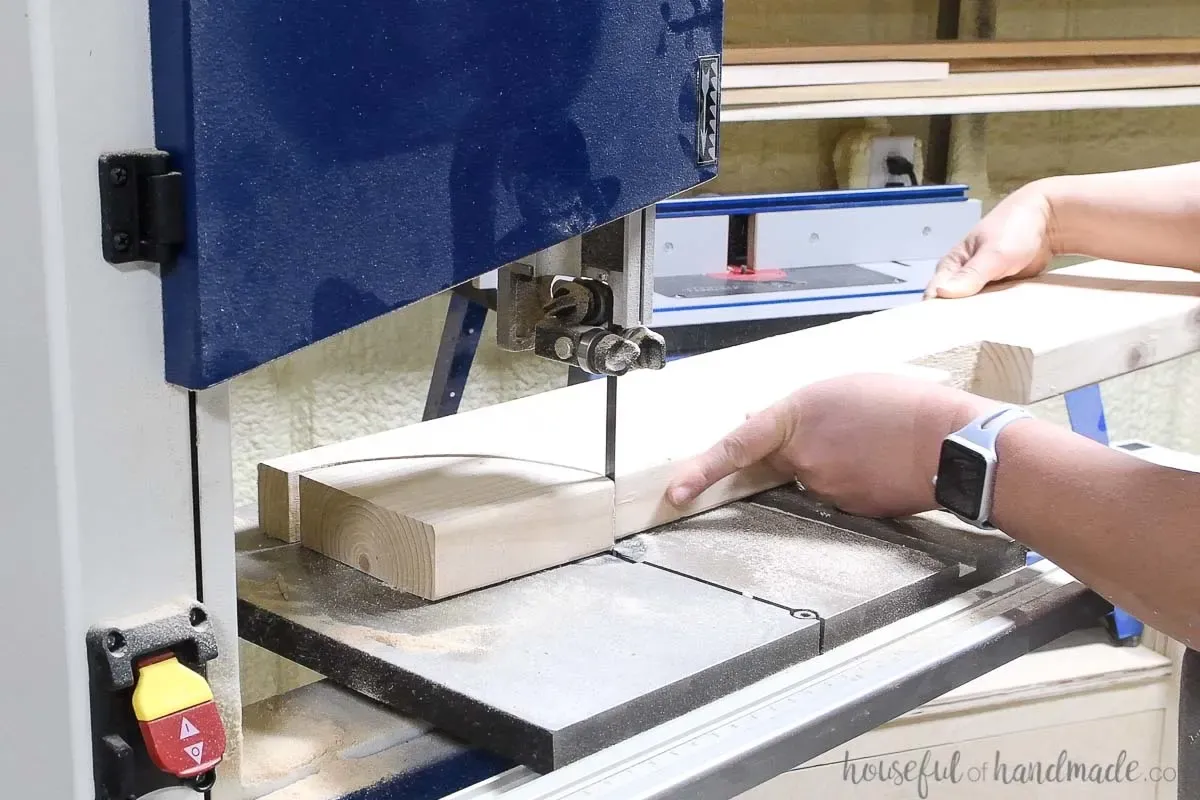 Cutting the curve with a bandsaw.
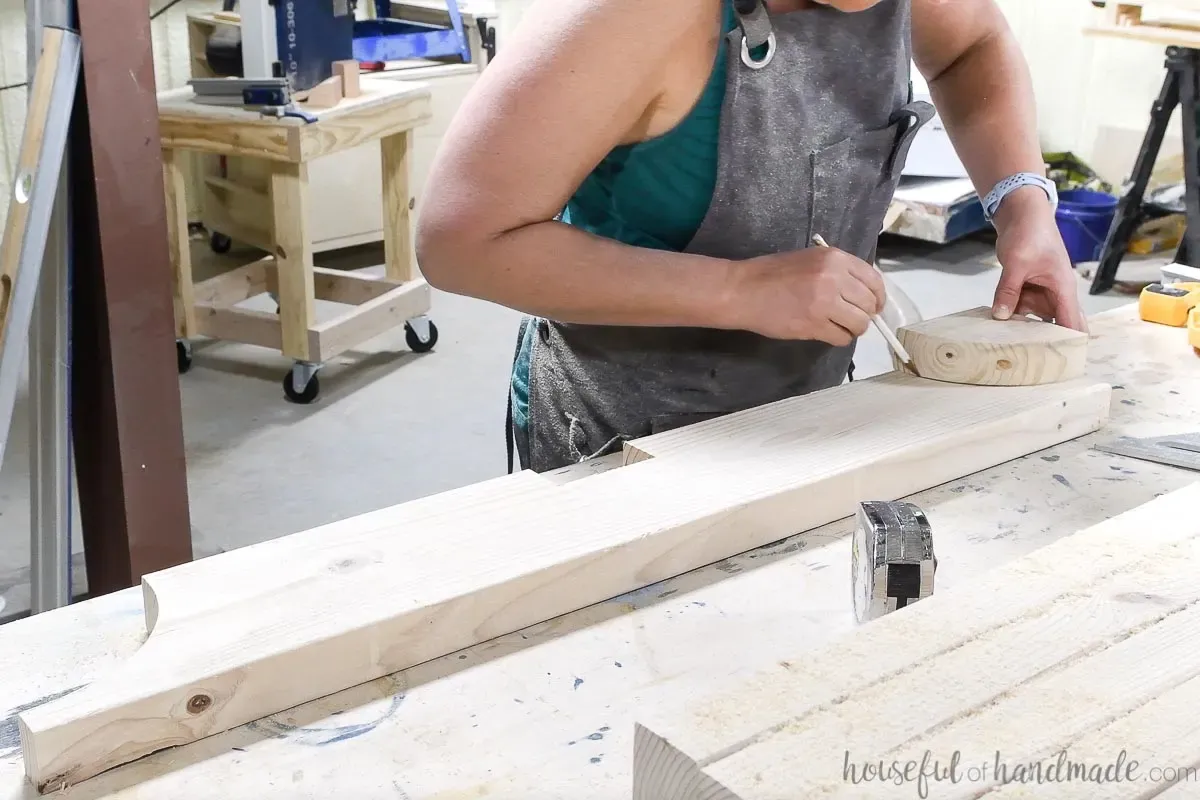 Using the cut out piece from the first curve to draw the curve on the remaining rafter boards.
-
Select two visually appealing boards for the outer ends of your pergola rafters. On these boards, drill two pocket holes for 1 1/2″ thick material above the notch, on one side only.
-
For the remaining rafter boards, drill one pocket hole on each side above the notch, ensuring the holes are on alternating sides for a secure attachment.
-
Position the first rafter so it sits just over the inside edge of the legs. Secure it to the top piece with 2 1/2″ pocket hole screws.
-
Space the remaining rafters evenly across the top, attaching them with pocket hole screws.
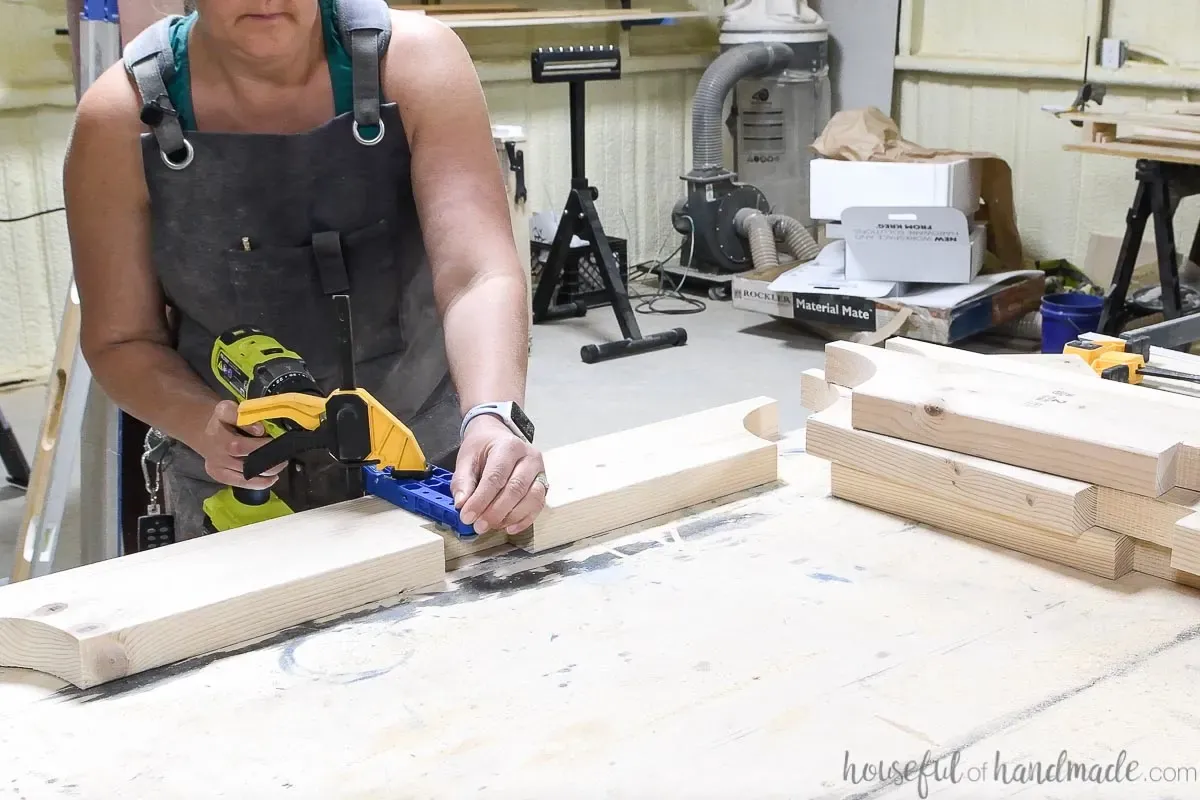 Drilling pocket holes in the center of the rafters over the notch.
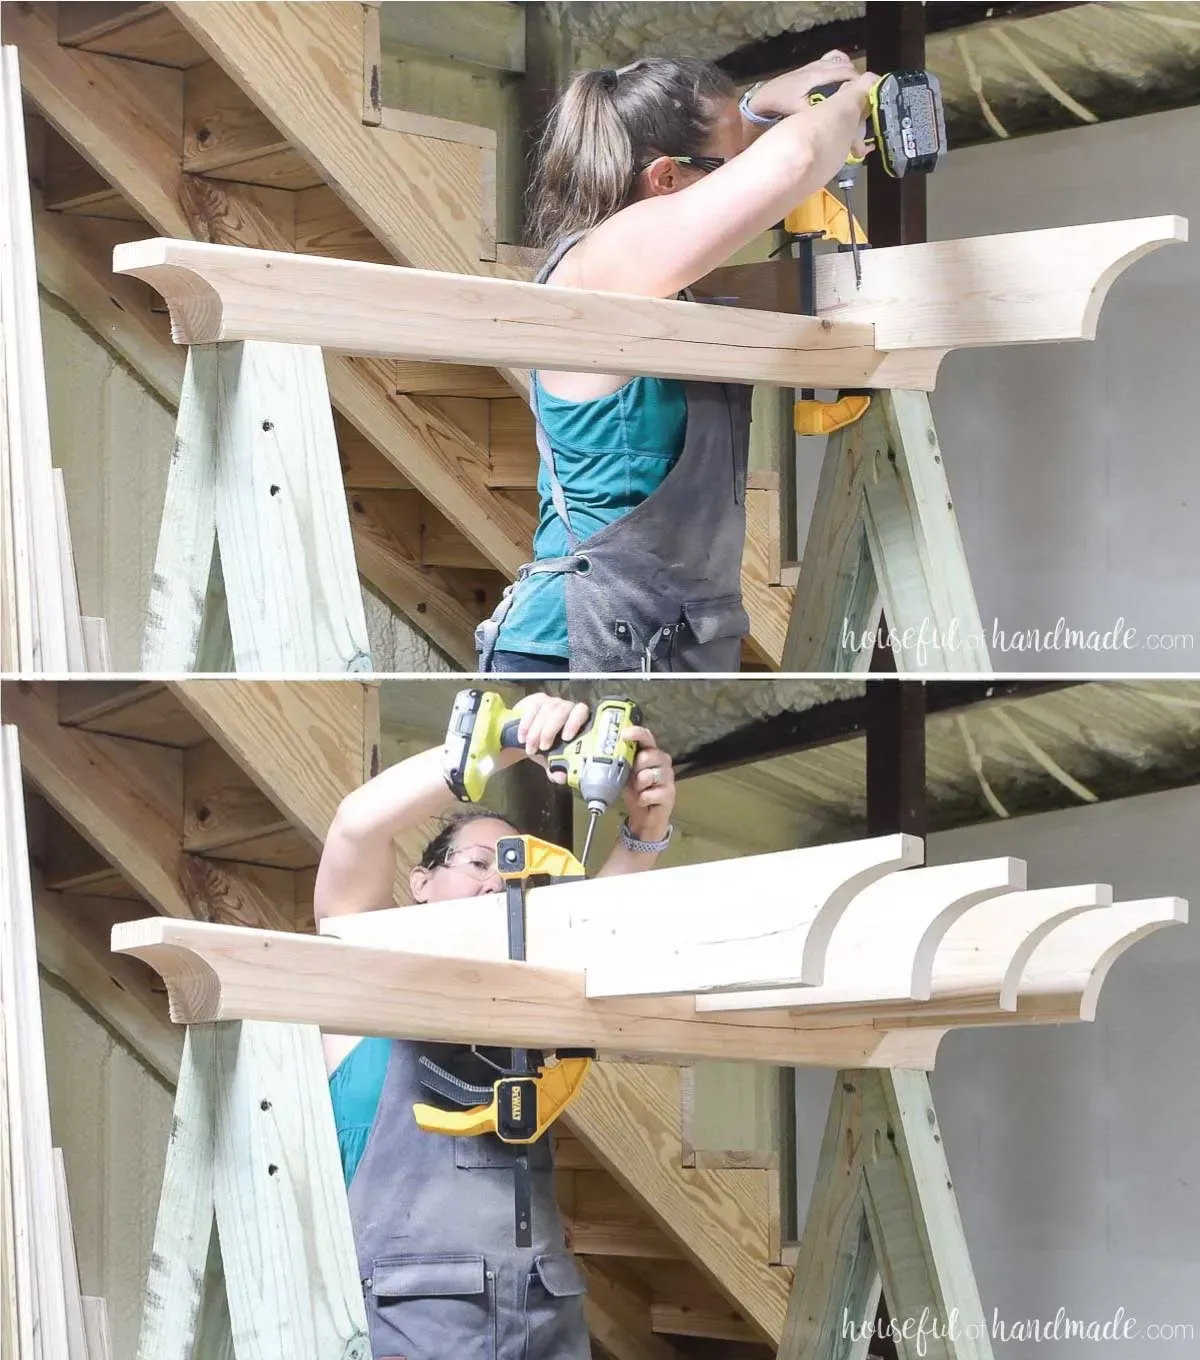 Attaching the pergola rafters to the top of the hammock chair stand.
The Finishing Touch: Hanging Your Hammock Chair
-
With the pergola top complete, let’s create the hanging points for your hammock chair. Predrill a hole for the screw eye on the underside of the top post, following the manufacturer’s instructions for the correct drill bit size.
-
Using a pair of pliers for added leverage, begin screwing the heavy-duty eye screw into the predrilled hole. Once it’s started, switch to a strong, flat-head screwdriver for better grip and torque. Continue twisting until the screw eye is securely in place.
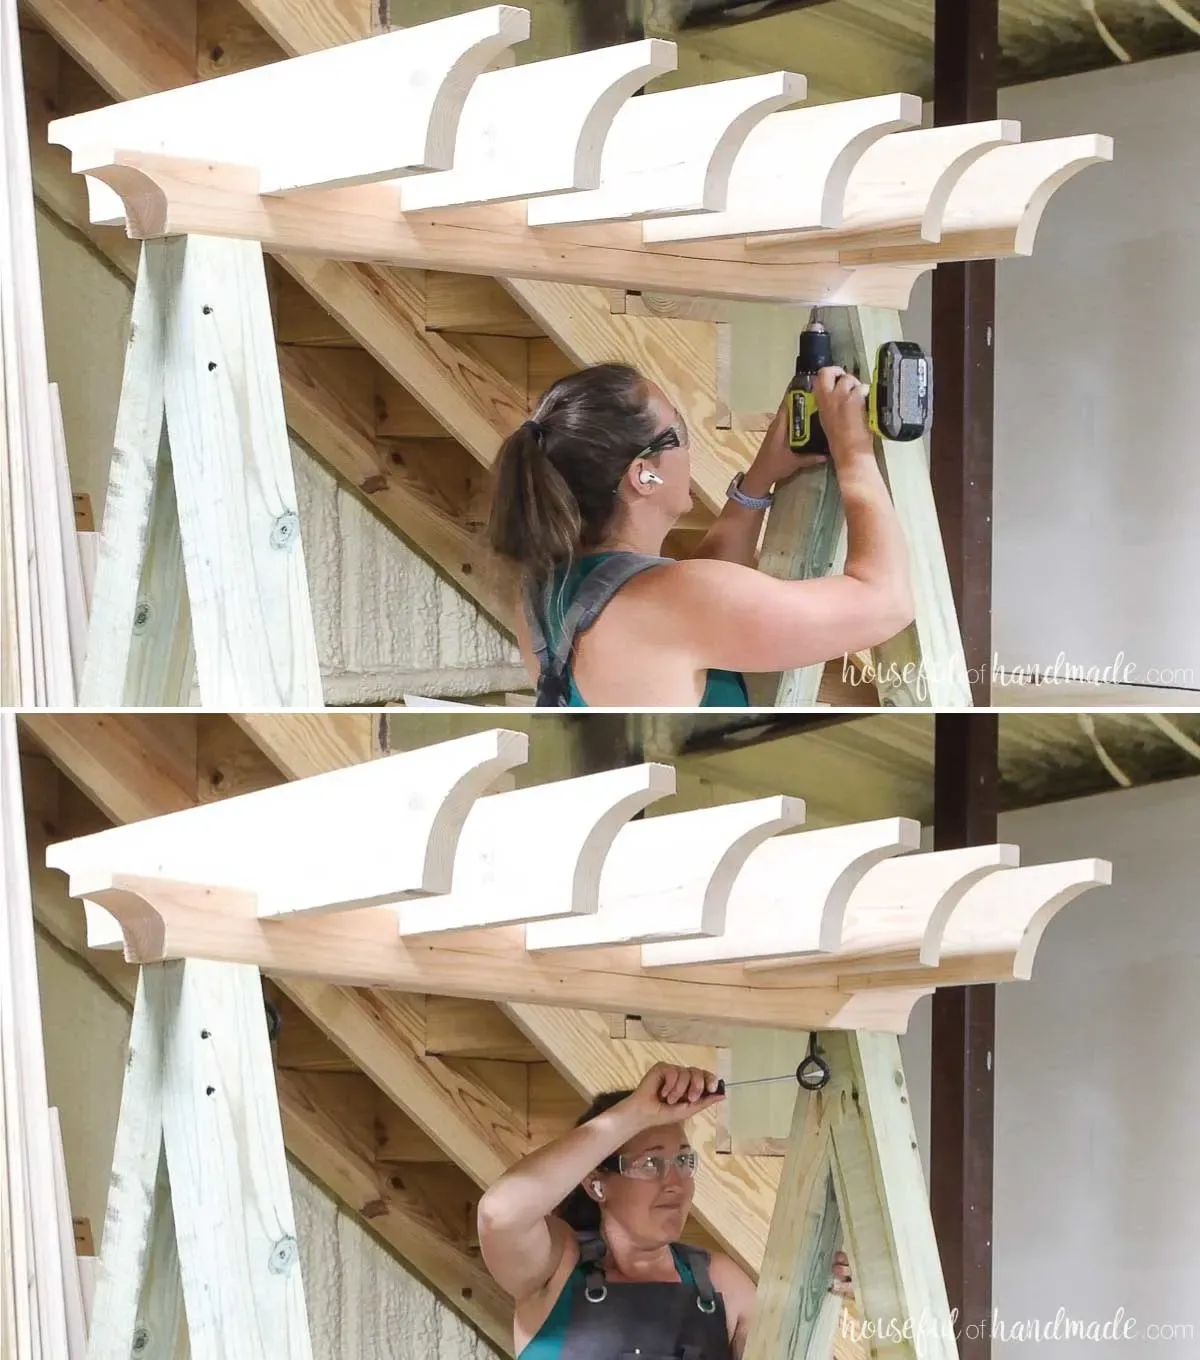 Screwing the heavy duty screw eye into the top board to hang the hammock swing from.
-
To hang your hammock chair, remove it from any supporting pole it came with. Attach a heavy-duty carabiner to each loop on the sides of the chair. These carabiners make it incredibly easy to clip and unclip the hammock from the stand, allowing for easy storage and cleaning.
-
If you used treated lumber for your stand, allow it to dry thoroughly for several weeks before applying any outdoor sealer. This ensures optimal protection and longevity for your creation.
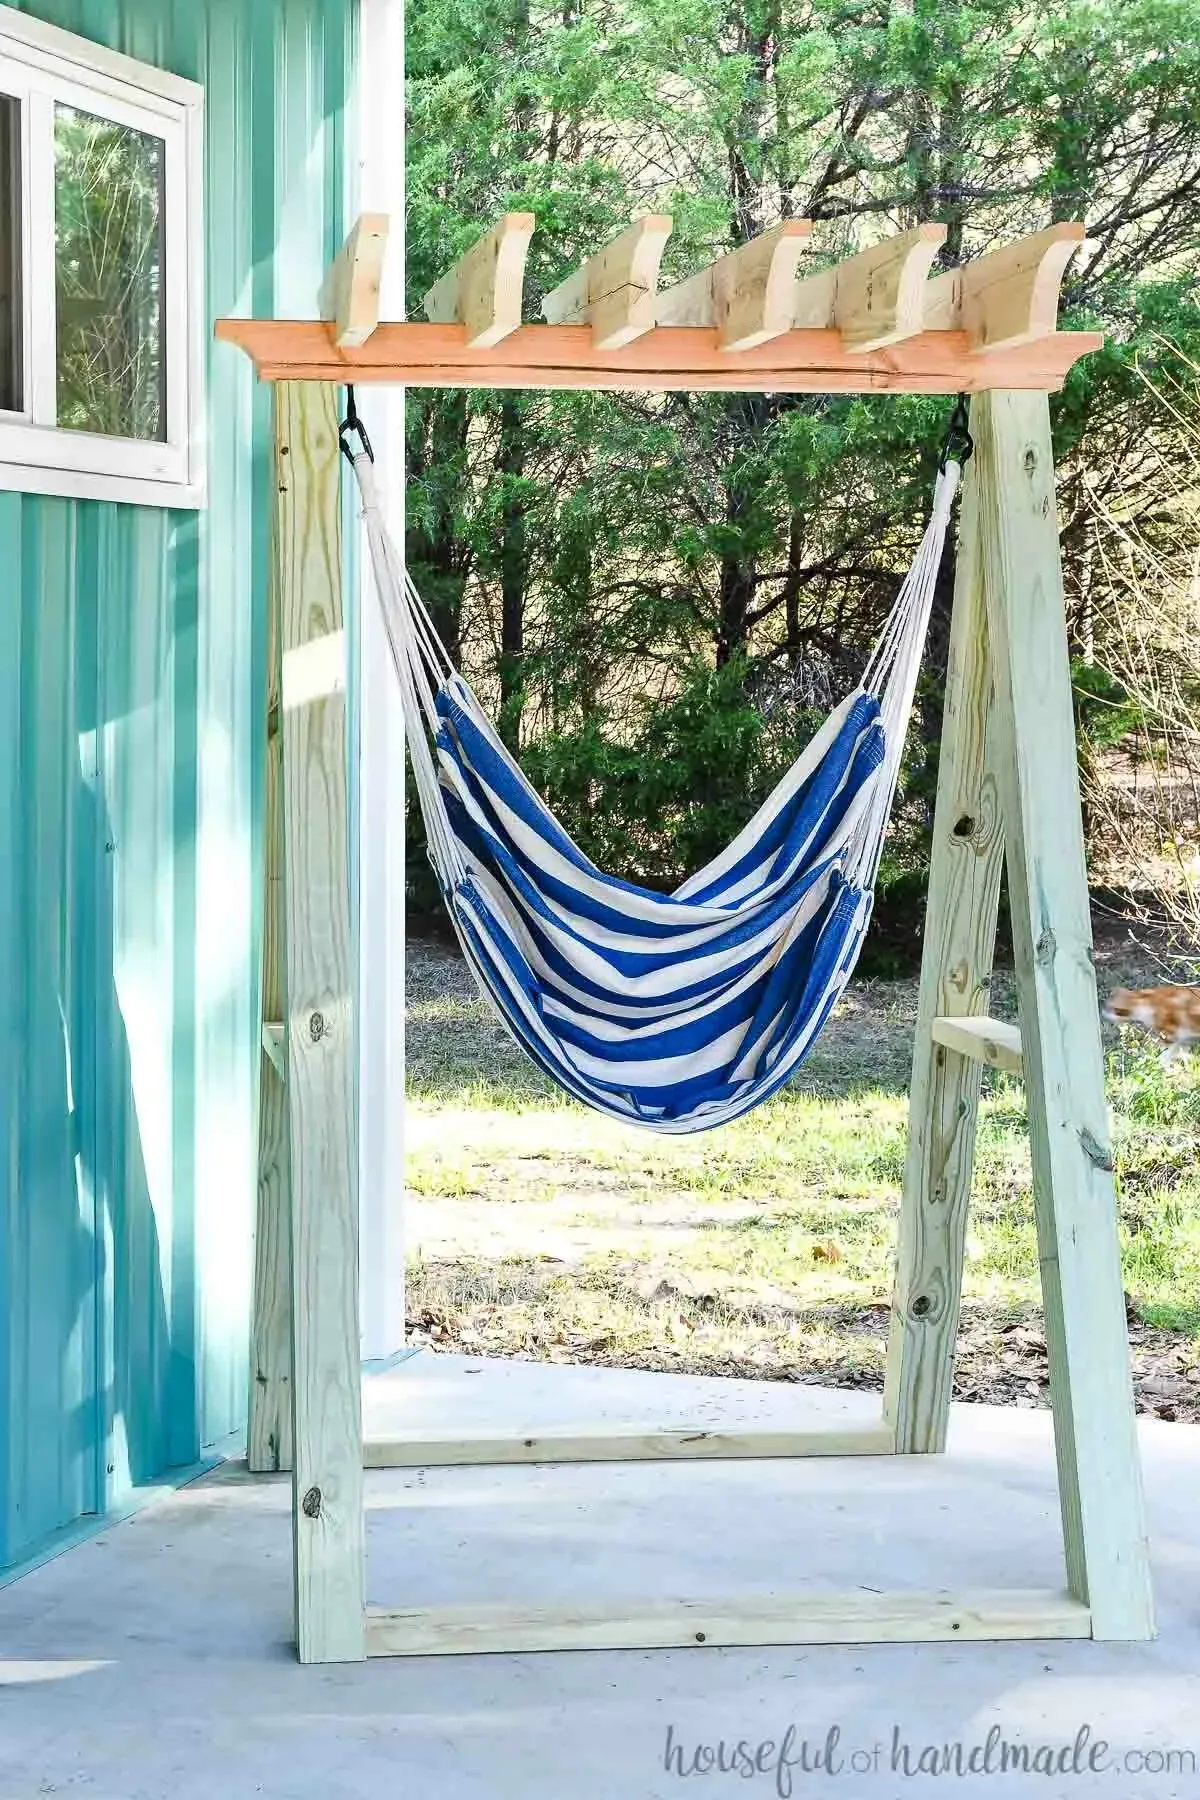 Blue and white striped fabric hammock chair in a wood hanging chair stand on a porch.
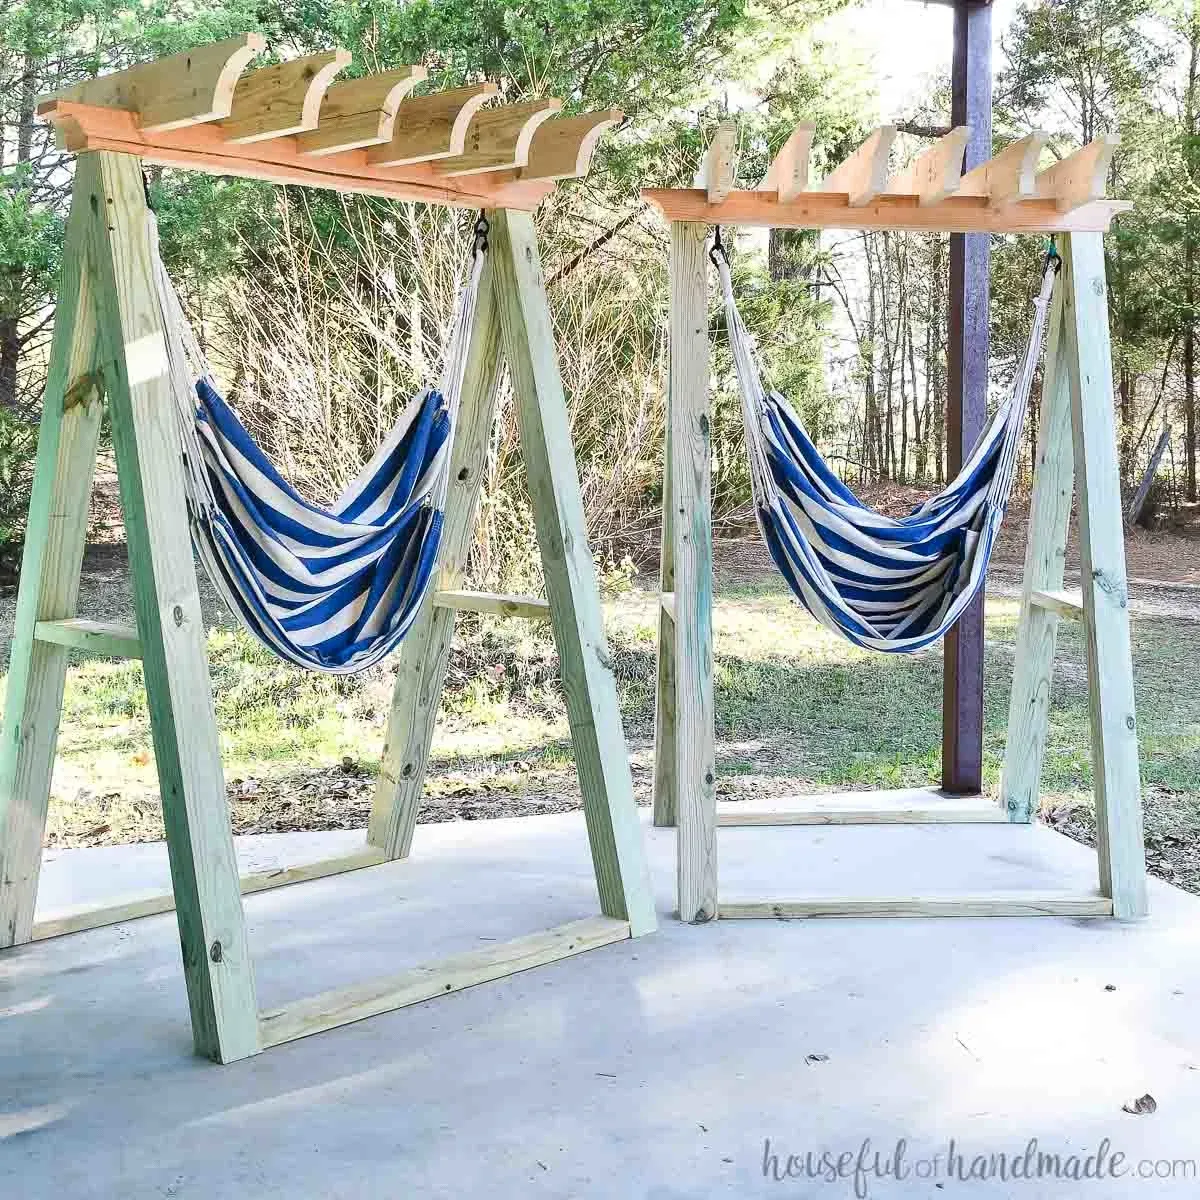 Two hammock chair stands with blue and white stripped hammocks hanging in them on a porch.
Relax and Enjoy Your Handmade Oasis!
Congratulations! You’ve successfully built your very own hammock chair stand with a charming pergola top. Now it’s time to step back, admire your handiwork, and indulge in the ultimate relaxation experience. Whether you’re soaking up the sun, reading a captivating book, or simply enjoying the gentle sway, your handmade haven awaits!
Robert Kline Art: Your Source for Creative Inspiration
Looking for more inspiring DIY projects and crafting adventures? Head over to Robert Kline Art for a treasure trove of ideas and guidance. And don’t forget to share pictures of your creations – I can’t wait to see your unique spin on this hammock chair stand! Happy crafting!
P.S. For a detailed breakdown of the required materials, tools, and step-by-step instructions with helpful diagrams, be sure to download the printable PDF woodworking plans!
