Crafting a Custom Kitchen Island: A DIY Journey

Hey there, fellow craft enthusiasts! It’s Robert Kline, and I’m thrilled to share a recent project that transformed my kitchen: a stunning DIY kitchen island. Let me tell you, this was no small feat, but the results were well worth the effort. Today, I’m going to walk you through the steps, peppered with personal anecdotes and tips, so you can feel confident tackling your own custom island project.
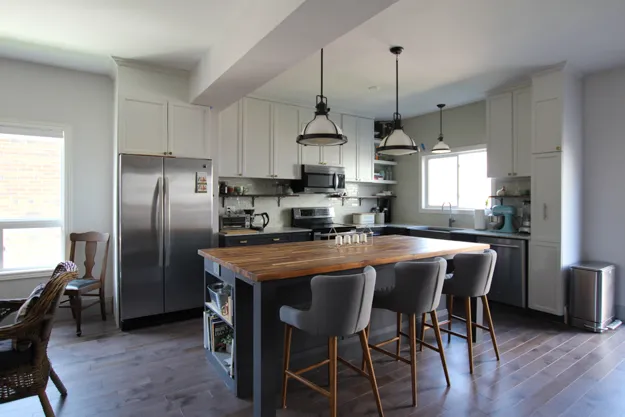
 Kitchen Renovation Makeover Reveal | Spring 2018 One Room Challenge | House by the Bay Design
The Why Behind the DIY
Like many of you, I dreamt of a spacious kitchen island – a gathering place for family and friends, and a functional centerpiece for cooking and entertaining. But my search for the perfect store-bought island left me wanting. They were either too small, too pricey, or simply lacked that unique touch. That’s when I decided to roll up my sleeves and embrace the power of DIY.
Building the Foundation: A Sturdy Island Base
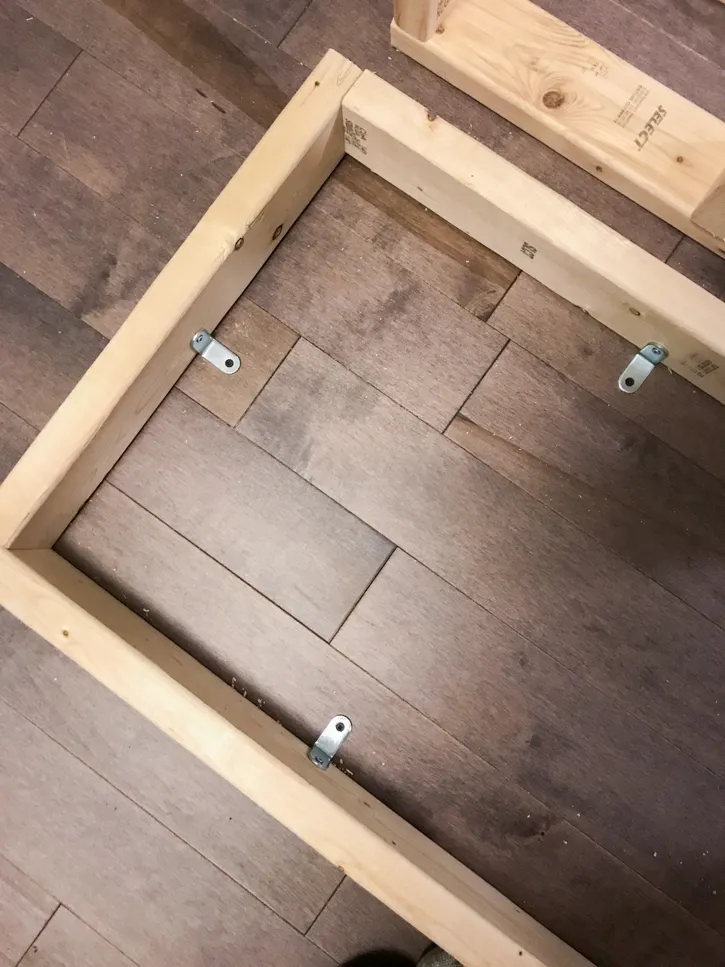
Every masterpiece needs a solid foundation, and our island was no exception. We opted to build our own base using durable 2x4s. Now, a little math comes into play here to determine the base size based on your desired overhang. Trust me, a well-calculated base is crucial for a stable and level island. We secured the base to our hardwood floor using L brackets, adding extra support pieces for each cabinet.
 DIY Island Base from 2x4s
The Art of Countertop Support
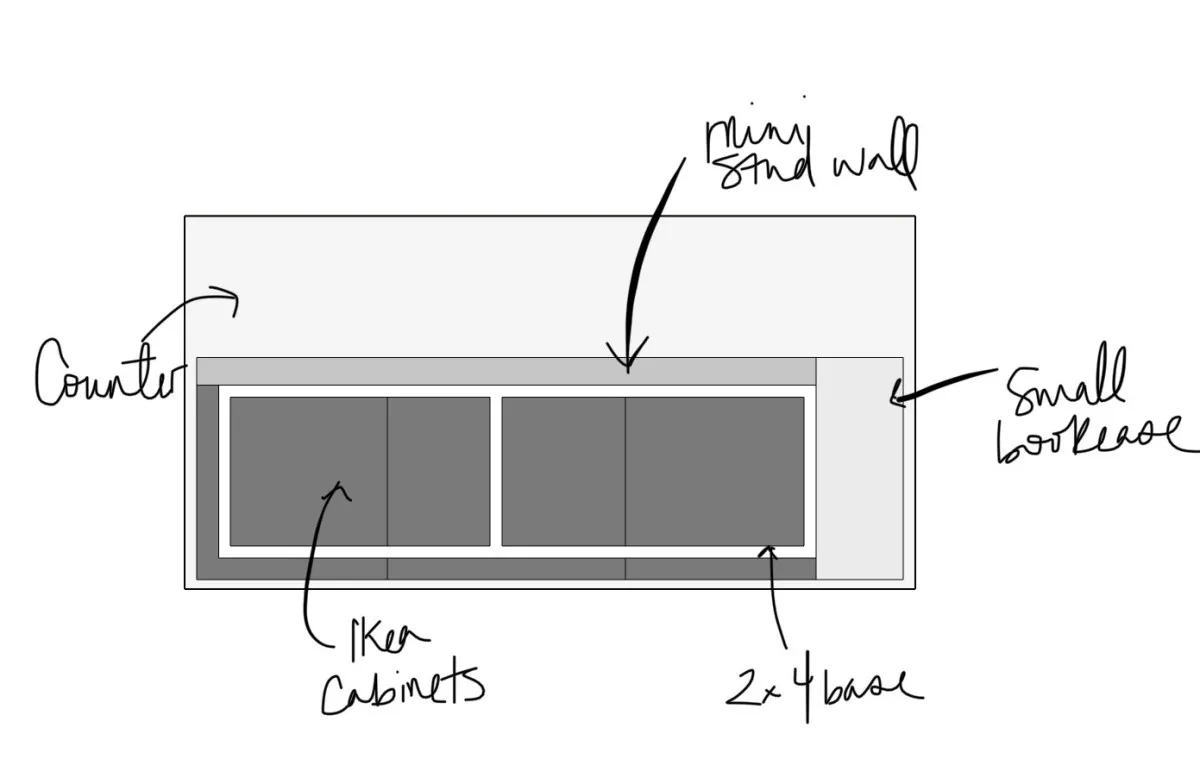
For our countertop, we chose to join two butcher block pieces, which required a robust support system. This is where a mini stud wall came in handy. Picture this: a sturdy framework attached to the floor and the 2×4 base, providing excellent weight distribution and preventing any future cracks in our countertop.
Assembling the Puzzle: Cabinets and Beyond
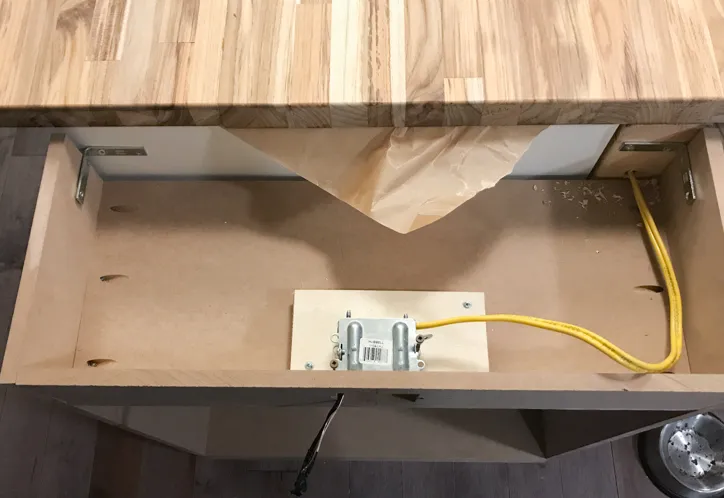
Next came the IKEA cabinets. Now, I’ve worked with my fair share of IKEA furniture, so the installation was a breeze. We did, however, make a small adjustment to accommodate our stud wall. And let me tell you, installing those drawer slides before attaching the cabinets to the base is a game-changer – learn from my experience!
 width=
The Countertop Crown: Butcher Block Beauty
Our countertop deserved a showstopping finish, and what better choice than butcher block? We went with a generous overhang, perfect for comfortable seating. Securing the butcher block involved screwing through the cabinets and the stud wall into the countertop’s underside.
Adding Character: Cover Panels and Trim
With the structural elements in place, it was time to infuse some personality. MDF panels concealed the support wall, while flat trim artfully hid any seams. A touch of baseboard along the bottom added a polished, finished look.
 class=
Supporting Elegance: Custom Island Legs
For added support and a touch of elegance, we crafted custom legs from MDF. These legs were carefully attached to the cabinet underside and floor, seamlessly blending with the island’s design.
 class=
The Finishing Touches: Priming and Painting
The final act involved priming and painting our masterpiece. MDF, while a great material, tends to absorb paint like a sponge, so a good PVA primer is your best friend. For a smooth, durable finish, I recommend Benjamin Moore Advance paint.
 class=
The Grand Reveal: A Custom Kitchen Island
And there you have it – our very own custom kitchen island, a testament to the power of DIY and a little creativity. I encourage you to embark on your own crafting adventure. And who knows? You might just inspire others to do the same. If you found this guide helpful, share your thoughts in the comments below. And for more unique handmade crafts and gift ideas, be sure to explore the Robert Kline Art website!
