Blog
DIY Baseball Hat Rack: A Home Run for Organization and Style

Hey there, fellow craft enthusiasts! It’s Robert Kline, and I’m thrilled to share my latest creation with you – a unique and stylish baseball hat rack made entirely from scrap wood and old baseballs. As an avid believer in sustainable crafting, I love giving new life to discarded materials. This project is not only practical but also adds a touch of sporty charm to any room.
Inspiration Strikes: Tackling Clutter with Creativity
My sons, like most kids their age, are passionate about baseball. Over the seasons, their collection of baseball caps had grown out of control. Hats were strewn everywhere, turning their room into a disaster zone. Sound familiar?
Inspired by a friend’s “Scrap Wood Challenge” and my son’s love for organization, I decided to tackle this clutter with a DIY project. The solution? A rustic yet stylish hat rack using an old pallet and worn-out baseballs – a match made in crafting heaven!
Gathering Your Gear: Simple Materials for a Striking Project
You don’t need a professional workshop to bring this project to life. Here’s what you’ll need:
- A Wooden Pallet: The backbone of our project, offering a rustic, upcycled feel.
- Old Baseballs: These will act as unique and functional hooks for your hats.
- Basic Tools: A saw (circular or table saw), measuring tape, marker, drill, and sandpaper will do the trick.
- Screws: Two-inch screws are perfect for attaching the baseballs to the pallet wood.
- Safety Gear: Always prioritize safety! Goggles and gloves are a must.
Crafting Your Masterpiece: A Step-by-Step Guide
Ready to get your hands dirty? Let’s get crafting!
Step 1: Preparing the Pallet
- Trim it Down: Start by removing the bottom portion of the pallet using a saw. This will ensure the hat rack sits flush against the wall.
- Adjust the Depth: If the remaining horizontal boards seem too deep, trim them down to your desired width using a circular saw.
Step 2: Adding the Baseball Hooks
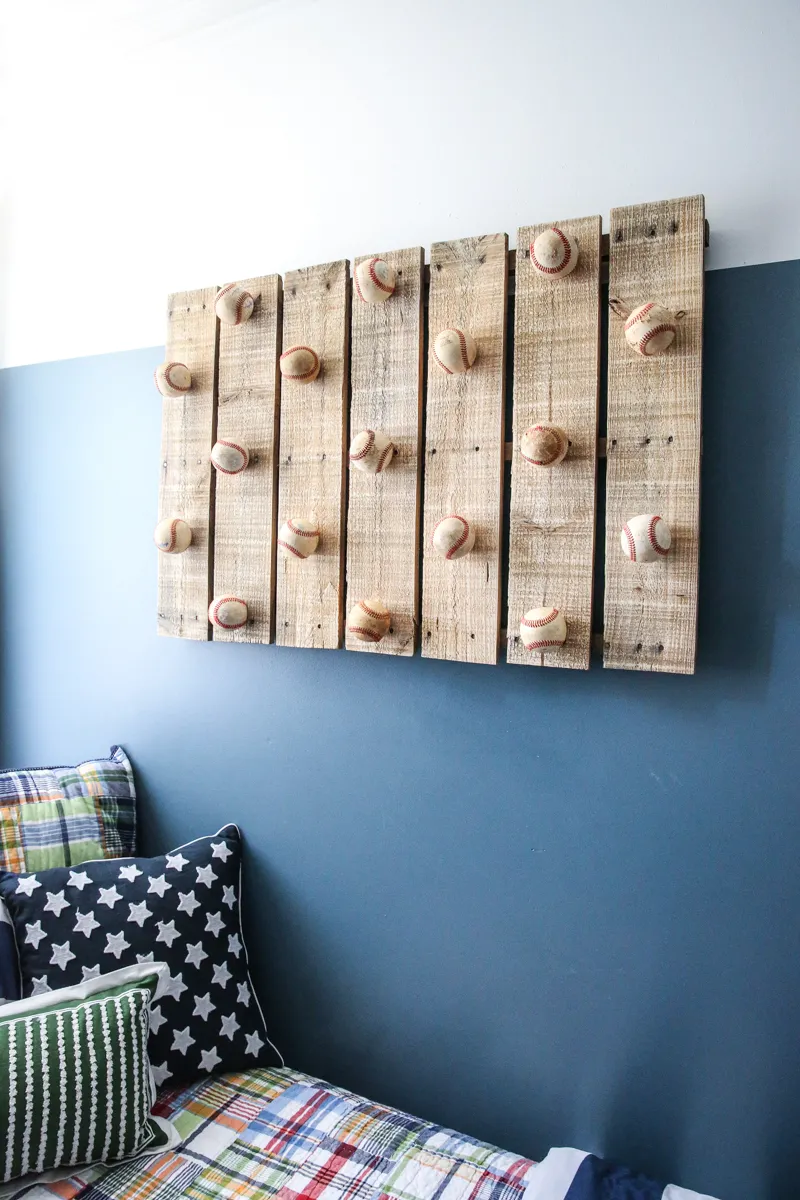
- Plan the Layout: Arrange the baseballs on the pallet to determine the ideal spacing for your hat hooks. I opted for an offset pattern for a visually appealing design.
- Mark and Drill: Once you’ve finalized the layout, mark the position of each baseball and pre-drill holes through the back of the pallet.
- Secure the Baseballs: Align the baseballs with the pre-drilled holes and carefully screw them into place. Make sure not to over-tighten, as this could damage the balls.
Step 3: Finishing Touches
- Smooth it Out: Sand the entire surface of the pallet using 120-grit sandpaper. This will not only create a smooth finish but also enhance its weathered look.
- Hang Your Creation: Locate the studs in your wall and securely mount the hat rack using screws.
The Grand Reveal: A Home Run for Organization and Style
And there you have it – a unique, functional, and visually appealing baseball hat rack! My sons were absolutely thrilled with the result, and their hats finally have a designated home.
This project is a testament to the power of creativity and upcycling. It’s amazing how a few simple materials can be transformed into something both practical and stylish. Remember, crafting is about experimentation and fun. Don’t hesitate to personalize this project with different paint colors, additional embellishments, or even different sports memorabilia.
 " width=
Let me know what you think of this project in the comments below. I’d love to see your unique creations! And for more inspiring DIY projects and handcrafted treasures, be sure to explore the rest of the Robert Kline Art website. Happy crafting!
