Blog
DIY Folding Wall Desk: The Ultimate Space-Saving Solution
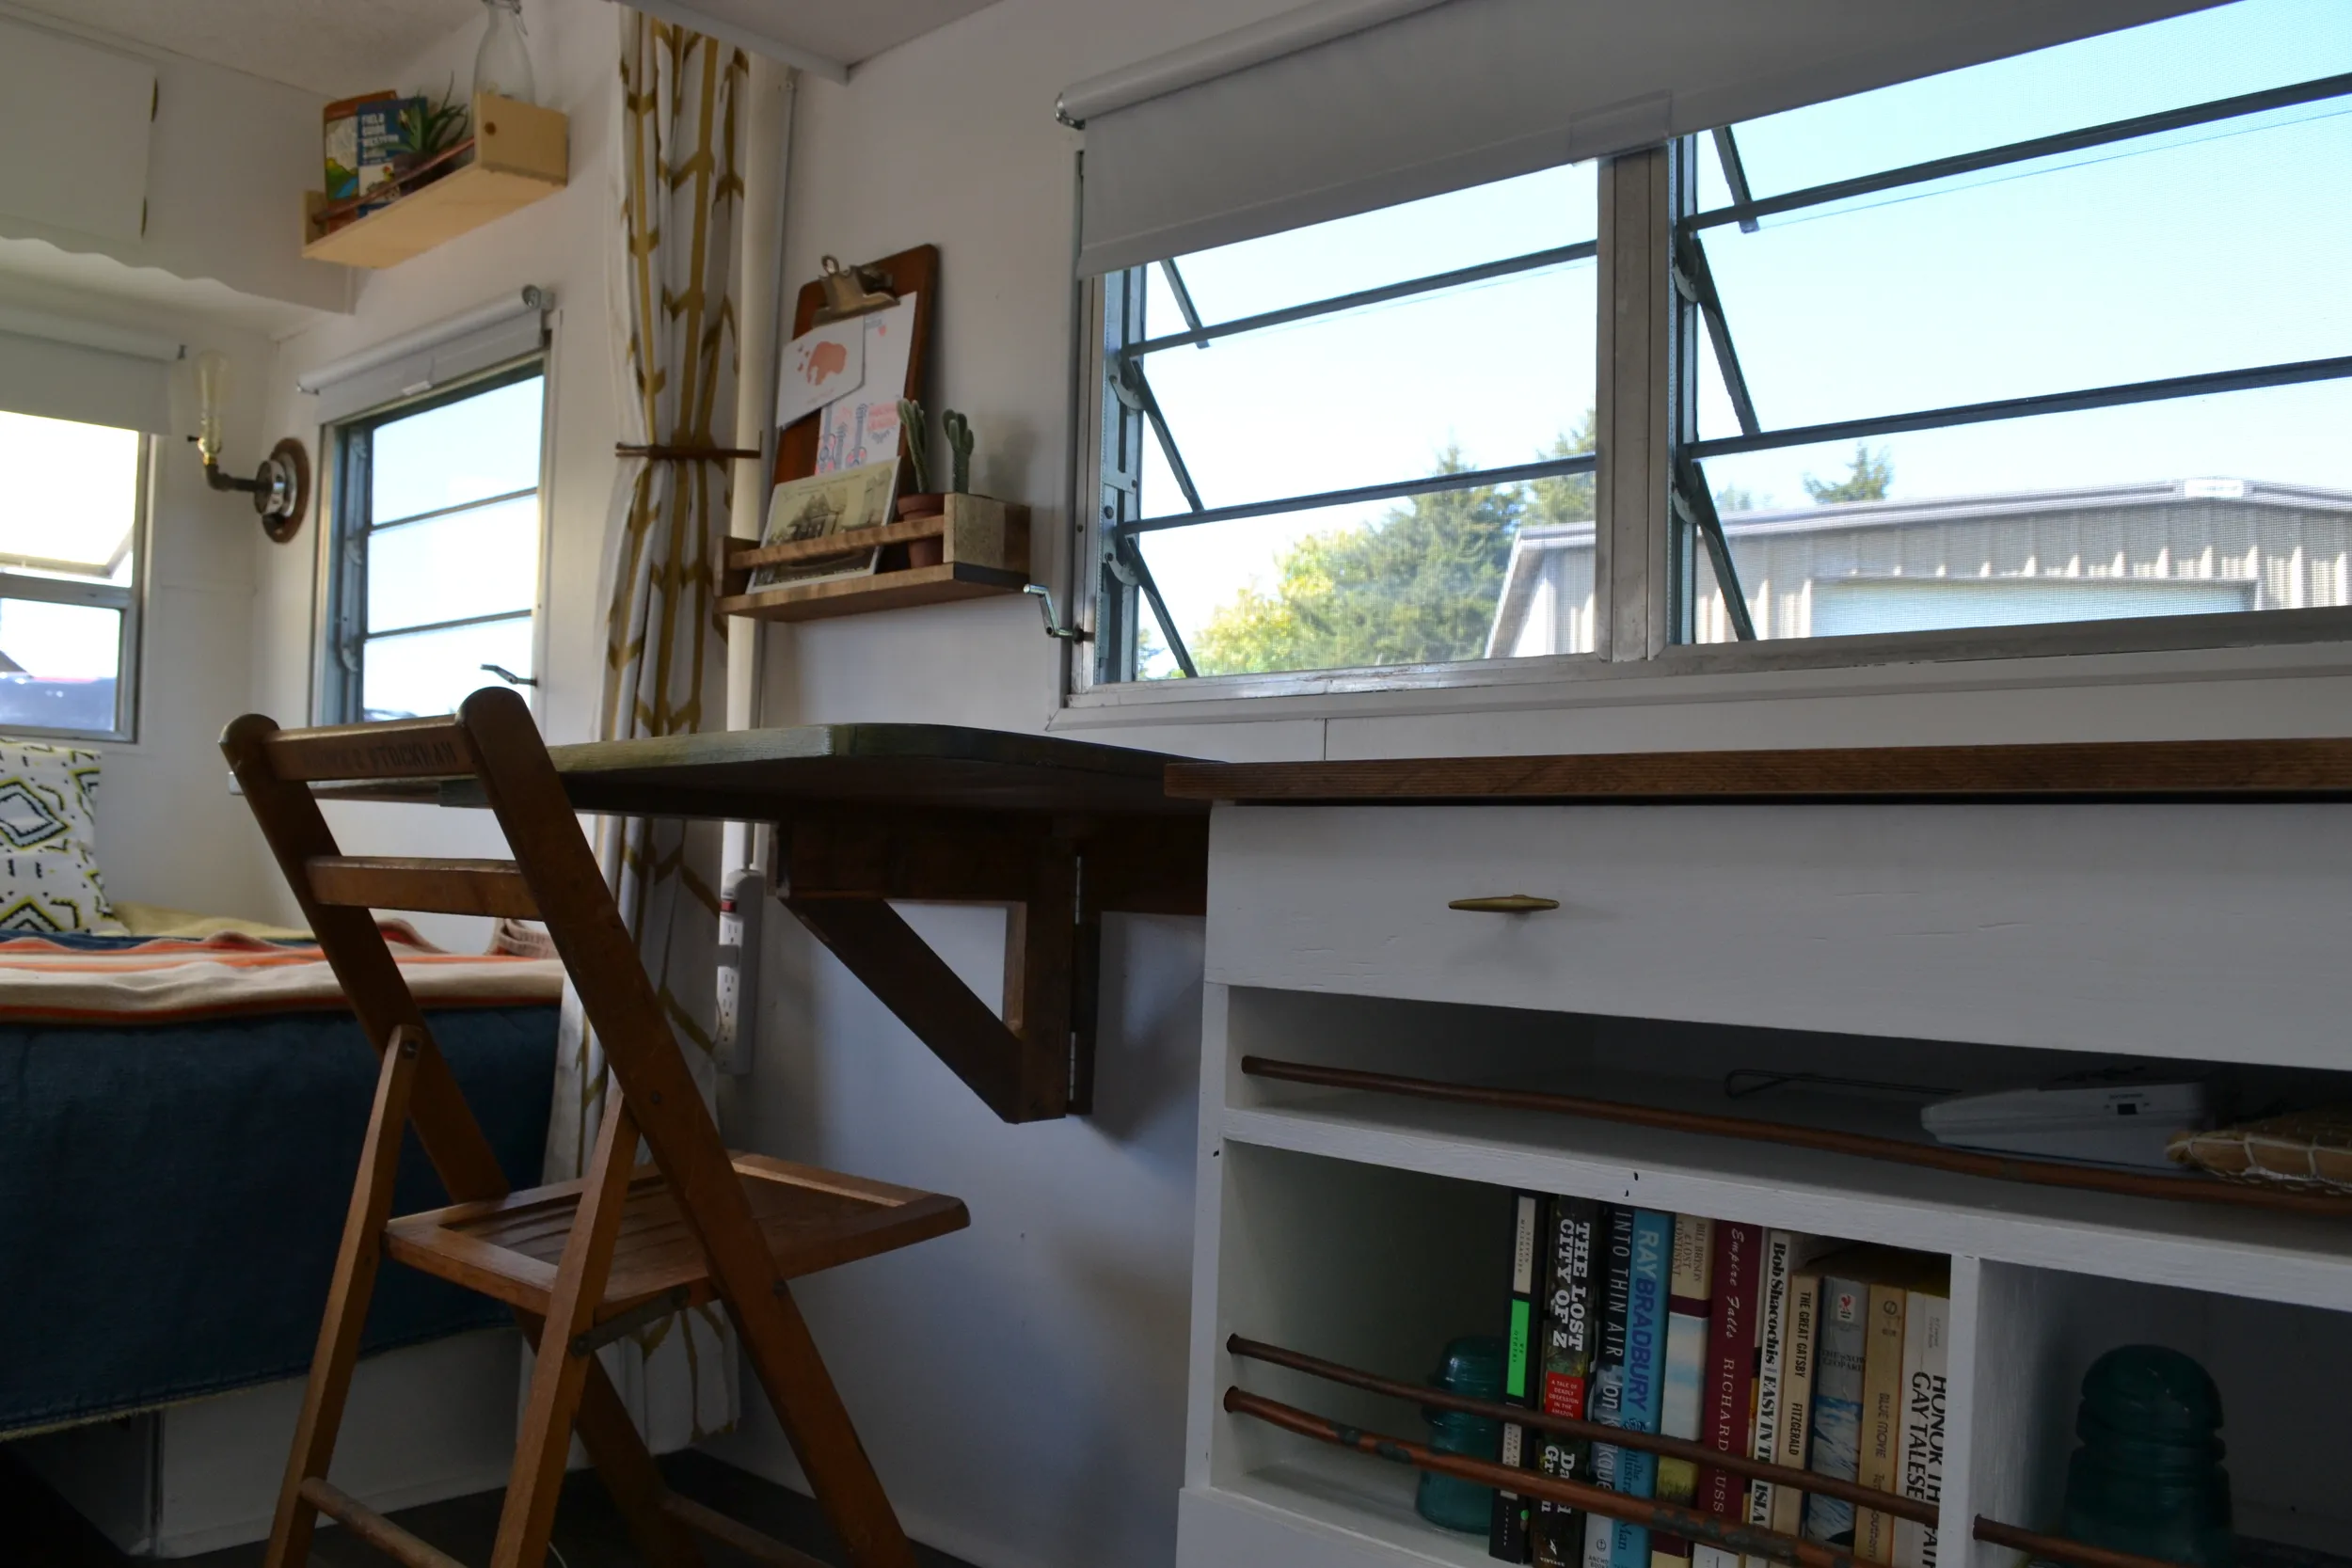
Here at Robert Kline Art, we love a good DIY project, especially when it transforms our living spaces. Today, we’re tackling a challenge for all you small-space dwellers out there: building a simple yet stylish folding wall desk.
This project is perfect for adding functionality to your home office, craft room, or even a tiny house! Let’s get started, shall we?
Planning and Preparation
Before we dive into the construction, let’s gather our materials and lay the groundwork for success.
Materials You’ll Need:
- A large piece of wood for the desktop (pine or plywood work well)
- Wooden boards for the support braces (scrap wood works great!)
- Two hinges for the desk’s up-and-down movement
- Two hinges for the brace’s folding mechanism
- Screws
- Wood glue
- Sandpaper
- Stain or paint (your choice!)
- Polyurethane
- A wooden dowel for the locking peg
- Basic tools: drill, saw (jigsaw is ideal), measuring tape, pencil, level
Design and Measurements:
- Inspiration Time! Head over to your favorite furniture store or browse online for folding desk designs. Take note of the dimensions and mechanisms you like.
- Sketch It Out: This helps visualize the project and ensures accurate measurements.
- Measure Twice, Cut Once: Determine the desired height and width of your desk. A comfortable working height is typically between 32″ and 34″. Remember to consider the space available in its folded and unfolded positions.
Building the Folding Desk
Now for the fun part – let’s build this space-saving masterpiece!
Step 1: Locating the Support and Desk Height
- Find Your Stud: Use a stud finder to locate a sturdy wall stud to anchor your desk. This ensures maximum stability.
- Mark Your Height: Once you’ve found your stud, use a level and pencil to mark the desired height of your desk on the wall.
Step 2: Constructing the Support System
 The folding desk is a huge space saver in the camper. Sure, we could have bought one at IKEA. But then it wouldn't really be ours.
- Horizontal Brace: Cut a wooden board to the desired width of your desk. This is your horizontal support brace. Attach it securely to the wall stud using screws.
- The Lip: Cut a smaller board and attach it to the top of your horizontal brace. This creates a “lip” that prevents the folded desk from protruding too far from the wall.
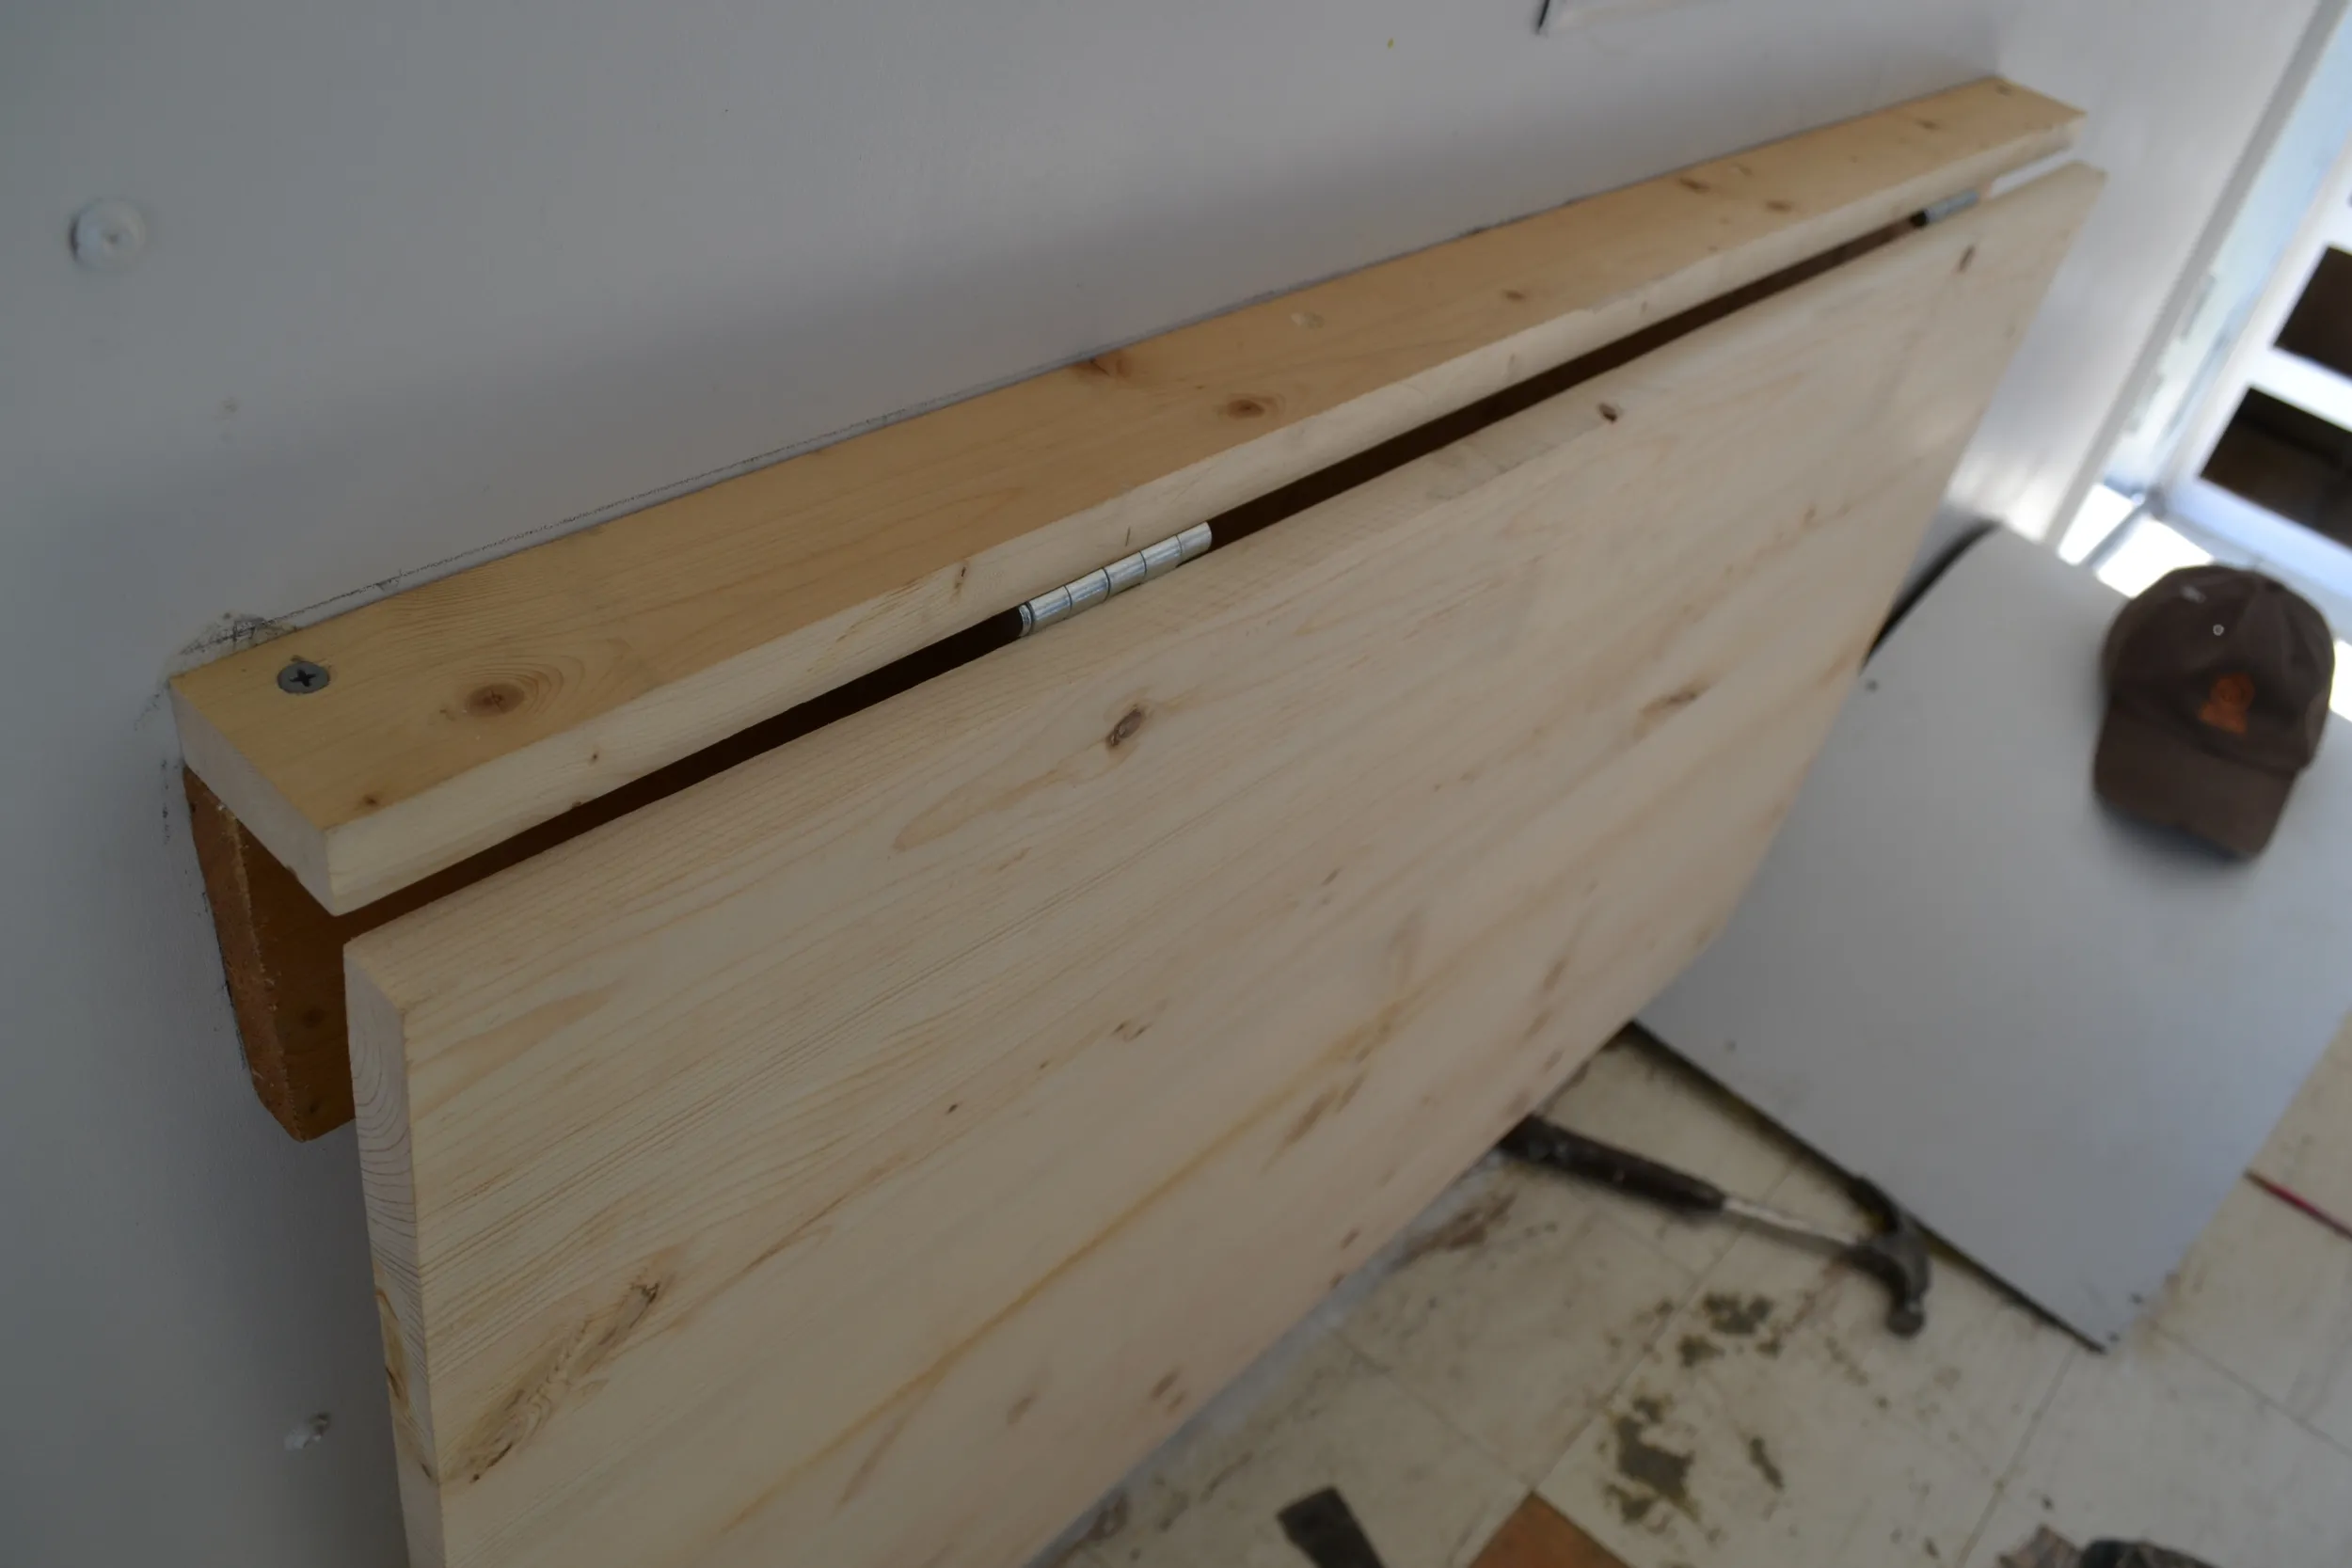 Here's what you're working toward. It looks a lot like the IKEA version, if you ask us. Take note: see that pencil line? We drew that once we found the stud in the wall and it was our measure of how high we wanted the desk to be. Just read below, it…
Step 3: Attaching the Desktop
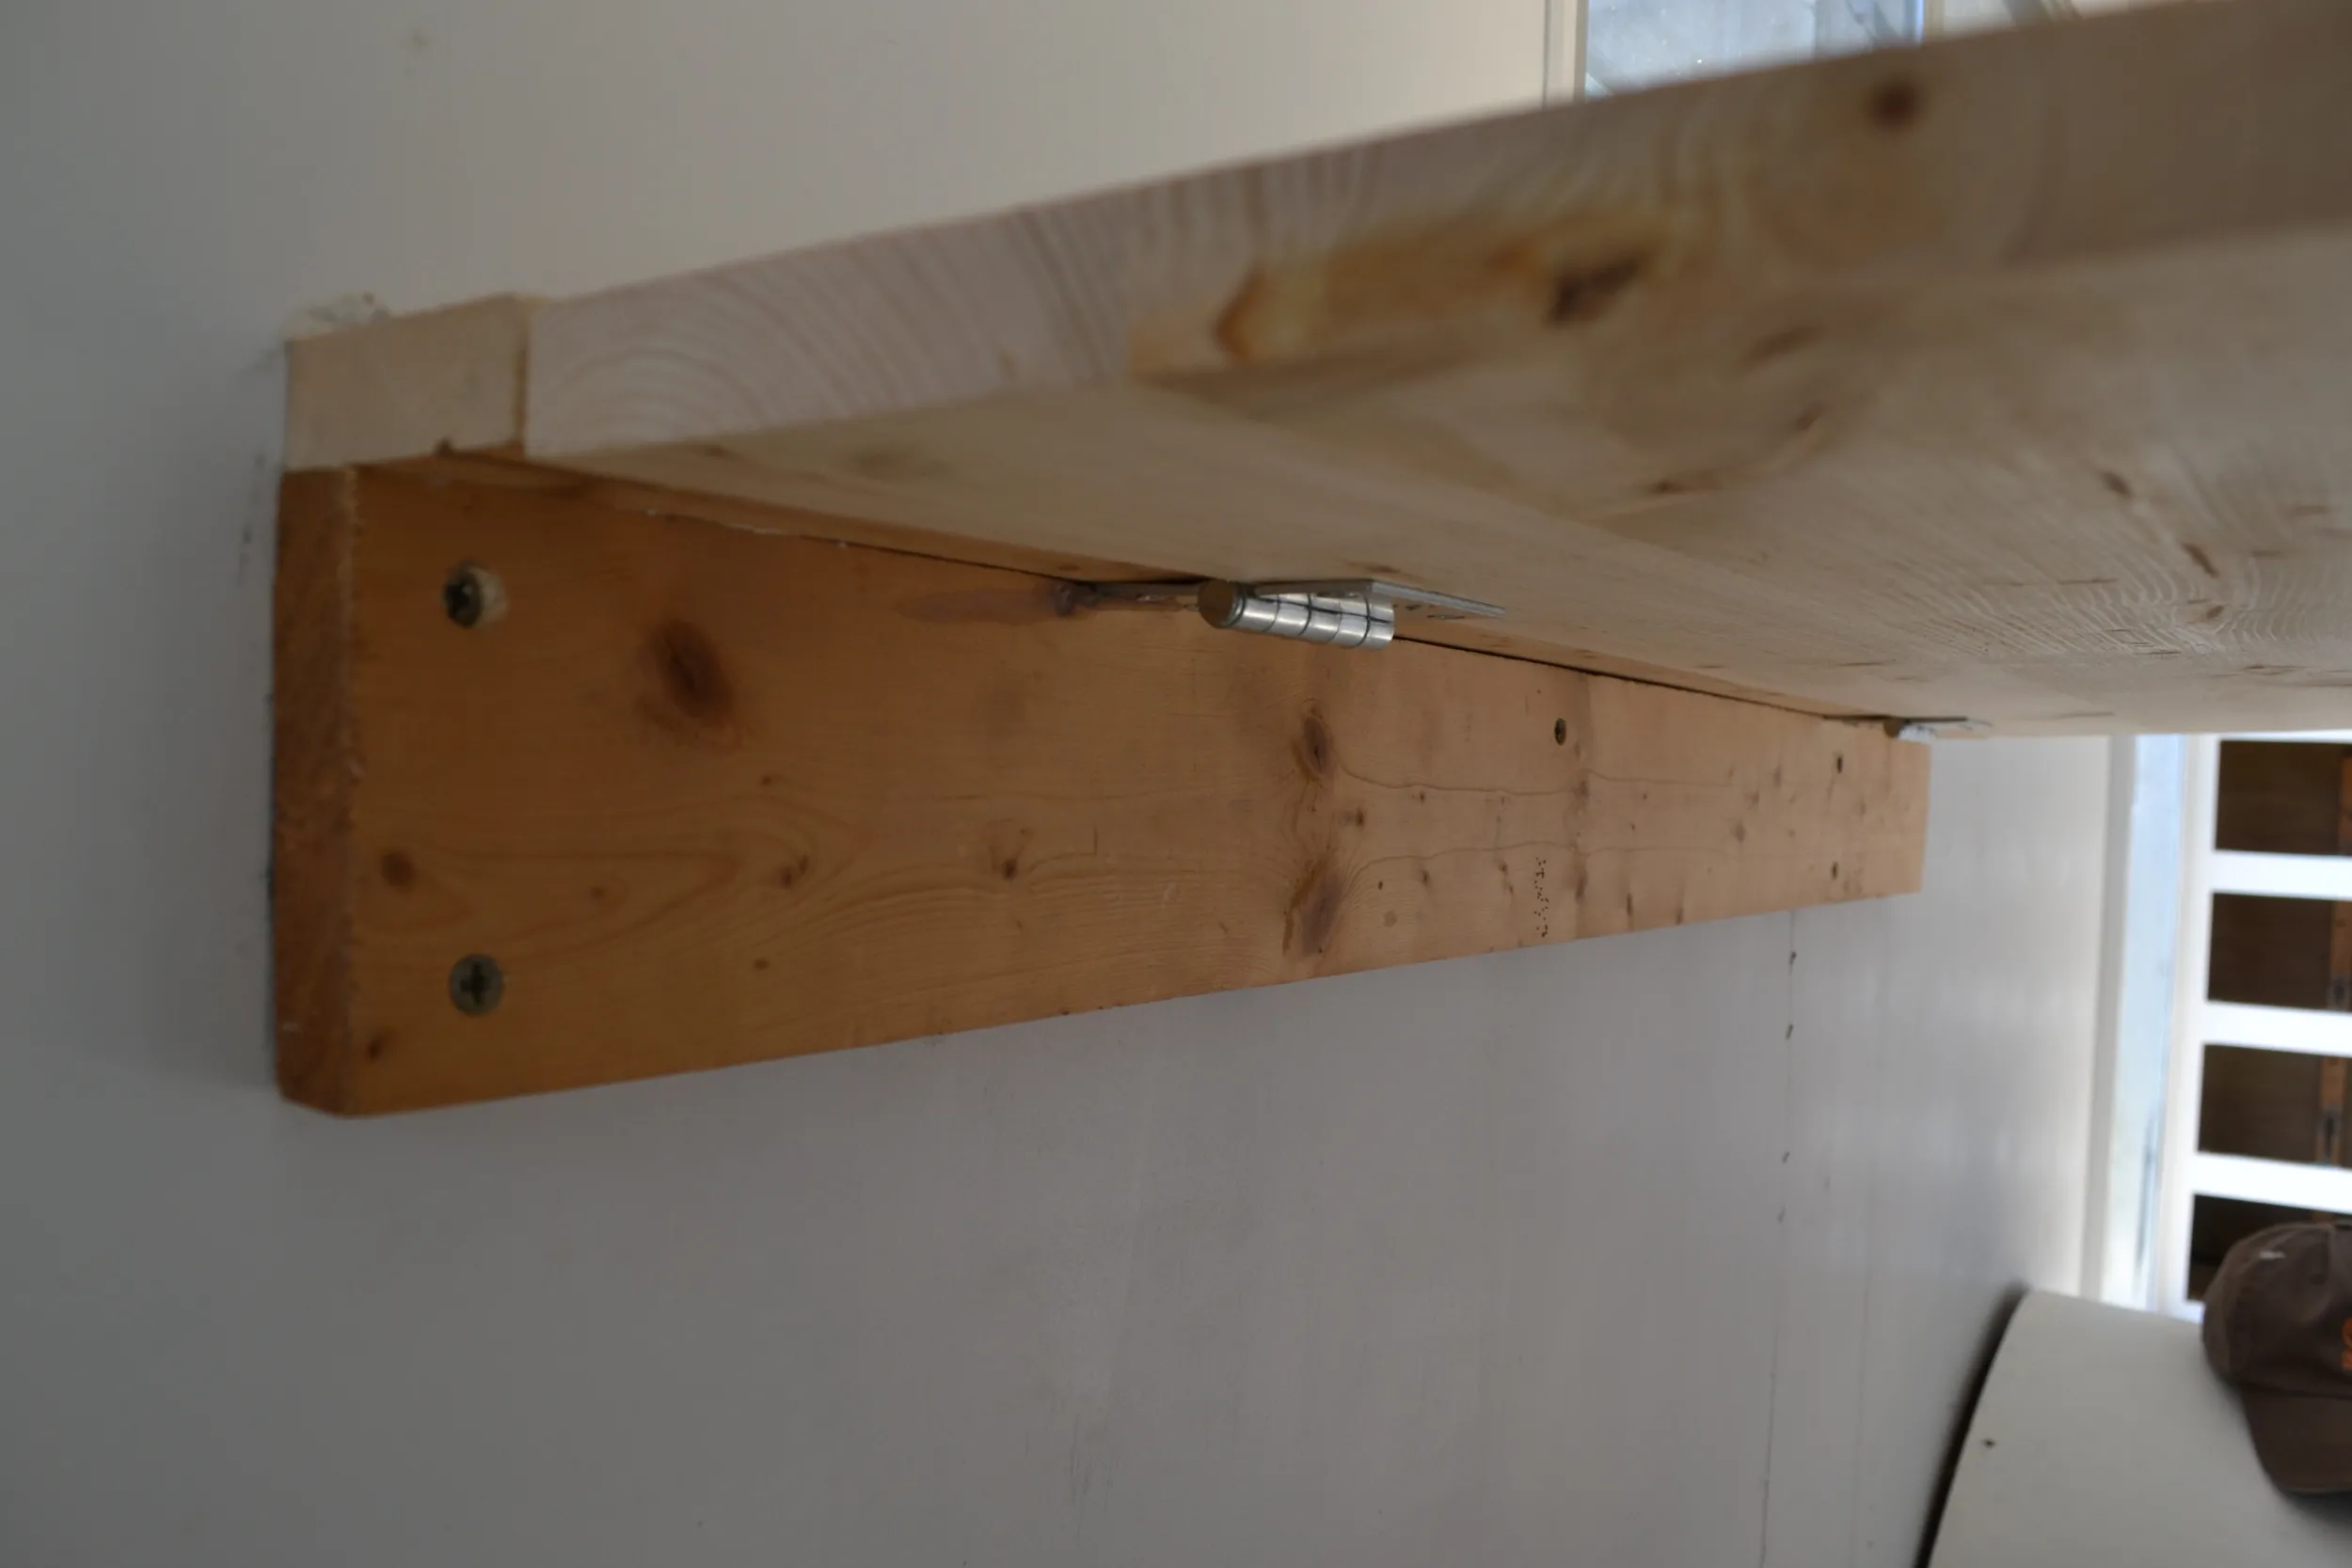 Here's the important stuff: a) the horizontal brace is the one drilled into the wall. The lip is the board sitting on top of it. The top is the big piece hinged to the lip. Got it?
- Hinge Placement: Attach your first set of hinges to the underside of the lip.
- Secure the Desktop: Align your desktop with the hinges and attach it securely.
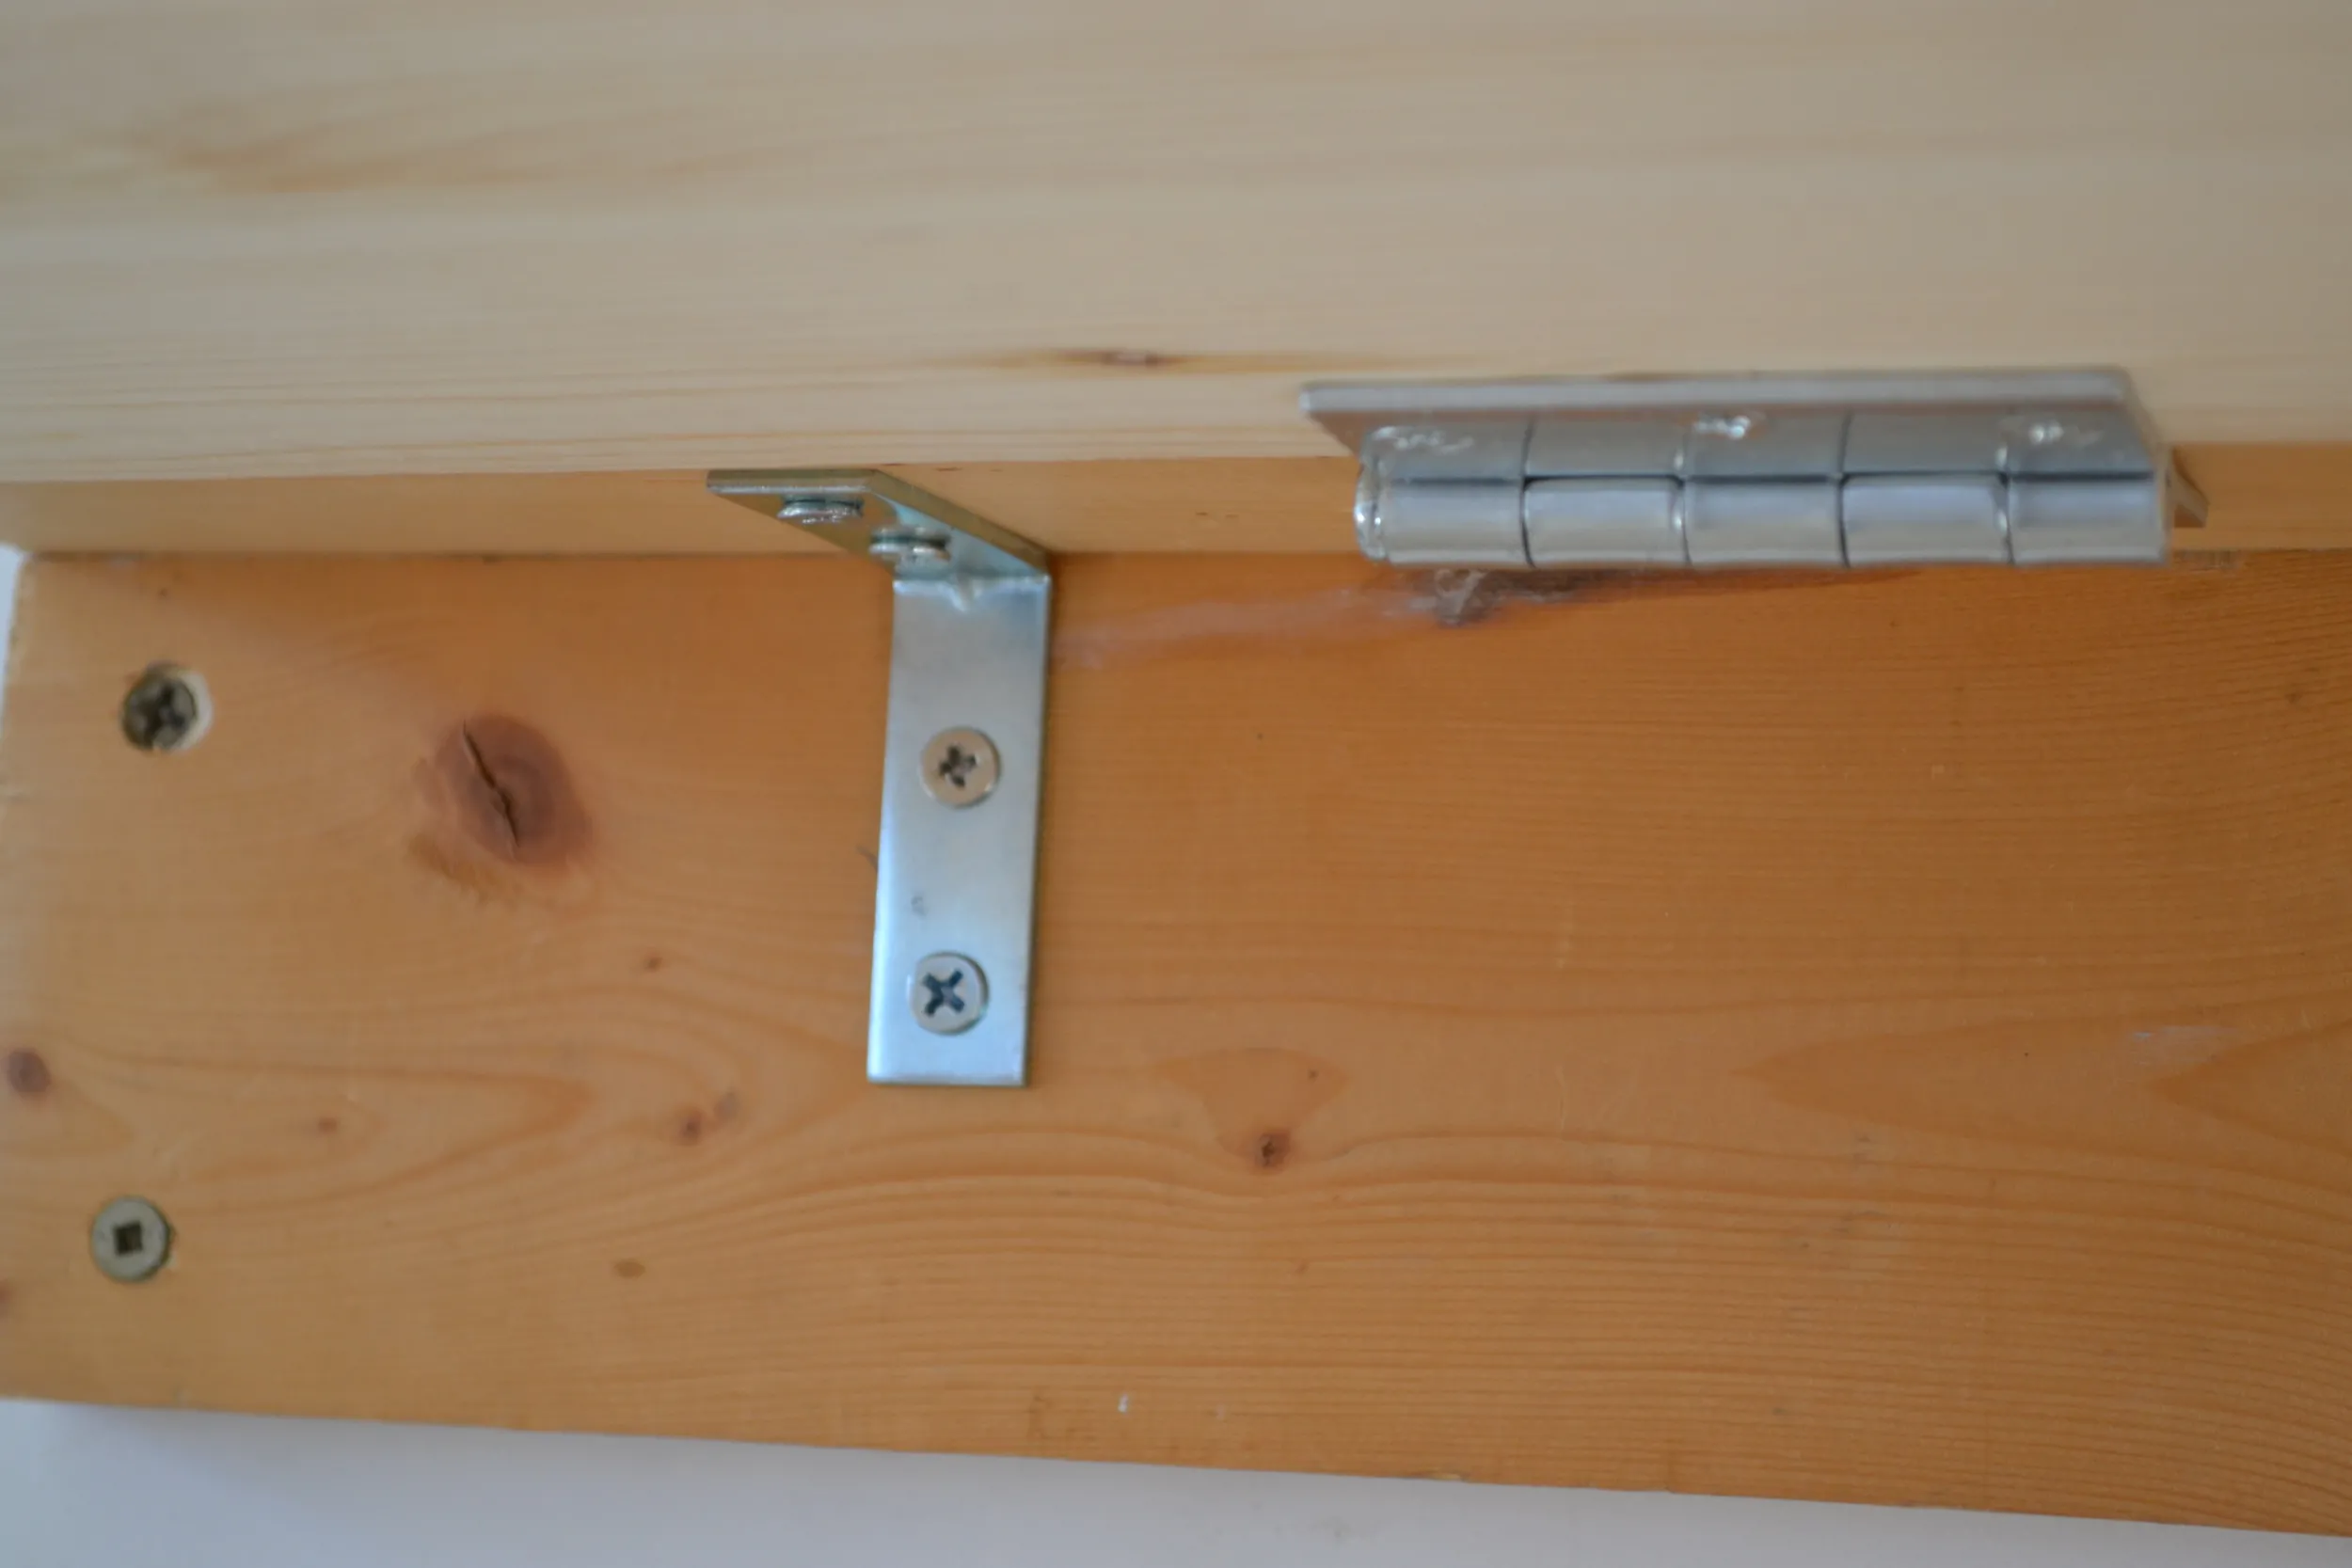 Here you can clearly see the horizontal brace, the lip, the L bracket, and the up/down hinge.
Step 4: Creating the Folding Brace
- The “T”: Build a “T”-shaped support structure. The vertical part of the “T” will be attached to the wall, and the horizontal part will connect to the underside of the desktop.
- Triangle Brace: Construct a sturdy triangle brace. This is crucial for supporting the weight of the desk when unfolded.
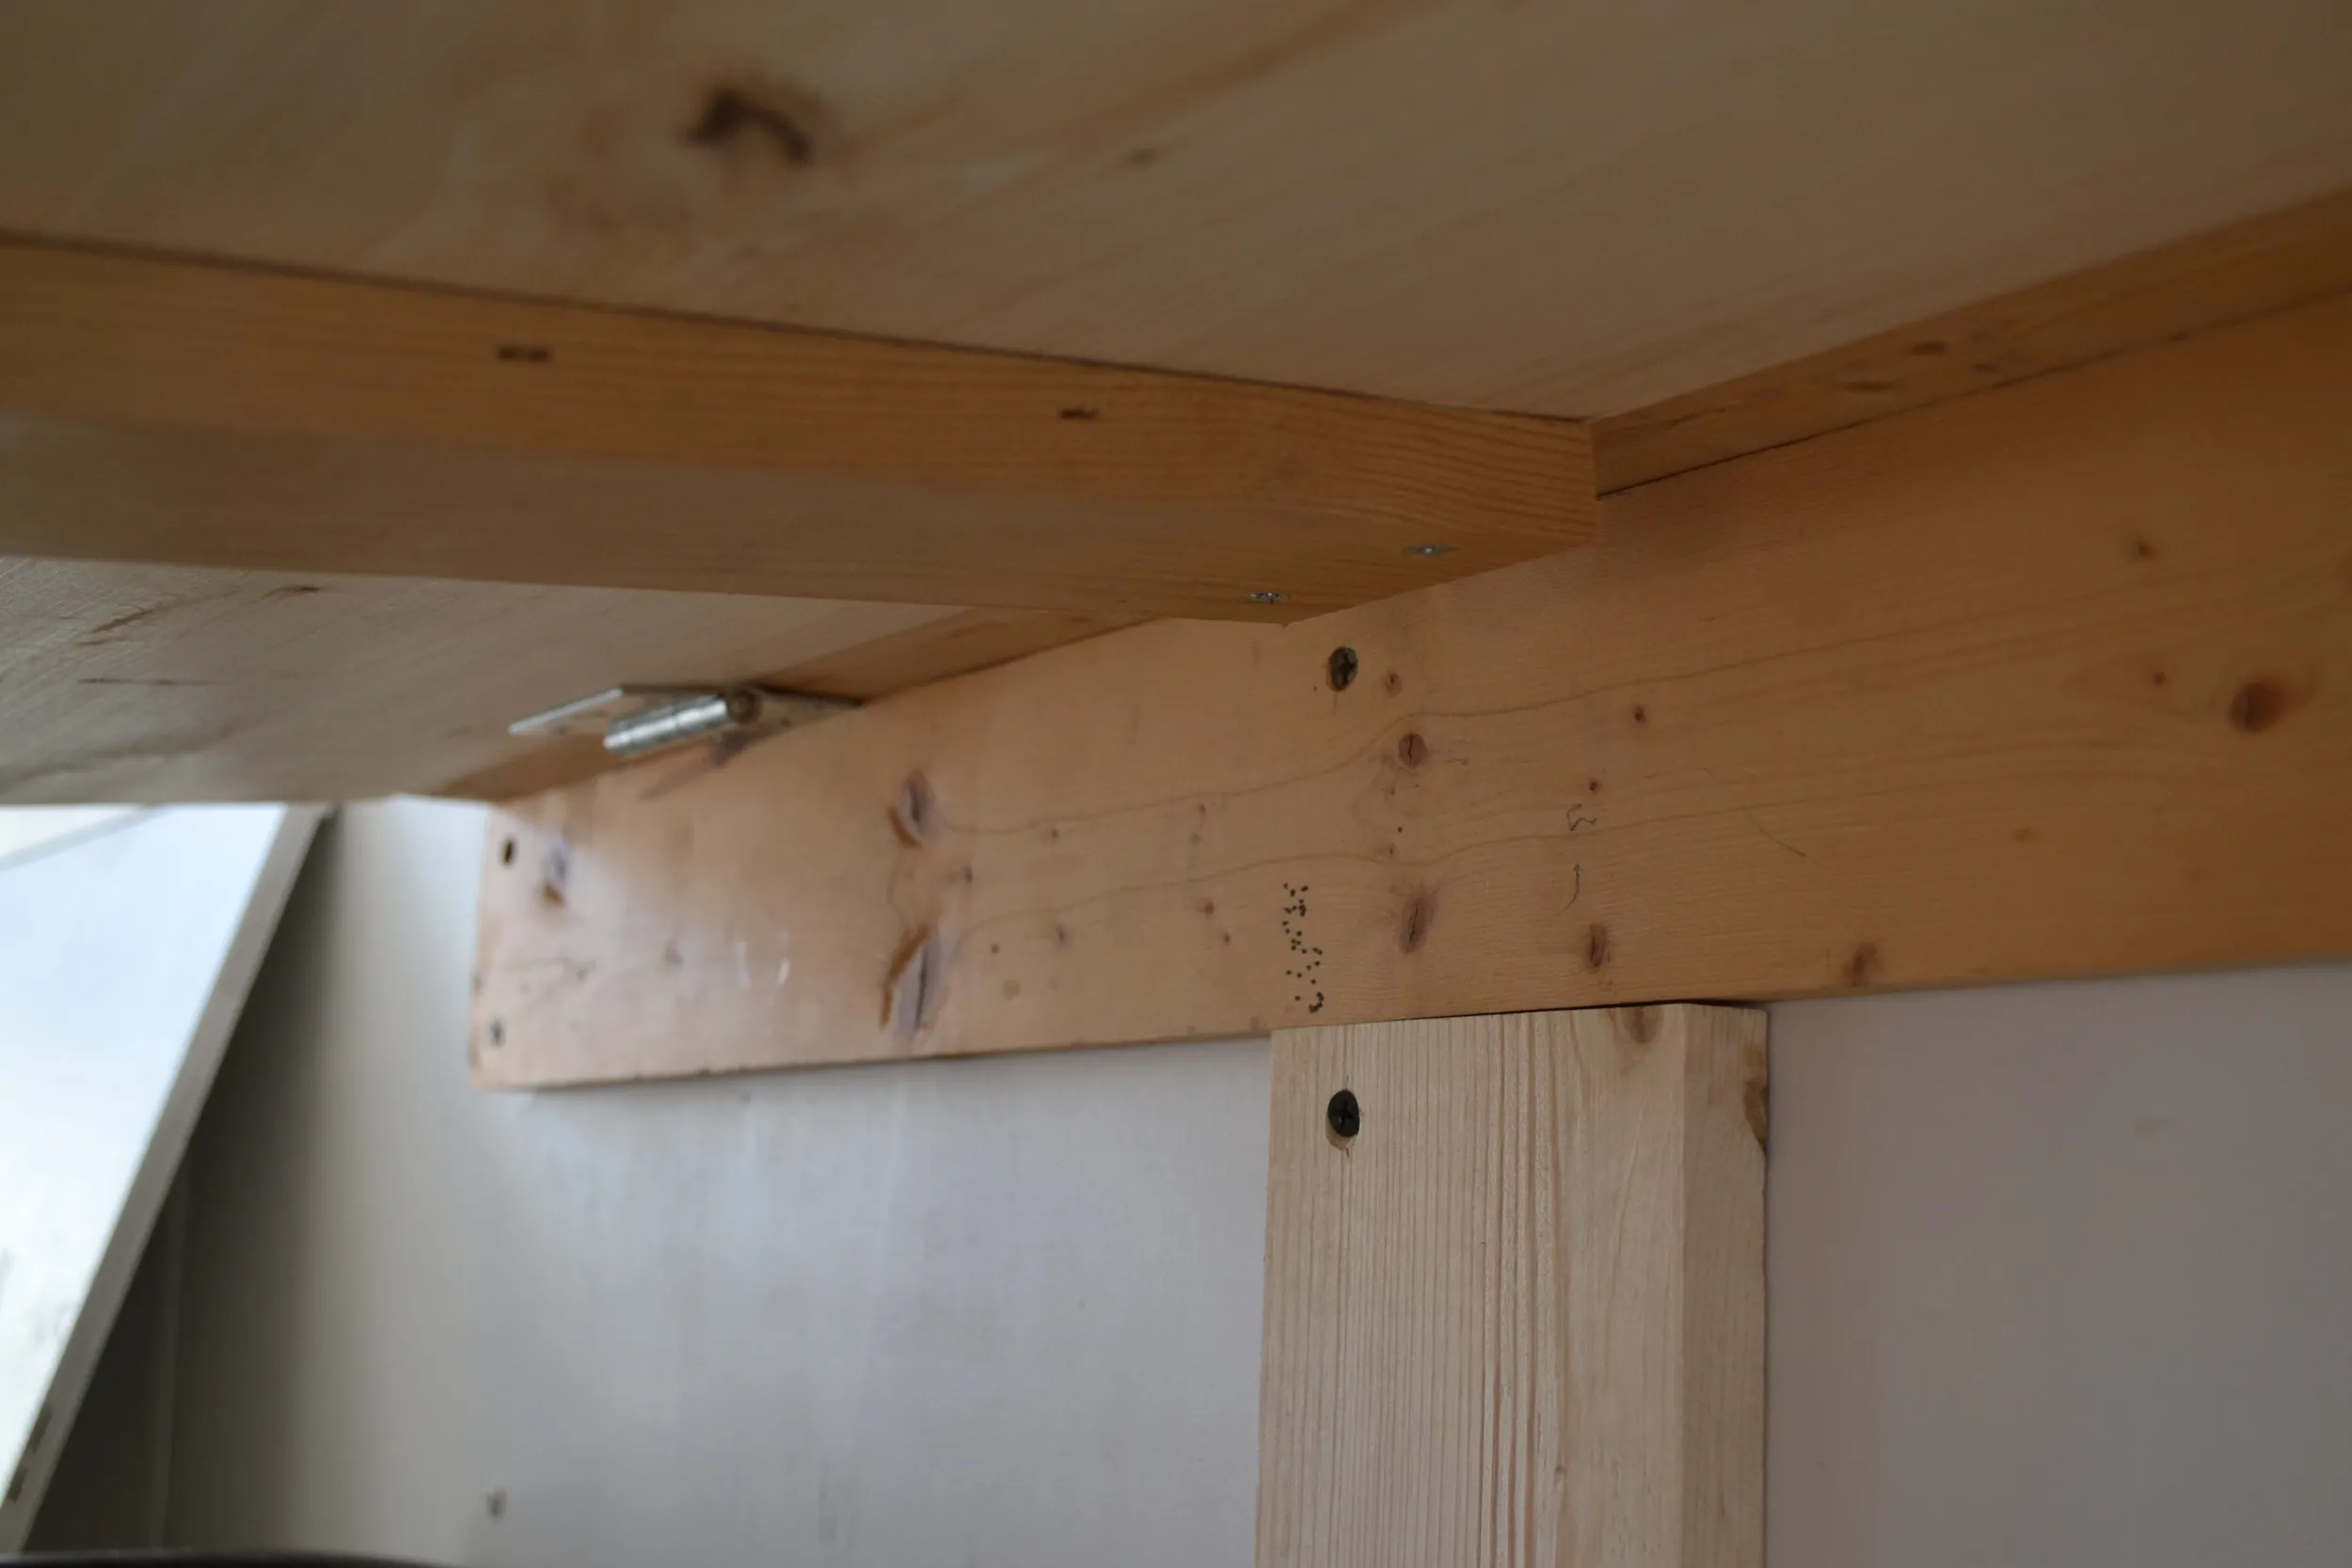 Here's your T. Also: see the brace board we applied the the underside of the top board.
 - Hinge the Brace: Attach one side of the triangle brace to the vertical part of your “T” using hinges.
- Second Hinge: Attach the other side of the triangle brace to the underside of the desktop, ensuring it folds inward when the desk is closed.
Step 5: Adding the Locking Mechanism
- Drill and Glue: Drill a hole into the bottom portion of the triangle brace and insert half of your wooden dowel with wood glue. This creates your locking peg.
- Second Hole: Drill a corresponding hole into the “T” support structure. This is where the peg will lock into place.
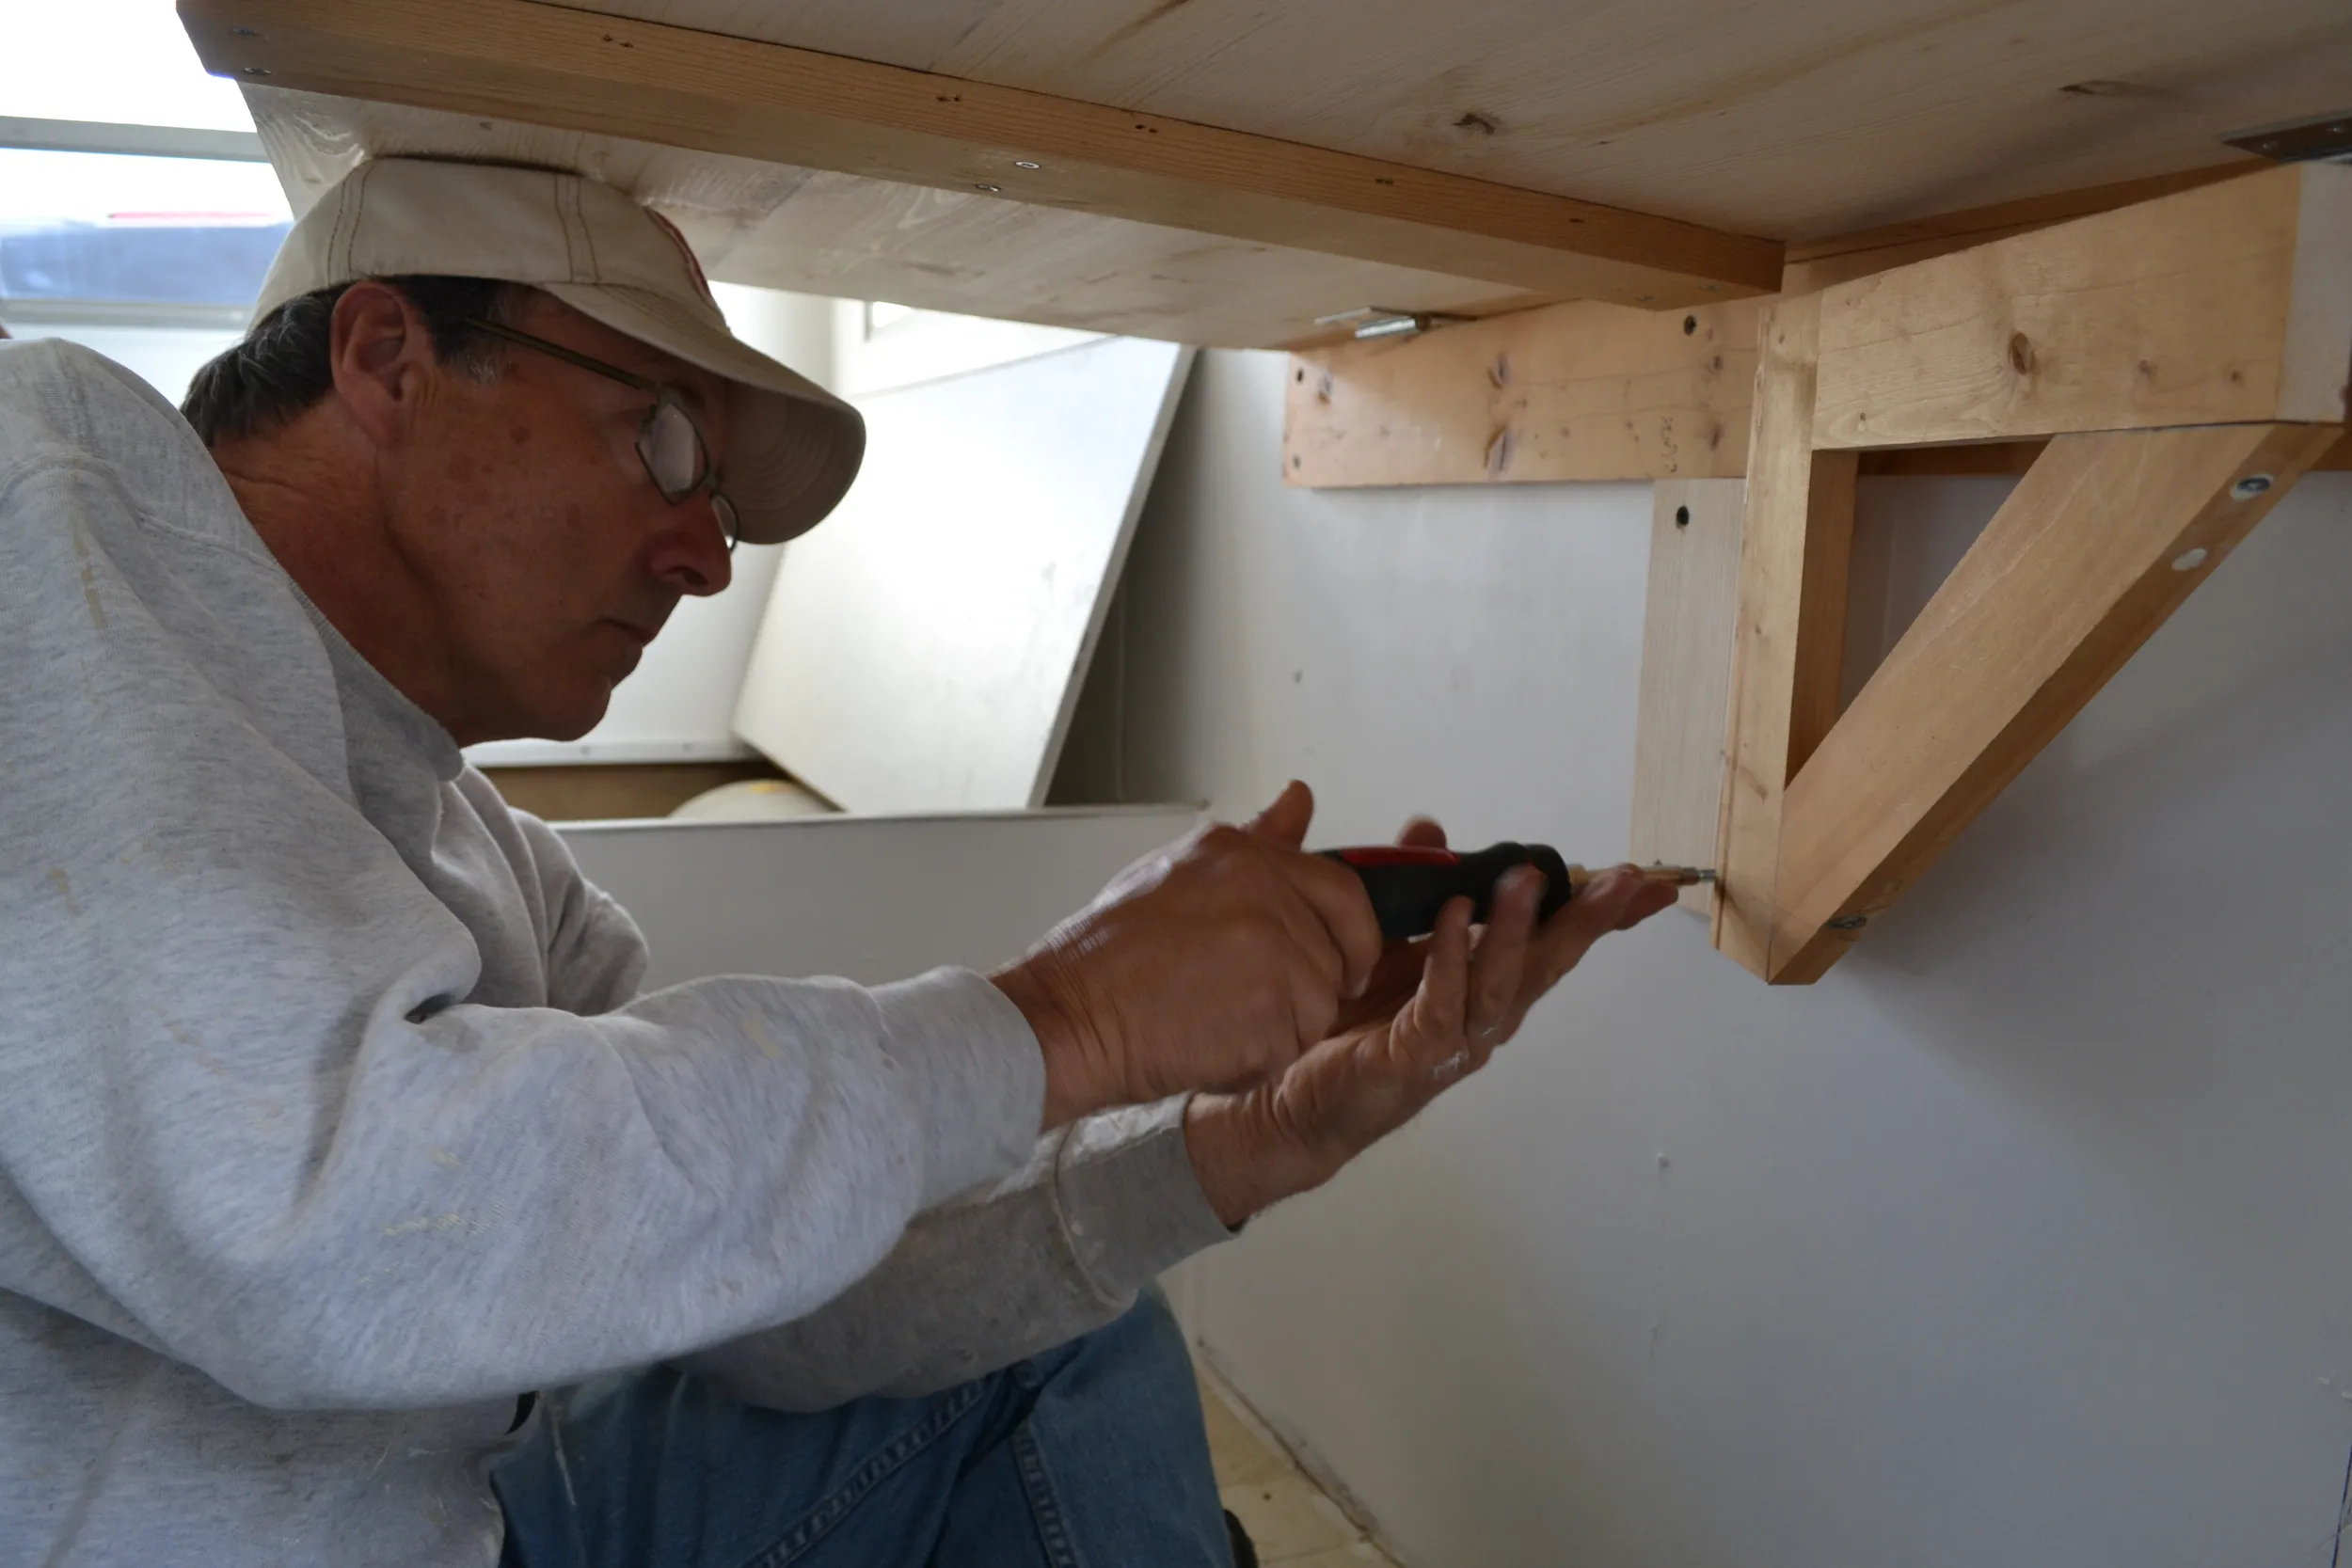 Jerry screws the triangle brace into the T.
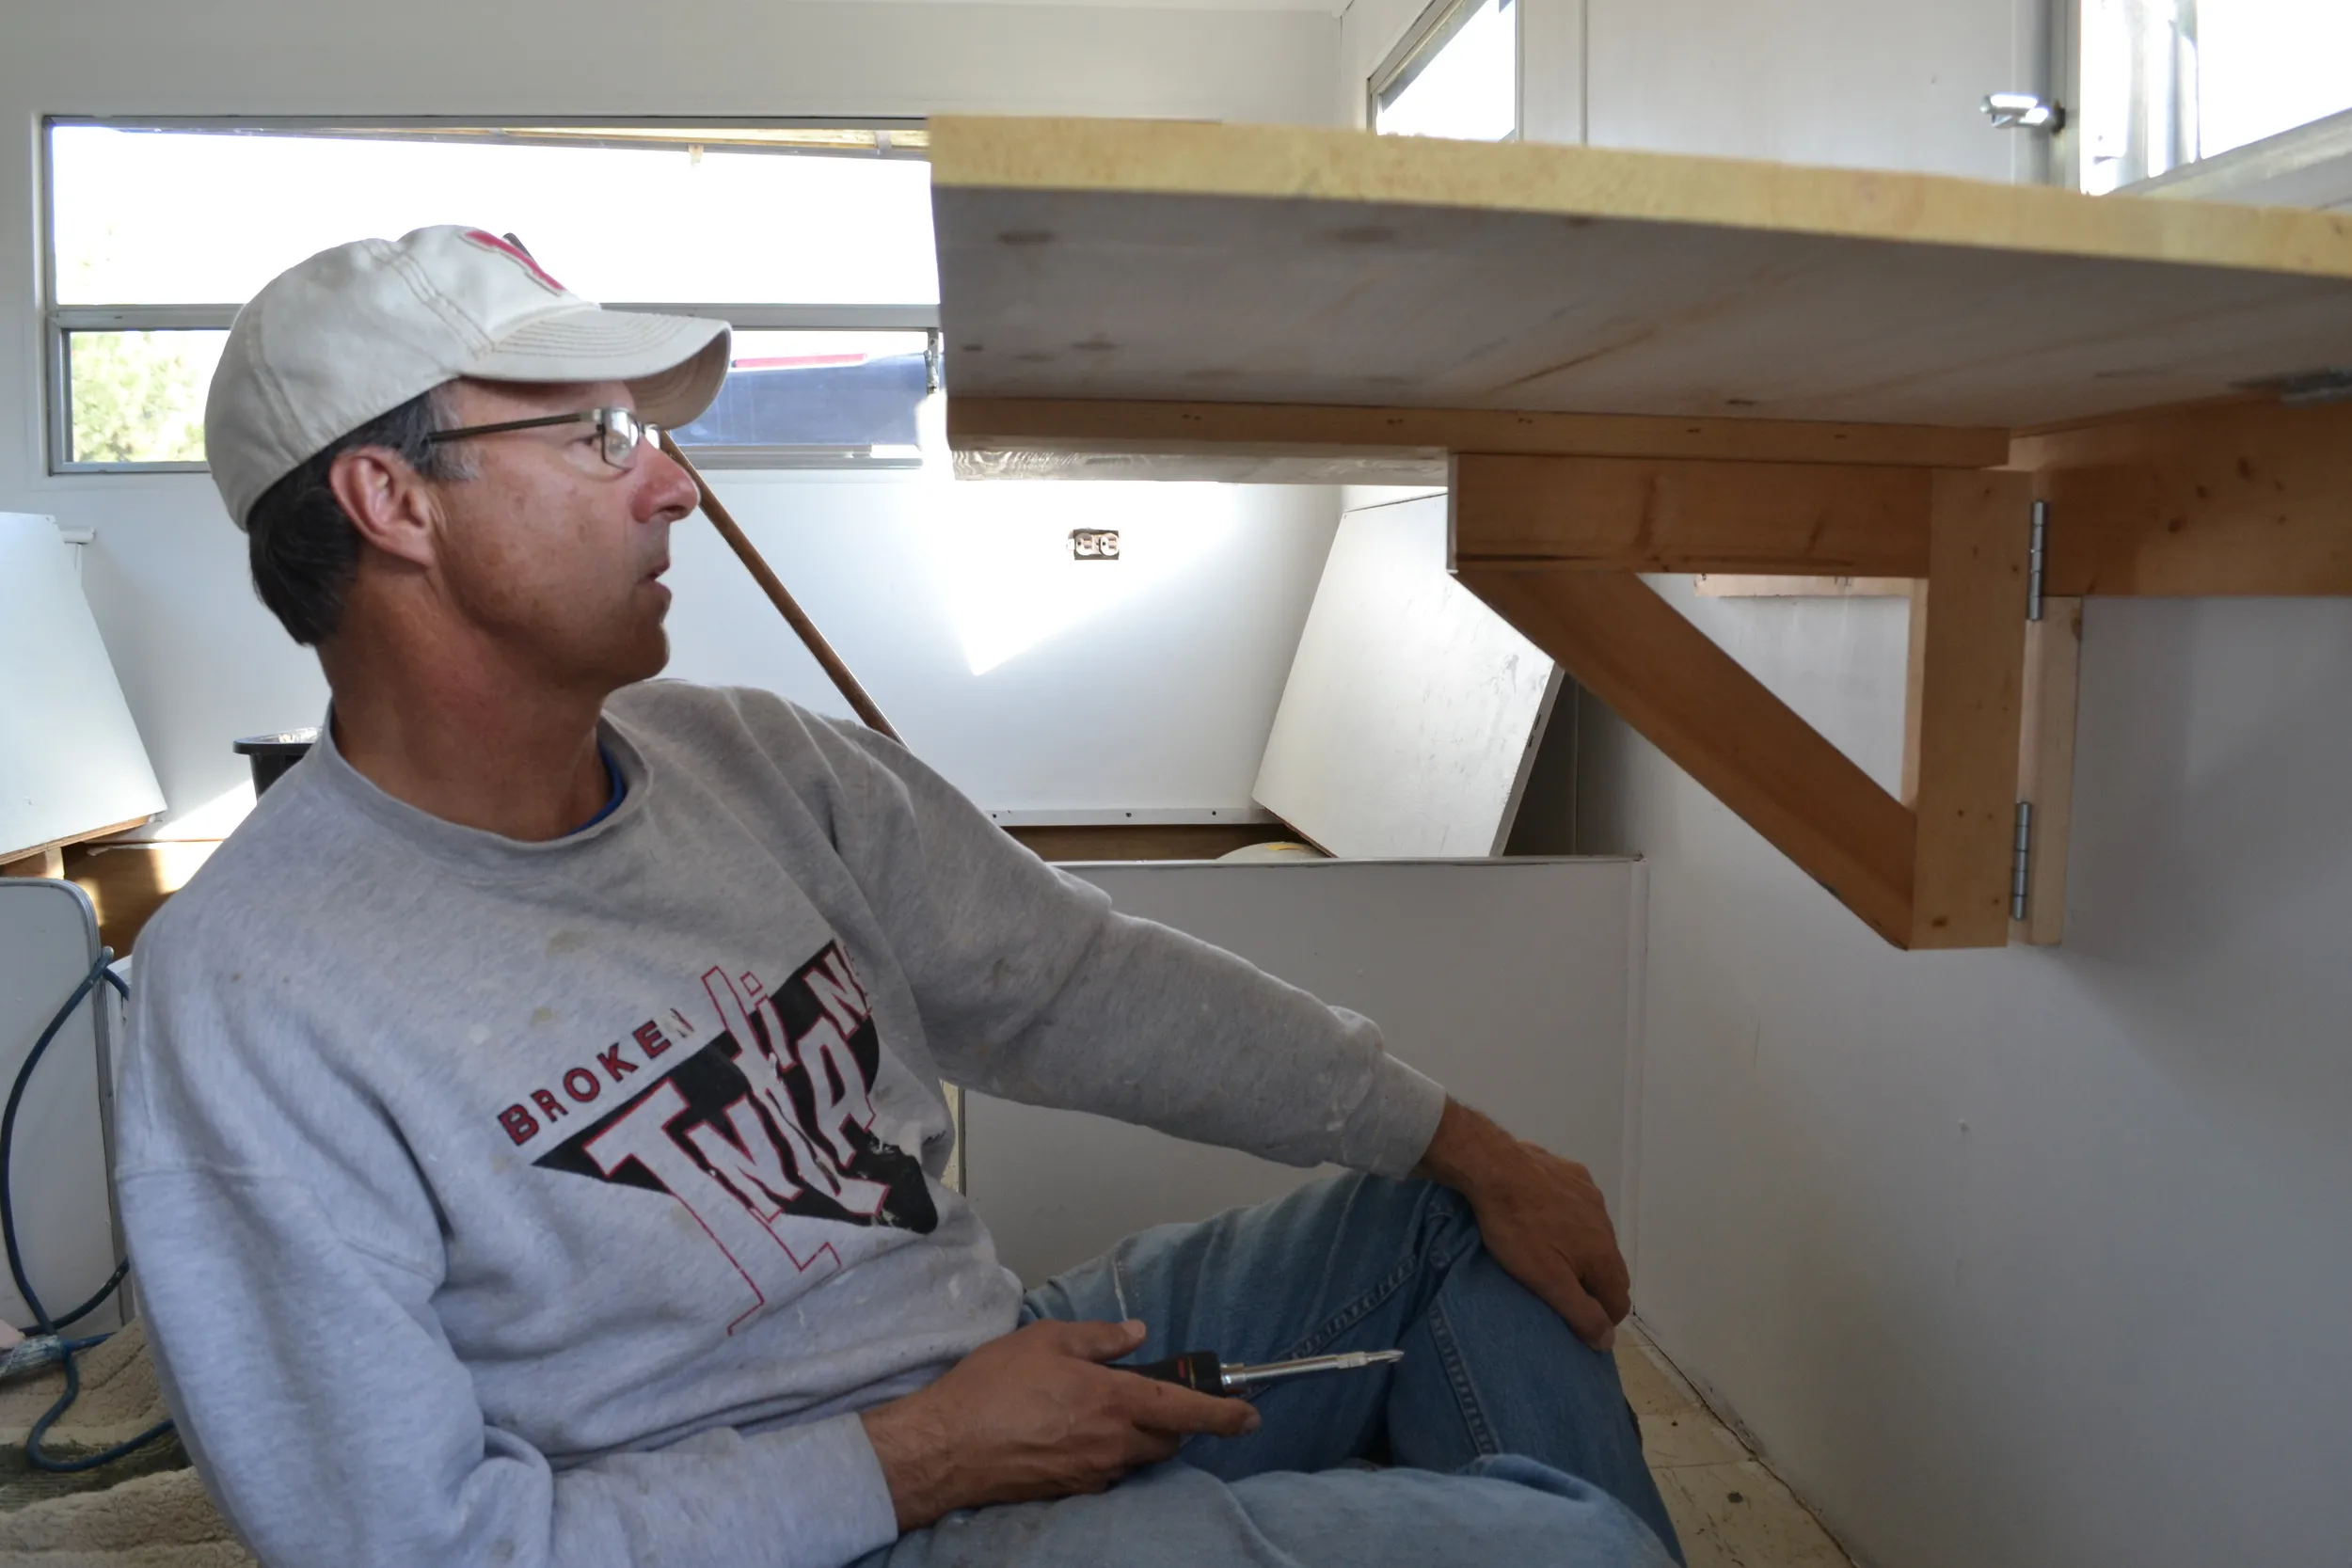 Triangle brace is in. Everything's sitting pretty — now we just have to secure it with the wood peg. 
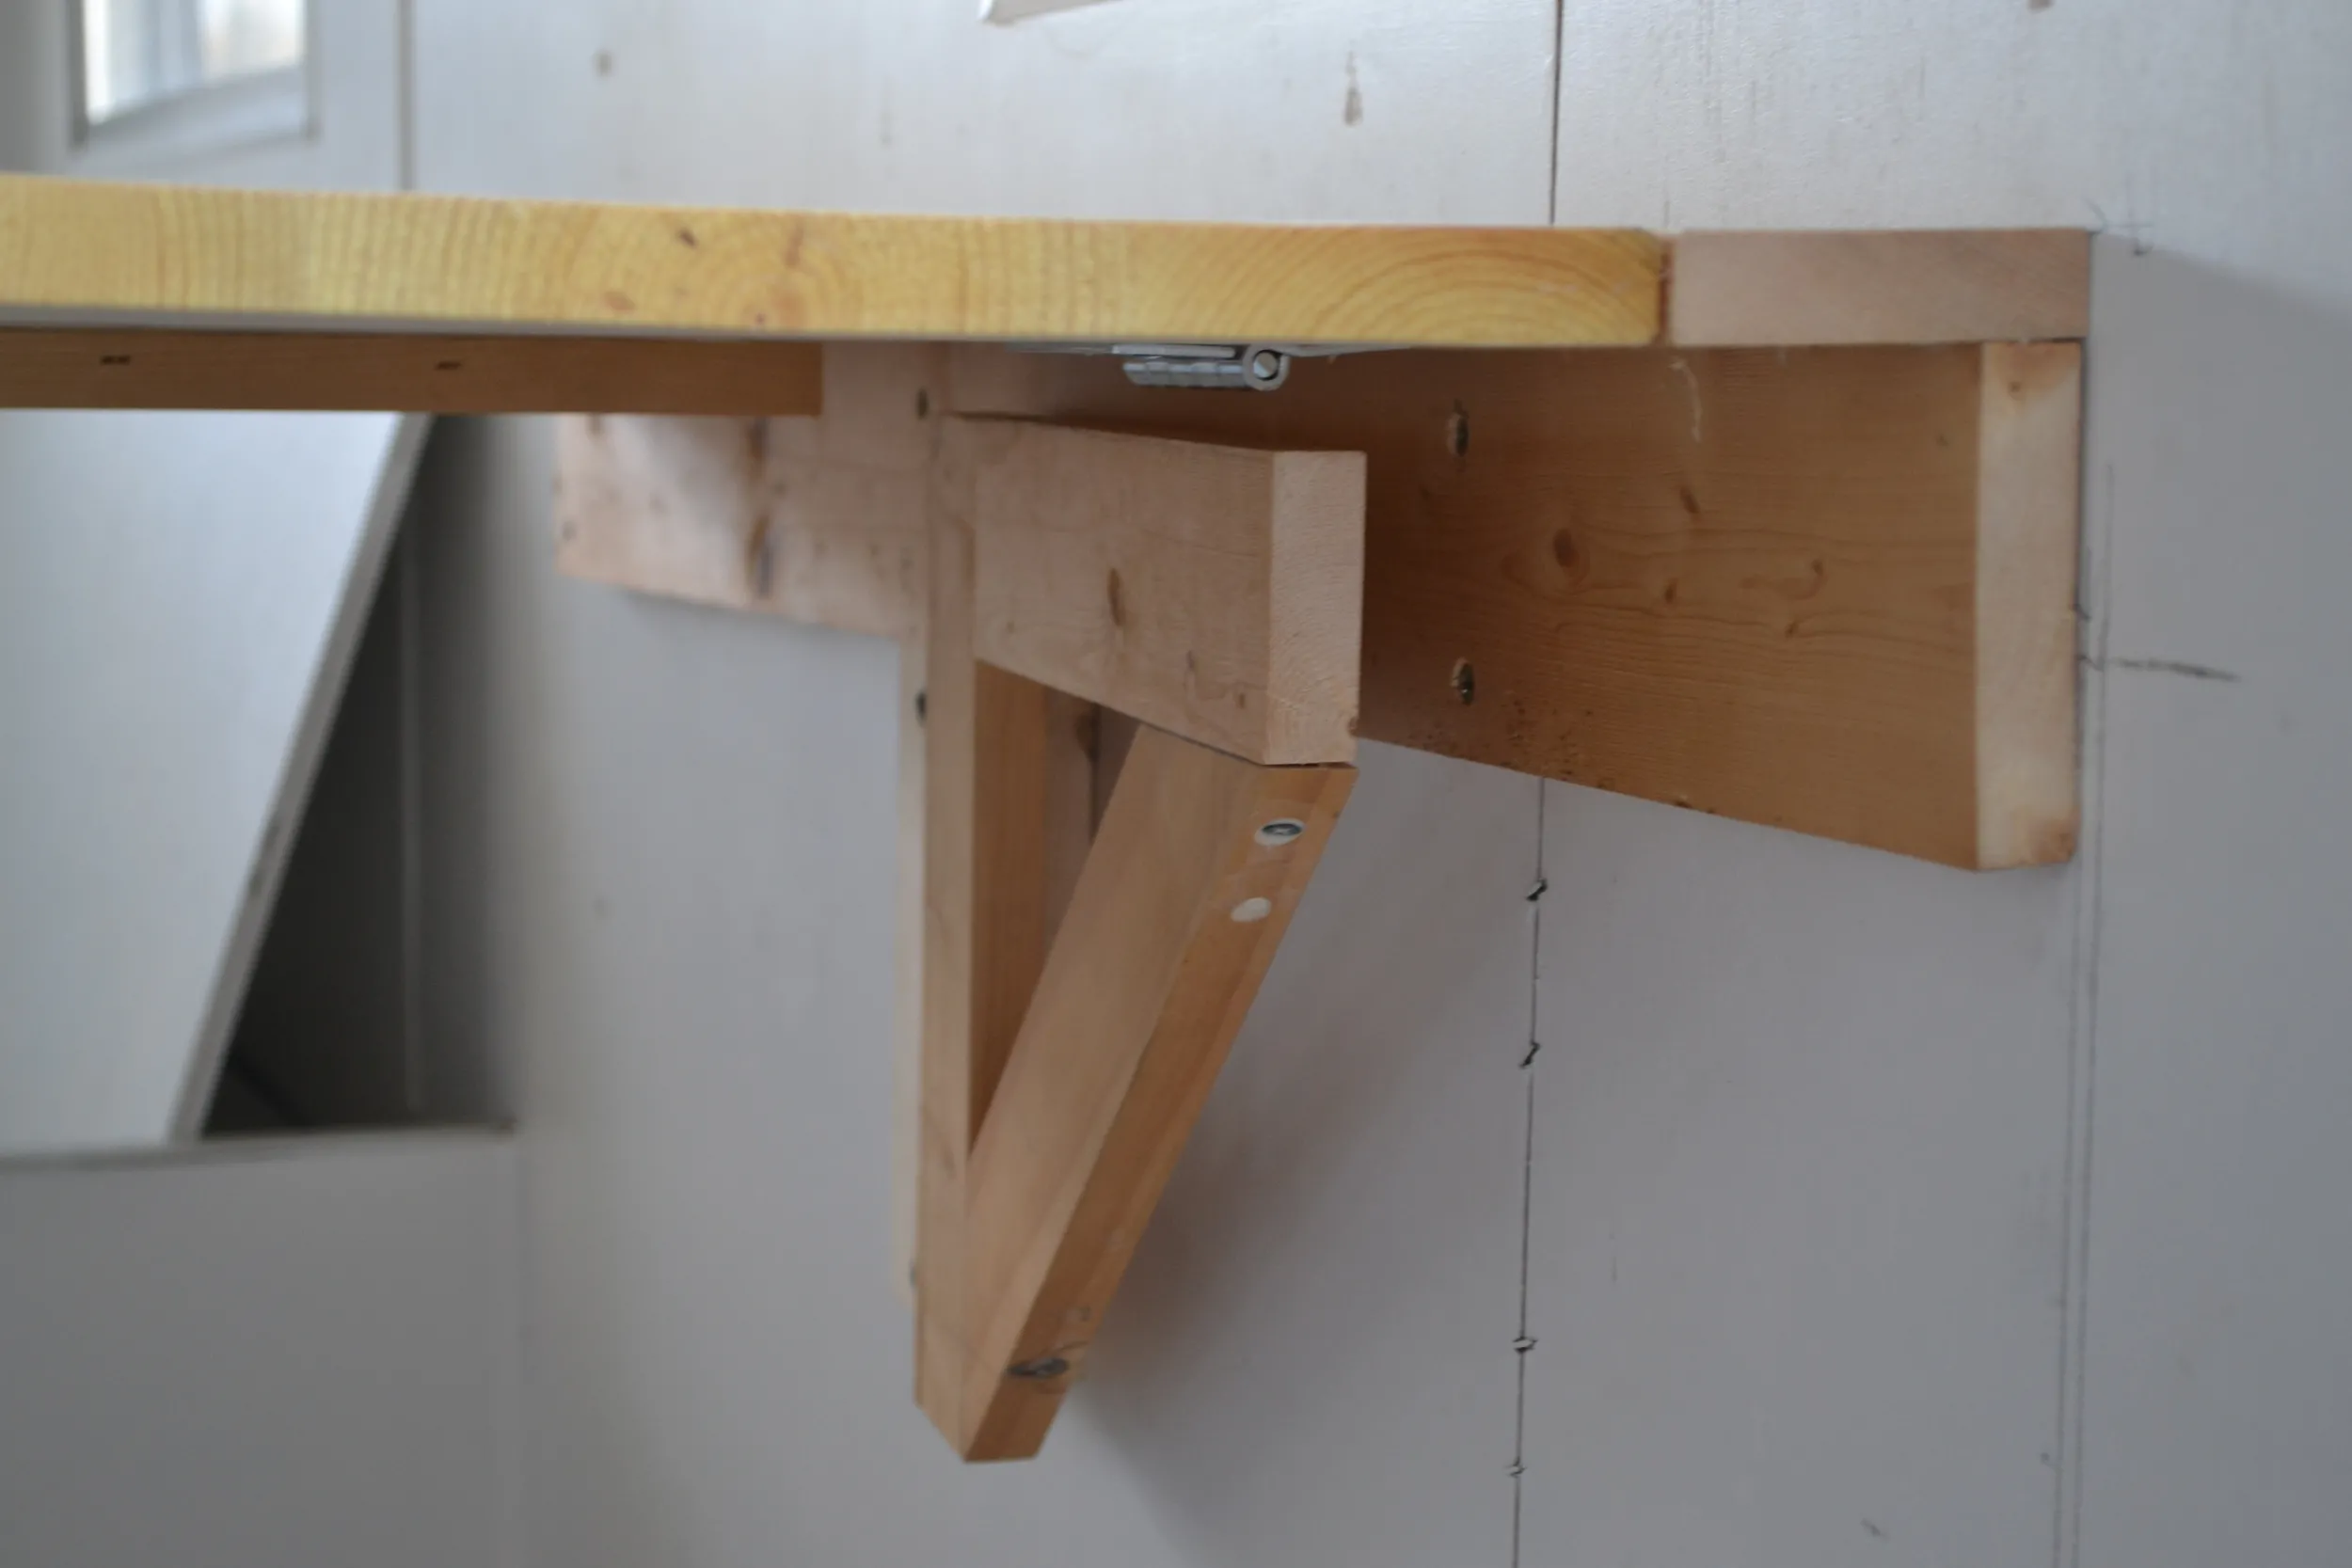 Remember how we said the lip was necessary so that the top board doesn't "stick out" when the triangle brace is folded back? This is your visual guide. See what we mean?
Finishing Touches
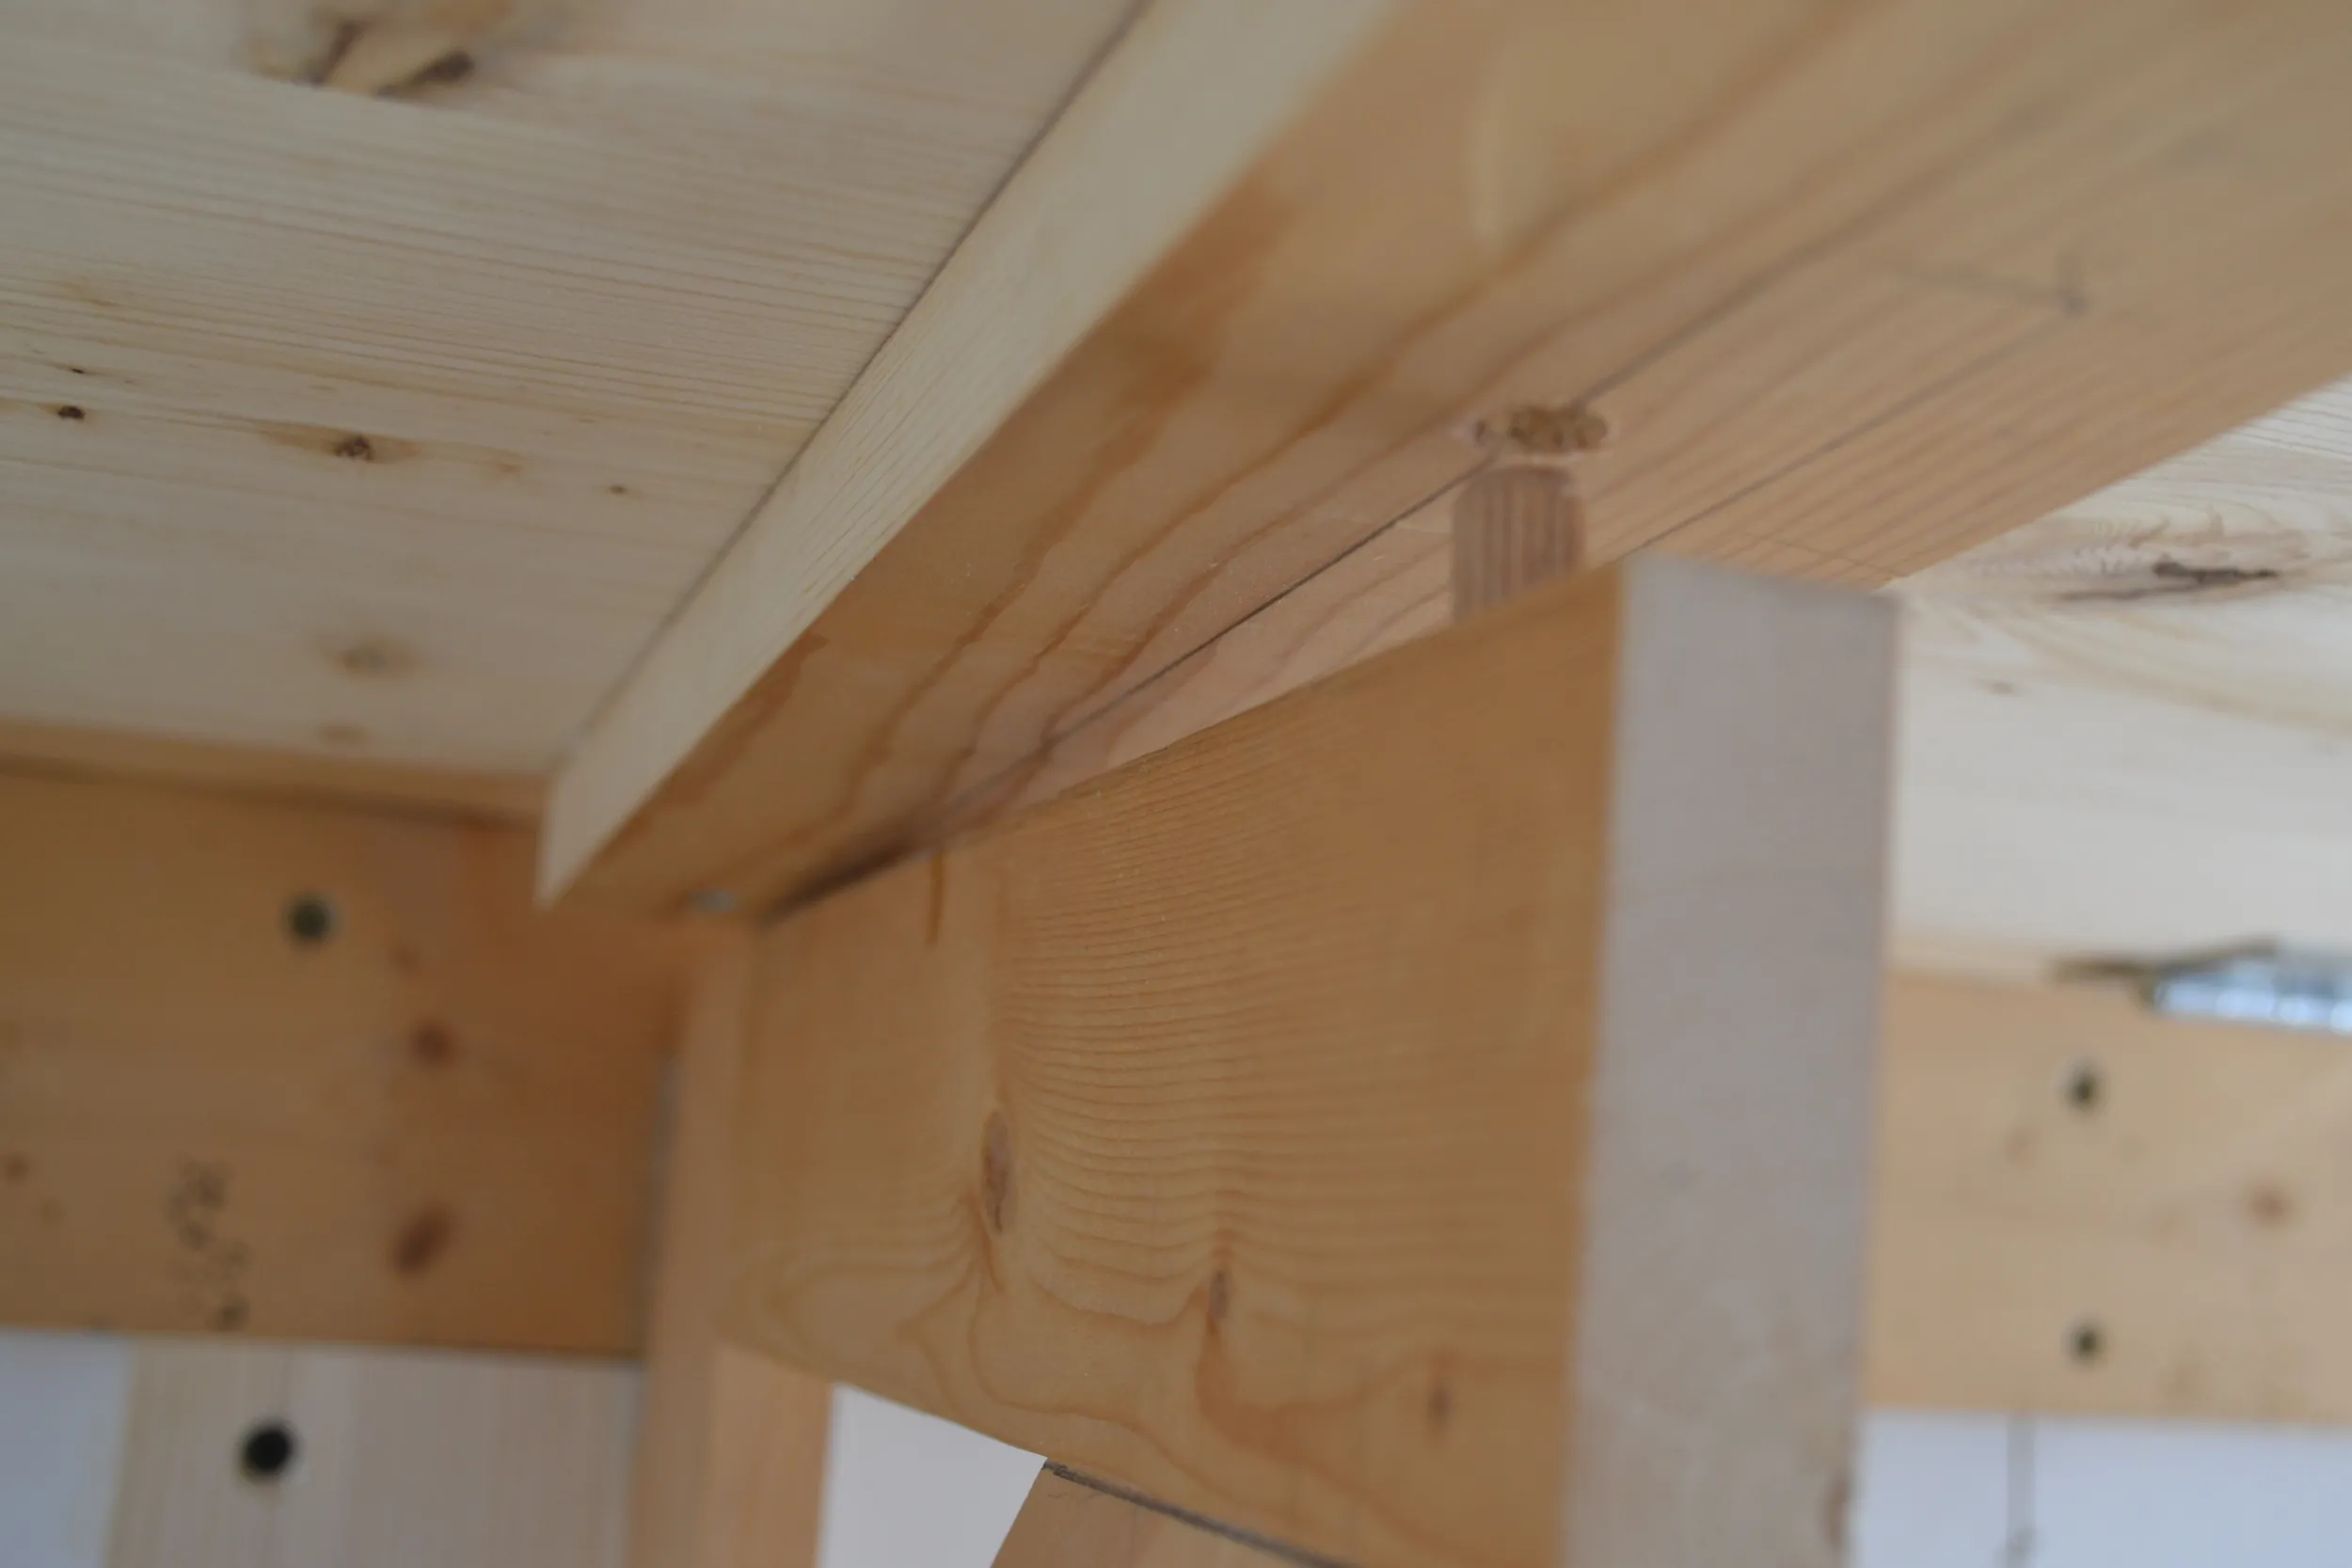 The very, very important wood peg!
- Sand and Smooth: Sand down all the edges of your desk and braces for a polished look and feel.
- Stain or Paint: Unleash your creativity! Choose a stain or paint that complements your decor.
- Seal and Protect: Apply a few coats of polyurethane to protect your desk from wear and tear.
- Optional: Round the Edges: If you prefer a softer look and want to prevent bumps, consider rounding the edges of your desktop.
Congratulations!
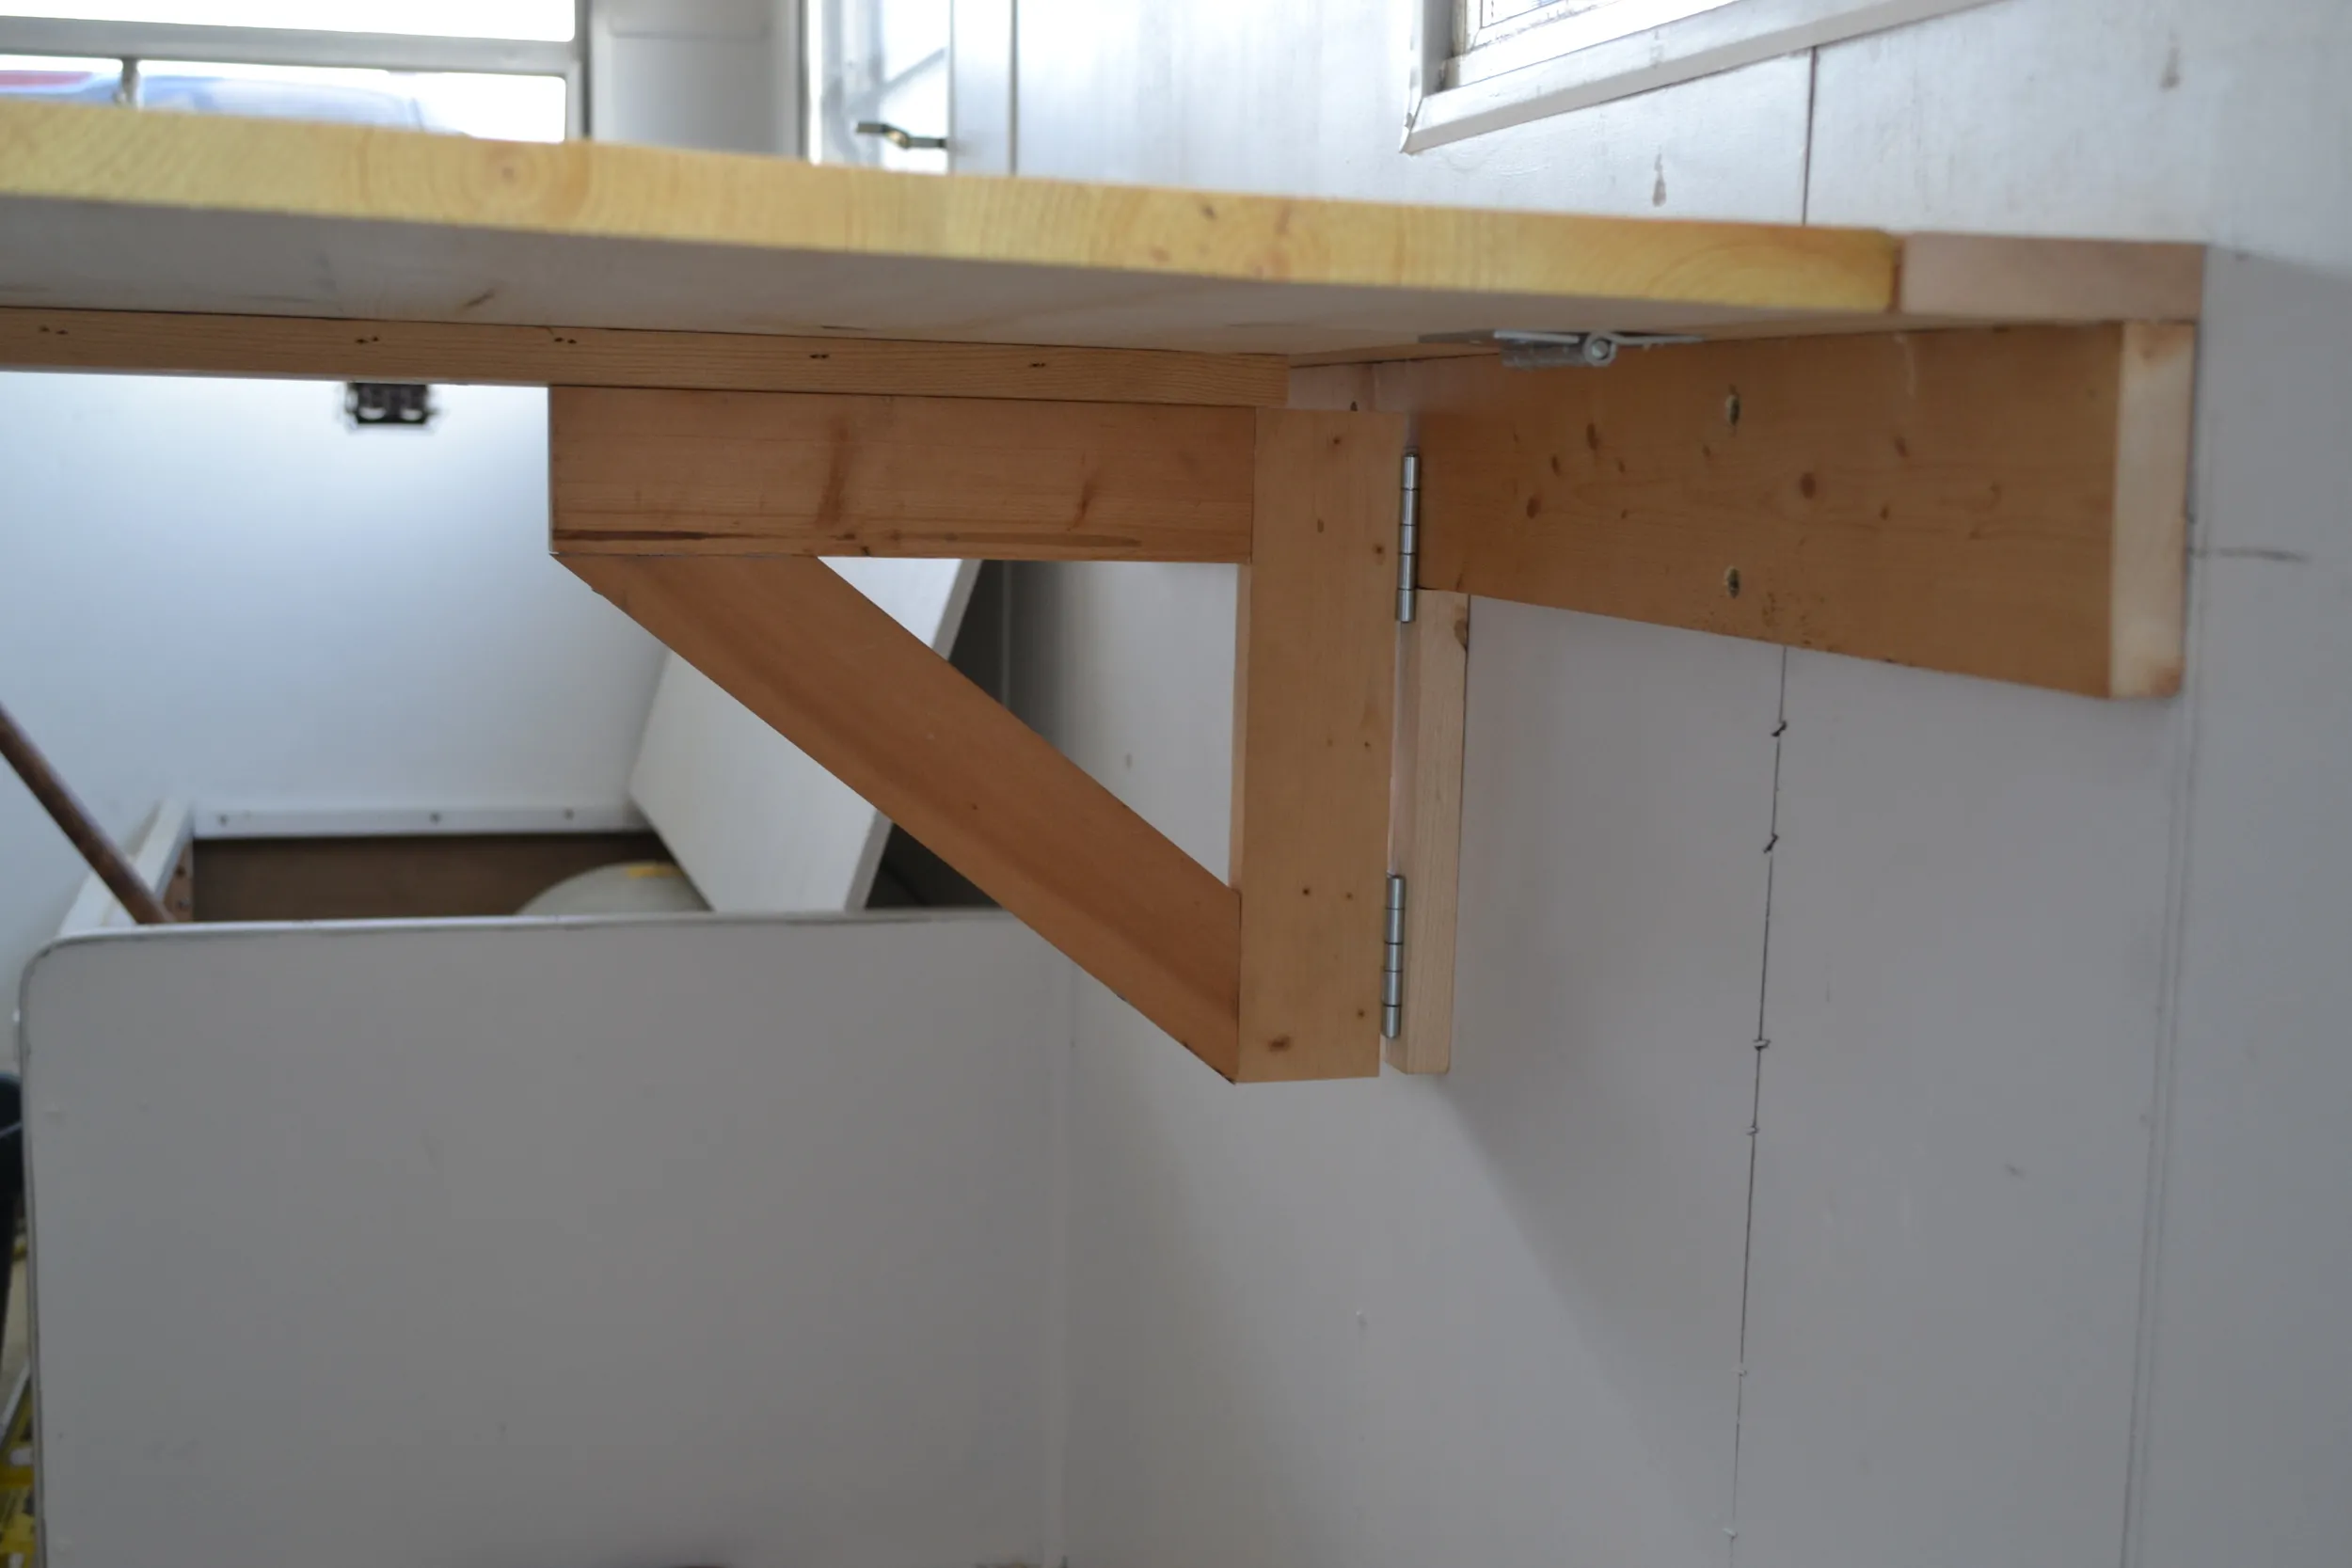 Voila! Your desk is complete.
You’ve done it! You’ve built your very own folding wall desk. Now you can enjoy a functional and stylish workspace without sacrificing precious space.
We’d love to see your creations! Share pictures of your DIY folding desks in the comments below.
And don’t forget to explore the incredible collection of handmade crafts and gifts on Robert Kline Art – perfect for adding a personal touch to your new workspace or finding unique presents for your loved ones.
